
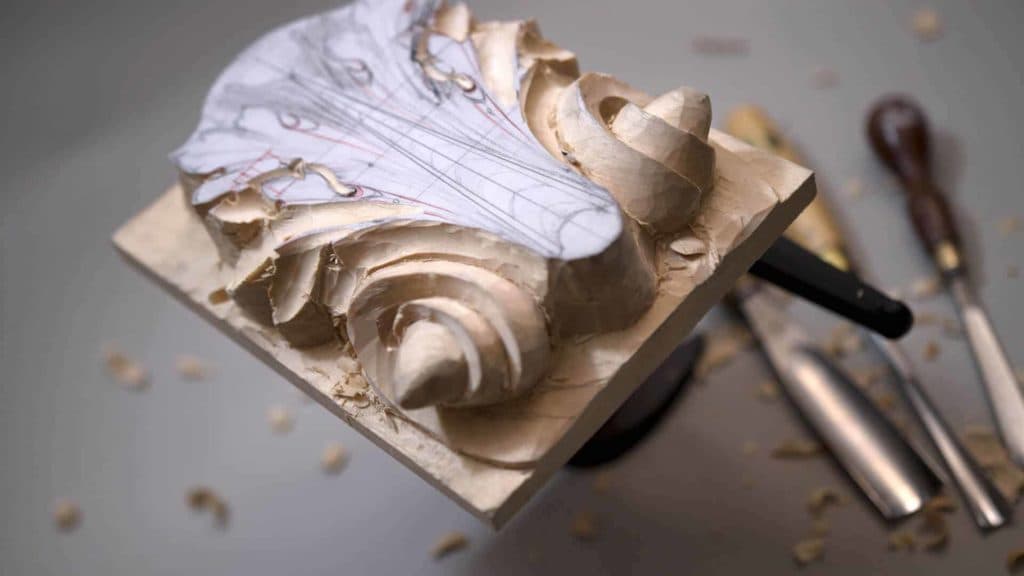
Alexander Grabovetskiy, woodcarver, School of Woodcarving · Published 2018
How do you stop a relief carving losing its design?
Quick answer: Losing the design while carving happens because pencil lines sit on the surface and the surface is what you remove. The grid underneath survives, a coloured mark rescues any small pipe, and a vertical cut has to be truly vertical or the whole outline drifts inward.
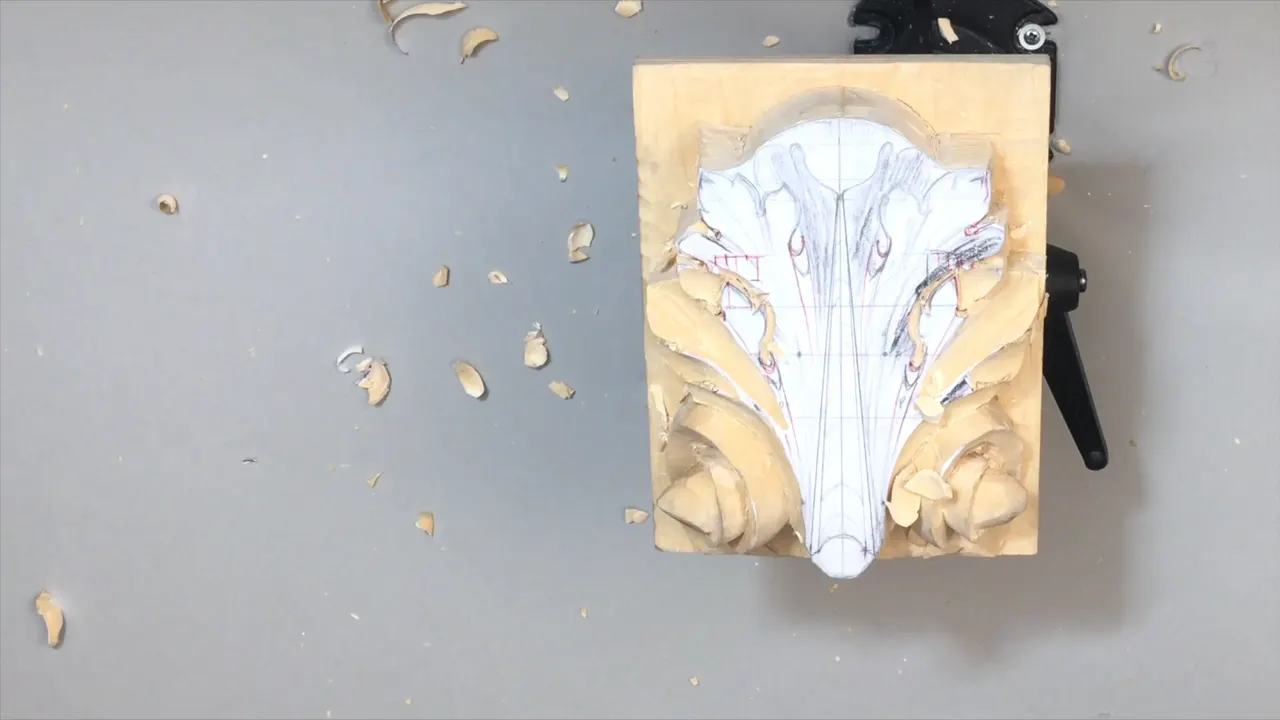
By this workshop most of the drawing is gone, and the grid underneath is the only witness left. Pencil lines live on the face of the wood, and the surface is exactly what a carver removes, so the leaf you drew in workshop one starts dissolving on the first heavy pass.

Has a carving of yours slowly stopped looking like the drawing? Did a small detail vanish and never come back? Have you pressed a chisel straight down and watched the wood bruise instead of part?
One cause sits behind all three, and one repair. Keep re-establishing the picture while there is still meat on the board.

What keeps a design alive once the pencil is gone
- The grid was measured off the edges of the block, so it survives everything you carve off the face.
- A stop cut driven in cold crushes fibre. Give it somewhere to go first.
- Colour any small pipe you are about to lose, before either lobe drops.
- One tool used on both sides gives one radius. Free symmetry.
- A vertical cut has to be dead vertical, or the outline creeps inward on you.
- Plenty of wood is still there. Accuracy can wait, the overall picture cannot.
Why does a relief carving drift away from its drawing?
The drawing and the waste occupy the same wood. Every line lives on the top face, and that face is the first thing to leave, so you are erasing your own instructions with each cut you make.

You will lose lots of the details you originally drew. Expect that, and do not fight it. What must not happen is losing the lines, because the lines were where the leaves overlap, where the eyes sit and where the flow runs.
So I re-establish constantly. The 3 driven vertically for reference, a V tool re-cutting a division, a coloured line on something small. The picture gets redrawn in wood about six times before it is finished.

Can the grid still check you mid carving?
It gives you addresses that outlive the drawing. That grid we created actually helps me to see: the point of this leaf sits right on a line, and the point of its twin should sit exactly the same, right on the same line.

Space gets measured the same way. Take one square, divide it in half, and a leaf tip lands on the middle. Divide it in four instead and a point lands three quarters across. Putting the matching point at that same position on the far side is then easy, and the two halves agree without anyone measuring anything.

Accuracy still is not the aim. If it is not completely accurate, do not worry about it. You are a human being and you cannot work like a machine, and I believe the machine version would not look as nice anyway.

| What goes missing | Why it happens at this stage | What I do |
|---|---|---|
| A pipe | it sits between two lobes and both of them get lowered | mark it before either moves |
| An eye | nothing in the wood records where it belongs until modelling starts | press it in early, using the smallest gouge on the bench |
| The outer line | a supposedly vertical cut leans over and eats the edge away | drive it dead upright, then check it |
| Depth on one half | half the panel gets carved while the eye is tired and the light is poor | compare right, centre and left every few passes |
| Crisp fibre | a chisel driven in cold | relieve the line first, then drive the blade |
Which leaf goes under which, and when do you decide?
On paper. Then you defend that decision in wood for the rest of the project. This leaf overlaps that one, and the same relationship has to hold on the far side of a symmetrical design, so an overlap carved the wrong way round on one half ruins both halves at once.
I keep saying it out loud while I carve because it is the thing I am most likely to lose. That part of a leaf goes underneath this part. Say it, mark it, then lower whichever leaf passes beneath before you touch its neighbour above.

Test a gouge against the drawn line before committing. Lay the blade on the leaf edge, and if its curve sits on the line you already drew, that is the tool. My Marples 3, 13 mm across, matched the movement here on the first try.

Then mark it preliminarily and drive it down a couple of times, and repeat the identical move on the other side while the feel of it is still in your hand.

What makes a stop cut crush the wood?
Fibre with nowhere to move sideways. When you drive a chisel straight into the surface, you are pressing on the fibres, and they smash on both sides of the blade instead of parting.

Give the waste an escape and the same cut behaves. Run a small gouge along the line first, then put the same number 3 back on it and drive. Now the fibre on the waste side is carved away rather than compressed, and the side you are keeping comes out clean.

This is why I do not recommend driving a chisel in cold, every time, as a habit. A place for it does exist, and that place is after something else has made room.

What rescues a pipe that is about to vanish?
Mark it, then carve it in with the smallest gouge you own. I keep a tiny DockYard gouge about an eighth of an inch across, roughly a number 8 by the look of its curve, and it is not numbered at all. Any other brand does the same job.

Press it straight down and wiggle it slightly. The wiggle releases the fibre round the edge of the blade so the tool comes out without tearing anything. Because the same tool goes in on both sides, the radius matches on both sides, and that is symmetry you did not have to measure.

Leave the mallet on the bench for this. Better not to put a mallet on really tiny tools. If you are careful you could, and I would still rather you did not.

For a pipe that has almost gone, colour comes out first. I place the mark, then reach for the small gouge, because a marked pipe lasts the next twenty minutes and an unmarked one does not.

Where do the eyes go in before you can see them?
Into the rough, early, while you still know where they belong. An eye is the small hollow at the base of a lobe, and nothing in the wood marks its position once the pencil is gone, so I press four or five of them in with the small gouge long before the modelling stage.
Do not worry that the final eyes are not visible yet. Pre-establishing the movement means you can push each one farther or deeper later, and the final picture becomes far easier to reach.
Use the tool that is already in your hand. I set eyes with the same small gouge I was using for the pipes, purely because it was there, and consistency of radius across a symmetrical leaf comes free when you stop swapping tools.
What is the safe way to lower a whole section?
In stages, and with a reference cut left standing. When a section has to drop, I take a 7 of about 13 mm and go down roughly half an inch from the top, approximately, then do exactly the same on the matching side.
Between those passes I run the 3 vertically again, purely as a reference. It costs ten seconds and it means the outline is still visible after the heavy work, instead of being something I have to reconstruct from memory.
A small V tool does the last of it. Number 12 at 8 mm re-establishes the division line between two sections, and after that I can see what I am doing again, and seeing again is the entire point of the exercise.

Then a cleaner pass with the 7 where the shape is now readable. Work the two halves in the same order every time and the panel stays balanced through the roughest stage of the whole project.
What counts as a properly vertical cut?
One that goes down and nowhere else. Make sure you do not undercut while you believe the blade is going straight in, because a blade leaning even slightly under the shape removes the very edge that defines it.
Lose that edge and you lose the overall picture. That is the single easiest way to wake up with a relief a size smaller than the one you drew, and there is no repair beyond redesigning around it.
Check it from two angles. Look along the board at eye level rather than straight down at it, and the lean shows up instantly.

Ready to carve a Roman acanthus leaf yourself rather than read about mine? Pick a course and start here, or take everything at once with Yearly Access and work through all sixteen workshops at your own bench.
Why do some carvings look perfectly smooth?
They were sanded, in almost every case. People look at a very smooth carving and wonder how the carver achieved it with chisels, and the honest answer is usually that they did not, whatever the photograph suggests.
Chisels cannot produce a perfectly smooth surface. Semi-smooth is achievable and perfectly smooth is not, so where you see glass you are usually looking at abrasive paper.
Culture decides some of it too. Most of northern Europe, England and Germany among them, leaves the tool marks visible and treats those marks as the point of the work. Go south and the taste changes, as any walk through an Italian church will show you. Italy, for one, really likes smooth carvings.
My own habit follows the north. No sandpaper on a carved surface, and a stem of dried reed for the fuzz when the piece is finished.
How much wood should still be left at this point?
Lots of meat, as I say on camera. The basswood started near two inches thick and the background is only going down a quarter of an inch, so there is a great deal of material between where you are and where you can do real damage.
Read that as permission to work confidently rather than carelessly. Preliminary outlines, preliminary background, preliminary everything, none of it final. These lines are not the final lines and this background is not the final background.
Push the movement in rather than the detail. Once the movement is established you can always push it farther or deeper later, and the final picture gets much easier to find.

When is a section deep enough?
When the far side matches it and your eye stops arguing. I take a section down, look, take it slightly lower, look again, and then decide that is enough. No measurement occurs anywhere in that sequence, and none is needed at this stage.
The check that does matter is the comparison. Keep an eye on how low you go on each side, because in this workshop I went lower on one side than the other, saw it, and had to come back and bring the shallow side down to match.
Overdoing it is the real risk. A section carved too deep cannot be raised, so the last millimetre of any drop is worth approaching in two passes rather than one confident stroke of the mallet.
And when the depth is right, the overall picture reasserts itself. Suddenly the eye reads a leaf passing under another leaf rather than a field of carved hollows, which is the moment this stage has been working toward all day
 , and the one the next workshop builds on.
Must every cut follow the grain?
Ideally yes, and I break that rule about twice a minute. Carving from outside in is wiser and follows the grain direction on this leaf, and there are places I simply cannot reach from that side.
Two conditions make against the grain acceptable. The tools have to be really sharp, and the cut must not be a final one. On a final pass, follow the grain, and even so it will not always be possible. You wish it were. Believe me, it is not.
Watch the depth on both halves while you do it. My left ended up deeper in this very workshop, and I had to come back and bring its partner down to meet it.
Then the shapes start reappearing out of the rough. Here is my eye. And there, after four weeks of this, is the leaf I drew on the very first day.

How it's done
- Re-cut the outline before the lines vanish. Run a V tool round both halves while the pencil is still readable. Six millimetres of V at a time, and the shape survives the next heavy pass instead of becoming a guess.
- Check a point against its grid square. Divide the square in half or in four and read where a tip lands. Then put the matching tip at the identical position on the far side, and the halves agree without measuring.
- Give the fibre somewhere to go. Send a small gouge down the line to begin with, then set the chisel on it and drive. Straight in with nothing beside it crushes fibre on both faces of the blade.
- Colour anything small you are about to lose. A coloured line on a pipe, right before either lobe around it drops. A marked feature lasts the next twenty minutes at the bench, and an unmarked one usually does not.
- Press the eyes in early with the tiniest gouge you own. Something near three millimetres across, wiggled straight down. No mallet on a blade that small. One tool used on both sides gives one radius, which is symmetry for free.
- Lower a section, then leave a reference. Take the drop with a 7, roughly half an inch down, and repeat it on the matching side. Then run a 3 straight down purely so the outline is still visible afterwards.
- Compare left, centre and right before stopping. Look at the depths together rather than at the shape you just carved. One side ended up deeper in this very workshop, and I came back to bring its partner down to meet it.
Frequently asked questions
Why does a carving stop matching its drawing?
Pencil sits on the top surface, and that surface is the first thing a carver removes. Details disappear by the hour, which is expected. Lines that carry the overlaps, the eyes and the flow have to be put back in wood before they go, or the shape drifts.
What makes a chisel bruise the wood on the way in?
Fibre with nowhere to escape. Pressing a blade into the surface squashes the wood on both faces instead of parting it. Relieve the line with a small gouge to begin with, and the same chisel then leaves a clean wall on the side you are keeping.
What stops small details disappearing while you carve?
Marking them again and again. Colouring a pipe about to be lost costs two seconds, and pressing an eye in early with the tiniest gouge fixes its position permanently. Everything unmarked competes with waste, and waste wins.
What to carve next