
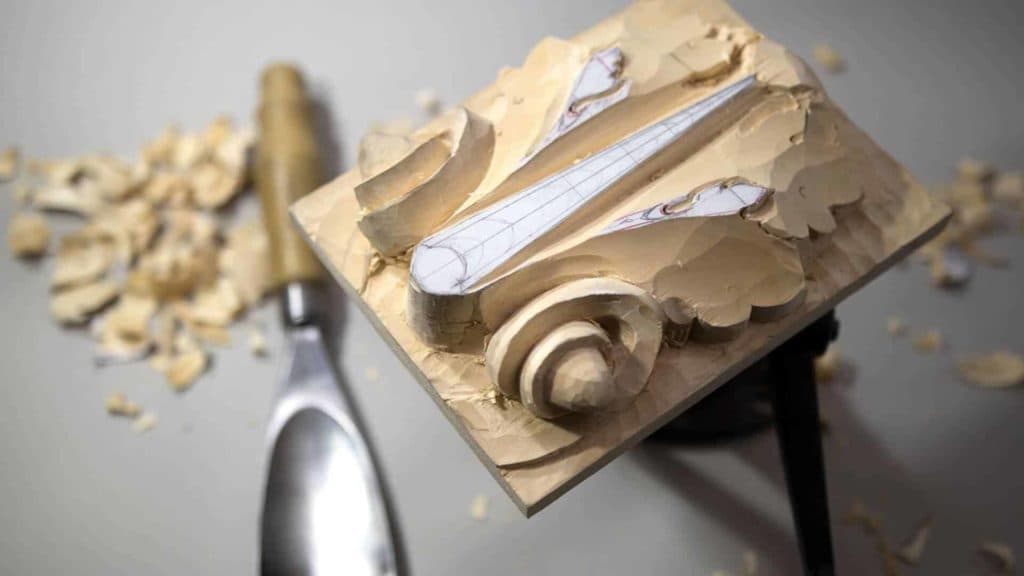
Alexander Grabovetskiy, woodcarver, School of Woodcarving · Published 2018
Which part of a carved acanthus leaf should be highest?
Quick answer: The highest point of a carved acanthus leaf sits at its centre, and every section round it falls away from there. Settle that hierarchy before any modelling happens, because a leaf carrying two rival peaks reads as two objects stuck to a board rather than one plant.
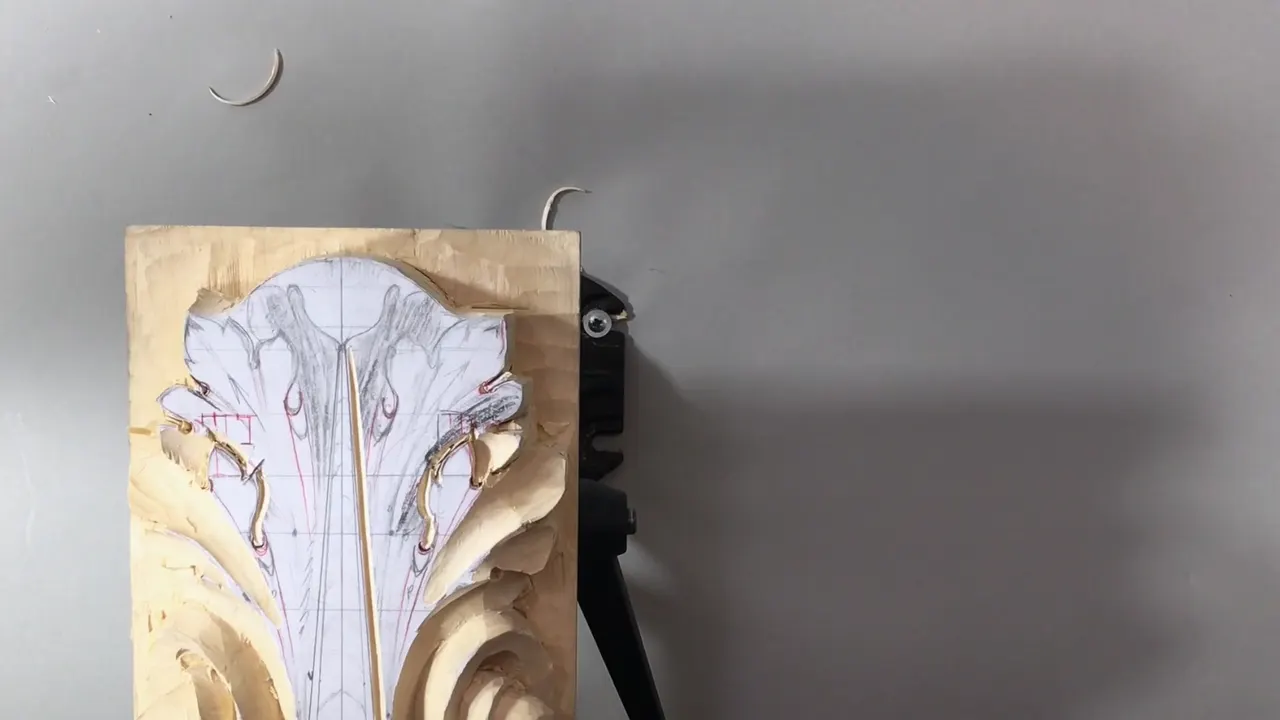
My centre is the high spot, and today everything else on the board starts falling away from it. The right side comes down, the left side comes down, and two more sections run downhill after them. Nothing gets modelled. This workshop only decides which parts of the leaf are allowed to stay tall.

Does your relief look busy without looking deep? Have you carved a leaf where three different places all seem to want to be the front? Did the whole thing flatten out once the waste was gone?
Nobody set the hierarchy. One high point, and a long slope down from there, is what turns a carved outline into a carved object.

What this workshop decides about the whole leaf
- The centre stays highest. Every other section drops, each in its own direction.
- Preliminary cuts hold the picture while the heavy waste leaves, and none of them is a finished line.
- Two lines run round the design, and the outer of them is where a roughing stroke belongs.
- Long strokes beat short ones, always. Wait for the continuous one on a final pass.
- A wide gouge, worked on its corner, gets into places a small one was bought for.
- Lose an eye and put it back at once. Later will be too late.
Which bit of a leaf belongs highest?
At the centre, on a symmetrical design like this one. The heart of the leaf carries the eye, and every lobe round it sinks in mirrored pairs, this section downhill one way and that section downhill the other.
Later the whole centre goes downhill too, which sounds like a contradiction and is not. Relative height is what matters. The centre is highest compared with what surrounds it, even after the entire panel has been taken down another half inch.

Decide this now or you will decide it by accident. Two competing high points on one leaf read as two objects stuck to a board, and the viewer stops seeing a plant.
Why bother with a preliminary cut?
Holding the picture while the wood leaves. My concern around the centre is accuracy, so before any waste moves I take a V tool and put the lines in properly.
Number 12 at 8 mm does it here, and a mallet helps. The cut goes in a little deeper than it strictly needs to, because the whole point is that it survives the next twenty minutes of rough work.
I do not want to lose the main picture. Holding it is the entire reason for the preliminary cut, and it is why I make them on both sides before carving either one.

Why are there two lines round the design?
One marks where the carving ends and the other marks where the background will finally sit. Line number one and line number two, and the same pair on the opposite side.
The outer one is what I carve close to at this stage. Really close, in fact, which takes some nerve and calls for care, because there is nothing behind a line you have already passed.
Keeping both lines visible for as long as possible is worth the effort. Once the outer line is gone you are guessing about the inner one, and a guessed background line shows up the moment a blade passes somebody looks at the panel edge on.
What does the return do, and why outline it early?
A return is the place where the leaf folds back on itself. The edge runs out, turns, and comes home again, and the fold is the part that will eventually throw the darkest shadow on this half of the panel.
The leaf flips this way at that point, so the V tool goes round and outlines the whole turn before anything near it drops. That single outline is what stops the fold reading as a lump later.
Both directions get the same treatment, and one spot is already a final cut rather than a preliminary one, with its twin on the far side. Knowing which strokes are final and which are not is half of working at this stage.
Look at a Corinthian capital and every leaf on it has returns. Strip the returns out and the stone would read as flat ornament.

Should a carving stroke be long or short?
As long as you can make it, always. In one pass here I took a really long stroke with the V tool, and you can see it on the recording as a single unbroken line rather than a series of hesitations.
Right now it does not really matter. Roughing work forgives a stuttered stroke because the surface is coming off anyway. On the final passes it matters enormously, and there I will wait for the right hand position rather than take a short safe stroke.
The reason is simple. Every time a blade stops and restarts it leaves a tiny step, and an edge made of nine steps reads as wobbly from across a room even when nobody can point at why.

| Tool | Where it went today | Why that particular one and not another |
|---|---|---|
| V tool number 12 | preliminary cuts, the return, and every subdivision on the panel | 8 mm of it, and it holds a line through everything that follows |
| Number 7, half inch | beside the eyes | its curve happened to match the shape already drawn there |
| Number 6 at 20 mm | vertical reference marks | three quarters of an inch of edge, a perfect fit on this leaf |
| Number 7, two inches | lowering whole sections of the panel | far quicker, and one wide facet beats six narrow ones |
| DockYard number 8 | the eyes, over and over again | an eighth of an inch, small enough to mark without harm |
| Number 12 knife | following a wandering pattern | a favourite, quicker than swapping gouges four times |
How do you reach a small place with a big gouge?
Use its corner. Here lies the point of the dovetail shaped tools, because I can engage a single corner of the edge, and make a cut far narrower than the blade.
Smaller tools would also work, and plenty of carvers reach for them. Owning big ones changes the arithmetic though. The point or the corner of a wide blade gets surprisingly deep into a tight spot, and you keep the control that a long edge gives you.

This matters more as the panel develops. Swapping tools costs time and breaks concentration, and a carver who can do three jobs with one blade finishes the day further along than one who cannot.

What holds the pipes in place while the wood drops?
Attention, and nothing else. A pipe is the rolled tube between two lobes, and I have to make sure I am not losing the location of the pipes while whole sections come down around them.
The plan is that the leaf grows from inside out and flows, which means most of the waste leaves the middle. Do that carelessly and the pipes go with it, because they sit exactly where the gouge wants to travel.
Coming back later is possible. I can always reestablish a pipe, and I would rather not, since every rebuild is a guess layered on a guess. Marking the position first costs a second and saves five minutes.

On a symmetrical design the cost doubles. A pipe rebuilt on one half has to be matched on the other, and two rebuilt pipes rarely agree as well as two original ones.

Why keep sinking the blade vertically?
Reference marks that survive, is what they are. The reason I keep sinking a blade into the design is that finding the original drawing gets much easier later on when those marks are still there.
Position the tool right on the line and drive it down. Make sure it goes down and only down. Do not undercut, do not angle it, keep it perpendicular, and take it all the way in one committed push.

Subdivisions get the same treatment. I do not want to lose the small divisions inside each lobe, and those are exactly the features that vanish first, so the V tool goes in vertically on each one before the neighbouring wood drops.

Ready to carve a Roman leaf at your own bench rather than watch mine? Pick a course and start here, or take everything at once with Yearly Access and work through all sixteen workshops.
What do you do when you lose an eye?
Put it back before you carve anything else. Twice today I looked down and an eye had gone, and both times I stopped and reestablished it rather than pressing on and hoping.

Finding the position is grid work. I eyeball my lines, look for the parallels, and follow a point straight up until it tells me where to stay, usually about an eighth of an inch off. Then the small gouge goes in and the eye exists again.

The preliminary pokes earn their keep here. Because I marked those spots early, I can still see roughly where each one belongs even after a big gouge has crossed the area twice.
Not one of these is a true eye yet. Every one will be lowered later, and every one will be cleaned. Their only job today is to still be findable tomorrow. An eye you can locate at a glance costs nothing to deepen, and an eye you have to hunt for costs ten minutes of squinting at a grid that no longer sits flat under your thumb.

Is a knife quicker than a gouge for outlining?
Often, yes. As an alternative to working round with gouges I can take my number 12 knife and simply follow the pattern with it, and that is a much, much quicker way to work round a shape.
The knife wins where the line changes direction constantly. A gouge needs its curve to match, so a wandering outline means four or five tool changes, while one blade tracks the whole thing.
Gouges win on depth and on anything that needs a defined wall. Use both. The knife is not a shortcut, it is a different instrument for a different kind of line.

Does it matter which way the grain runs today?
Less than it will tomorrow. Carving along the grain makes one side of every stroke split rather than slice, and you can watch it happen on the recording.
Attacking from the other direction would give a cleaner result. I know that, and right now I do not worry about it much, because none of these are final cuts and the torn surface is leaving anyway.
Change the rule for the last passes. A final cut goes with the grain whenever the shape allows it, and where the shape does not allow it, a genuinely sharp edge is the only thing standing between you and a torn lobe.
What does a two inch gouge actually save you?
Whole minutes, on every section. When a side has to come down I reach for a gouge two inches across, and the carving goes much quicker than it would with anything narrower.
Speed is only half of it. A wide blade crosses a broad surface in one stroke and leaves one facet behind, where a narrow one leaves six, and those six all have to be cleaned away at the end of the project.

Not everybody owns a two inch gouge, and nobody needs to. Take the biggest you have, use its corner where the space is tight, and accept that the work will take longer than it does on my bench.

There is a second way to use a big blade here. If your gouge has a sweep like mine, you can simply stand it upright on the line and drive it straight down, which sets an edge and saves an outlining pass in the same motion.

After that the panel gets tidied all the way round while the big tool is still in your hand, because putting it down and picking it up again is the part nobody counts.

How deep is deep enough today?
About half an inch down from the top, and I could go further. The middle of the panel has come down, the sides have come down, and there is still a great deal of basswood between where I am and the final background.
Watch the grain as you go. Carving along it makes one side split rather than slice, and moving round to attack from the other direction would be cleaner. Most of the time I let it go, and on a Roman leaf that is a defensible position.

My final depth is nowhere near this. Which is exactly why I am not afraid of it.

How it's done
- Name the high point before touching anything. On a symmetrical leaf, the centre. Everything else has a direction to fall in, and knowing which direction saves you from carving two rival peaks into one design.
- Put preliminary cuts round the centre first. A V tool at 8 mm, driven a little deeper than it needs to be, with a mallet if the wood is stubborn. These lines have to survive the rough work that follows them.
- Work near the outer of your two lines. One line marks the carving and the other marks the final ground. Work close to the outer of the two now, keep the inner one readable, because a guessed ground line shows on the finished edge.
- Outline every return before its neighbour drops. A return is where the leaf folds back on itself. Take the V tool round the whole turn first, and the fold will read as a fold later instead of a lump.
- Mark the eyes, then mark them again. Poke each one in with a tiny gouge, three millimetres across. None of them is the true eye, and all of them drop again later. Their only job today is to still be findable tomorrow.
- Lower whole sections with your widest blade. Two inches of edge takes a side down in a handful of strokes, and leaves one facet where something narrow leaves six. Bring its corner in where the space gets tight.
- Leave vertical reference marks standing. Drive a blade down on the line, perpendicular, no lean and no undercut. Those marks are how you find the original drawing after the surface around them has gone.
Frequently asked questions
Which bit of a relief carving stands tallest?
The middle of a symmetrical design, with everything round it falling away. Height here is relative rather than absolute, so that middle stays tallest even after the whole panel drops another half inch. Two peaks in one leaf make it read as two separate objects.
What is a preliminary cut in wood carving?
A line carved in early purely so it survives the rough work. Waste removal destroys pencil marks within minutes, and a V tool groove holds the same information in a form no gouge can rub out. Nothing about it is final, and there lies the point.
Why do relief carvers draw two lines round a design?
One shows where the carving stops and the other shows where the background will finally sit. Roughing strokes belong beside the outer line, and the inner one stays visible, because the distance between them is the margin every later correction comes out of.
What to carve next