
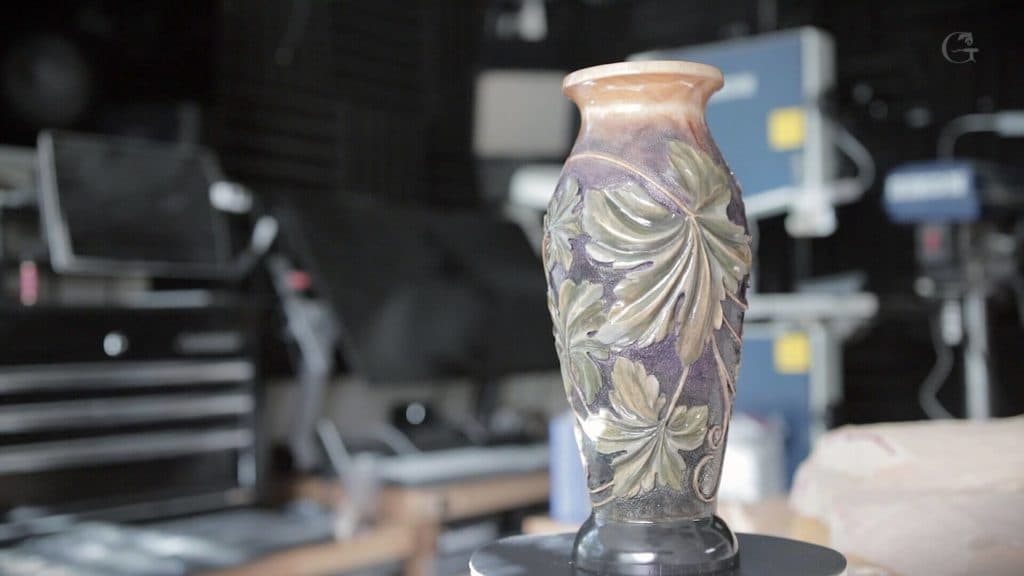
Alexander Grabovetskiy, woodcarver, School of Woodcarving · Published 2020
How do you tell a carving mistake from a mark left on purpose?
Quick answer: A carving mistake is a mark that costs the leaf something you can name, and a deliberate mark costs nothing. On my grape leaf vase the faults took away something specific, like a natural look, movement, shape, or grain under the color. Rough micro notches, open facets and end grain gone black took nothing, so they stayed.
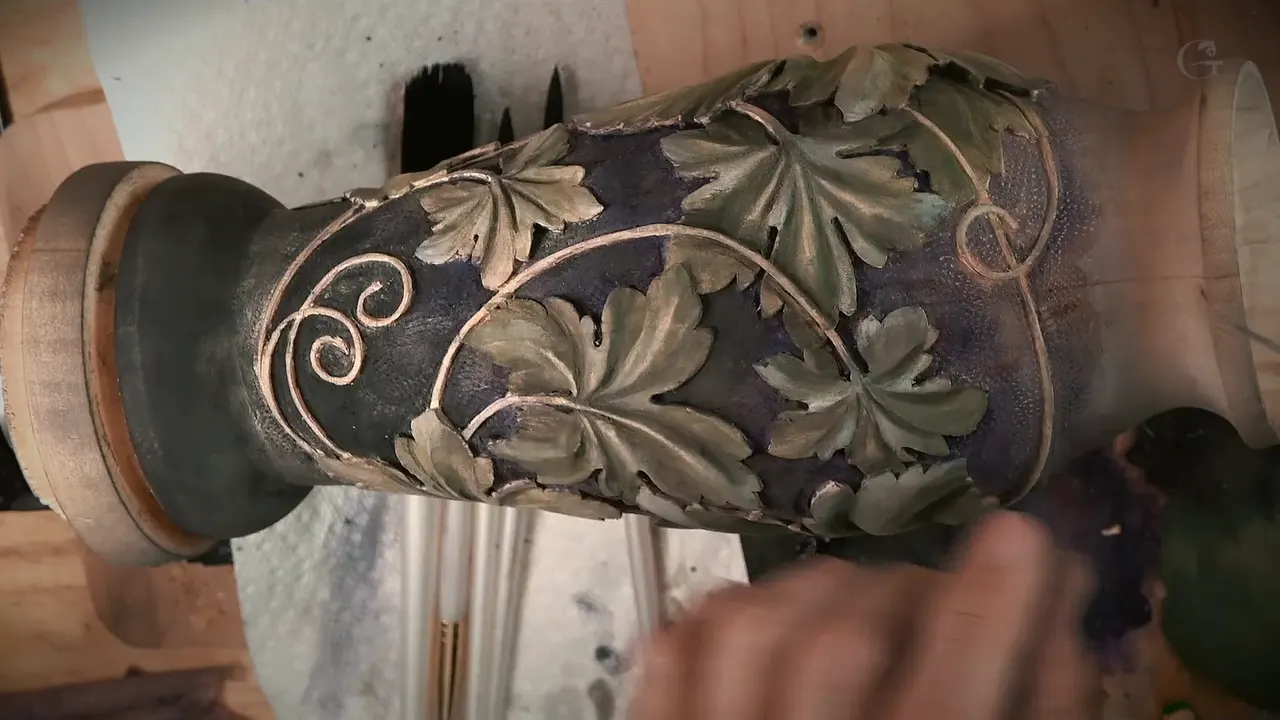
Telling a carving mistake from a mark left on purpose comes down to what the mark costs the leaf. On my hand carved wood vase, when I called something a fault on camera, I usually said its price in the same breath. Spooning looks unnatural. Without a clear middle ridge the leaf loses its movement, and a heavy white wash would bury the grain. Rough notches, open facets and black end grain cost the leaf nothing like that, so they stayed. That is how I sort carving mistakes from choices in this course.
Have you ever looked at a carved leaf, yours or somebody else's, and wondered if a rough spot was a slip or the style? Would you like a way to tell before you touch it again? Then read this vase with me, one mark at a time.
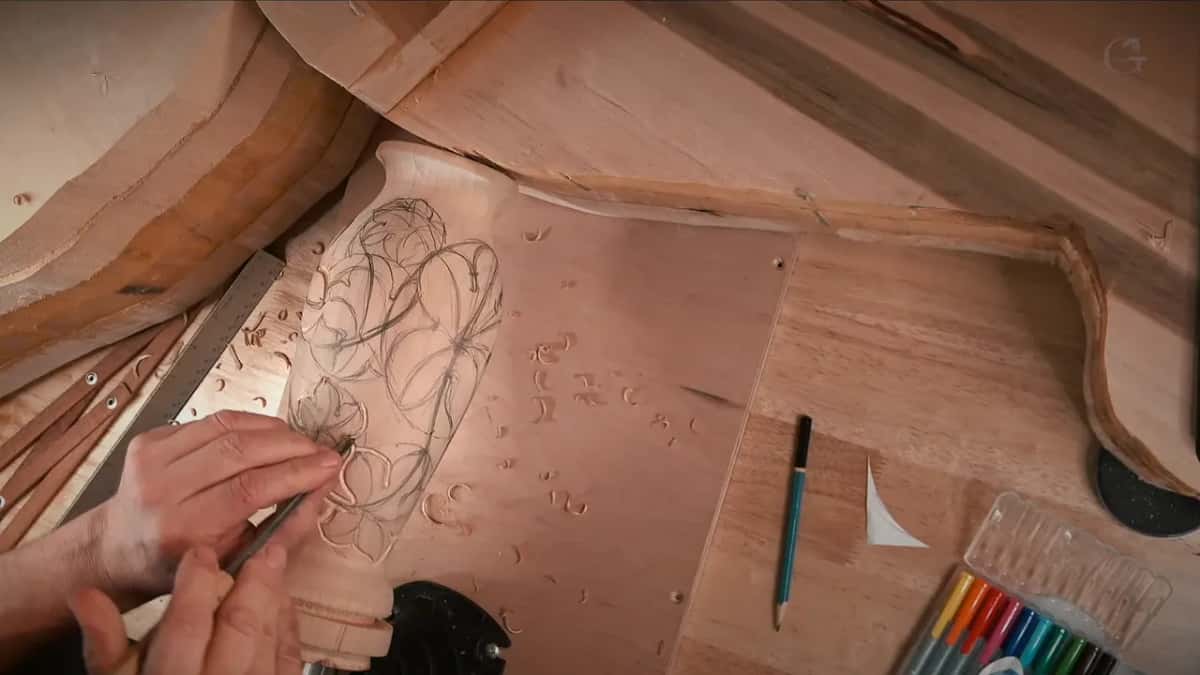
I'm going to be honest with you. Somebody emailed and asked me to show wood carving and turning together, so I made this small vase for him, about 10 and a half inches tall, and I made carving mistakes on it, on camera. I also left marks on it that look like mistakes and are not. Below are both kinds in my own words from the four lessons, with the lesson named each time, so you can go and watch the moment.
Mistake or meant on this vase, in seven lines
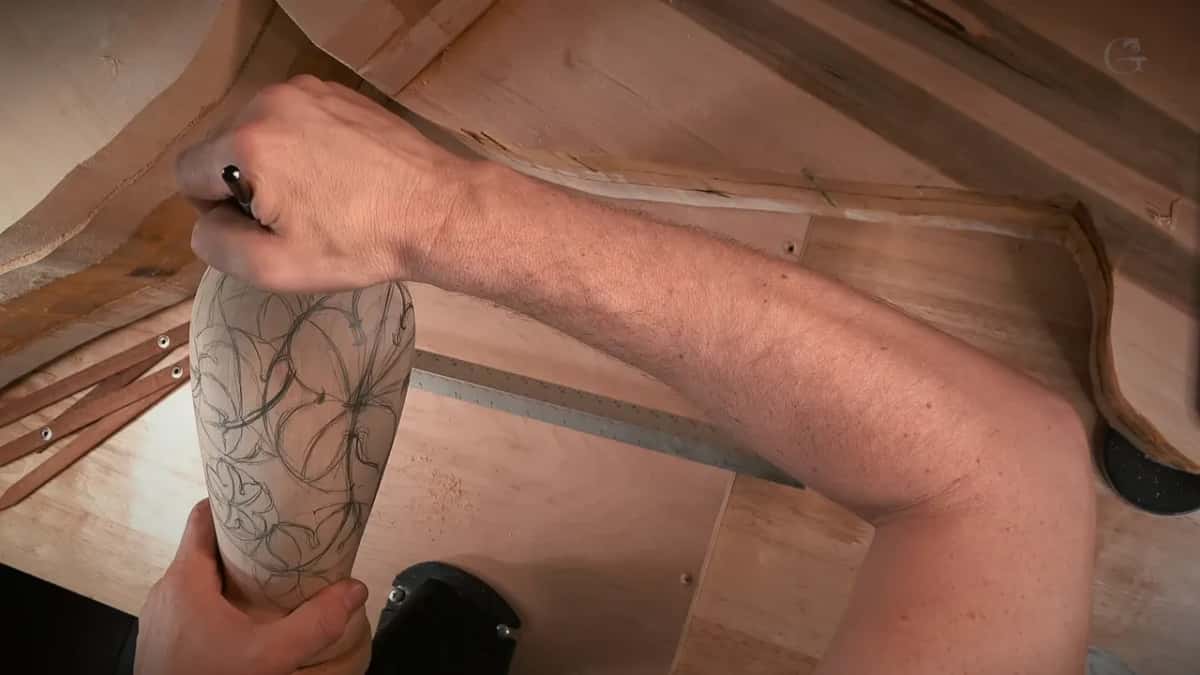
Messy pencil and marker lines are a stage.
The micro notches look rough, and they are what I was after, and I said that on camera while they still looked bad.
Facets that show after I wipe the color back are meant.
End grain gone black is good.
A hollow lifting at its end is spooning, a fault.
Stab marks inside a leaf, a middle line that wiggles and the marks a dull gouge leaves are faults too.
So are S curves on every leaf, black used as shadow, and white over the grain.
Why does a carving look wrong before it is finished?
Half of it is not there yet. My layout in lesson 1 was circles and pencil lines on bare basswood, and in the third part I told you a bunch of circles doesn't make sense as of now, but it will. Two parts later I said I know it looks a little messy. Part seven opens with it. Now it looks messy, but it's going to be looking really good.
The first carving looked rough too. After the outline I marked the background with colored pencils, and while I did it I asked you, please do not judge. It was just preliminary setting in, nothing detailed. A lesson later, in lesson 2, blending a small leaf down under a bigger one, I said don't forget that is not the final form yet. And when my gouge dug a little into an earlier pass, I said that is okay, because it's not the final destination.
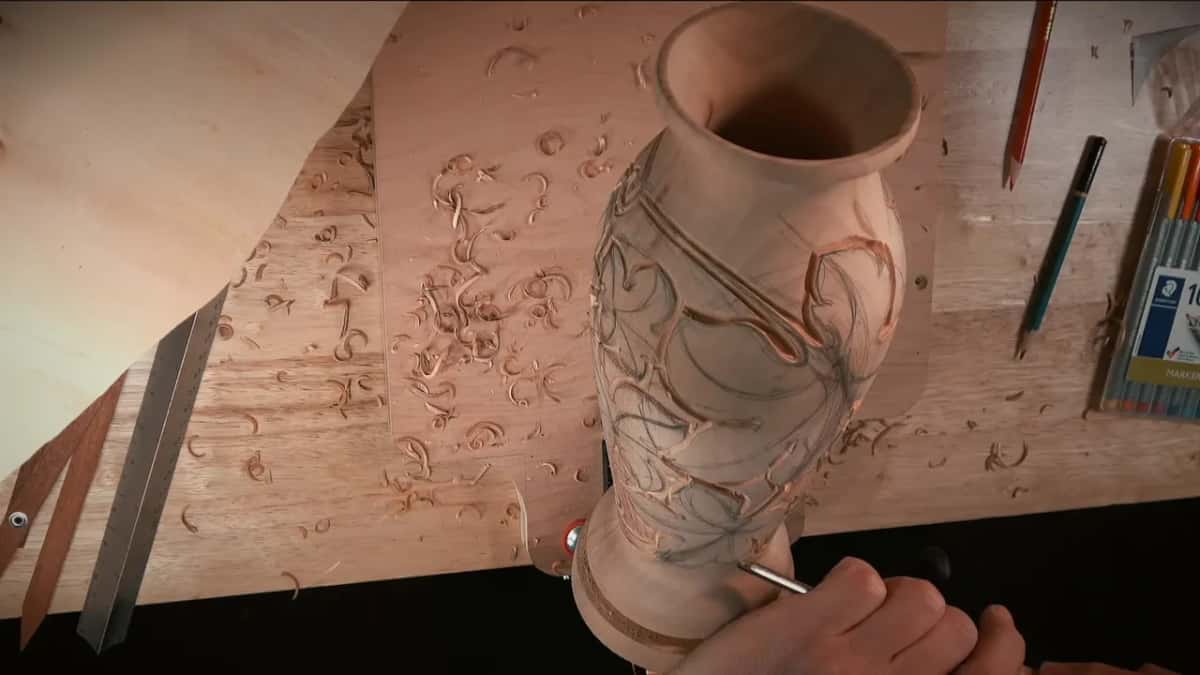
How did I sort these? I kept naming what was still coming. Ridges left between passes did not worry me yet, I said in part ten of lesson 2, because we can blend them later with the later steps. A mark with a step still coming for it was a stage to me, not a mistake yet.
I placed those first circles by the golden ratio, and that part of the story lives on the course page.
Are rough notches a mistake or the style?
On this vase they are the style. Every concave I carved beside a ridge in lesson 3 left a small triangle, and I wanted that triangle exaggerated. So I took a smaller tool, went straight down and removed it. A micro notch. Then I looked at it on camera and said it doesn't look too good, but that is what we are after.
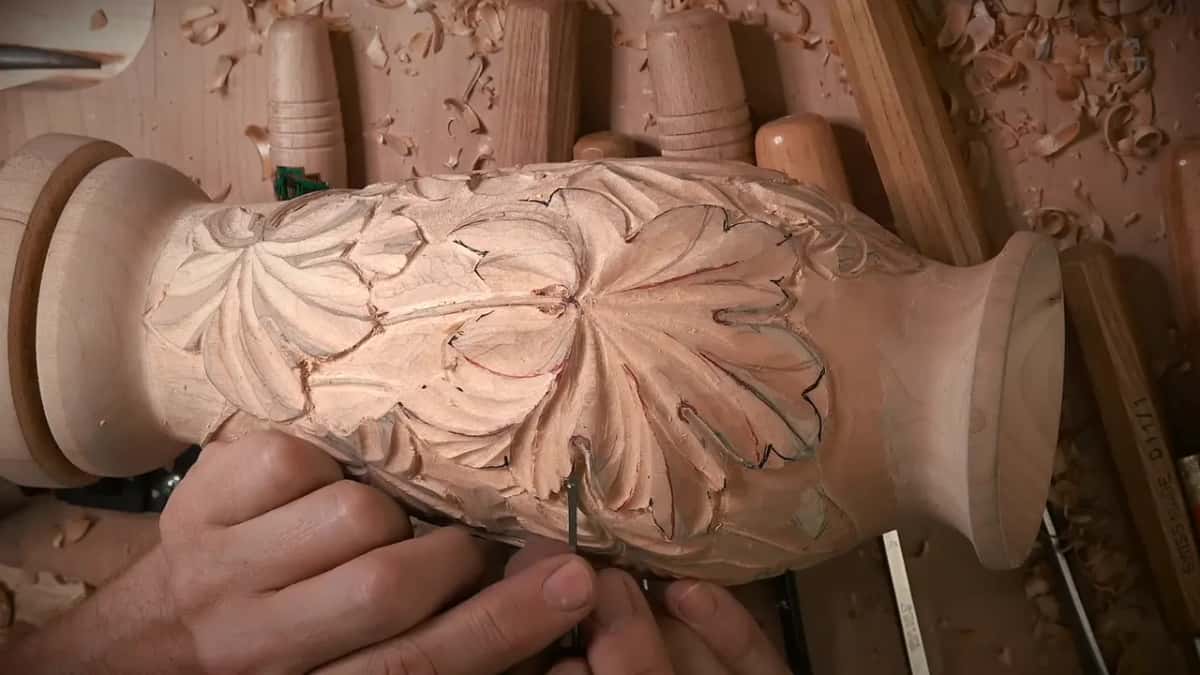
The reason came one part earlier. Every time you see a separation like a triangle, a micro vein goes in there, I told you. So the notch is the vein. Wherever you see the ridge, we're going to create the notch, I said, and I told you there would be lots of them.
A leaf asks for a vein at every triangle. That is why I carved one there and kept it, however rough it looked that minute.
How much exaggeration is too much on a carved leaf?
Exaggeration is the point on this leaf, right up until one movement shows up everywhere. Back in lesson 1, just before I drew the first eyes, I said wood carving is all about exaggeration, so we really need to exaggerate. The third lesson, lesson 3, has me calling this grape leaf more like carver's style. Exaggerated, I would say.
Deep undercuts belong to that. Under one leaf I planned about 3 mm and measured about 5 mm (3/16 in), and I said out loud that I must not pierce it, but I really want to undercut. I like those deep ones because shadow is really important, and wood carving is pretty much about light and shadow.
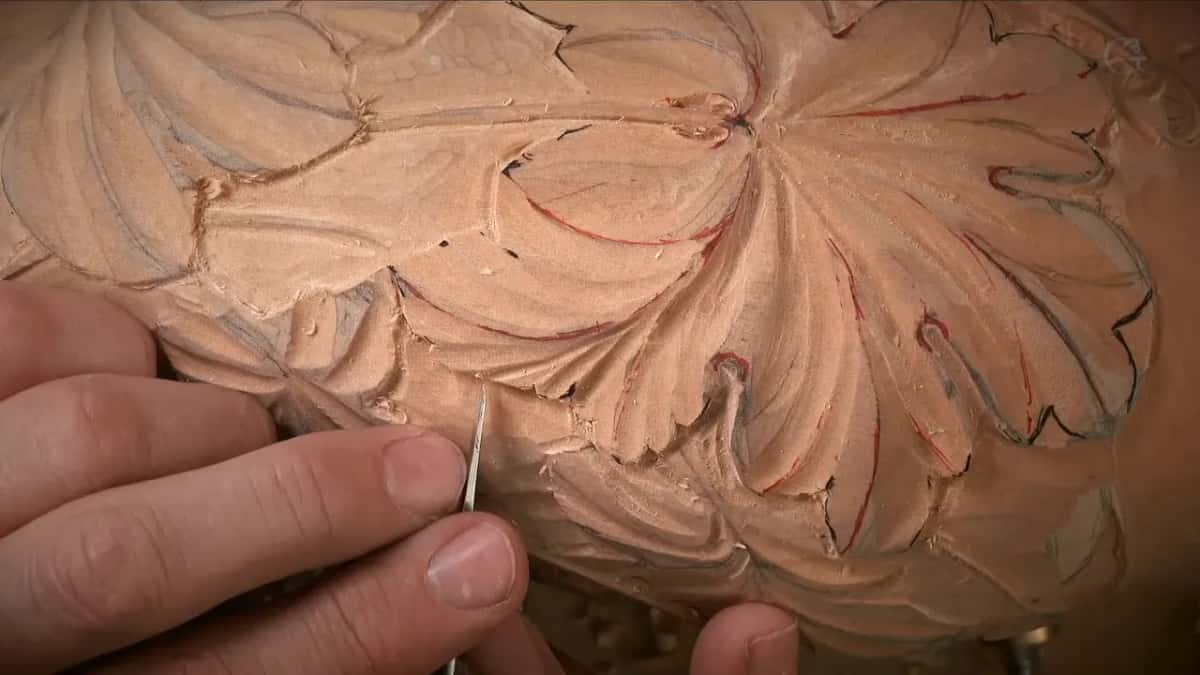
Then came the other side of it. Drawing a letter S into one leaf, I stopped and asked you, please, when you're going to do it, don't be too crazy. Don't do it everywhere. Otherwise, it's just going to look too much. The long thin lines I carved into a few separations got the same words, not everywhere, but some spots.
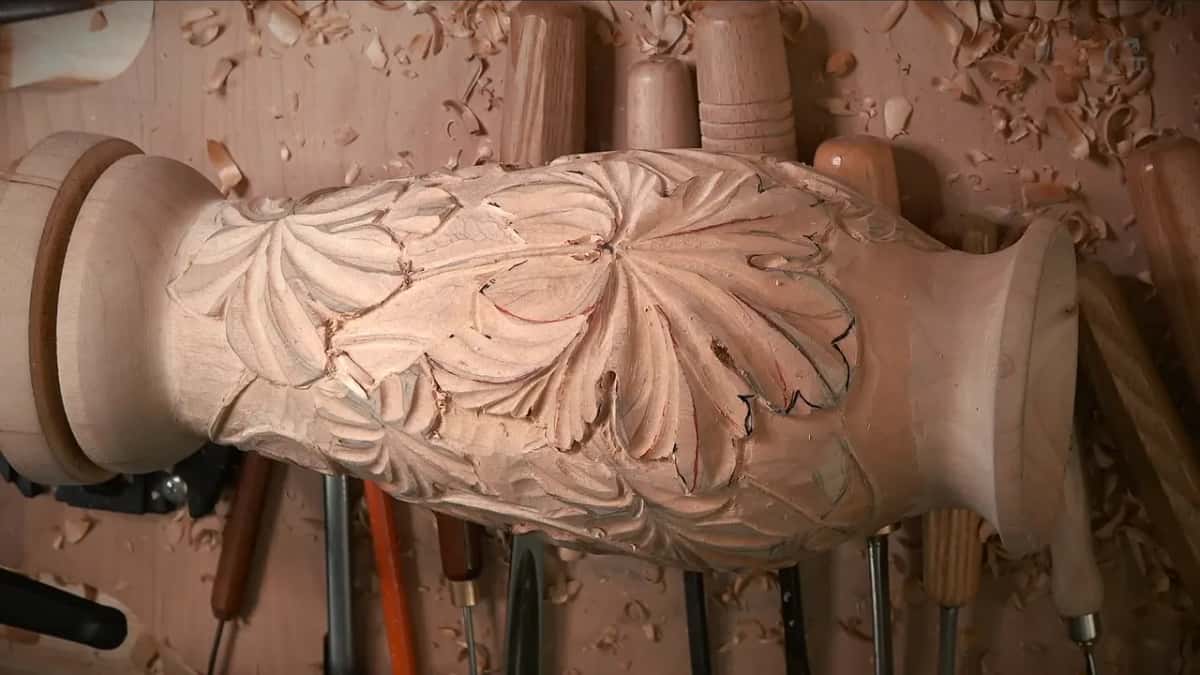
One spot I made airborne, carved from both sides with a 3 mm (1/8 in) #3 until you can see through it. I called it a little detail, not necessary. Extras like that are taste.
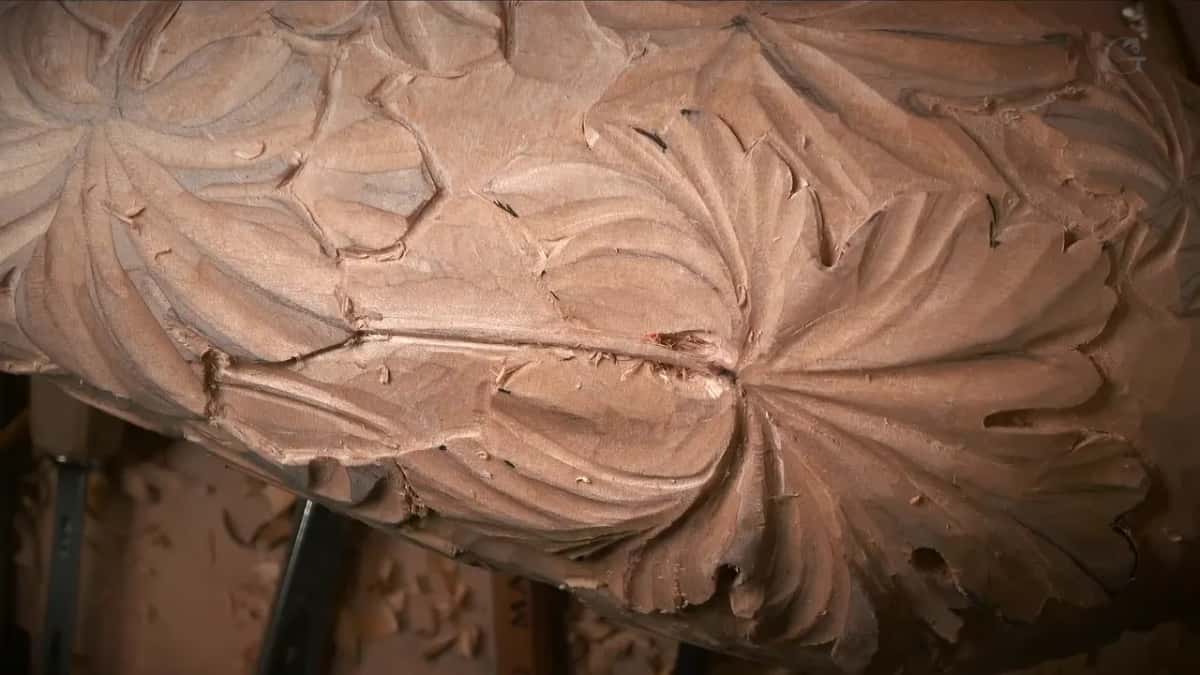
So here is how I read exaggeration on this piece. Anything that bought a shadow I did on every leaf. A movement that would repeat itself on every leaf, I kept to a few places.
Should tool marks show on a hand carved wood vase?
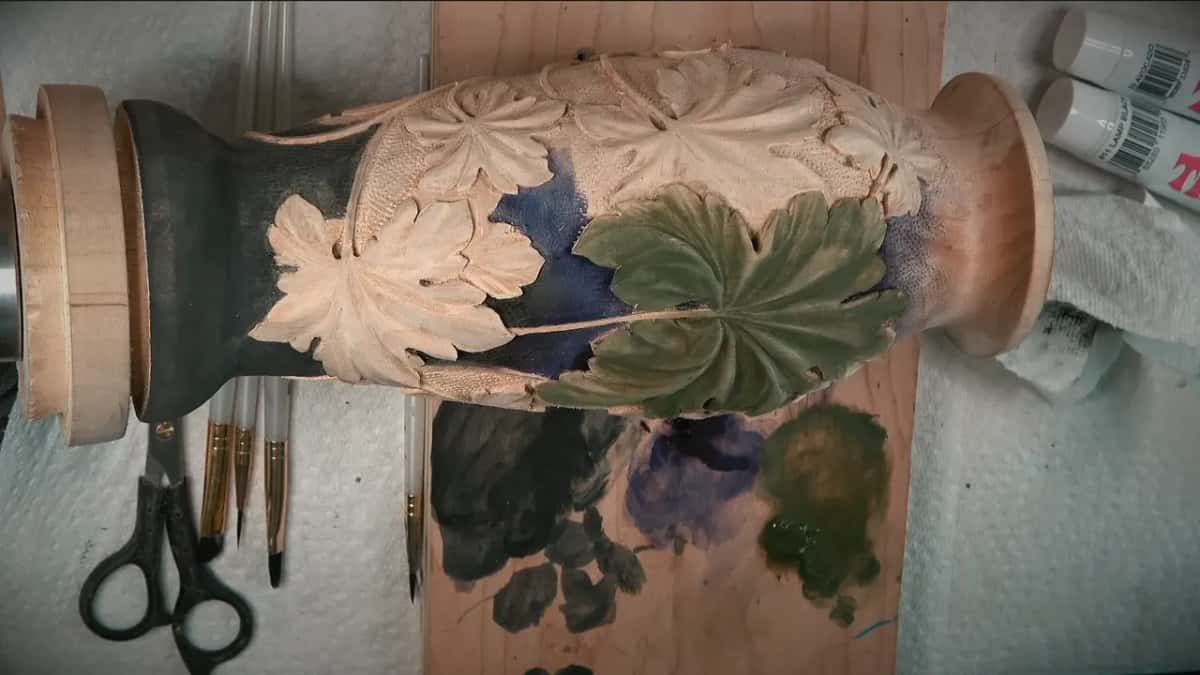
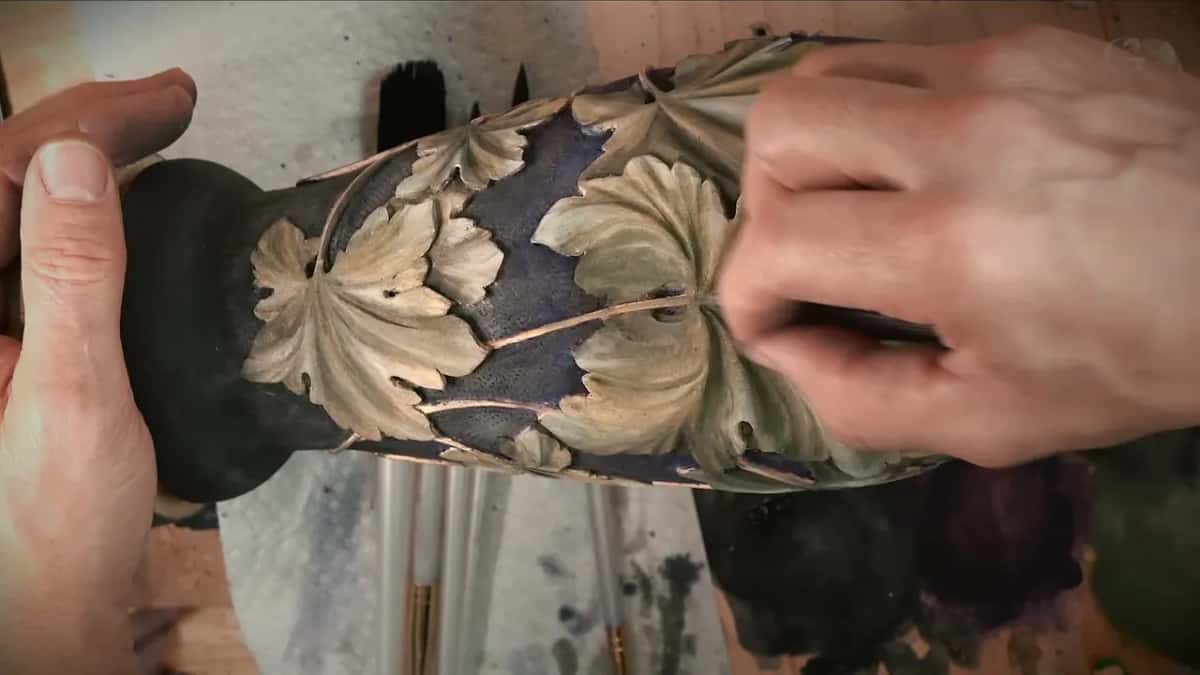
The right ones should, and on mine they do, on purpose. Wiping the wet color off the high spots in lesson 4, with a paper towel and denatured alcohol, I was taking pigment out of the high spots, and as I said on camera, all of those facets and tool marks get exposed. That wipe is how the leaves got their light.
Two other kinds of marks are faults, and I named both. The first is a stabbing cut. Notching the subdivisions in lesson 3, I said you're not supposed to use straight-down cuts with gouges. Don't stab on the inside, because we still have to subdivide, and you don't want to create extra tool marks which you have to deal with later.
The second shows on the surface. Shaping a pipe in lesson 2, I stopped and pointed. See those marks? That means my tool is not as sharp as it has to be. Earlier in that lesson I had buffed a gouge on plain leather with Trend's mirror paste, and I said a sharp edge even sounds different. Push too hard on that strop and you roll your bevel.
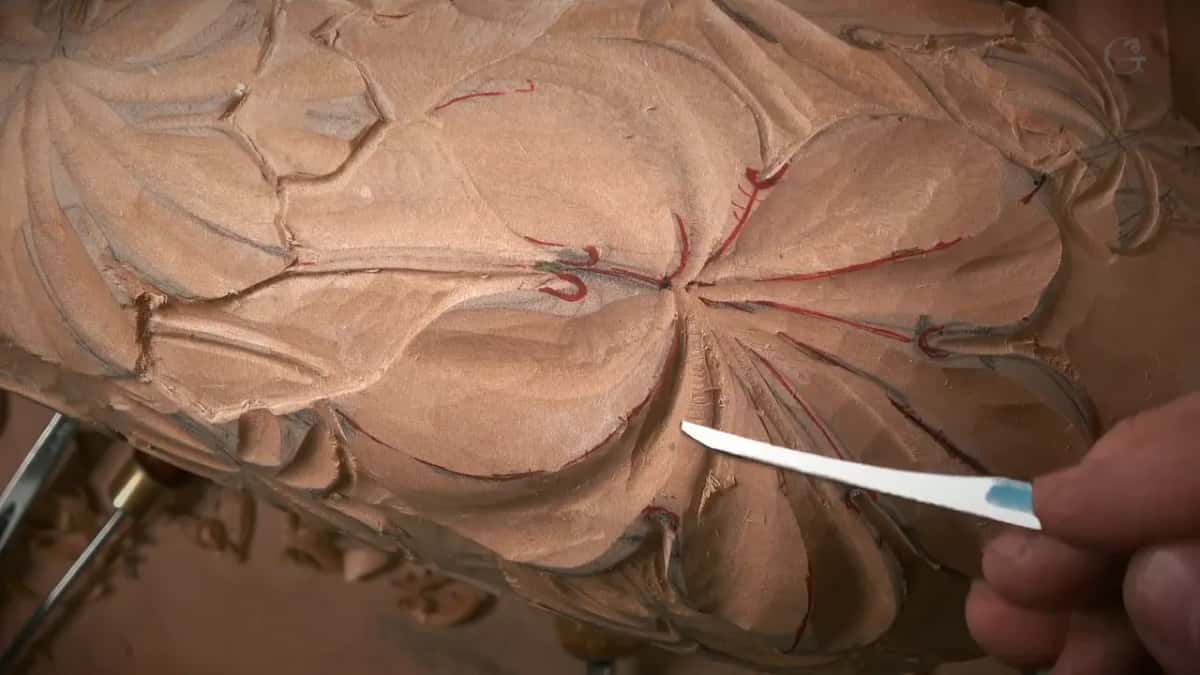
A facet from a sharp edge is the carving itself, and the marks I pointed at on that pipe meant the edge needed work before I went on.
What does spooning look like at the end of a hollow?
It looks like a hollow that lifts up before it reaches the edge. I said it while carving the first concave of the big leaf in lesson 2, with a 10 mm (3/8 in) #11. We don't want a spooning effect. Some people, when they approach the edge, are trying to escape upward, and that is not going to look natural.
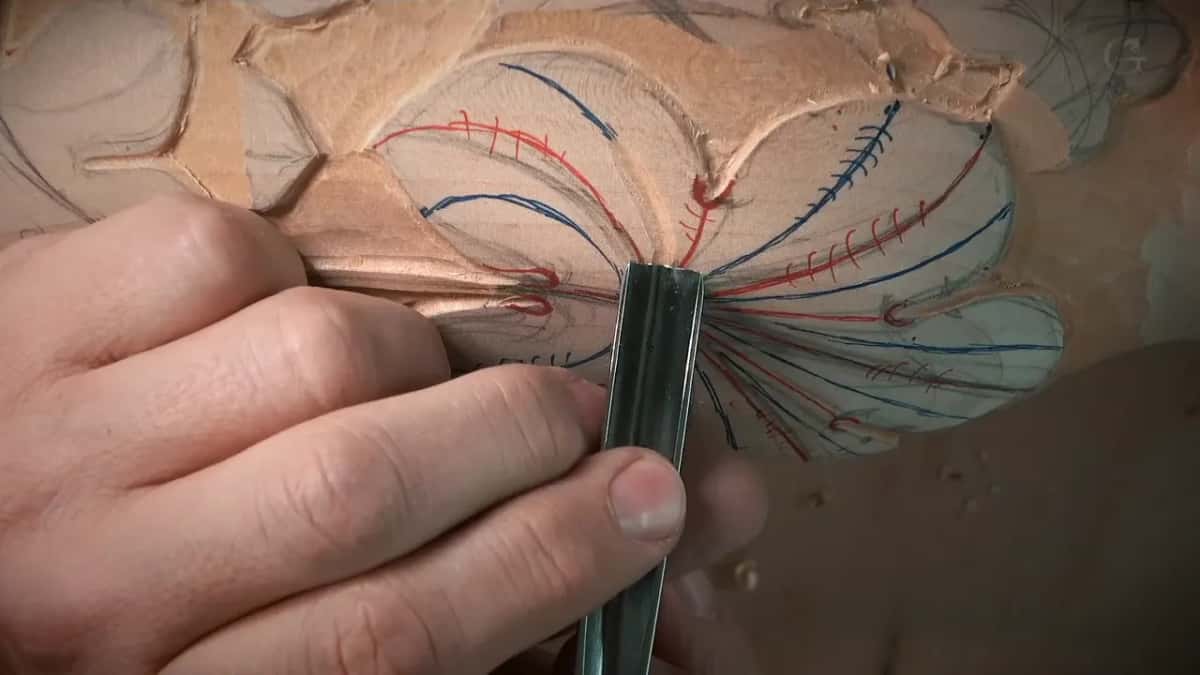
My own pass ran right out, and two parts later, on a really wide leaf, I said it again, all the way to escape, just to the edge.
So look where each hollow ends. Running out at the edge is right, and turning up early is spooning.
Why is a wiggly middle line a fault?
The middle line carries the movement of the whole leaf, and a wiggle breaks it. My marker work in lesson 2 put the high spots in red and the hollows in blue so you could see them, and about the middle line I said, just make sure it's a flowing line, beautifully flowing line, so without too much wiggling.
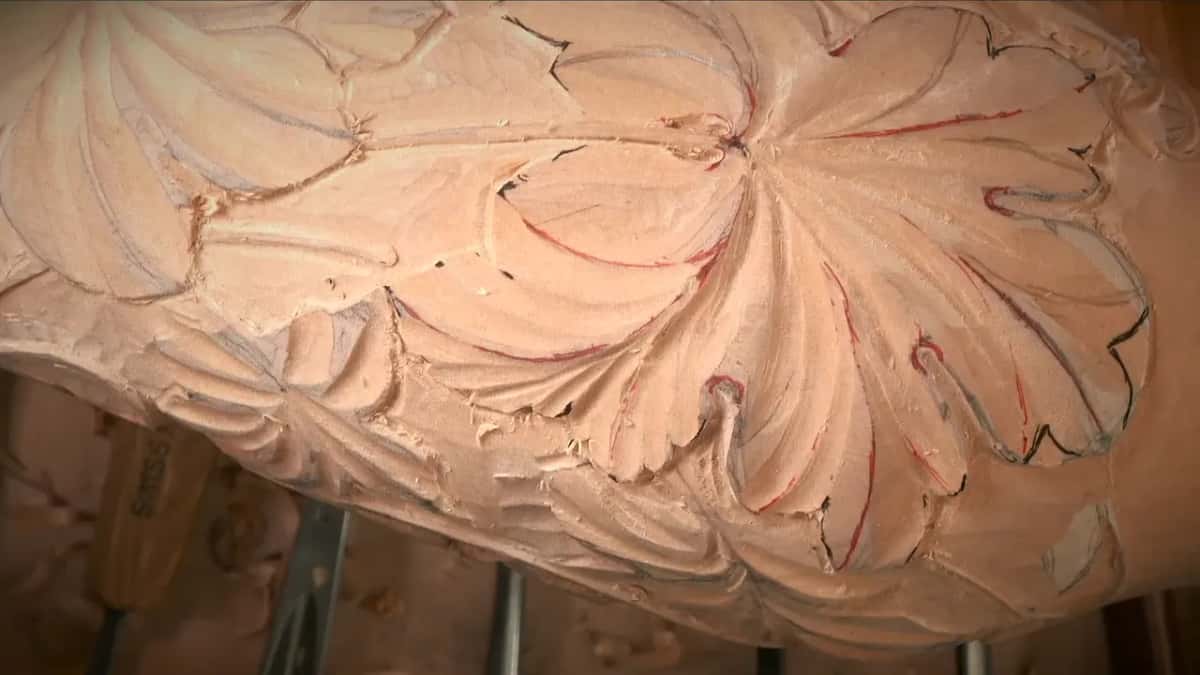
Later in that lesson I went over every division with a #3 upside down, shaving to that line, because we really need to see that middle ridge. Otherwise, we're going to lose the movement. The high spots stayed almost untouched too, or we lose the overall shape, and in part nine I said I meant the shape of the vase.
My check was short. Can I see the ridge in all five divisions, and does it flow? I wanted that ridge visible in every division, on every leaf, all the way round the vase.
Is dark end grain a staining mistake?
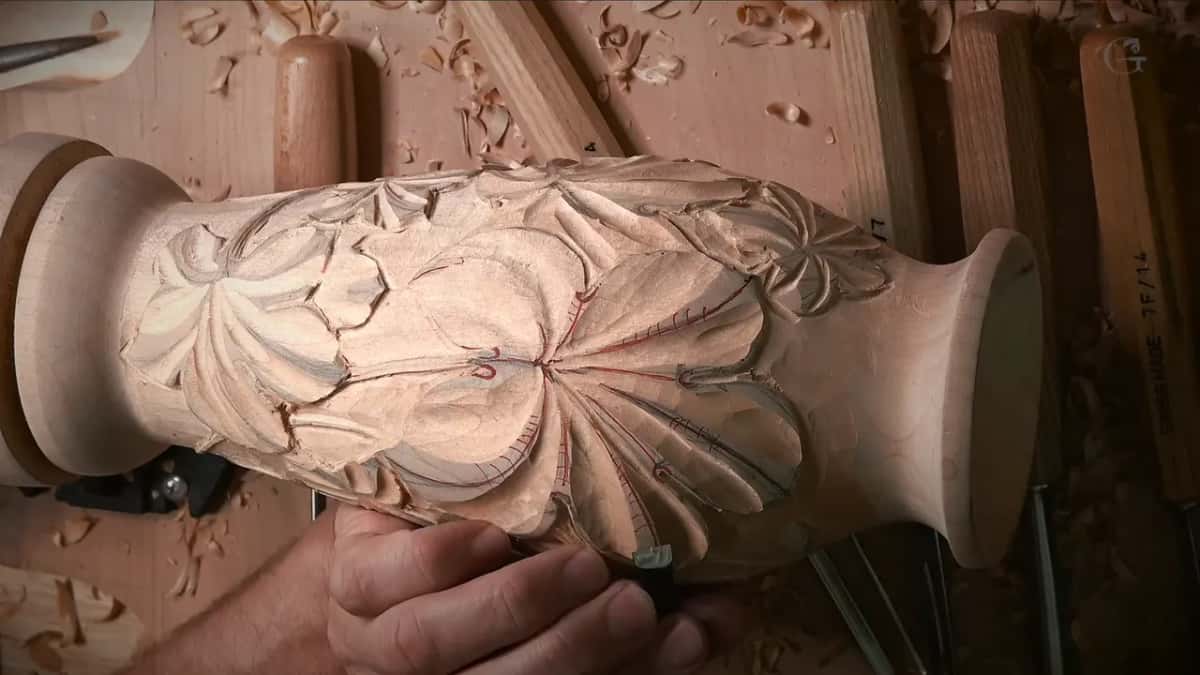
On this vase it was a gift. The background got black colorant mixed into denatured alcohol in lesson 3. On the first coat I warned you that whatever end grain you see is going to take that stain a little differently. Don't pay attention to blotchiness yet, I said. Two minutes later the downhill end grain drank much more, and I said it becomes more black, which is really good thing.
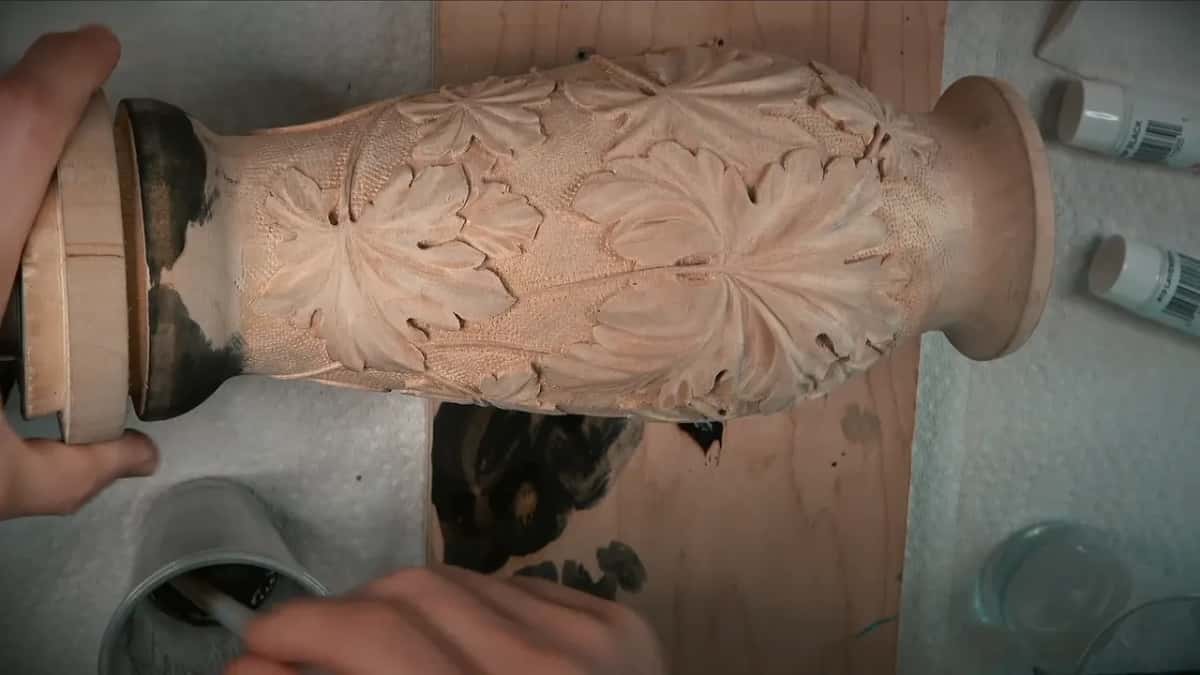
Uneven color on the leaves was a choice as well. Brushing the avocado base, I said it should not come out too even. It should have some variations. One spot came out too dense, and I said in this case it's okay, then took color from there to use elsewhere.
Dark that lands downhill or deep in a concave helps the shadow. Where it hides the grain, it turns into a fault, and that is the next part.
When do black and white become faults on a stained carving?
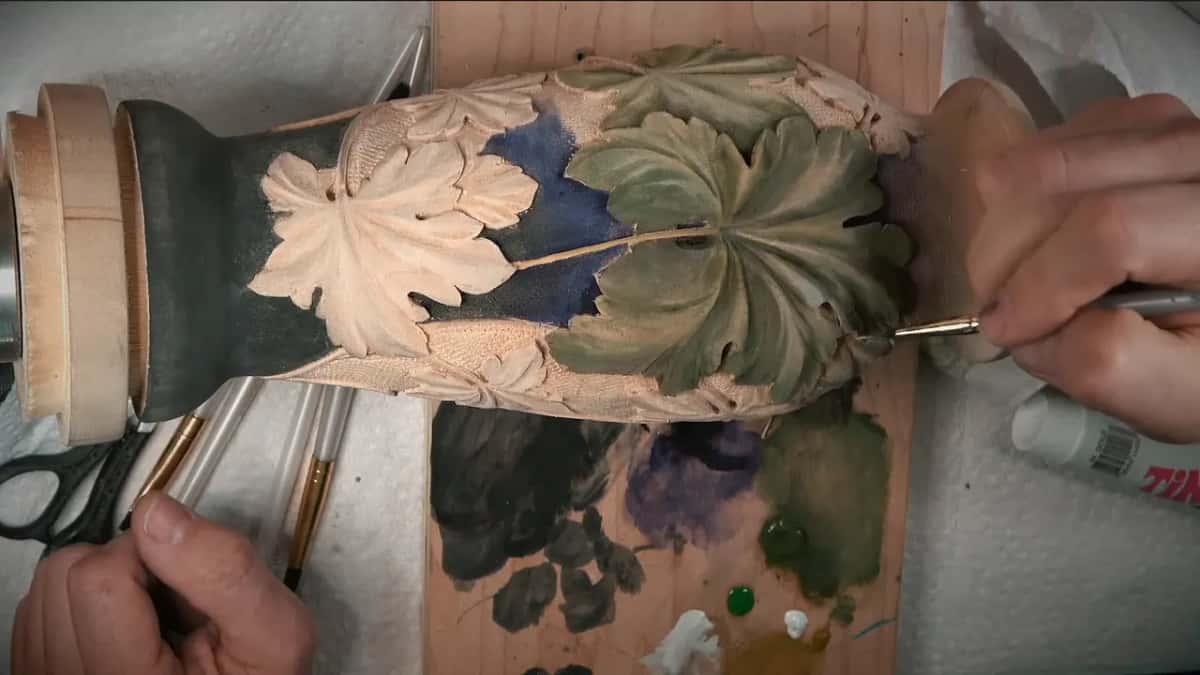
Black on the background was the plan. Black as a shadow on the leaves would have been the fault. The antiquing in lesson 4 used raw umber, almost a black earth color, to fake shadow without losing the color, and I said I wouldn't use black because it would look unnatural. Going down into one deep spot with it, I said I don't want to see any white spots right here.
White goes the other way. The flake white on the pipes and the leaf ends was the most important color, I said, and the easiest one to overdo. Please do not overdo it. All we need is just the highlights, and we still want to see grain of the wood.
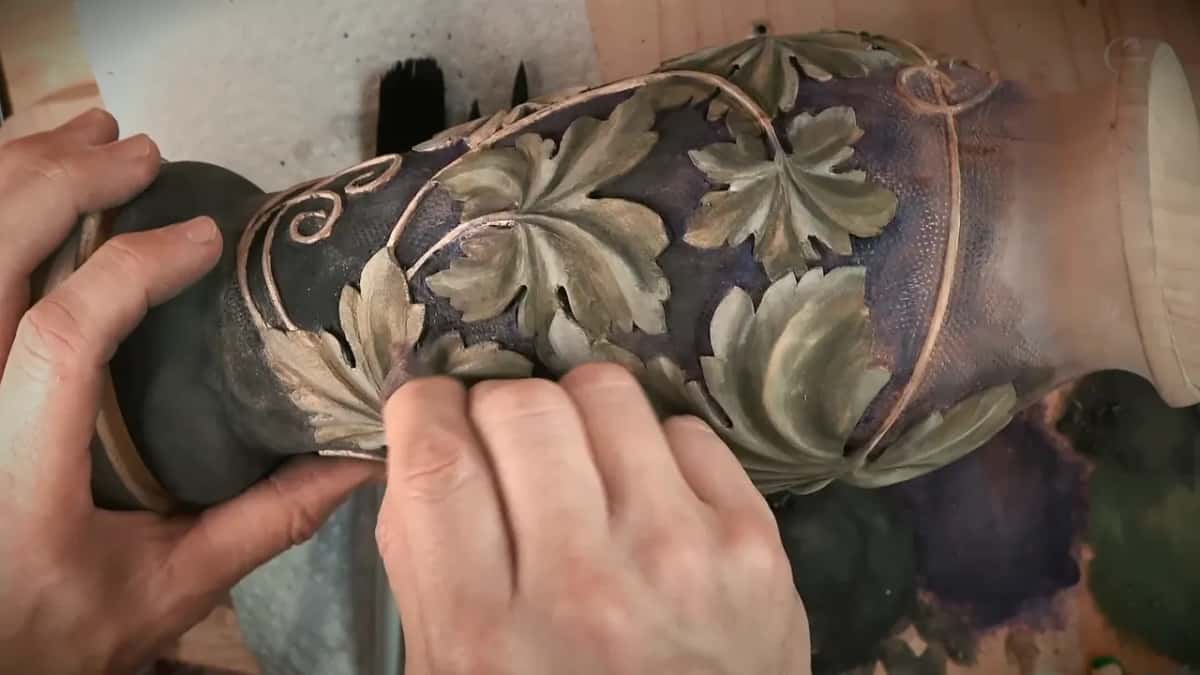
So I read the color in two places. Down in the shadow it has to stay a color, umber and not black. Up top, white leaves the grain showing.
What happened to the carving mistakes I made on this vase?
Each one got named the moment it happened. Outlining in lesson 1, my veiner slipped, and I said so that is no bueno. It's okay, but it is better not to do that. Soon after, a line threw me off and I called it a wrong cut. Then, taking out the background with a 14 mm #7, half an inch in my words, I went too deep in one spot and said so out loud. I've got a little mistake, so I cut too deep. It's better just not to rush it, and remove little by little.
Lesson 2 had an extra ridge I left by a pipe, and I said it's not really the end of the world. A minute later, working that pipe across the grain with a small #7 upside down, I said that's no bueno and picked up a #5. During the undercuts of lesson 3 there were two weak fibers, because I wasn't too careful. One flew out a little later. I can recreate the movement right here, I said. Nobody's going to know that.
The color had its own slips. A brush went where it should not, and I said it's easy to fix, just create an extra cut. Another time, not too late yet to shave off some of it. Dirty fingers touched a leaf, so I cleaned my hands and my brush. At the very end of lesson 4, sanding small details with sandpaper, I said I didn't want to sand them too aggressively, and a minute later, that's what I was afraid of. Which is still okay, but I wish it didn't happen.
The landscapers were working on my yard while I filmed part of lesson 2. I apologized for them on camera.
Every mark on the vase in one table
Here is the whole vase, mark by mark, with the words I used while carving it.
Mark on vase | Mistake or meant, in my own words | Tool involved | What it does for the leaf |
|---|---|---|---|
Messy layout lines | Meant, a stage, it will make sense | Marker, pencil | Carving takes the drawing away later |
Rough micro notches | Meant, doesn't look good, we're after it | Smaller gouge | Exaggerates the triangle each concave makes |
Facets left showing | Wanted, the wipe exposes all tool marks | Paper towel | High spots lighter, hollows stay darker |
Dark end grain | A good thing, it becomes more black | Black stain | Downhill end grain soaks up more |
Hollow rising upward | Fault, spooning, it will not look natural | Wide veiner | The pass escapes before the edge |
Stabbed gouge outline | Fault, extra tool marks to deal with | Any gouge | Leaves marks you deal with later |
Wiggly middle line | Fault, otherwise the leaf loses its movement | Upside-down #3 | The ridge has to flow cleanly |
Curves on everything | Too crazy, it just looks too much | Marker drawing | Fine in a few spots only |
The top four rows are meant and the bottom four are faults, and you can read your own piece down that same second column.
The last page of this course asks for a photo of your carving, and I look at your work and certify you based on what I see.
Do you have a gouge, or want one? Would you like to see each of these marks happen, part by part? All four lessons sit behind the tuition page, and the Tray of Blessing carries grape leaves on a flat board if a round one feels like too much.
How it's done
- Follow each middle line. Look down every division for its ridge. It should flow with no wiggle and stand high enough to see.
- Look where each hollow ends. A good hollow runs right out at the edge of the leaf, and one that lifts up early is spooning.
- Check inside the subdivisions. A stab there leaves marks of its own. Micro notches at the triangles belong, rough or not.
- Read the tool marks. Facets from a sharp gouge stay. Marks from a dull one mean the edge comes first.
- Count the S curves. Somewhere is fine. Putting one on every leaf of the vase is too much.
- Look down into the shadows. Raw umber there, not black, and no white spots.
- Check the white wash. Grain should still show through it on every pipe and leaf end.
Frequently asked questions
Is a messy layout drawing a carving mistake?
The layout on my vase looked messy in lesson 1, and I said so on camera, twice. Then I said it would look really good. The architectural markers I drew with do not go deep into the wood, so those lines come off.
How can you tell a gouge is getting dull?
Look at the surface it leaves behind. In lesson 2, shaping a pipe, I pointed and said those marks mean my tool is not as sharp as it has to be. Earlier I buffed one on leather with mirror paste and said a sharp edge even sounds different.
Can you fix a slip after the stain goes on?
I did it twice on this vase. A brush went where it should not, so I created an extra cut, and another time I shaved a little stained wood away because it was not too late yet. Dirty fingers on a leaf meant I stopped to clean my hands and my brush.
What to carve next