
Alexander Grabovetskiy, woodcarver, School of Woodcarving · Published 2021
How deep can you carve when you are close to your workbench?
Quick answer: Depth near my workbench is what I said I need to be mindful of in the second video of Venice Room workshop 116, since too much can come off. Workshop 121 adds, "I cannot go too deep," and workshop 73 calls the bench a limitation.
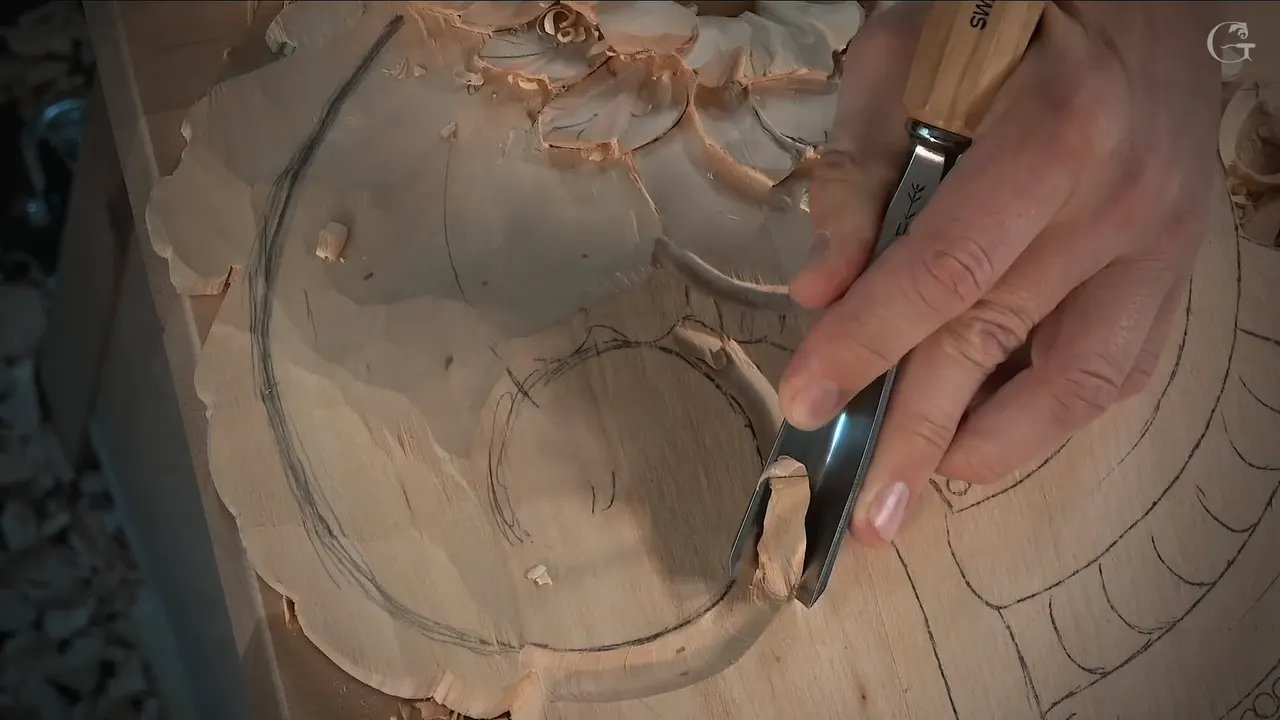

"So it's easy to overdo it and remove too much" is what I said in Venice Room workshop 116, part 2, about carving beside my workbench. My workbench comes up in many other lessons of mine too, as a limit on depth, as a thing a blade can reach, and as a thing that moves.
Do you know what sits under your board when a gouge goes in? Does your bench ever stop a tool before you want it to? This page starts with part 2 of workshop 116, then follows the bench through the Venice Room, the Grape Onlay, the Hashemi flowers and a few more courses. The pillar of this course tells one small piece of it, and I leave that piece there.
What did I say about the bench in workshop 116, part 2?
One line, near the end.
The part starts with the first cut. It would be right on the line, I said, and now I could take a much deeper cut and stay away about an eighth of an inch (3 millimeters) or so. All that area would be much, much lower, so I was not afraid to lower it right away. A question followed: "Why don't I take number seven and three inches and get rid of some of the junk I don't really need?" Three inches is about 76 mm.
Working with the grain, I warned, makes a big mistake easy. The tool I planned was just a number 11. And one line says, "I do have a dog at my workbench, so got to be careful."

Later I said to look closer, because a line was going all the way. "But right here," I said, "I'm going to have a shell movement right on the side. I think it's going to look really awesome." For that a part still had to come off and sit a little lower, "otherwise it's not going to look as nice" and then I would recreate the drawing. "Little lower, but not too low," I said. Then again, "Not too low."

Next I planned the outline of this side, with a smaller number 11, "of course." The size I named was 7 millimeters (0.28 in), for a "little nicer outline cut."

Then came the line itself. "Okay, so I have to be mindful how deep I cut because I'm really close to my workbench. So it's easy to overdo it and remove too much."
The outside came next, as a plan. "Let me now outline outside, and I'll take, again, big number seven. Place it straight down, just like that." My plan was to chop straight 90 degrees down.

Does the bench show up in the other two videos of workshop 116?
It does, in part 3. There I said I would move my bench so you would see it. "I created a lots of mess. It looks really messy." Later came "I need to make sure it's stable. I mean, my workbench."
That part has a grain warning too. I would attack from both sides because of the grain of the wood. A mistake is easy to make, I said. The tools I named were a number 11, probably at 10 millimeters (0.39 in), a number three of maybe 20 millimeters (0.79 in) for straight down cuts, and later a number seven and three inches (about 76 mm) to remove some of the mess.


How deep did I go when the work sat close to the bench?
Workshop 121, part 3 gives the plainest version. At "number one cut" I said, "I cannot go too deep because I'm really, really close to my workbench. That would be a big mistake." For the second cut, only the 30 millimeters could start (about 1.2 in). I noted I was working along the grain and had to be careful not to break. The course pillar tells this cut too, with its own words around the number 11.

A shadow brings the same worry in workshop 122. A number nine, an eighth-inch tool (3 mm), could "create even deeper shadow." I did not have to, but my personal opinion was that it would look really, really good. I planned the plug cut "pointing this direction" with care, since the bench was so near. Then came "There you go. Remove the first plug." The shadow was "much, much, much darker" and I was happy.

A limit is named in workshop 73. My tool was 3 millimeters, number 11, "of course," a veiner of an eighth-inch. "But I have a limitation, really a big limitation, pretty much. I cannot create the right angle, okay, because that's already my workbench. But it's okay. Little by little."

A bench dog turns up in workshop 107. "I do have a bench dog inside, so got to be really careful," I said, adding "I forgot about it almost. Oops." Later, "But to the bench dog, I'm okay." Going near it was fine, I said.

Another course, the Grape Onlay, says it with other words. In the ninth Grape Onlay lesson I said I would grab my number 11, probably "a bigger one, like 12 millimeters" (0.47 in), and that I could just excavate. "I have to keep an eye how deep I go because I'm pretty close, you know, to my work bench."

How do I measure depth with a bench under the board?
A fragile part opens workshop 106. The grain runs that way, I said, and I did not want to break it. Then the figures: "I'm going to be about maybe three-eighths of an inch, maybe about half an inch, something like that, about 12 millimeters, 11 millimeters, 10 millimeters from the surface, from my workbench." In inches that is 0.47, 0.43 and 0.39.
Later I planned to attack another section and make it the same level. A blend was coming, I said, because the depth in that spot sat a little higher than the part I was matching, measured from the workbench I was talking about. So it needed blending "really, really nicely."

A pointing machine, I said in workshop 79, is one of the tools I really, really like. "Sometimes it's hard to use even calipers," I said, "but pointing machine is good." Once I had the depth of certain points from the backside, I could then measure, "since it's laying flat on my workbench." To me it is really easy to measure to the point "right from the surface of my workbench."
The first Floral and Molding lesson turns it around. "Now, I have to take it to my workbench, and I cannot reference from the bench." I said I reference from plywood, because the pieces we sawed have the same thickness.
What happened when a tool could reach the bench?
Workshop 75 has a jigsaw. I planned a normal one to cut a section roughly, and I did not need to be on the outline. Then: "Let me raise a little bit, because if I'm not going to raise it, my blade going to hit the workbench." Not too much, "but a little bit" and I would use the cookies, bench cookies, three of them underneath.

The other way round comes in workshop 126. It "looks and feels really, really good, although I damaged a little bit my workbench," I said. That was no good, I said. "But it's okay." A moment later I said I did not like how it looked, and that I could always hit it with an upside-down tool and shave it a little bit. Earlier I had said a rasp on the high spots might be a good idea.

Over in workshop 156 a piece went upside down. "Put that upside down," I said, with an undercut to come from the backside, "but now just preliminary for establishing the form." The knife edge could wait. "Now it is good," I said, and one more line follows. "I don't want to damage my workbench also."

The fourteenth Grape Onlay lesson sets the bench behind the cut. Raising the tool while you excavate, I said, "creates like a spooning effect" and it "doesn't look natural, in my opinion." Better for me is to "just excavate and exit" and "go downhill," toward the background, "in this case, my bench." That gives me "much better shadow," I said, though it is just my opinion.

Which of my lessons has a bench that moved under the cut?
A short fix is in workshop 129. "Maybe not really on the line, but really close." Next came "I guess I need to make it tighter because it looks like my workbench is moving."

My plan in workshop 153 was a number 2 of about 16 millimeters, 5/8 of an inch, for a straight down cut. "I probably have to move my piece just on my workbench. It's kind of bouncy a little bit." That was okay, I said, but moving it would be better, and I would do it slightly later.
Here is what came of it in workshop 154. The piece was kind of loose and "just vibrating," so I would refasten it "more solidly on the workbench." With my clamp in place I expected a lot less vibration, and added, "At least I hope." Then, "yes, it is. It's just actually excellent. And I can get my cuts much deeper."

A clamp sits in the corner in workshop 124. You could not see it, I said, but I had just clamped it to the workbench and wanted to make sure it was stable. Next I planned to remove that clamp and use big tools.

A glued block in workshop 49 was too heavy to move. "My bench is moving, but not this piece." There is a reason, I said. I have so many tools, and I organize them in drawers. The bench I was using "right now on the wheels" was a tool chest with drawers, "which is working really good."
A squeak opens the second video of lesson 4. "It's just my workbench does it, which in this case is just a tool chest on wheels." Why not a normal workbench? In this case, I said, I really needed to be mobile. The eighth video of lesson 1 adds "Because my workbench has wheels, I just kind of moved little bit one of the sides, and that way I can see much better." I added that I would block you.
Roman Acanthus 5 answers a viewer. Some of you asked if I could remove the shakiness of my table. Probably, yes. A different type of workbench, "really solid, unshakable workbench," would probably fix it. For me it is "not the problem at all." My vice sits on just a small workbench, "and definitely it creates some movement." A really stable bench is "absolutely fine" too, I said, though I like my portable one.

Grape Onlay 10 has a break, and the line runs "Oops. And I just broke that thing, right?" My attack had come from the wrong side, I said. I did not want to move my work bench "just because of the cameras." "Usually if I'm working without the cameras, I would obviously just rotate the piece and attack that way."
What is the top of my workbench like?
Hashemi 27 gives numbers. "I can just use the workbench to do that, to dig this out." I would use my clamps and clean those holes. If you wonder why I did not drill them through, "this workbench top is only two inches thick, and I've got multiple holes, and I didn't want to make it weaker." Two inches is about 50 mm. I was not sure it made sense, but I thought it would be more stable if I drilled it and not all the way. "Maybe I'm just trying to be overprotective."

The Floral and Molding lesson also says what I mount to the bench. The holes in my bench are 19 millimeters, three quarters of an inch to be exact, and pegs also come in 20 millimeters (about 0.8 in) for a European workbench. A piece of leather went on solid brass pegs to keep the piece from getting marred. The first beginner workshop says you do not need expensive benches. "So you need wood, you need your table or workbench," it goes, and having a workbench is "a good thing."
Where did the bench come up, lesson by lesson?
| Lesson | What the bench did |
|---|---|
| Workshop 116 | I watched depth, the bench so near |
| Lesson 121 | Going deeper meant a big mistake |
| Venice 122 | Careful beside a plug cut, the bench so near |
| Video 73 | No right angle, already my workbench |
| Room 106 | Depth figures taken from its surface |
| Workshop 75 | A jigsaw blade could reach the workbench |
| Lesson 126 | I damaged a little bit my workbench |
| Venice 129 | It looked like my workbench was moving |
| Video 154 | Refastened the piece, and my cuts could go deeper |
| Hashemi 27 | A bench top two inches thick, holes not through |
Where does the bench sit under your own cut?
Is there a spot on your board where the bench sits just under the cut? Could you measure that spot before the tool goes in? Everything on this page sits inside one tuition plan. The Part 10 course page holds workshops 110 to 121, and lesson 116 has all three videos of that workshop, between workshop 115 and workshop 117. More wood carving and relief waits there.
How it's done
- Say the limit. The limit in workshop 121 was the bench, and a deeper cut would be a big mistake.
- Take depth off the surface. Depth in workshop 106 ran about 12, 11 and 10 millimeters (0.47, 0.43 and 0.39 in), measured from my workbench.
- Raise the board. A jigsaw blade in workshop 75 would have hit the bench, so I raised the board a little, with three bench cookies underneath.
- Hold it still. The clamp in place in workshop 154 held the piece more solidly, and the cuts could go much deeper.
- Work with the limit. With the bench already there, workshop 73 left no right angle, and I used a 3 millimeter number 11 (about 1/8 in).
Frequently asked questions
What does part 2 of workshop 116 say about the bench?
Depth was something to be mindful of, I said, since the bench was near and too much could come off. After that I planned the outside outline with a big number seven, placed straight down, and a chop straight 90 degrees down.
Was there a limit on depth in workshop 121?
The bench set it. I called going deeper a big mistake, and the second cut could only start with the 30 millimeters (about 1.2 in). Along the grain, I added, care mattered so nothing broke.
Where did I take depth from in workshop 106?
About three-eighths of an inch (9.5 mm), maybe half an inch (12.7 mm), something like that, off the surface of the bench. In millimeters I said about 12, 11 and 10. A second section sat a little higher, so a blend was coming.
What to carve next