
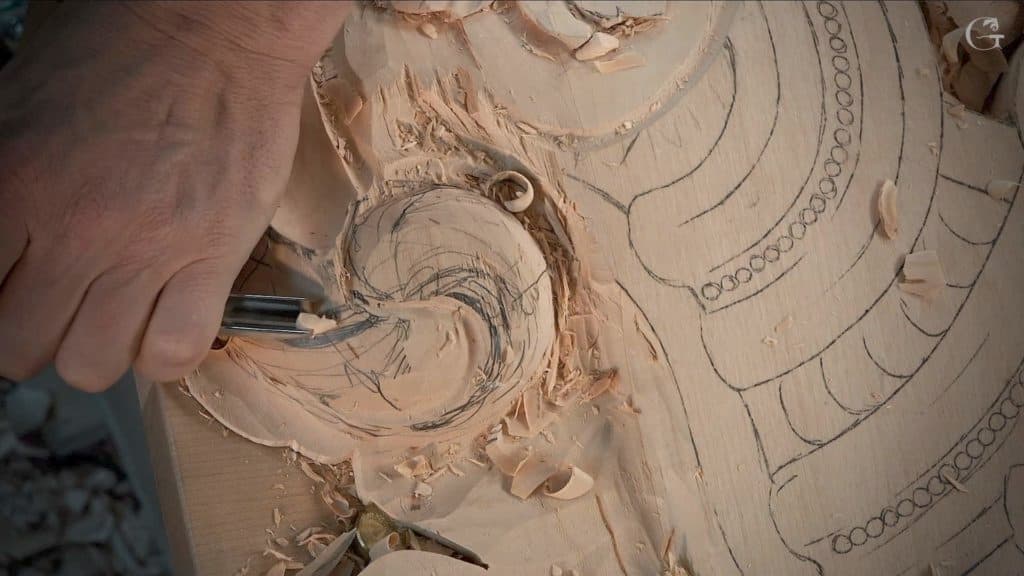
Alexander Grabovetskiy, woodcarver, School of Woodcarving · Published 2021
What does a wood carver mean by "my first cut"?
Quick answer: Part 2 of workshop 117 has me saying it just before saying there are many ways to develop an acanthus head, and my number 11 gouge, ten millimeters (0.4 in), went in at that spot. In other lessons I said it before a different tool, size, direction or hold.
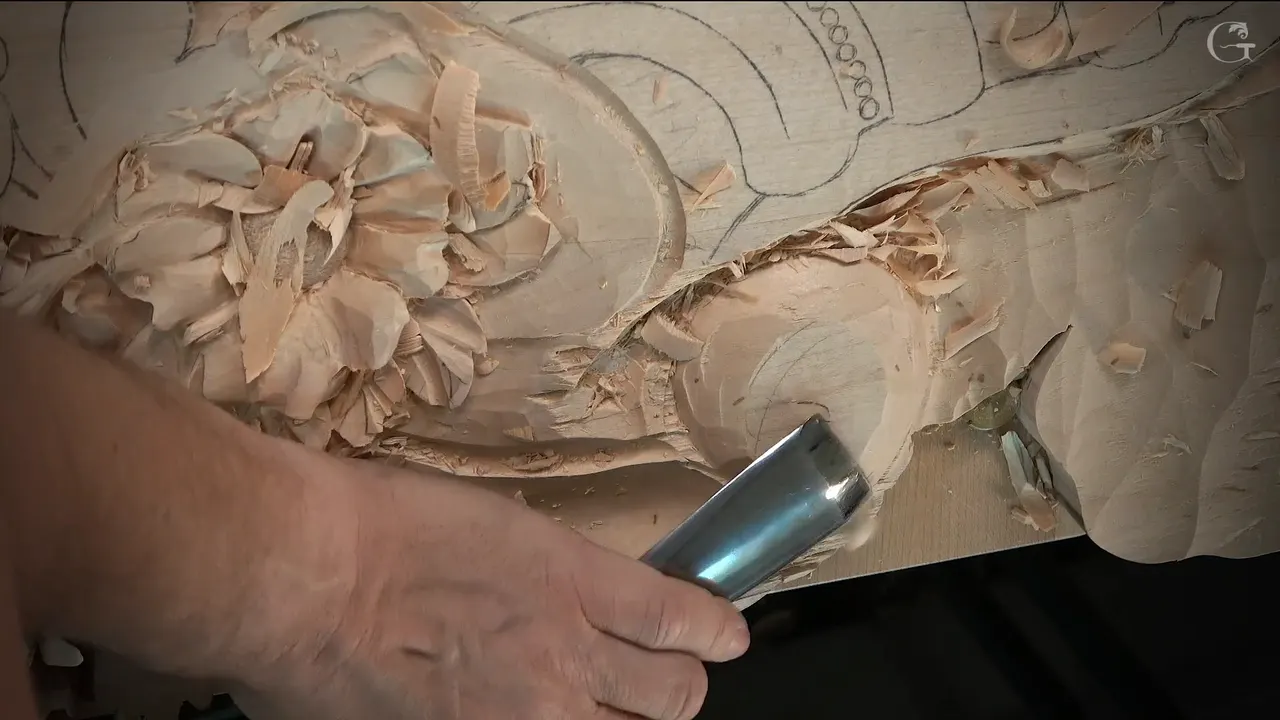

In part 2 of workshop 117, I said the first cut would be "right here." My tool was a number 11 at 10 millimeters (0.39 in). Options for an acanthus head came right before that.
Ever held a gouge over a clean leaf and not known which mark goes in first? Does that first line change how the rest looks? This page starts with that short video. Then the same words turn up in the Venice Room, the Furniture Panel, Roman acanthus, the butterflies plate and a few more lessons.
What did I say before the first cut of workshop 117?
Part 2 opens on a movement I called beautiful already. After "Oops" and "Too deep," I said "But that's okay" and then "It should be okay." Smaller tools were my plan after that, with "Let me actually clean a little bit, this section." Then, "Now I can develop" and then: "Let me think. How am I going to do it?"
An eye would be there, and the movement would go one way. A pipe would be there too. I planned to show it from a different point of view, "if you don't understand on the camera" and told you where I was working. That pipe would run a long way in that direction.

A decision came next. "I need to make the decision," I said, about where my point would go. I called it "the big question." The movement would run one way, and "maybe I can actually do my point something like that." That, I said, would be "the development." Two more separations would follow, one "right here," another "right in this area."
One option stayed open. "I could make it much lighter" and "like I did previously, I could excavate a bunch of material from here and get that really deep shadow." My doubt came right with it: "But I'm not sure if I want to do that or not." Then again: "I don't know if I want to do it or not."

For now, I would get another eye, and another. Each one would be a movement. After those came "the main idea" and then "Hopefully, it makes sense." Another option was to "flip it even more and create the illusion just that goes all the way and goes back to this point."
And I said the line. "But either way, my first cut is going to be right here." Next came "Like I said, there's so many different ways I could develop it." Last came "It's all about what I really want to see."
What happened after the first cut in part 2?
The spot was "right here," I said, and my tool was "Number 11 is what I'm using, 10 millimeters" (about 0.4 in). Then came "So number one cut."

A ridge got my attention. "Chop out right away that ridge," I said, because this leaf, this separation, would go underneath the main movement, "and that is my main movement." Then: "So let me right away take care of it. That is good."

Next came a count: not sure about four, and "Maybe I'm going to do three separations." One would be one of the main movements, a second "this chunk" and the third one a "little smaller." Maybe I would move the line "this way" and "So that would be probably better." Then: "One, two, and three. I hope you understand."
A concave cut was on my list. "There's going to be an eye," I said, so I had to start with its approximate spot. Later I added "Now I can blend this ridge right away."

What do the other two videos of workshop 117 add?
Part 1 starts on the main movement. Two spots would move "about six parts out of 10, golden ratio." I also planned a dome, "like a half a sphere." The tool was a number 11, "and I'll take 10 millimeters, three-eighths of an inch." On thickness, I had an inch and a half to the most high spot, about maybe 40 or so millimeters (roughly 1.6 in), and I did not want to lower too much.
Bigger tools followed. "I take 20 millimeters again" (about 0.8 in), then "maybe about 30 millimeters" (1.18 in), number 11, which would give "a really beautiful smooth cut." Part 3 begins with another decision, which is higher, the leaf or the point, and I planned to roll this one underneath of the leaf.
Which way does the first cut lean in other lessons?
A little toward the right, in workshop 52, part 8. Before it I had said "this part going to go below that one" and "I think it's going to make more sense." Then the tool: "same number 11, actually, I'm using." And: "It's not really undercutting, but it just gives me an idea that this is going to go underneath, and I actually can go lower if I wish." Blending was the next step.

Workshop 55, part 1, leans right too. The separation got "about the same approach what I just done" with four millimeters (0.16 in) again. Three would be better, I said, one-eighth of an inch (about 0.12 in). The cut would go "like this." Leaning right a little bit was the plan.
After that I said I would probably use a "little bigger veiner," maybe five millimeters (0.2 in), to "excavate much deeper." A smaller veiner would follow, going "even more in." I added that I wanted "the feel that this separation goes really nicely underneath," but needed to blend right then.

In workshop 61, part 12, I started the divisions with a number 11 at 7 millimeters (0.28 in), "little bigger than a quarter inch." The plan: establish the first cut "to the eye," from the opposite direction. That ridge, I called "my high spot." And: "I have to follow this movement with my cut."

Workshop 122, part 3, opens on "number 11 and 20 millimeters" (0.79 in). The first cut would be "hitting that line," I said, and I would not be "as deep." Then: "Although, I probably could go much deeper." Next: "I have to be careful and attack that from the other position, I think." I asked what the best position would be, and answered "Guess this side."

Where does the first cut go on the wood?
In workshop 66, part 3, it went where a part had to come off. I would need to excavate much deeper in one area "because I really want to exaggerate that shadow." Then: "I need to remove that part." Raised up, I said, and concave.
Then "Let me use that 30 millimeters" (1.18 in), a number 11 veiner. It could lie on one of the sides, and it gives "a much shallower cut on this side and much deeper on that side." Rough on one side, I said, and "It's always like that with veiners and gouges."

Triangle trouble was the story in workshop 82, part 9. That triangle needed exaggerating, I said, which meant carrying the concave and separating it in two cuts. I would use a number 11 of three millimeters (0.12 in) and make the first cut "all the way up" then the second. Later: "I don't want to leave that as a high spot. I don't think it looks organic."

How deep did I go around a first cut?
In the Roman Acanthus course I said "I'm not going deep. There is no reason to go really deep," right after "I always get better results if I am working with the grain with my first cuts." Just before that: "I just feel it's safer if you go from a middle with the grain."

Workshop 59, part 5, had a number 11, "probably around four millimeters" (0.16 in), with three millimeters (about 1/8 in) working also. "Carefully attack it," I said, and "I'm not sure if even a straight tool will be sufficient for me. Maybe not." Using the mallet was "impossible for me" right then, and "Just have to push it." On depth: "I could go a little bit deeper, but I don't want to go too deep because remember, I still have to be creating some concave-convexes movements."

"Somewhat deep," I said in the butterflies plate, and "I don't know how deep I am," maybe "about even 3/8 of an inch" (9.5 mm). That came after a straight-down first cut. The antique rosette had "I don't go as deep," about "16th of an inch deep, no more than that" (1.6 mm). And: "I'd rather make two cuts, three cuts, than make a mistake and snap it."
When is the first cut a knife cut?
A knife, in Carving Plate with Butterflies 9, part 1. "My knife gonna be really like a 90 degrees, but still just because I'm pulling." Then: "So I'm using the logic of the pulling," I said, and "a lot easier to pull like that." The knife would pull right on that line. After it came "Now I gonna lay almost flat again."

Butterflies 10, part 3, has me saying I have to "just create" the first cut plus a second cut. "Pay attention how low my angle is and how I'm holding my knife." The hold, I said, was "almost like a pencil or pen." Later: "Low angle I'm talking about." One spot needed to be "a little deeper," without a rush.

The antique rosette lesson shows the same hold, with my hand placed "like this" for the first cut. Then: "In this case, I'm more careful. I'm guiding with my finger right here and holding my knife almost like a pencil." The section was only an eighth of an inch (about 3 mm), and "it's really easy to snap" with the end grain I was doing right then.

The Furniture Panel course gave a quick way. In lesson 22 I said I love that approach for a "quick, really quick job." The first cut had just been made, and for the second I would lower the knife "even lower and get in just like that." Not too far in, I said, "because you can break the edge." About one thirty-seconds of an inch (0.8 mm) was my cut. And: "It's created actually a really nice edge."

Which tool did I name for it besides a knife?
In Roman Acanthus 4, I wanted to be "as close as possible to the original design." The plan was to make the first cut, then "turn my tool opposite direction and remove it." "Any small tool will work in this case," I said, and I named a number 7, about 3/16 or 5 millimeters (about 0.2 in).

In Furniture Panel 22, part 11, the first cut was "straight, just like that." Next, I could lean the tool to a side and "blend it with that side." A bigger tool would help even more, and a number three or a number five would give "exactly the same result." Then: "Blend that, but not much."

Furniture Panel 26 and 27 add two more. In lesson 26, part 2, the first cut was "with the flute pretty much to 12 o'clock" and next I could rotate to the left, and with the same tool make "multiple blending cuts." Lesson 27, part 3, had a concave as the first cut, one I could get "right underneath of this line," using a number 11, five millimeters (3/16 in).

The Floral and Molding course gave a size for the first tool. "It would be number seven, and about one inch and one-eighth," I said, which I thought was about 28 and a half millimeters. "Any bigger tool will work. The bigger tool you have is much better always." Number eight or number nine would do as well, I said, and you don't have to have exactly the tools I'm using.
Where I said it, in a small table
| Lesson | What I said about the tool or the way in |
|---|---|
| Venice 117-2 | Number 11, 10 millimeters (0.39 in), right here |
| Room 52-8 | Same tool, leaning a little to the right |
| Venice 61-12 | Seven millimeters (0.28 in), to the eye |
| Room 122-3 | Twenty millimeters (0.79 in), hitting that line |
| Venice 82-9 | Three millimeters (1/8 in), then a second cut |
| Furniture 22-10 | A knife first, then a lower knife |
| Panel 26-2 | The flute, pretty much to 12 o'clock |
| Roman 16-6 | Along the grain, and not deep |
| Antique Rosette 2 | Hand placed like this, a pencil-style hold |
| Butterflies 9-1 | Knife at about 90 degrees, pulling |
| Roman 4-2 | A number 7, about 3/16 inch or 5 millimeters |
| Floral 1-2 | A number 7, one inch and one-eighth (28.6 mm) |
Is there a leaf on your bench that has not had its first mark yet? Everything in these lessons sits inside one tuition plan. The Part 10 course page holds workshops 110 to 121, and lesson 117 has all three videos of this workshop. For first cuts on other pieces, try the Furniture Panel course, the Roman Acanthus Leaf course and the butterflies plate. More wood carving, relief and gouge work waits there.
How it's done
- Ask where the point goes. "The big question," I said, and the movement would go one way.
- Say where the cut starts. It would start "right here," I said.
- Name the tool. Number 11 gouge of 10 mm (about 3/8 in), and "So number one cut" came next.
- Deal with the ridge. Chop it out right away, I said, because that separation is headed under the main movement.
- Count the separations. Not sure about four, I said. Maybe three.
Frequently asked questions
Which tool did I name for workshop 117's first cut?
Number 11, with 10 millimeters (about 3/8 in). My words in part 2 were "Number 11 is what I'm using, 10 millimeters." Part 1 of the same workshop calls that size three-eighths of an inch.
Where did the first cut start in part 2?
Where my point would go was "the big question," I said. Many ways to develop it were open, I added, and the cut would start right here.
Which way did the first cut lean in workshops 52 and 55?
Toward the right, a little. In 52, part 8, I said "It's not really undercutting," only a hint that the part would go underneath. In 55, part 1, I said three millimeters, one-eighth of an inch, would be better, and I wanted the separation to go "really nicely underneath."
What to carve next