
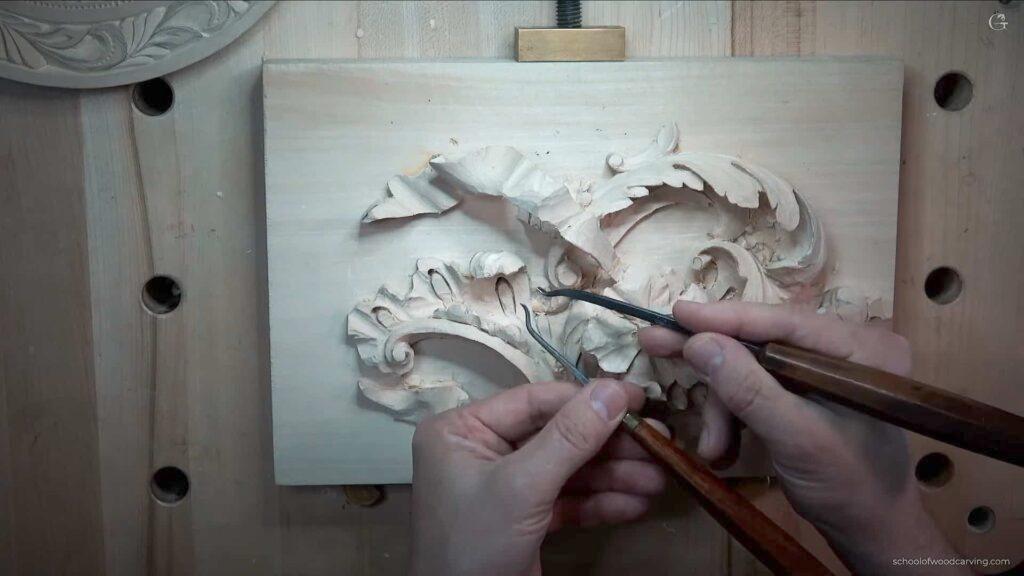
Alexander Grabovetskiy, woodcarver, School of Woodcarving · Published 2017
Which wood carving tools should you buy first?
Quick answer: A first wood carving tool kit is a set of gouges you are ready to keep sharp yourself, whatever the brand. The bevel decides a lot about how the edge enters the grain. Hardness hardly varies. For real carving, a beginner set runs about 12 tools, and even a cheap set can carve.

A first wood carving tool set for real carving runs about twelve gouges, and you have to be ready to sharpen every one of them. The bevel decides how high your hand has to ride. The brand decides how the handle feels when you hold it all day long. I keep around five hundred tools in my shop, and only a few of them sit on my bench at any time.
Does your gouge skid across the grain instead of slicing it? Do your shoulders ache after a full day at the bench? Have you opened a new roll of gouges, tried them, and felt almost nothing happen in the wood? Two of those come from the bevel, and the third from steel nobody ever buffed.
I came to America from Russia with one gouge and one knife. My teacher gave me the gouge. The knife I made myself, because I could not spend forty dollars on a tool and still eat that month. So I have stood on both sides of this question, the side with no money and the side with a wall full of steel, and what follows is what I would buy again.
What decides whether a gouge works for you
- Steel across the good brands runs between RC58 and RC62, so hardness is rarely what separates them.
- Nearly every maker grinds the bevel a little high, and your shoulder pays.
- Rounding the heel keeps the edge strong in oak while your hand stays low.
- A cheap 12 piece set can carve a grape panel. I did it on camera.
- Every new gouge wants buffing before its first carving, whatever the price was.
Which wood carving tools should you buy first?
Buy a set you are ready to sharpen, one strop, and some green compound. Two things are worth adding to the cheap boxed set I tested, and I say that after carving a whole panel with it. A narrow number 11 veiner, around 1 mm and thinner than a sixteenth of an inch, gets underneath and cleans the really tiny spots. And I would want a V tool near 35 degrees, not the 60 that set came with. That is a working kit. The rest of my wall came later. The lesson on choosing tools walks the shelf brand by brand.

When I landed here I bought what the store had, which was a Swiss Made set, the brand everybody in the States calls Pfeil. Walk into a Woodcraft and you will find maybe three names on the shelf: Pfeil, Flexcut, and some small Dockyard miniatures. Online the door opens wider. Ashley Iles from England, Auriou from France, Two Cherries and Stubai, Henry Taylor, and more besides.
Most of my shelf is Ashley Iles. The steel carries real mass, the fishtail shape lets me reach into a corner, and the rounded English handle sits easier in my palm through a long day than an eight sided one. Nobody pays me to say that. If I were starting over with money in my pocket, my order would be Auriou first, Ashley Iles second, Pfeil third.

People argue about the eight sided handle because it will not roll off the bench. Fair enough. I carve every day and no tool of mine has ever rolled off a bench, not once, and if yours does, some kind of mat on the bench ends the argument.
Do cheap carving gouges actually work?
Yes, better than the price suggests, and I tested it rather than guessed. A set of 12 Schaaf gouges is much, much cheaper. Their listing says RC60, which sits in the middle of the normal range. Their listing also says something honest: if you are not planning to sharpen these, do not buy them.
That warning is true of every brand on earth. A Pfeil usually arrives ready to carve and stays that way for a day or two, maybe longer, then it needs sharpening like anything else.
So I played beginner. I took the Schaaf gouges out of the box, put no grinder near them, and only buffed each one on a felt wheel with green compound on my Work Sharp 3000. Then I carved grapes on a basswood offcut, 6 by 8 inches, 152 by 203 mm, and just under 2 inches thick. The board had a planer snipe on one end. I planed it off.

I used 11 of the 12 tools and rebuffed each one three or four times while carving, which is about what I do with Ashley Iles. One handle came slightly loose. On Amazon they say they will swap a tool like that, and I can always put a new handle on myself anyway.

The grapes came out in full 3D. Hobbyists and furniture makers who want a little carved ornament should buy it without hesitation. For professional wood carving it is plainly not enough. I would want a number 11 veiner near 1 mm for undercutting, and their V tool is ground at 60 degrees where I use 35 a lot. Two tools short of a working kit is a fair complaint about a set that cheap.
Why is the bevel too high on almost every new gouge?
Makers grind the bevel too high for my taste, and I have seen only one brand get it right at the factory. Here is a quick test. Slide your hand under the tool, rest the bevel on the wood, and look at your knuckle. Your knuckle touching the surface means the tool will carve. A gap under it means the grind is riding on its back corner, so you have to lift the handle, and lifting the handle means lifting the elbow, and lifting the elbow means the shoulder, hour after hour.

The obvious fix is a longer bevel. That works in softer wood and betrays you in oak. Grind the bevel long and the steel behind the edge goes thin, and thin, weak steel is risky in white oak or cherry. Red oak is really hard too. Brown oak is a little kinder than the American white.

So on hardwood I keep the bevel short, about a quarter inch, 6 mm. Short bevels lift your hand, though, and now we are back at the sore shoulder. The way out of that circle is the heel. Take the sharp corner off the back of the bevel and round it smooth. The steel stays thick and strong near the edge, and the rounded back still lets the blade reach the surface with your hand down low.

I keep three number 3 gouges on the bench ground three different ways for exactly this reason. One long, one short, one with the heel rounded away. I left the short one untouched for the mallet.
Mallet work has its own geometry. With a heavy mallet on hardwood you hit the end of the handle, so you have to raise the tool up before you can hit and carve. Mine weighs 32 ounces, two pounds. That is why the short bevel stays on that gouge.

How do the brands compare on the bench?
| Brand | Made in | Hardness | What I notice at the bench |
|---|---|---|---|
| Pfeil | Switzerland | RC59 to 61 | Straight, holds an edge, thinner blade, eight sided handle |
| Ashley Iles | England | RC61 | Thick steel, fishtails reach corners, rounded handle |
| Auriou | France | Similar | Beautiful, handle thick as the Iles, my first pick |
| Schaaf | Set of 12 | RC60 | Machine marks, carves fine once buffed |
| BeaverCraft | Ukraine | High carbon | Good handle notch, tall factory grind, bandages included |
One German brand, where I own only micro tools, taught me a smaller lesson. Its little tools sat on the same shelf as my Pfeil, in the same air, and only the German ones came up with rust on them. I still use them for tiny work. I would not buy the big sizes.
The Ukrainian sets were sent to me, and I told the makers publicly what I liked and what I did not. What I liked most was not the steel. Somebody there thought to pack adhesive bandages in with the knives. I have cut myself many times, and on complicated carving some days it was over a hundred, and I never saw another maker put a bandage in the box.

They also threw in a strop of thick double shoulder leather and green paste. Those two things cost real money bought separately. The big gouge they sent has a notch in the handle that just feels good in my hand, and their bevel is a little too high, same as everyone else. I tried them on a Byzantine acanthus leaf and a low relief furniture panel, and both went fine.

What can a back bent gouge do that a straight one cannot?
Back bent gouges reach behind and underneath, and they are my favourite tools in the shop. The blade bends away from the handle instead of toward it, so the edge comes at the wood from above a high spot rather than digging straight into it.

Undercutting is where they earn their keep. When a panel is carved from one solid board, and nothing is glued on afterwards, you still need to get really deep underneath. Sometimes something sits in the way, and then no straight blade gets in there. Mine run from huge ones for big carvings down to about 3 mm, an eighth of an inch, in several curves.

How should the tools sit on your bench?
Lay them with the edges pointing at you, spaced a hand apart, and keep only a few out at a time. Turning the sweeps toward yourself sounds backwards until you try it. Not every maker stamps the sweep on the handle, so with the blades facing you, you read the profile instead of hunting for it.

It is safer that way too. You pick the tool up by the handle, the blade goes away from your body, you carve, you set it back. A student told me he laid his blades away from himself because he was afraid of opening his hand. But that way he could not see the sweep.
Leave space between them for your fingers. And keep two or three on the bench, five at the outside. I have about five hundred tools, and if I put them all on the bench I would get lost.
What takes the ridges out of a finished carving?
Spring steel scraper cards pull the facets down, and honestly I like the facets. Tool marks read as veins in a leaf and they say a hand was here. Some of my customers want that surface. Others want it smooth as glass, and both are right.
Gold leaf changes that. When I filmed this I was working on a piece that was going to be gold leafed, so I had to make it smooth. For water gilding you really need to get the surface ready, though I would not take off too many facets.

I used to make my own, sometimes from really cheap spring steel carving tools. Then I found a boxed set of cabinet scraper cards on Amazon, 12 pieces of blue spring steel in a dozen profiles, two working sides each. Probably made in China. Nobody pays me to mention them, and out of the box they were not bad at all.

A scraper needs a hook turned along its edge before it will work properly. The burnisher does not have to be expensive, but it has to be good steel. Sometimes I just use a screwdriver. Put the card in a vise while you do it. Holding it in your fingers while you push is a bad idea.

Small habits like that one live in the techniques lessons rather than in any tool catalog. None of this is the hard part. If you do not know how to sharpen your tools, you are going to get frustrated with any brand, and on the grape panel the design came first. Tools only have to stop being in your way. If you want somebody to stand beside you while you learn which end of that is which, the school is where I do it, and there are in person classes when I can run them.
Not sure where to begin? The first carvings course wants almost nothing on your bench, the kitchen board gives you something to hand somebody, and the grape onlay is where undercutting starts to matter. The whole course list is one page, and the lesson map shows how they connect.
My teacher handed me that first gouge when I was sixteen. The knife I made myself. Both of them came with me across the ocean.
How it's done
- Sight along the blade. Hold a new gouge up and look down its length. Blade and handle should run in one line. Check it when you buy, though a slight wander is not that big of a deal.
- Buff it before the first carving. Load a felt wheel or a leather strop with green compound and buff the edge. I do this to every new tool, high end or not, before I use it.
- Put your knuckle on the wood. Slide your hand beneath the tool and set the bevel down. If your knuckle touches the surface, the geometry is right. If air sits under it, the grind is riding on its back corner.
- Soften that back corner. Ease the sharp corner at the rear of the grind into a smooth curve. Thickness stays where oak needs it, while the handle drops low enough to spare your shoulder.
- Lay the bench out. Set the edges pointing at you, one hand width apart, and keep only two or three within reach. Everything else goes back to storage until some carving actually calls for it.
Frequently asked questions
How many gouges does a beginner actually need to start?
A couple of tools can still do something, but for real wood carving I think of a beginner set as about 12. On one small grape panel I used 11 of the 12 in a cheap set.
Are dearer carving gouges worth the money?
Price mostly buys finish and comfort rather than sharpness. Steel from the well known European makers lands in one narrow hardness band. Handle shape and how the grind arrives from the factory change your day, and an expensive badge does not fix a high grind.
What hardness should carving steel be?
Carving tools mostly range from RC58 to RC62. Most European makers aim near RC60, so this number rarely decides a purchase.
What to carve next