
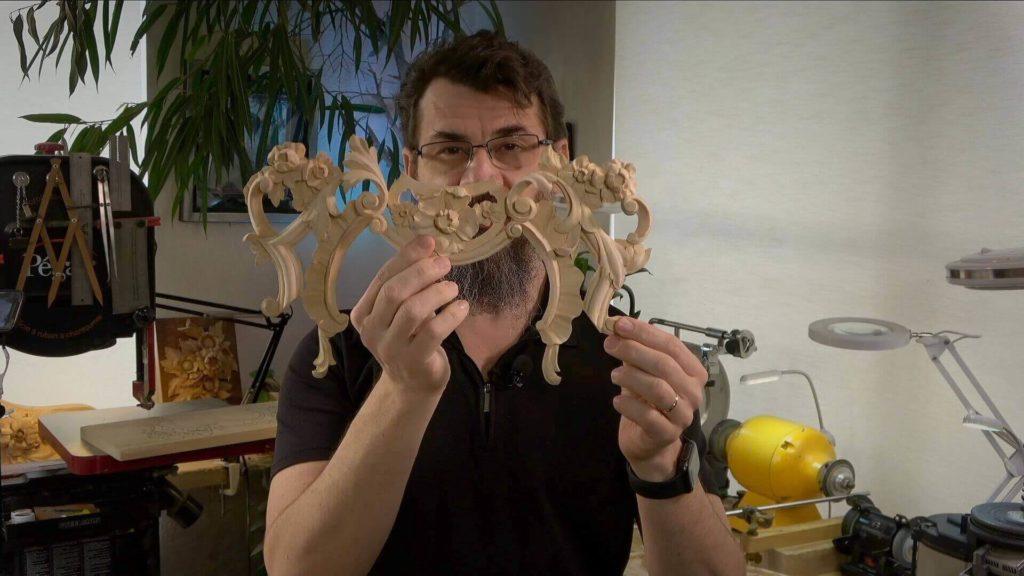
Alexander Grabovetskiy, woodcarver, School of Woodcarving · Published 2022
How do you carve a floral panel with a molding?
Quick answer: Carving a floral panel with a molding is relief work that puts flowers, volutes and a clover molding on one basswood board about 20 mm thick. The heights come off the first piece with a pointing machine, the big shapes come down before any detail, and about one millimeter of spare wood stays along the molding for the miters.

Flowers and a molding on one board is relief work where flowers, volutes, acanthus and a clover molding all come out of a single piece of basswood, about 19 or 20 mm thick. You read the heights off a finished piece before the tool ever touches the wood. The big shapes come down first. And you leave a little spare wood where the molding meets a miter, because the moldings next to it get carved later.
Have you seen a carved mirror frame or a furniture door with flowers running along a molding? Did you ever wonder how one person gets all of that out of a single board? Then pull up a stool. On my bench, in this course, a sawn blank turns into exactly that kind of detail.
I carved this detail once already. What you watch here is the second piece, mirrored, and a copy gives me no freedom about how deep I can go. My shop had just been rearranged, too. I took some of the sharpening machines out, because I get tired of looking at the same setup, and there is a tool chest along the wall with another four feet of chest running past the edge of the camera that you never see.
Fourteen lessons, one detail from a real Venice room, and an assessment at the end where you upload a photo of your work and I look at it. You sit at my bench for all of it, the mistakes included.

A floral and molding panel in six lines
- Basswood, one board, 19 to 22 mm thick (3/4 to 7/8 in).
- A pointing machine carries the heights across from the earlier carving, so the copy matches it.
- Router plane on the ground while a true reference face remains.
- Clover profile on the molding, three convex shapes, exactly 3/4 inch wide.
- Spare wood for the miters, a millimeter or so.
- On a small flower, attack from outside toward the middle. Always the best way.

What is this panel, and where does it go?
This piece is one detail of a Venetian-style room, a real-life project with lots of small details going in. The upper part and both rosettes were done already, and this part goes right above the earlier rosette.
On its own it is not that attractive. I kind of like it anyway, because the molding on it turns a miter and keeps going down. Put the same idea on a mirror, a picture frame or a furniture door, raised panel or not, set the small details in a different order, and you get a new composition.
Lesson 1 starts right there, with the sawing and the gluing, and the final lesson ends with the two pieces laid together. They are mirrored, and they are not symmetrical. I like that. There is also a whole Venice room course.
How thick should the board be?
I planned on 19 mm, and mine ran a touch over, almost an inch. Anything from 19 to 22 mm works, and it doesn't really matter which. In the United States, four quarter stock will do. Go to a full inch if you want the flowers to pop a little higher. The wood is the same basswood I always use. Limewood, linden wood, lipa, it's exactly the same thing, the trees of the genus Tilia.
What holds a pierced panel to the bench?
Glue it down to a scrap of plywood with paper in between. Mine was half inch plywood out of the garage, nothing special about it, with two sheets of ordinary printer paper and spray adhesive.
My glue is a Loctite spray adhesive, the high performance one. It's not as strong, but it has a high initial tack, and I can peel it easily, so the board comes off later without a fight. Photo mount spray is good too, and I used it for a long time.

The plywood gets pinned to the bench with solid brass pegs by Veritas, a company from Canada. I glued a piece of single shoulder leather to each one, because solid brass will damage a carving the day you clamp straight onto it. My bench holes are 19 mm. The pegs also come in 20 mm, the standard for a Festool table.

The slicing cut is in that first lesson too, where every pass gets some rotation.
How do you pierce a panel without a scroll saw?
A number nine gouge does it, with a plug cut. Set it in, rotate it, lift the plug out, and repeat until you break through the back, then work closer to the edges. On material this thin that is no problem. A hand drill or a screw gun works too, a few holes side by side.
I needed that in the second lesson, when I saw I had forgotten to scroll two small sections. I drilled a few holes and said a number nine, about 1/8 inch (3 mm), would do the same plug cut, only a little slower.

My scroll saw is a Pegas with a one millimeter blade, so I get inside a shape with no trouble. A band saw still does the outside perimeter. Start the saw where your drawing comes closest to the edge of the board, about a quarter inch away on mine. Starting anywhere else wastes wood, and I wanted to keep that piece.

Why read the heights before you carve anything?
Copying my own first piece means I do not get to choose the depths, so step number one is a pointing machine. I lay that earlier piece flat, set the needle on top of the molding, and carry the height over to the new board. It read a little under half an inch, about 1/32 less (close to 12 mm). Another spot read 10 mm, 3/8 inch.
I mark three spots, middle, right and left, using my own finger as a guide for the pencil. The more you measure before your first pass, the fewer mistakes you make. I still made a mistake or two on this piece, had to readjust and measure again, and then double-checked.

On a generic piece you could almost eyeball it. With a human face or a lion head, every slice matters. For depth, lesson 4 drills down to the height the needle gives, and the tool has its own pointing machine page.
Which tool comes off the rack at each stage?
| Stage | Tool | Size | Job |
|---|---|---|---|
| Boasting the shape | Big number seven gouge, 1 1/8 inch | 28.5 mm | Takes out the majority of material |
| Setting the outline | Number nine, three eighths of an inch | ten millimeters | Outlines the movement on both sides |
| Flattening the ground | Router plane with a narrow blade fitted | five millimeters | Leaves the surface absolutely dead flat |
| Hollowing the petals | Really tiny gouge, a number eight sweep | two millimeters | Excavates the curl for deep shadow |
| Opening flower centers | Dockyard micro tool, smaller than its label | 1-1.5 mm | Drills the center hole straight down |
| Blending and cleanup | Number five gouge, 6 mm, upside down | quarter inch | Clears the facets off the surface |
None of that is a shopping list. Whatever tools you have will still work, and bigger is better in the boasting stage, so a number seven at 30 or 50 mm beats mine. A lot of your success depends on sharpness. A sharp tool leaves a really shiny surface and brings you joy, while a dull one just rubs and leaves marks. So sharpen it. I keep a whole course on sharpening, and another on choosing tools.
Why does the ground need a router plane?
You don't really have to use one. I think it's a good idea, especially for furniture, because every surface comes out absolutely dead flat. Timing matters. The second lesson was not too late yet, because I still had a reference to work from, and with the router plane blade changed to 5 mm (3/16 in) I could go much lower. Even if you do just wood carving, it's a really good tool to have.

What shapes the volutes and the acanthus?
A volute here moves concave, convex, concave. From the side it drops about 3 mm (1/8 in) for the first concave, the convex runs about 6 mm, and another concave follows. That's lesson 3, along with my phone trick for the mirror piece. Take a picture, hit edit, flip it. They didn't use phones back then, I know, but we do have them.

Where one shape passes under another, in lesson 5, the tool goes straight down, without undercutting and with no leaning. Undercutting there would be a big mistake. So would rushing it.
On the acanthus in lesson 6, the middle line goes in first. I put it like this on camera: "Again, as you know, 40-60 rule. So we've got 62% and 38% on this side. It's a golden ratio." Look up the golden ratio if that number is new to you.

The spot where two leaves intersect gets a water drop shape, and that's called the eye, in lesson 11. The pipe under the flower has to be a big convex, otherwise it looks too dull. Then lesson 12 turns the gouge like a clock hand. Flute up at 12 o'clock, about 10 o'clock to attack closer to one edge, about 1 o'clock to blend the center part.
What is a clover molding?
A clover molding is three convex shapes side by side. It's pretty simple, not as complicated as some moldings. I put the calipers on it and got exactly three-quarters of an inch, about 19 mm. Calipers are always, always the best tool for a measurement like that, I would say.
This molding doesn't end with this piece. It turns a miter and runs downhill into the next section. So I left about a millimeter of extra wood all around, and that is not my final surface. Those other moldings still have to be carved, and when the corners get mitered, that millimeter is my room to play around and make it look really nice. Leaves crossing a profile get their own course, acanthus over moldings.

In lesson 8 I say it plainly: "As you know, I did not use any V tools because they didn't have one." I also undercut slightly underneath a line there, called it no bueno and said I'd fix it.
What makes a petal read from an angle?
Across the petal it goes concave, convex, concave, and that's going to look lifelike. Each petal in lesson 7 is "essentially four cuts."
The molding lesson adds a move nobody sees from above. The curl goes up, then back, then up again, and that ridge stays raised. From the side it makes a huge difference. I excavate that hollow with a tiny number eight, about 2 mm, then maybe a 1 mm to go even deeper, and I get a chance to undercut it from the backside later. See how deep a shadow that makes?

Seven flowers sit on this piece. Five are exactly the same, just going different directions, and two have a different center, to make it more interesting.
Color helps, too. Red goes on the convex in lesson 9, and blue on the concave. Think of red as sunshine and blue as ocean. For a flower standing on its own, try the Venetian flowers rosette.
Why does order matter on a tiny flower center?
Do it in the wrong sequence and that little center can break really easily. Each one runs a little under a quarter inch, about five and a half millimeters. I think it's just like a combination lock. You can know every number, but in the wrong sequence the lock stays shut.
Step number one is the center hole. For lesson 13 I take a tiny Dockyard tool, marked 1.5 mm but really a little bigger than one millimeter, hold it straight, 90 degrees to the surface, and make a plug cut about 1/4 inch deep (6 mm), without pushing too hard. If the plug doesn't pop out, don't worry. Then the same tool takes multiple passes toward the hole, starting at the outer diameter.

Next the petals come down. Mine sat only about a millimeter and a half above the background, so I took a number nine fishtail, 6 mm, went straight down and stopped a couple of millimeters before the detail underneath. For now it slopes outward like a mountain, almost. Later the walls get turned inward.
It is always better to attack from outside toward the center. Push too hard from the wrong side and you catch the grain, and the break can run into a detail you already finished. If that combination lock makes sense to you now, the tuition page is the next click.

When is the big shape done and the detail allowed to start?
We call it the boasting stage. The main 3D form first, all the movements and curves, without the details, and only then the flowers. Lesson 10 runs on that order. Wood carving is always about light and shadow, too. Installed, this piece gets light only from above at night, from the front by day, and a little from the room on the right, so the shadow will be much deeper there than in my shop.

What happens when something breaks?
It happens on camera in lesson 7. Oops. A piece broke off because I was pressing too hard and rushing. That's a real production piece, and I had multiple conversations that morning, so in my head I had to go quicker. I didn't glue it back. I had plenty of material left, so I changed to a number six, 3/8 inch (10 mm), with a really long bevel. It's always a good idea not to rush.

Do you sand a carving like this?
Mostly I do not. I'm not the biggest fan of sanding, and I really like to leave my work with the facets. This panel is paint grade anyway. It gets a really thick primer, maybe two times, and then chalk paint, really matte, with absolutely no sheen, so a lot of those facets will be covered.
Furniture that stays unpainted is different. There I would spend a little longer cleaning, and even sandpaper, why not? My suggestion is AbraNet by Mirka. It's mesh based, it doesn't clog, and it doesn't leave much abrasive inside the wood fibers.

The last lesson takes about three or four millimeters off one detail, shapes a small shell with two concaves and a convex, and ends with my note that some of this course was left somewhat rough on purpose, because paint covers it.
Where do you start if this looks like too much?
If you are earlier on than this, start with first cuts for beginners or the design principles course, then come back. For a whole furniture panel, see the furniture panel course. A full map of where to begin is on the start page.
This course ends with an assessment, where you upload a photo of your work and I look at it.

How it's done
- Saw the outline. Band saw the outside line, then use a scroll saw with a fine blade for the closed shapes. Begin where the drawing sits nearest the board edge, so the offcut stays in one usable piece.
- Glue it to a backboard. Half inch plywood, two sheets of printer paper, a spray glue that grabs fast but peels later. Peg the plywood down with brass pegs faced in leather.
- Transfer the heights. Lay the earlier carving flat, touch the needle to its high spots, and mark the same heights on the new blank at three places, the middle and both sides.
- Take down the big shapes. With the widest number seven you own, remove most of the waste across the grain and stay clear of the volutes. Heights and lows first, details later.
- Flatten the ground. Run a router plane over the background while some untouched face still gives it a reference. A narrow blade lets it reach much lower.
- Shape, undercut and clean. Carve volutes, acanthus, flowers and the clover profile, leaving a millimeter or so extra on the profile for the miter. Undercut, clean with a magnifier, pry the piece off its paper with a chisel or gouge, then carve the back.
Frequently asked questions
What wood is best for a carved floral panel?
Basswood, the same as I always use, and limewood, linden or lipa are the same wood under other names. Mine came out a touch thicker than planned, almost an inch, and a full inch lets the flowers sit higher. The whole detail, flowers, volutes and molding, comes out of one single board.
Can you carve this without a scroll saw?
A band saw handles the outside line. For each closed shape, set a number nine gouge in, rotate it, lift the plug and keep at it until the hole goes through, then open it out. A drill gets there sooner. With the gouge it only takes a little longer.
How wide is the molding on this panel?
Exactly 3/4 inch, about 19 mm, and I double-check it on both sides with calipers. Along its edge I leave roughly a millimeter of extra wood, because the next moldings still have to be carved and mitered. Those few fibers give me room when the corner gets fitted.
What to carve next