

Alexander Grabovetskiy, woodcarver, School of Woodcarving · Published 2022
How do you hold, support and carve a leaf that is almost free of its background without breaking it?
Quick answer: A thin carved leaf stays whole when the pressure goes somewhere else. I put my hand on a solid place, set my pinky down as the support, slice from behind using the number 9, and leave glue in a couple of places.
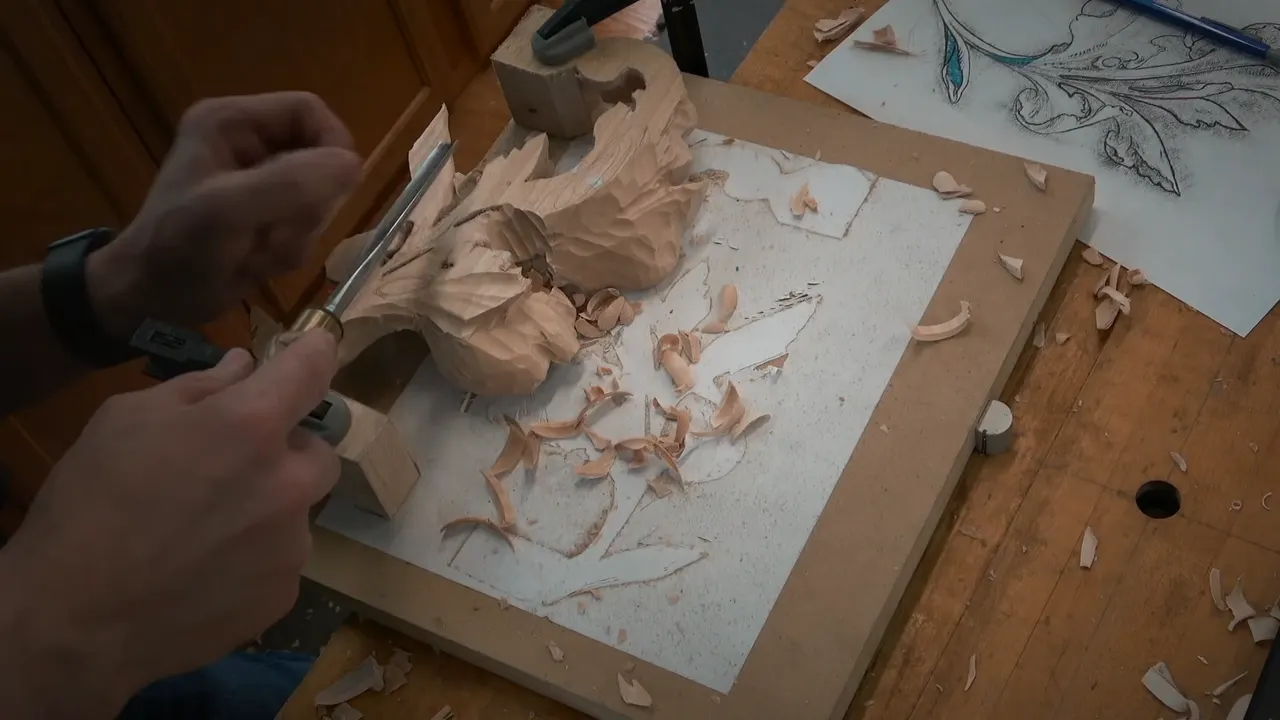
A leaf that is almost free of its background gets carved by hands that stay off the leaf. In the first video of lesson eight, my hand rested on a solid place off the piece, I took hold of the leaf like a handle, and I sliced with a number 9. Just a couple of glue spots would hold it later.
Lesson eight of Carving Modern Acanthus, the course built on a 1903 design, opens with this video. It is mostly about hands. At the end I laid the leaf on the board where it would live and traced roughly where the glue would touch. All three videos sit on the lesson eight page.
Have you ever turned a carved leaf over and found it too thin to lean on? Do your fingers know where to rest when the wood in front of you is the weakest part? Watch where my hands go. The gouge follows.

Where does your hand go when you cannot press on the leaf?
Away from the leaf. Even on this piece, I said, you still bring everything to the edge, and I planned to attack from the other side without creating pressure.
Look at my hand. It can still sit solidly somewhere, only not on the piece, and you don't push on the piece now.
Another technique on its own, I said, a really extreme undercut, if you plan to do really nice work. Then came the grip. I grabbed it like a handle, almost, with my pinky and one more finger.

Forgot how it looks from another side? Take the clamps off, I told them, look, and clamp it again. Better not to rush it, and better not to overdo it.
The whole idea is a hand on a place that can take the weight, so the leaf does not have to.
Why does the pinky matter on a thin part?
The pinky is where my weight goes, so the leaf does not take it. In this video I put it down and called it a supporting point, because my hand cannot press on this, I said, or I would break it. The middle part is kind of solid, though. There I can press.
That spot is probably one of the really important ones, I added, because it is an eye on the other side.
The same habit shows up in other courses of mine. The Tray of Blessing had it in lesson six, video three, where I was on a more fragile part. Less to carve, I said, so more control. My pinky still went down like a supporting point, and that matters a lot.

The butterfly plate had the same habit, this time with a knife, and in lesson nine I asked everyone to watch my hands. My pinkie lay down and made a supporting point. Not pushing too hard, I said, but it gave really good support, and the knife went where I guided it. Everything was just laying on that pinky.
I don't think about it all the time, I added. It's already in me, automatically. But if you never carved before, just pay attention.
Lesson eleven of that course had the pass going no deeper than maybe one millimeter (about 0.04 in), I said, at the most one and a half, like 1/16 of an inch (1.6 mm). Then came the pinkie. It prevents me from sliding. The other pinkie went down too, both hands solidly on the board, for a lot more control. I did not want to slip.

What does the pinky do when the tool is tiny?
A lever, and a limit. The Hashemi flowers course has the same line in different words. Over in Hashemi lesson eleven I asked the class to watch my left hand, which was supporting while I carved, and I used my pinky as leverage.
Lesson sixteen made the leverage point again, or a support point you can pry against. Pry, I said, is probably the more proper word.
By lesson 24 I placed my pinky right below it, to make a support, since I can't press too much. It comes naturally. Attacking from that side, the whole hand can go on the bottom. All of these sit in the Hashemi flowers course.

Lily box, first layer, was just fingers, and my pinky limited me, set right on the board, so I knew I could avoid slippage. Those lessons live on the lily box course page.
The Greek acanthus course shows where the pinky goes when I work with the grain. You have a tendency to push too hard that way, I said, and you can chip a section so it flies out on you. I controlled the movement with my pinky and that hand, using just my hand muscles. Greek lesson four has the video.

Is it air carving when your hand has no support?
It depends on the piece. I said both things on camera, and two lines that look opposed can both be true at different moments, so here is where each one sits.
Hashemi lesson 23 had a very fragile carving, easy to break. Don't press with your hands, I said. Hold them above the carving. Laying a hand right on top was almost impossible, so you had to get creative. There is such a thing as air carving, like painting with an airbrush, only with chisels. The one place my hand touched was right there, just a finger.
In Venice Room workshop 84 I felt almost as if I was air carving, no support, chipping away little by little. Workshop 69 said the opposite. My hand looks really high, but I am referencing on that finger. I'm never air carving. I'm always referencing somewhere.

The butterfly plate, lesson ten, had the knife held just like a pencil. My pinky was still supporting, and I wanted to make sure I was not attacking with the airbrush. So it's not airbrush carving, and you have to understand that.

Back in lesson two of this course I was solidly placed on the background, and I said never do air carving. Yes, I know I repeat that multiple times, but it's important, and I know what I'm saying because I see that all the time. The furniture panel put it plainly: do not raise your hands. It doesn't work in wood carving, so you have to support them. Lesson 18 of the furniture panel has it.

Put short, on solid wood my hand goes down. On a very fragile piece it can go on a finger, or be held up off the carving.
How do you slice from the back using a number 9?
Slowly, and without pushing. Partway through the video I looked at one area and said, see how much material I have to take out. So I grabbed just the number nine. Slice it, I said, four times in a row, and don't push it. If you push, it will catch, and you can break it. Now it's even more important than before.

Earlier, the same number 9 had shown why the back is worth the trouble. Use different tools, I said, a number 9 or a spoon, to create the inner movement. Some areas you could not reach with the tool when carving from above. Now you can excavate and make beautiful movements on the inside. Unfortunately a camera hides that, but once you come here you'll know exactly what I mean.
Then the wall. Whenever you see a wall, you either blend it to the previous undercut and make it really rolling, or you eliminate the wall completely. At another point I said I see the wall. You don't see it, but I do, and I don't want to see it. I worked my way in.

On a stem area I tried to round it a little, and not take too much. On another section I could take some out, keep maybe just the beginning, and make some really interesting movement. But I don't want to make mistakes.
Lesson four of this course has a warning that fits here. One piece lies right on top of another there, and a pass that goes too deep makes it really weak. It's going to be floating in the air, I said, and you're going to break it. So the carve goes uphill, almost a blend, and later a number 11 of 3 mm (about 1/8 in) undercuts it, if you feel it's time.
How far under can you go before the leaf just floats?
Far enough that it looks like it floats, and not so far that it snaps. This video gives no number for it. I gave reasons and places instead.
Looking at the space below one part of the Greek acanthus leaf, I thought it would be really nice to make that part float in the air, partially. It would create a beautiful picture. I was not sure I should, so I stopped to think first. After that I said it would look nice. For that I needed a back bend gouge of 13 millimeters (about 1/2 in). It is in Greek acanthus lesson nine.

Why only a couple of glue spots?
A couple will do, and the leaf then looks like it floats. We kept just a couple of spots for the glue, I said, and that will be plenty. You could also use screws if you have plenty of material.
The look is the payoff. It's going to look like it's completely floating in the air, and people are going to say, man, how in the world did you do that? That will be impossible for people to understand.

Near the end of the video I got ready to glue. The glue spots needed a little cleaning with sandpaper, I said, or the glue won't stick. Then the leaf went where it was supposed to lie, and I traced approximately where the spots were going to touch. Approximately, I said again.
My Maine class on Grinling Gibbons says it again. In class two there were going to be some gluing spots, and we don't really need a huge one, and a couple touching each other is good. In class six I marked one area in the center of the carving as untouchable, because it would be the glue spot, and the board on the back would make it solid.

A later video of class six gives the method. You glue that middle part, and you don't need to go all around. A small hole in the gluing spot, with a screw in from the back, is another way. But honestly, "I never had any problem with just the glue." Glue nowadays is really excellent.
Class 18 shows the result. Some parts of that carving go all the way down to the background when you look from the side, and a gluing spot sits right underneath, which makes them really stable. A small, tiny flower on the lily box got glued right away, and I did not need dowels for it.
What comes after the leaf is on its board?
The background. Shortly before the glue talk I asked whether anyone would like me to show how to do that. Leave it flat and it is going to look okay, but. The ladybug came up next, and that is lesson eight's real subject.

Which hand position did I use where?
Eight places, set side by side. Each row is a line I said on camera, with the course and lesson in the first column.
| Course and lesson | Where my hand or pinky went | Tool | What I said about the hold |
|---|---|---|---|
| Modern acanthus 8 | Off the leaf, pinky down as support | Number nine | I cannot press with my hand |
| Blessing tray 6 | Pinky as support on a fragile part | Unnamed tool | Less to carve, so more control |
| Butterfly plate 9 | Pinkie laying down, knife guided by it | The knife | Really good support, not pushing hard |
| Butterfly plate 11 | Both pinkies down, both hands on board | Tool unnamed | A lot more control, no slipping |
| Hashemi flowers 16 | Finger as a leverage or support point | Not stated | Pry is the more proper word |
| Hashemi flowers 23 | Hands held above a very fragile carving | With chisels | Almost impossible to lay a hand |
| Lily box 3 | Pinky on the board to limit myself | None named | I know I can avoid slippage |
| Venice Room 69 | Referencing on one finger, hand held higher | Not said | Always referencing somewhere, never air carving |
Every row says one thing. Find a place that holds, and put the finger or the hand there.
To watch these hands instead of reading about them, the full lessons open with your Tuition. Access covers every lesson of Carving Modern Acanthus and the rest of the school. Pick up a gouge you trust, set your pinky on the board, and see how much control comes back.
A page like this cannot show a pinky that sits under a camera. The video can, and so can your own bench.

How it's done
- Find a firm place. Set your hand where it sits solidly, on the board or another firm part, off to the side of the thin piece.
- Grab the leaf as a handle. Take the piece with your pinky and one more finger, and do not push on it.
- Put the pinky down. Make a supporting point with it. Press only on a middle part you know is solid.
- Slice with the number 9. Slice, slice, slice. If you push, the gouge will catch and the leaf can break.
- Blend or remove the wall. Blend it into the previous undercut so it rolls, or take the wall away completely.
- Glue only the kept spots. Clean them with sandpaper, set the leaf in place and trace where the spots touch.
Frequently asked questions
Can you press on a thin leaf once it has nearly come loose from its board?
Pressing with the hand is out. On this leaf I said I could not press with my hand, since I would break it. The middle part was kind of solid, though, and there I was able to press. So the pressure went where the wood could take it.
Which gouge clears the back of a thin leaf?
A number 9 was in my hand in the first video of lesson eight, and I said a spoon works too. Either one makes the inner movement in areas you could not reach from above, though a camera hides it.
How many glue spots does a nearly free leaf need?
A couple, and I called that plenty. Screws were my second option for a case with plenty of material. In the Maine class I said we don't need a huge gluing spot, a couple of spots touching each other.
What to carve next