

Alexander Grabovetskiy, woodcarver, School of Woodcarving · Published 2018
What do you do when you make a mistake carving?
Quick answer: A carving mistake is either cut away or adopted, and adopting it is usually the better trade. Take the surrounding wood down until the damage has gone, or follow what the slip suggests and turn it into a division the design can use. Nobody looking at the finished panel will find it.
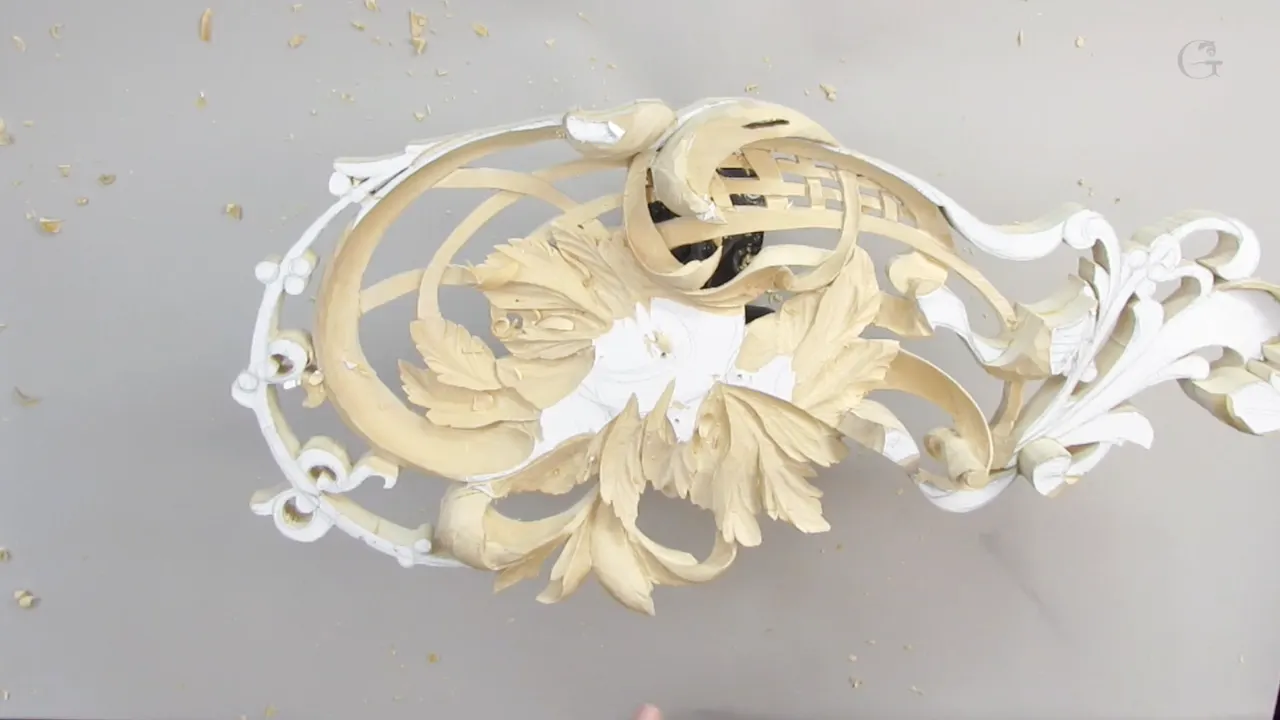
Two routes out of a slip, and the second one is usually better. Cut the surrounding wood away until the damage has gone, or look at what the tool actually did and turn it into something the design can live with. I took the second route on camera in this workshop.
What happens in you the moment a gouge goes somewhere you did not send it? Does the afternoon end there? Mine used to.
What changed was realising that a carved panel has no correct version stored anywhere. There is only the piece in front of you and what it can still become. Workshop 11 of Carving Hashemi Flowers contains two genuine mistakes of mine, both left in the recording, and the more useful one became a detail I now like better than the shape I had planned.

Two ways out of a slip
- Lower everything around the damage.
- Follow what the slip suggests and make it a subdivision.
- Stop, and come back to that area later with a clearer head.
- Glue, when something has actually broken off.
- Nothing, because plenty of marks disappear under the next stage anyway.
What kind of mistakes actually happen?
Three kinds, and only one of them is dramatic. A chip lifts where the grain changed direction underneath. A cut arrives from the wrong side and leaves a step you did not want. Something snaps off, which sounds worst and is often the easiest to repair.

My slip in this workshop was the second kind. I attacked a ridge at the wrong angle, the tool went further than intended, and suddenly the shape had a notch in a place the drawing never asked for. Careful is the only way forward from there, because a hurried correction is how a small problem becomes a large one.
Earlier in the same session I lifted a chip out of end grain by rushing a small gouge. Different fault, same cause. A carved part that breaks off has its own procedure, and glue does more than most beginners expect.
Which of the two do you pick?
| What went wrong | When it makes sense to cut it out | When to adopt it | What that damage ends up turning into |
|---|---|---|---|
| A notch | Plenty of wood still remains underneath the damage | The notch sits where a division would have gone anyway | A subdivision |
| Torn fibres | Always, since torn wood never finishes well | Never | Waste |
| A lifted chip | Reaching beneath it is possible | It falls inside the outline of a future hollow | Part of a concave cut |
| A snapped point | Rarely, and only with plenty of wood left | Almost never | A glue joint that nobody ever finds |
Look at how much wood is left, first of all. With enough thickness beneath you the honest answer is to take the whole area deeper until the fault is gone, and that costs nothing except the depth you give up. Without that thickness you have to work with what happened instead.

Then look at where it happened. A notch in the middle of a smooth passage is a problem. The identical notch a few millimetres away, at a point where one part of a leaf could plausibly end and the next begin, is an opportunity, because acanthus foliage divides constantly and one more division looks entirely natural.
Mine landed in the second place, more by luck than judgement. I followed the nature of what had just happened, deepened it slightly, made it deliberate, and the ridge now reads as a designed subdivision. Nothing in carving can be undone, so the skill is in what you do afterwards.

What does adopting a mistake look like in practice?
Deliberate is the whole trick. A slip left as it fell looks like a slip, because its edges are ragged and its depth is inconsistent. The same shape recut cleanly, carried to a sensible depth and given a matching partner on the other side, reads as something the carver intended from the beginning.

My sequence goes: clean the ragged edges with a knife, decide how deep it wants to be, cut it to that depth properly, then add a concave cut beside it so it belongs to the surrounding modelling. Perhaps two minutes of work. Afterwards I added a second subdivision elsewhere on the same leaf purely because the first one had turned out well.
That last step matters more than it sounds. One odd feature looks like damage; two matching features look like a pattern. Repetition is what persuades an eye that a shape was chosen, and it is the same trick that makes a carved leaf catch the light convincingly.

Why does rushing cause most of them?
Speed removes the pause where you check the grain. Every slip I made in this workshop came from moving before looking, and I said so at the time: I rushed too much, and rushing is always the mistake behind the mistake. The tool was sharp and the plan was sound.
End grain punishes it hardest. Fibres running into your edge instead of along it mean trouble, because a cut that would shave cleanly elsewhere lifts a chip, and the only defences are a lighter touch and a slower hand. Patience is not a personality trait here, it is a technique.

Pressure is the tell. When I am working properly I create almost no force at all, to the point where the tool feels as though it would keep cutting if I let go of it. Shaving rather than carving is how it should feel, and pushing harder is the first sign that something is wrong. A properly sharpened edge is what makes that possible.
Should you hide your mistakes?
From the finished piece, yes, and from your students never. I promised at the start of this course that I would leave my errors in the recordings, and I have, because a beginner who only ever watches flawless carving concludes that their own hands are the problem.
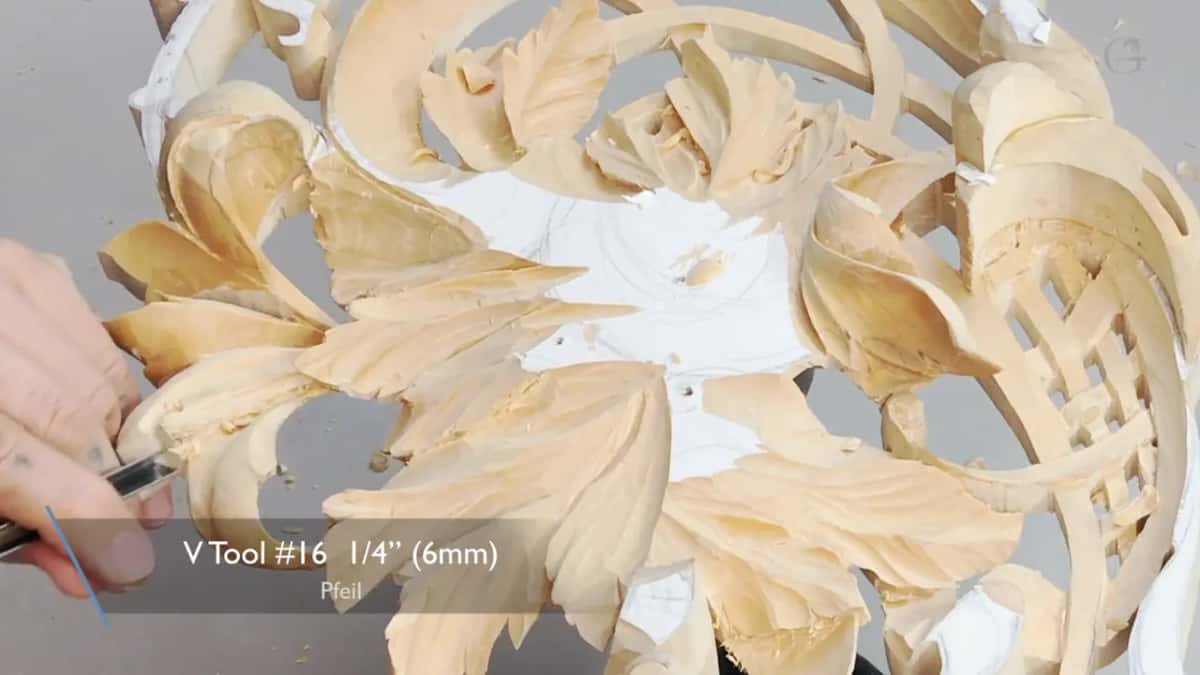
Ask me how many mistakes I make and the truthful answer is that I do not know. I have never counted. I know the number should be smaller, and after twenty five years it has not reached zero and is not going to.
What does change is recovery. An experienced carver is not someone who stops slipping; they are someone who slips and then spends two minutes rather than an hour, and whose finished work carries no trace of it. Students see the smooth surface and assume the first thing. Checking a finished carving is where that becomes obvious.

Which tools cause the fewest slips?
Small ones, because your hand sits closer to the edge. A micro gouge with a short handle puts my fingers almost against the edge itself, and that proximity gives a level of control a long handled tool simply cannot match, whatever its quality.
Half a millimetre is the smallest I use regularly. At that size a number 11 veiner undercuts a rim five millimetres in without the eye ever finding the line, and the cut is so fine that a mistake removes almost nothing. The smallest tools in carving go further down than most people realise.

Specialist shapes help too. A Chris Pye undercutting tool is pulled toward you rather than pushed, which changes where the force goes entirely, and an eighth inch dovetail gouge reaches the side of a pipe nothing else can. Auriou and Ashley Iles both make small tools worth the money.
How should you hold work this fragile?
My left hand does two jobs at once. It steadies the panel, and my little finger sits underneath the exact element the edge is about to reach, so the cutting force presses the carving against my fingertip instead of into thin air. Nothing else supports it at this stage.

Where the grain runs decides where that finger goes. A leaf is weakest across its fibres, so I place the support directly behind the weak line and cut toward it. Doing this properly is most of what separates a carver who breaks things from one who does not.
Leverage is the other half. That same little finger rests on the panel as a pivot, so the tool moves in a controlled arc instead of a push, and I can stop the cut at any point. Holding a gouge for fine detail covers the grip in full.

Is extreme undercutting asking for trouble?
Carvers disagree about this, and both sides have a case. I sit at the extreme end, and I know some carvers would not approve, particularly those working on ecclesiastical commissions where a piece will be handled by people for centuries and a thin rim is a liability more than a virtue.
Their logic is sound. Work that gets touched should survive being touched, and every millimetre you remove from behind an edge is a millimetre of strength given up for a shadow. I would carve differently for a church rail than for a panel hanging on a wall.

On the other hand there is Grinling Gibbons, who undercut as extremely as anyone ever has, and whose work is still standing three hundred years later. Some of it has broken. Most of it has not. Stand in front of the pieces in the sculpture collection at the V and A and judge for yourself.
My own aim in this workshop is an illusion, not a record. I excavate under a leaf until it reads as a separate piece glued onto the panel, when it is nothing of the kind, and that deep dark line under an edge is what sells it. Solid stock, carved to look assembled.
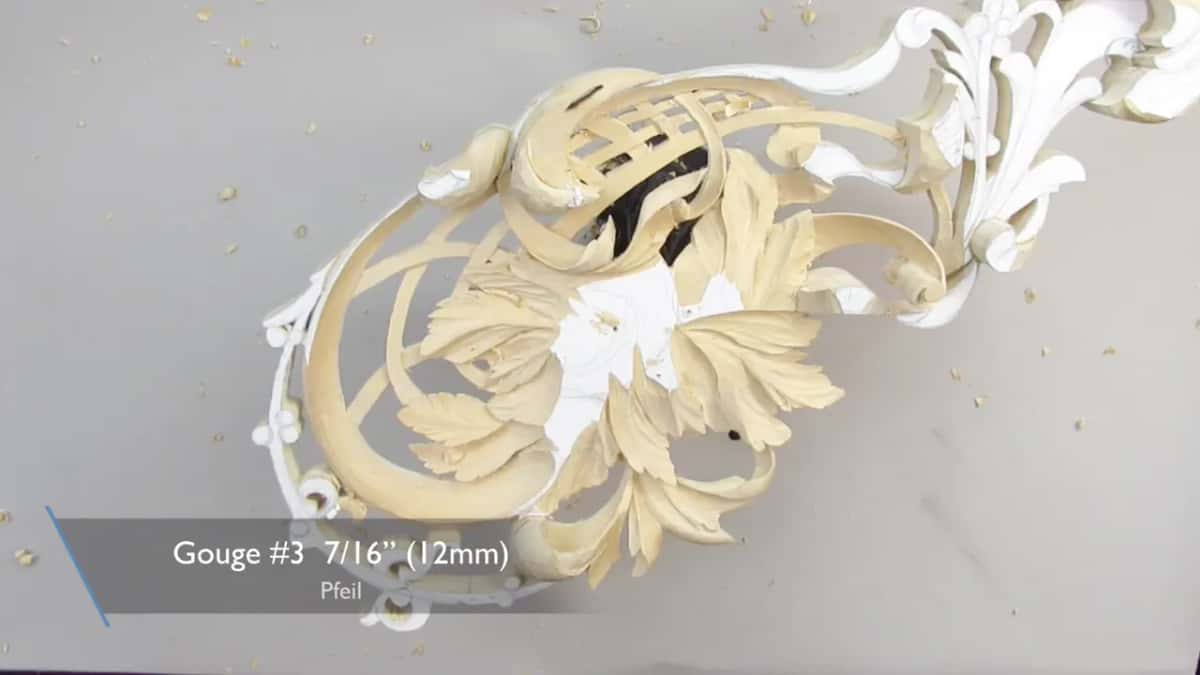
Why does one leaf get an eye and a pipe and its neighbour does not?
Rank decides it. The foliage sitting behind the flowers on this panel is there to carry movement, so it gets a ridge and veins and nothing more, while a leaf that reads as proper acanthus has to carry the features the tradition demands. Mixing the two vocabularies on one leaf looks wrong immediately.

Every acanthus leaf wants an eye and a pipe. Looking down at the shape I was working on here, it seemed thin and underfed compared with everything around it, and the answer was not more veining but the two features that say acanthus out loud. I like mine exaggerated, with a pipe rounded until it reads unmistakably as a pipe.
Behind it, the background leaves stay deliberately plainer. Give them eyes and pipes as well and you have three competing subjects in one relief and no hierarchy at all. Restraint on the secondary shapes is what lets the primary ones speak.
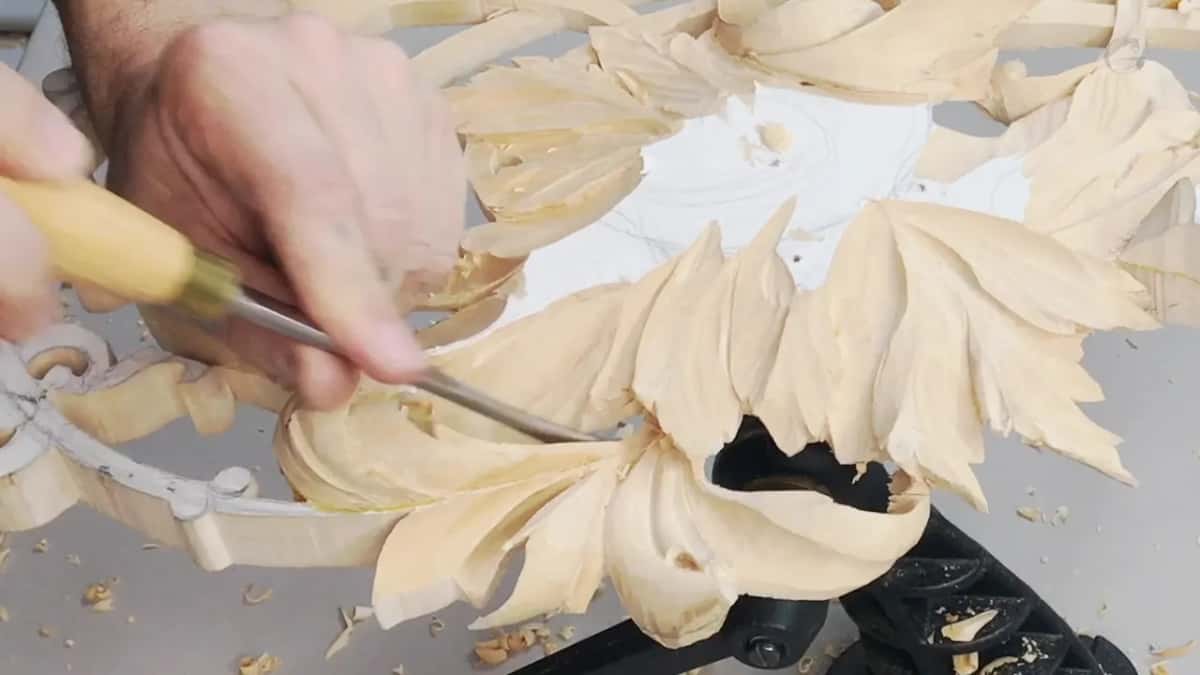
Placing the eye is a judgement more than a rule, and I place it wherever the leaf has enough material to take one. A drill bit gets there faster than a gouge when the hole must be deep, which I mention because carvers are strangely reluctant to use one. A number 11 veiner finishes the shape afterwards.
Two thousand years of carved ornament settled these conventions, and the surviving work in the Getty collection follows them closely enough that you can read the rank of every leaf in a panel at a glance.
How do you choose which gouge to pick up?
By eye, and there is very little arithmetic in it. I study the hollow I want, glance along the rack, and estimate which sweep will sit into that curve. Being close is enough, since the next cut can always correct the last.
Tool markings make guessing unavoidable anyway. Gouges from different makers are numbered on different systems, some stamp the sweep and omit the width, and after a while you stop reading the numbers and start recognising the tool. My guide to stamped gouge numbers explains the main ones.
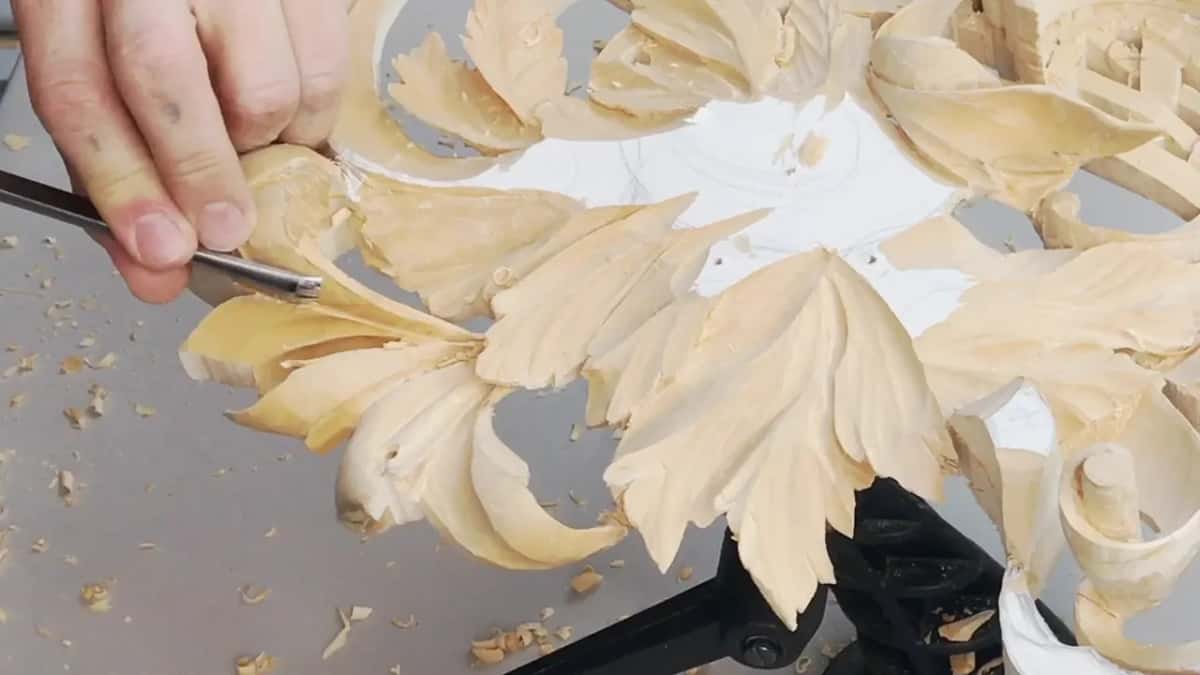
Basswood forgives an approximate choice. The fibre is fine and even, so a sweep that is slightly wrong leaves a ridge you can blend instead of a tear you cannot. Oak demands that you get it right first time.
What should you do the next time it happens?
Put the tool down and look at the damage for thirty seconds before touching it. That pause is worth more than any technique here, because almost every second mistake I have made was the panicked repair of the first one.

Then ask the two questions in order. Is there enough wood to take the whole area down? If not, can this become part of the design? All 49 workshops of this course are inside the school, mistakes included, because that is where the teaching actually lives.
One last thought about the knife on my bench. A carving knife does more of this repair work than any gouge, it goes where nothing else fits, and it was the first tool any carver anywhere ever held. Ancient people had a knife and nothing else, and they managed.

Mine is a number 12, it cost very little, and it has rescued more of my panels than any other object in the workshop. Keep one sharp and within reach, and the bad moments get a great deal shorter.
How it's done
- Stop moving. Put the tool down and look at what happened for half a minute before touching anything at all.
- Measure what is left. Judge whether enough thickness remains beneath to lower the whole area so the fault disappears.
- Read the position. Ask whether the damage sits where a division could plausibly belong. Acanthus foliage divides constantly, so the odds are decent.
- Clean the edges. Pare the ragged sides with a knife so the shape gains a defined boundary and not a torn one.
- Commit to a depth. Recut the feature deep enough to match the modelling around it instead of looking accidental.
- Give it a partner. Add a second, similar division elsewhere on the same leaf. One odd feature reads as damage, two read as pattern.
- Slow the next cut. Work the surrounding area with a lighter hand, since almost every second fault is a repair of the first.
Frequently asked questions
Can you undo a mistake in wood carving?
Removing wood runs one way only, so a chip on the floor has gone for good. What remains available is lowering the surrounding area until the fault vanishes, or making that fault into something the design accepts.
How do you turn a carving mistake into a feature?
Recut it deliberately. Clean the torn edges, take the shape to a depth matching the modelling nearby, then add a similar division elsewhere so the eye reads pattern instead of accident.
What causes most slips?
Hurrying past the moment where you check grain direction. Every fault in this workshop came from moving before looking, with a sharp tool and a sound plan. End grain punishes a rushed hand hardest of all.
What to carve next