
Alexander Grabovetskiy, woodcarver, School of Woodcarving · Published 2017
How do you carve an apron for a dining table?
Quick answer: Dining table aprons are carved in shallow relief, no deeper than 3 mm, or 1/8 inch. You outline the design with a V tool just outside the line, take the background down crossways to the grain, model the flowers and acanthus, then punch the ground so the carving lifts.
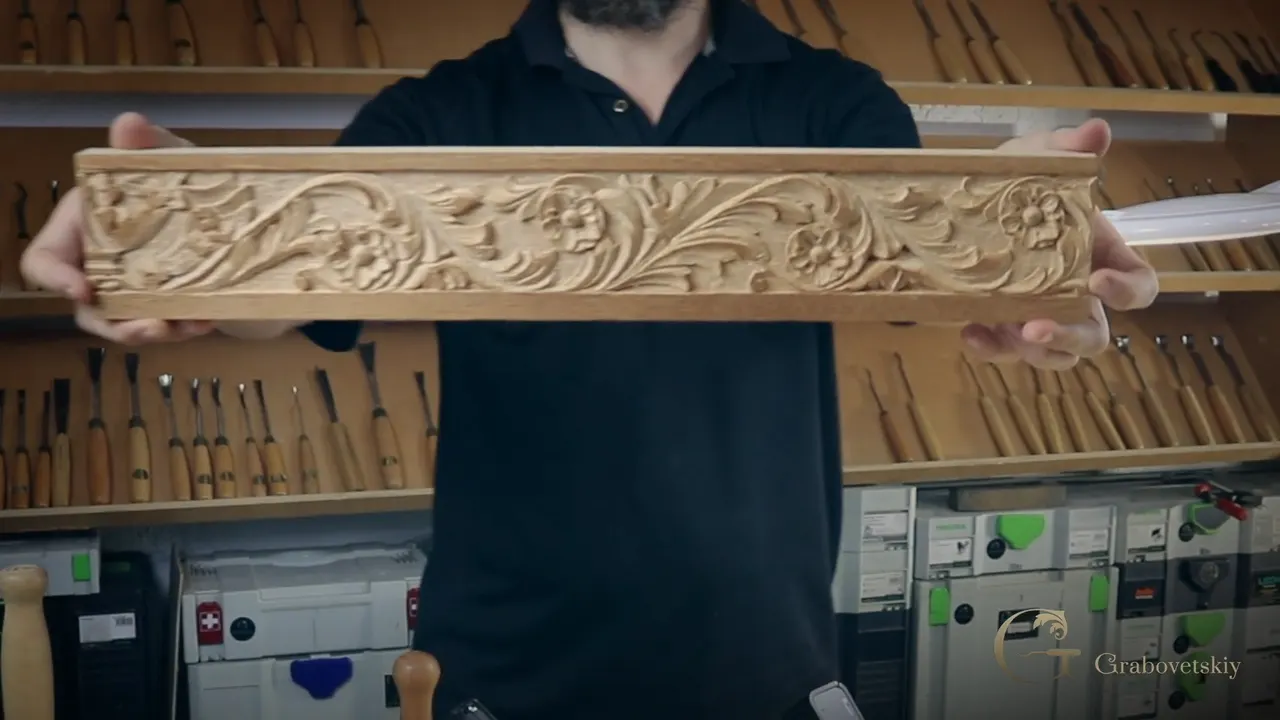

What is the apron on a dining table?
The apron is the skirt board that runs under the top of a table, between the legs, and on good old furniture it usually carries carving. I say apron, and I say skirt too. Same board.
Ever knelt down under an old table to see what somebody carved on the apron? Did you find flowers down there? Somebody put them there on purpose, and one day that decision landed on my bench.
A family had owned this table for generations and wanted it bigger. I guess the family was growing. Bigger top, longer leaves, and the old skirt no longer reaches. So the client boxed up one section of his table with the original drop leaves and mailed me the lot. My job was four new pieces nobody would ever pick out from the old one.
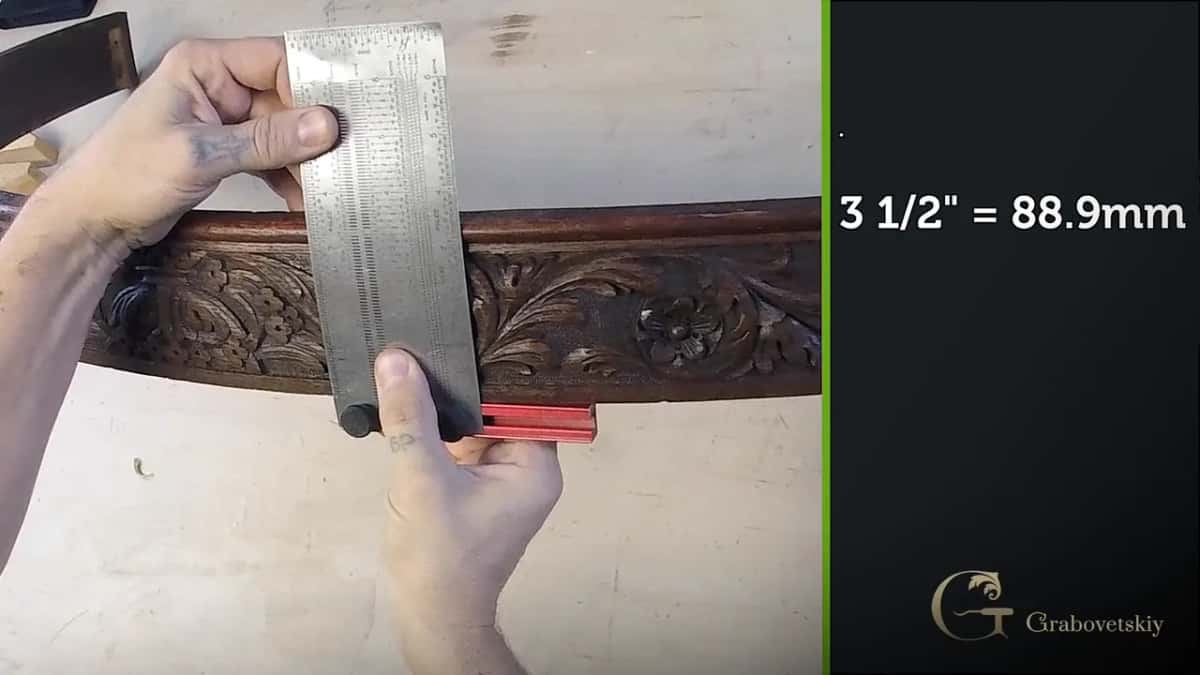
What is shallow carving in wood?
Shallow carving is relief carving that never goes deeper than an eighth of an inch, 3 mm, and most of it sits at three or four millimeters. Low relief, if you want the book word.
Furniture makers in Europe leaned on it hard through the 19th century and part of the 18th. France, Belgium. Chippendale worked to that same eighth and you can find it on his chairs. Chests, drawer fronts, picture frames, a table skirt like mine.
A couple in North Carolina once had me carve two mahogany doors for a wine room. They bought the doors thirty years earlier. Solid Indian mahogany all the way through, they were told. I put a knife into the raised panel and found an eighth inch of veneer over yellow pine. So I called them, then told them the good part, which is that an eighth is plenty. A grapevine, carved shallow. The man who built that house won builder of the year for the wine room.
How deep should carving on furniture be?
An eighth of an inch, 3 mm, and no deeper until the whole picture is standing.
You can always go deeper. You can never go back.
Depth on the antique wandered up and down. Most sat at an eighth, and in a few spots the old carver had dug to three sixteenths, 5 mm. He did not really care. Flower centers went below the ground, so I took mine to about four millimeters, a hair over an eighth. Matching means matching his depth, not showing off mine.

What wood is used for antique furniture carving?
White oak here, and the oak came from the customer's own table. He sent the original drop leaves along with the skirt, so I ripped all four blanks from antique wood that had already lived in that house.
The drop leaf measured 10 and 9/16 inches wide, 268 mm, and 13/16 thick, just under 21 mm. Lucky, because the finished pieces had to come out 3 and 7/16 inches across, 87 mm, by 21 inches long, 533 mm, four of them. No planing. Rip it and carve it.
Oak sounds different under a gouge than limewood, a crunchy sound. Before limewood reached England the carvers there worked English brown oak, and when you walk into an old church the carving there is oak. I love that wood. Limewood still lets you do more, because oak carries far more grain and is harder on an edge.

Why does basswood dull carving tools faster than oak?
Basswood is far softer than oak and it still takes the edge off my gouges quicker, and I cannot tell you why. My teacher tried to explain it once. I still did not get it.
Some woods carry abrasive inside the fibers and eat steel for that reason. Basswood is not one of them. Smooth, mild, nothing in it that should touch an edge, and yet on this oak job I walked to the sharpening station less often than I do on a basswood panel. My tools do this, and everything I know about holding an edge sits in Carving Tool Sharpening.
How does a carver copy carving off an antique piece of furniture?
Tape paper over the old carving and rub it with the side of a pencil until the pattern comes up out of the graphite. Paper, tape and a pencil.
Green tape only. The apron came in with shellac on it, not lacquer, so I used the green Scotch tape that peels off a finish clean. Blue tape I would not put near it, not even the mild fourteen day kind.
Hunt the biggest shapes first and everything else walks in behind them. Big flowers, then the acanthus wrapping each flower, then the circle the flower sits inside. Check the spacing as you draw, by eye or with a ruler. On this one the gap from one point across to the next came to exactly half an inch, 13 mm.
I learned the rubbing as a boy, laying paper over a coin and dragging a pencil across it. Antique furniture also shows you the other man's shortcuts. A swirl he snapped and left. The piece is still beautiful.
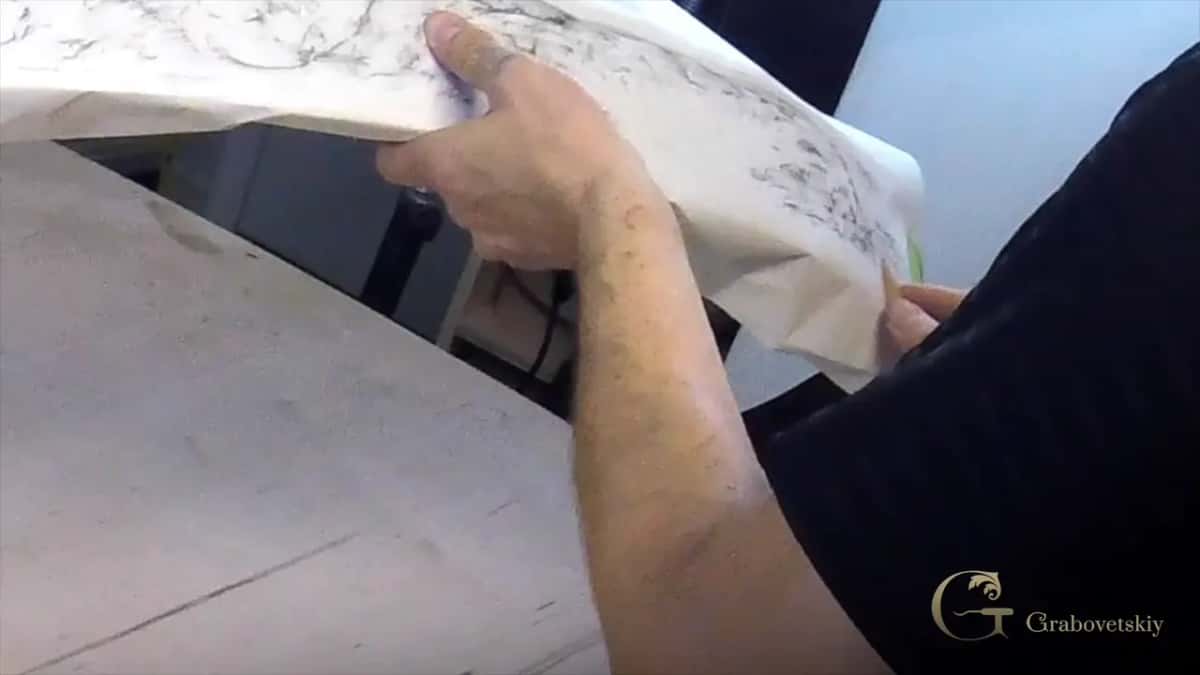
Can you use carbon paper to transfer a design to wood?
Carbon paper, the old office kind, still beats everything else for getting a drawing onto wood. Hard to find in a store now. Order it online, black or blue, either works.
Press gently. Lean on it and the sheet gives out, and I needed one sheet to serve all four pieces. Then check before you lift the drawing, because a line you missed is very hard to find afterward. I checked mine and I had missed a few spots. One of them was the center of a flower.
The older way was a needle. Prick the outline through the paper, hole after hole, and the dots show up on the wood. Carvers worked that way in the 18th and 19th centuries.
Works fine. Takes too long.


Which tool do you pick up first for relief carving?
The V tool, and you run it outside the drawn line, never on it. Roughly 3 mm out from the line, an eighth inch.
Put a chisel straight down on your line and the wood pushes back from both sides at once, so fibers tear where you did not want them torn. Run a V groove on the waste side first and that side is relieved. Come back with a gouge and the fibers give way into the empty groove while the design side stays clean. Damage happens only in the wood you were going to throw away.
That is step number one of shallow carving.
The V tool is one of the most important tools in wood carving.

Should you use a mallet for small carving work?
A mallet gives you more control than your bare hand, not less. Small bronze one, and I hold it in my palm, not the normal way most people hold one.
You are not supposed to use a mallet on small tools like these, and I use it all the time anyway. Then there is your hand to think about. Hit a tool with your hand and you can get what they call carver's or carpenter's disease. I try not to. Sometimes, in a hurry, I do it anyway, and I know it is wrong.

Do you carve with the grain or across it?
Across the grain whenever you can, and downhill from the high point when you cannot. Go uphill and the edge grabs fibers and breaks them. Put the tool along the grain on a background and you can snap a side off. I have done that. Telling you from experience here, not out of a book.
Neither direction matters once you are working across it, and the honest method is to rotate the board instead of arguing with the wood.
Turn it, carve downhill, turn it back.
You will watch me break that rule on camera. I am filming, so I do not want to rotate the piece all the time, and oak this dry is crunchy, so my tool does not dig in. Not every wood forgives like oak.
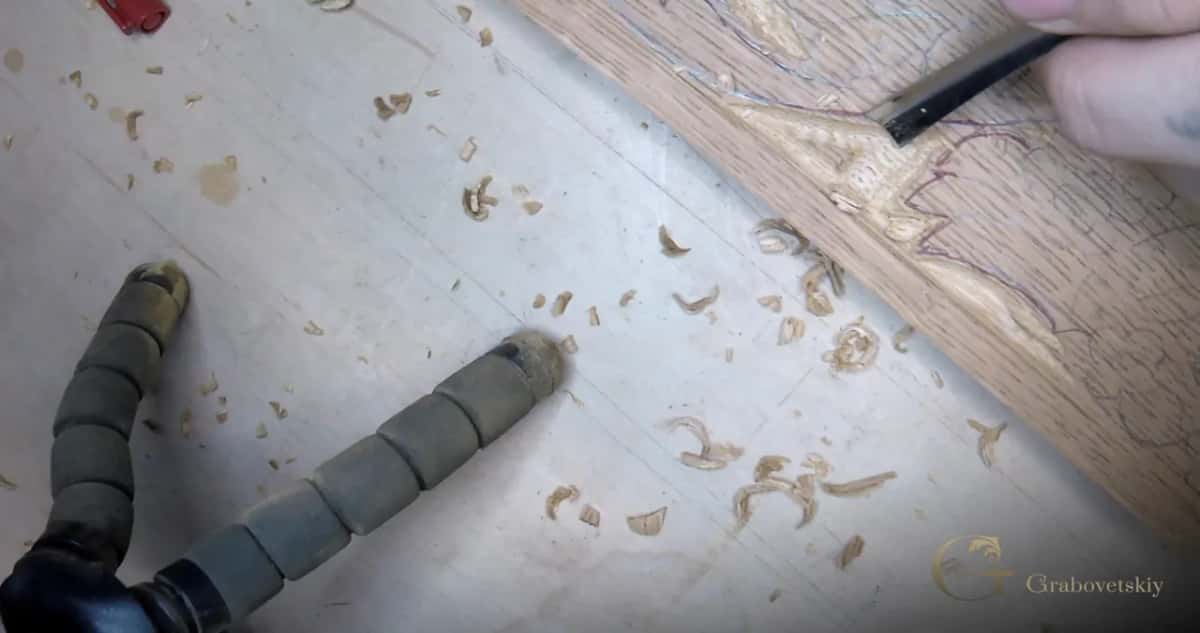
What tool do you use to remove the background in relief carving?
A number 7 about 10 mm wide, three eighths of an inch, worked across the fibers, then grounding tools for the corners it cannot reach. Not all the way down on the first pass. Get most of the waste off, set the outline, then come back and clean.
My grounding tools are Ashley Iles, number 47, and I keep three. One at 2 mm, one at about 3 mm, one at 10 mm or three eighths. The blade carries a slight bend, not much. Lay every tool out with the edges facing you and you see at once which one to grab, so no time is wasted.
Taking a background out by hand is the hardest part of the job. A router with a 3 mm bit, an eighth, would do it in a fraction of the time, and I have done that when a deadline was breathing on me. But you lose the fun, and the fun is most of the reason I am still here.

Why does the wall of my relief carving look wavy?
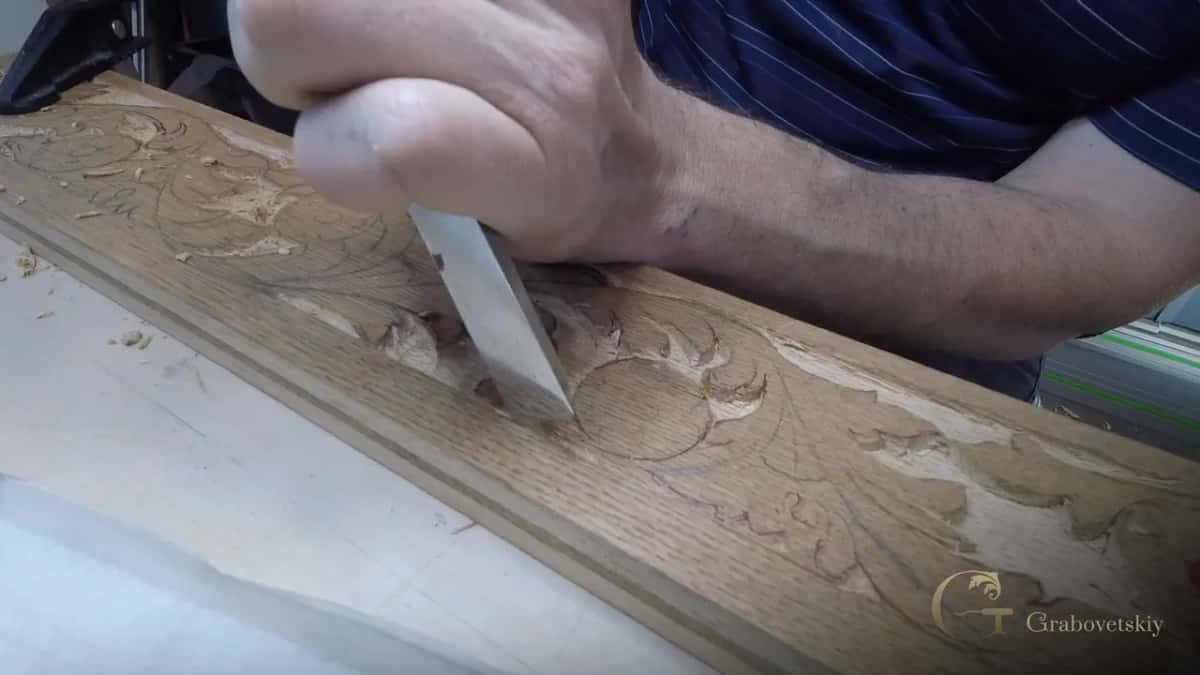
The cure for a wavy wall is step cleaning, walking a flat chisel along it one step at a time. Rest the chisel on one corner. Move. Step. Move. Step.
A wavy wall on furniture is exactly what a person notices, because furniture sits close to the eye. Use a single bevel chisel for that wall, never a double. A double bevel presses both sides at once and can snap that side of the wood out or leave a micro crack inside the wood. This board already had one, a micro crack near an edge, almost invisible, but I could feel it with the tool.

What gouges do you need for carving furniture?
About 30 sat on my bench, but mostly I used number fives in several widths, a couple of sixes, a three, a nine, and V tools. For tiny spots there is a number 15 V tool at 3 mm. The number 16 at 1 mm does the cleaning, thinner than a sixteenth of an inch.

Buy the wide ones first. With a wide gouge you carve a tiny detail by rolling up onto one corner of the edge. In one spot I could have used a really small gouge, and I took a bigger one just to show you it still works.
None of my Ashley Iles are marked for width, and the sweep is barely there on the side, so I marked the sweep on some of them myself. The old masters never marked theirs either.
So there is money in your pocket and a wall of tools in the catalog, and no honest way to know which three matter. My own drawer is open in All About Tools for Wood Carving, and if you would rather have somebody beside you while you choose, come and start at the bench.
Which gouge do you use to carve a flower in relief?
Outline the center with a V tool first, then find the gouge whose curve already matches the petal. In basswood I would skip the outlining, stab a gouge in and rotate it around the middle. Oak this dry snaps the center clean off when you try that.
Finding the gouge is not guesswork. Lay the edge down into the drawn line and look. A number seven was too big on these flowers, and a number five dropped in as if it had been ground for them. Carve the outside of the petal before the inside.
Seed holes come from a mini gouge, 3 mm or so across, an eighth. Stand it up, rotate four or five times, lift the plug. Then three rays per petal, starting about 3 mm from the edge, with a trace of undercut beneath each, because it looks a little better. I almost never draw the circles with a compass. A circle that is not quite a circle has a human touch in it.


What are filler flowers in wood carving?
Filler flowers are the small blossoms a carver drops into the empty spaces between the main shapes. Gibbons used them constantly, and we spent a week on his methods in the Gibbons class in Maine. Easy, quick, and they hold a design together where nothing else is happening.
On this original they sat flat, no dishing toward the center. Given the choice I would dish them, because in my opinion it would look nicer. My job was the other man's hand, not mine, and I cannot argue with him from here.

Colored pens mark them out, the architectural kind made for paper. Dry safe, no bleed, so the color does not sink deep into the grain. Thirty colors and a Helix 0.05 with a point fine enough for the smallest detail on the board. I have used a Sharpie before, and these are better.
Where do you start on an acanthus leaf in low relief?
Start with the main V groove down the middle of the leaf and take it as deep as the background, 3 mm, an eighth. Everything after that is deciding what is high and what is low.
The ridge beside that groove is the high point, so both sides fall away from it. Then look at the tip. An acanthus lobe is almost never like a flower leaf. Two radiuses usually live in it, inner and outer, and finding both is what makes the end of a leaf read three dimensional in three millimeters of wood.
Where the original was not undercut I only opened a shadow line. In other spots I slipped a back bent gouge under an edge and took a whisker off, so a dark line sits there now and the leaf lifts. It will not be noticeable. It just looks better.
Acanthus comes in as many dialects as a spoken language does. Roman, Greek, Moroccan, a German Gothic one. Whenever I get a foam cup, I start drawing on it, and it is always acanthus, done with my fingernail.


What do you do when you break a piece off a carving?
Glue it back, or leave it and make it look like you meant it. Two honest answers, and I give both in these lessons.
A piece snapped out of a filler flower with the camera running. My whole reaction, on tape, was that it was not supposed to happen, and then that we would make it look like it was supposed to be that way. No hair pulled. I lowered that section and it reads as a decision now. Later I made a little mistake on a leaf. Which makes me human.
The old carver snapped some of his swirls too and left them snapped. I tried to keep all of mine without snapping any. My teacher had a line for the rest of it. If you like what you have done, you are not a master any more.
Why do carvers punch the background on furniture?
A punched ground throws the carving forward and separates it from the flat wood behind.
Common on furniture, and not used as much on architectural work. Punch it and the flowers stand up off the board.
My set has five punches, three round, one square, one small rectangle, and it happened to match the antique exactly. Woodcarvers Supply sells them here. In England, I believe Henry Taylor makes some. The one I used most is 5 mm across, three sixteenths of an inch, and the rectangle is 3 by 10 mm. Drive them with a carpenter's mallet, the plastic and rubber kind, never a mallet made of wood against steel.
The ground on one piece took ten minutes, fifteen at the outside, and those few minutes make the carving much nicer. Stain lands darker in a punched ground, and the carving pops. Punches are not required, either. Take the thickest framer's nail you can find, grind the end flat, and file a pattern into the face. The pattern is then yours.

Do you sand a wood carving?
Not this one, and not anything else I make. Straight off the chisel. What I do instead is clean, a different job.
While I am carving I leave the chips where they land. At the end a 1 mm V tool, the number 16, goes around and picks the leftovers out of every corner. Not too far, though. A carving has to look like a hand did it, and the old carver left some chips in his corners, so I left some in mine.
Tool marks are the reason. Every mark on that oak is the one tool I reached for at that moment, and nobody can match all the tool marks. A man on Reddit once sent me a link and asked what I thought of his carving. He had used a DupliCarver, a router copying a form, no chisels at all. I said it looked good but it was not real carving. He did not take it well, and I apologized, because he is right that machine work is still carving.
But copying a form is not the whole of it. A painter and a photographer stand in front of the same country church on the same morning and both make art, and the two are still not the same thing. Brush marks are the difference. On wood we call the same thing tool marks.

What were the four kinds of wood carver?
Ship carvers, coach carvers, house carvers and furniture carvers, and in the old European trade those were four different men. Today there are really two.
A ship carver worked rough, Gorgon heads and mythical creatures on a ship nobody would stand close to. The coach carver worked finer, though his carving was going out on a dirt road to be splashed and knocked. House carvers, what we now call architectural, stayed indoors on frames and rosettes and egg and dart, a lot of it above your head. Furniture came last and closest to the eye, the only one of the four where somebody kneels down and looks at the apron.
Wood carving paid, as well. English books on the trade record the wages, and a carver made thirty or forty times what a man working a field made. Germany had fifty golden years of it, 1475 to 1525, and Tilman Riemenschneider came out of that stretch living like minor royalty. Who buys it today depends on the client. Most people, ninety percent of everybody, do not care whether there is carving in their house. The richer clients who care buy a lot of antique furniture. They want more that matches.

Can a beginner carve an apron like this one?
Yes, and I consider this probably the easiest type of carving. Shallow carving is more or less two dimensional, and it never asks you to hold a three dimensional shape in your head.
What it asks for instead is patience. Carving is subtraction, and it is easy to take too much. On dry oak nothing happens in one pass, ever. Little by little, again and again. Rush it and you make the kind of mistake that has no fix.
Anybody can poke a chisel into wood. The hard part is knowing before you start how deep that gouge will travel and what will be left standing when it stops, which is the whole of Principles of Design in Wood Carving. If you have never held a gouge, First Cuts for Beginners is where your hands belong, and the lessons map lays out the rest of the road. People want to know who is teaching before they ask what it costs, so here I am.
So there is a board on your bench and a piece of somebody else's carving lying next to it. Can you make yours disappear into his? Come and find out at the bench. Shall we carve?
Eighteen workshops make up Carving Dining Table Apron, with one antique on the bench the whole way and four pieces that had to fool the man who owns the table.
| The job | Reach for | Size |
|---|---|---|
| Copying the old pattern | Paper, green tape, a pencil | any |
| Getting the drawing onto wood | Carbon paper | one sheet for four pieces |
| Outlining outside the line | The V tool | 1/8 inch off the line |
| Taking the ground down | Number 7 | 10 mm, 3/8 in |
| Modeling petals and lobes | Number 5, several widths | 3 mm up to 35 mm |
| Wide clearing and flats | Number 3 fishtail | 20 mm, 3/4 in |
| Standing a wall up straight | Single bevel flat chisel | 20 mm, 3/4 in |
| Digging the deepest hollows | Number 9 | small |
| Corners the gouges miss | Grounding tool number 47 | 2 mm and 3 mm |
| Wider grounding | Grounding tool number 47 | 10 mm, 3/8 in |
| Seed holes in a flower center | Mini gouge | about 3 mm, an eighth |
How it's done
- Rub the old pattern onto paper. Tape drawing paper over the antique with green tape that lifts off a finish, then rub with the side of a pencil until the ornament shows. Find the biggest flowers first and the rest of the drawing follows.
- Rip the blanks out of the antique wood. The drop leaf came in at 13/16 thick, just under 21 mm, so no planing was needed. Four pieces at 3 and 7/16 inches wide, 87 mm, by 21 inches long, 533 mm.
- Transfer with carbon paper. Press lightly so one sheet serves all four pieces, and check for missed lines before you lift the drawing. I had missed the center of a flower.
- Outline with the V tool. Run the groove 3 mm outside the pencil line, an eighth, never on it. Tearing then happens in the waste and the design side stays clean.
- Take the ground down, crossing the grain. Take a number 7, 10 mm wide, three eighths of an inch, cutting across the fibers. Stop the background at an eighth, 3 mm, then leave the final cleaning for later.
- Model the flowers and the acanthus. Choose the gouge whose curve already fits the drawn line. Main V groove down each leaf to background depth, inner and outer radius at the lobe tips wherever they fit, seed holes rotated in with a mini gouge.
- Clean with a 1 mm V tool. The number 16 V tool goes around every corner and lifts the chips left from roughing. Stop short of perfection so it still reads as hand work.
- Punch the background. Stipple the whole ground with the 5 mm punch, three sixteenths of an inch, and the small rectangle for tight spots. Ten to fifteen minutes a piece, and the carving lifts off the wood.
Key takeaways
- Furniture work lives at three or four millimeters, 1/8 inch at the outside, and staying inside that limit is really important.
- Always start with the V tool, 3 mm to the waste side of the drawn line, so the tearing happens where it cannot hurt you.
- Across the grain for the background. With the grain, always from the high point downhill.
- Go deeper any time you like, but you can never go back, so match the original's depth rather than your own taste.
- A mallet gives more control than your bare hand, and it saves your hand as well.
- Pick the gouge that already fits the drawn curve, and buy the wide ones first because a big gouge does small work on one corner.
- A punched ground takes stain darker and pushes the carving forward, and it costs fifteen minutes.
Frequently asked questions
Can a beginner handle an apron for a dining table?
A beginner can carve one, and shallow relief is probably the easiest carving there is to start on. Nothing in it asks you to think in three dimensions. What it asks for is patience, because on dry oak nothing happens in one pass.
How deep should relief carving on furniture be?
An eighth is the ceiling, 3 mm, with the carving mostly sitting at 3 or 4 mm. On the antique I matched, a few spots ran to three sixteenths, 5 mm, and the flower centers went a hair past the eighth, about four millimeters.
What tools do you need for shallow relief carving?
Fewer than the 30 I had on my bench will do the job. V tools first, a 3 mm number 15 for tiny spots and a 1 mm number 16 for cleaning. Then several number fives, a couple of sixes, a number 7 at 10 mm for the ground, a number 3 fishtail, a single bevel flat chisel, and a mini gouge for flower centers.
What to carve next
More on this: White oak, the wood this apron came from, Thomas Chippendale and his carved furniture, Grinling Gibbons and his filler flowers, Tilman Riemenschneider, the German master, Tilia, the lime tree behind limewood, Relief sculpture, high relief and low, Shellac, the finish on the antique