

Alexander Grabovetskiy, woodcarver, School of Woodcarving · Published 2022
How do you carve a leaf curl so it rises and then drops?
Quick answer: Carving a leaf curl that goes up and then down starts with wood taken off the top, while the inside waits. On this acanthus leaf I opened the top with a number 9, three quarters of an inch (20 mm), knocked one side down with the 7, and left roughly six millimeters (a quarter inch) over the background.
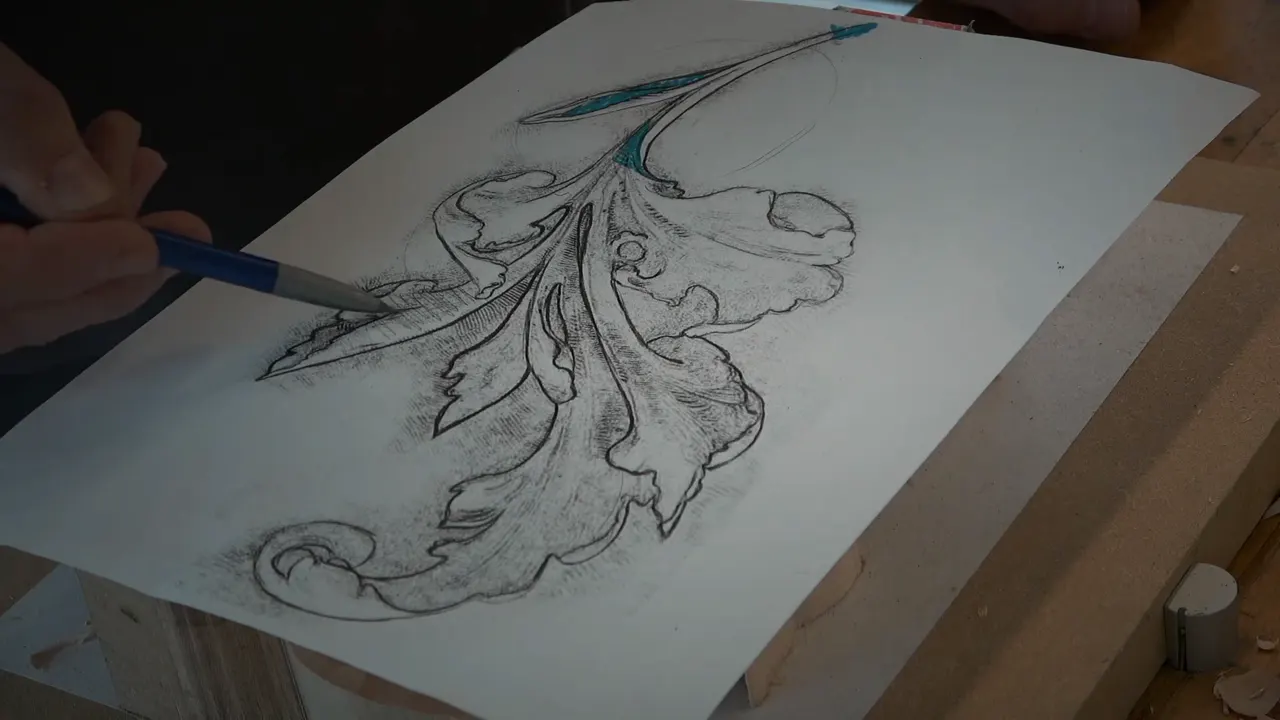
A leaf curl that rises and then drops is carved top first, and the inside is dug last. In this video I worked the little curl of an acanthus leaf, and I said what I wanted: roll this piece up, and let this part go inside. It is the third video of lesson three in Carving Modern Acanthus, a course built on a 1903 design.
Have you ever dug under a curl too early and watched it lose its lift? Did the part you meant to raise end up thin? Then the order of the cuts matters to you, and I gave that order out loud on camera, pass by pass.

The steps this curl needs
- Start with the top of the little part.
- Leave wood in the little part, because the inside is still to dig.
- Work little by little.
- Drop one side with the number 7, and let the other stay raised for now.
- Keep about a quarter inch (6 mm) of wood over the background.
- Make the next cut with a smaller number 9, then flip it and go at it from the other side.
Where does the wood come off first on a leaf curl?
From the top. I began the video by saying, let me repeat, because some of the class did not know what we were about to work on. The plan was short: we roll this piece up, and this part goes inside. So we take some material out from the top.
I used the same gouge as before, the number 9, three quarters of an inch (20 mm). Then I said I would attack the little thing. Yes, I know I am carving against the grain, I said, which is not the smartest.

How much wood do you leave before you dig the inside?
Only a little at a time. Yes, it will curl up, I said, but don't take too much material out of that little thing, because we still have to dig an inside. Little by little.
The top first, the inside after: that was the order I gave the class. The first video of this lesson has me saying I did not want to lose my gradual movement, and that spot was really important.

What do the rise and the drop look like?
I asked the class to look. What is going to happen? See that is the raising up, I said. Then it is going down. Can you see?
Up first, and down right after it. That was the movement I wanted the class to see.

Which tool knocks one side of the curl down?
The number 7. With it I knocked a side down as much as I could. That part of the movement stays raised for now, I said, and the other part is knocked down, going almost to the background. Not all the way, but really far.
I presented the tool with the flute at approximately ten o'clock, and for those who do not know what the flute is, it is right in the middle of the tool. My words for the pass: I am actually rolling that whole thing.

How far from the background do you stop?
Close to 6 mm (1/4 in). In my words, I would leave that much before I hit the background. Does that make sense, I asked.
The neighbor got the same treatment at the same time. I took the bigger tool, a number 9 of 20 millimeters (3/4 in), and did exactly the same: I dropped pretty much only one of its sides, and the other one became my high spot. The dropped side went far down, about a quarter inch (6 mm) above the background, and the pass went almost like a track.
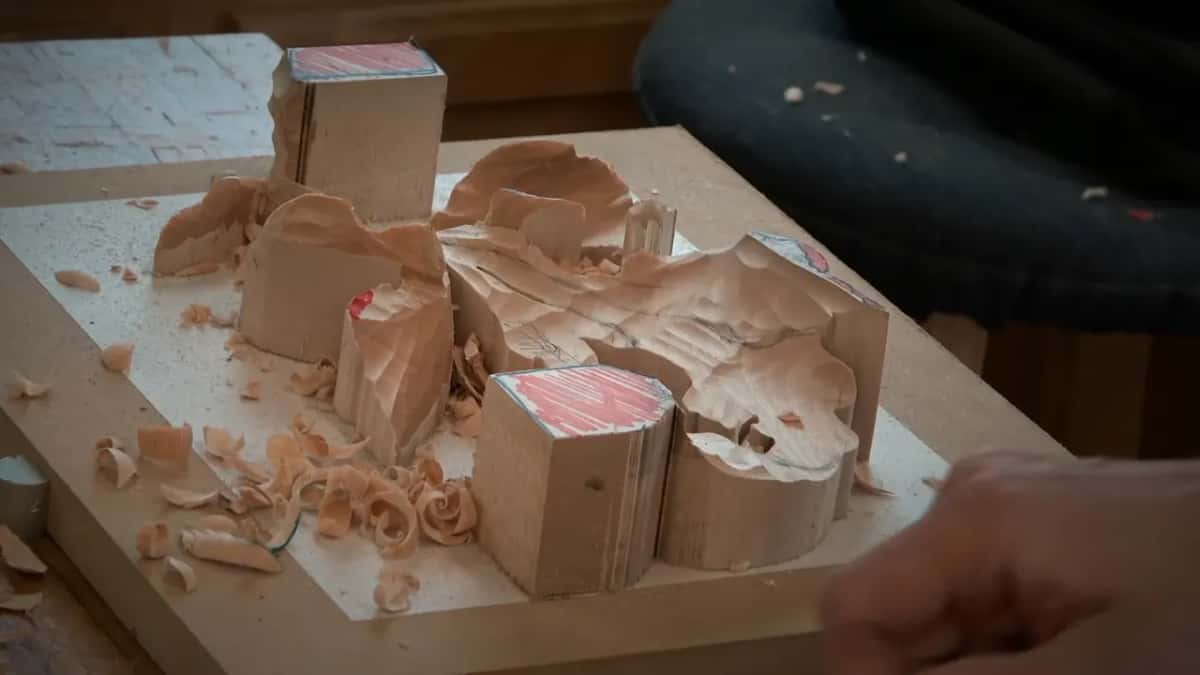
I showed it to the camera at one point, and I had left approximately six millimeters, I said. Can you see? I held on a second and tried to show them again.
Which cut matters most?
The one I called a really important cut. I held the drawing over the block and said, look what I want after, see the detail right here. It's just a rolling, I told them. We are going to create that cut, I told them, so don't mess that up, please.
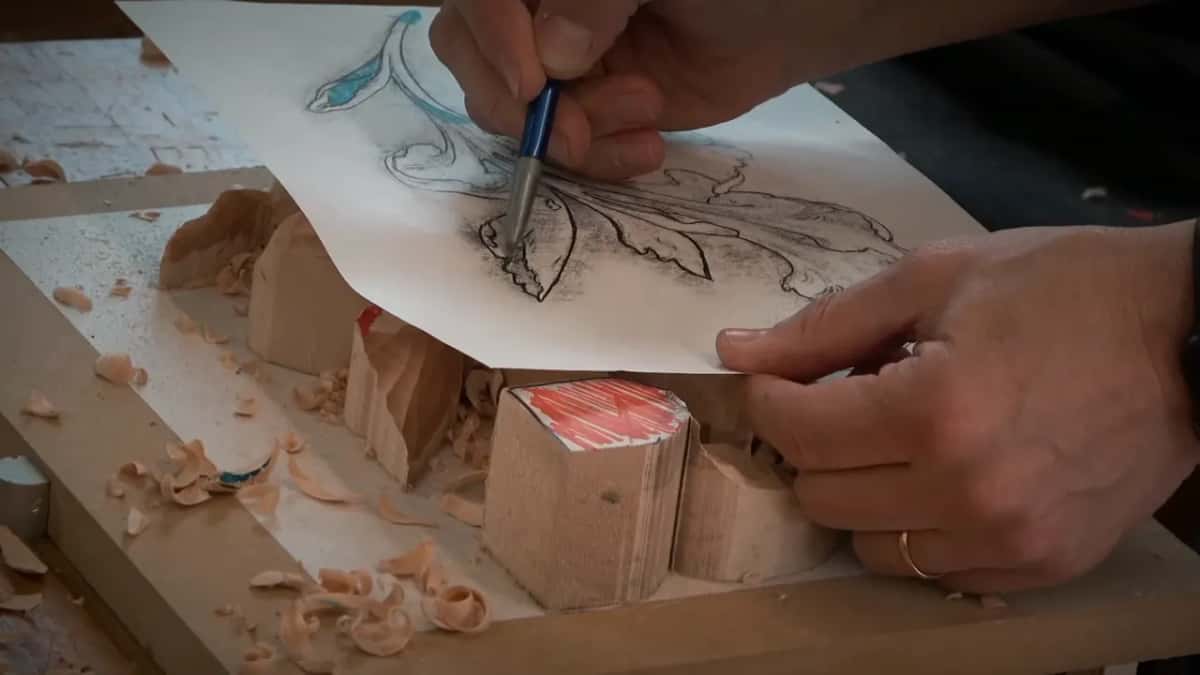
To open it, I took the number 9, three-eighths of an inch (10 mm), and made a preliminary cut, and again I left six millimeters. Is it visible, I asked, with my hand right there?

What do you do after the first pass of the opening cut?
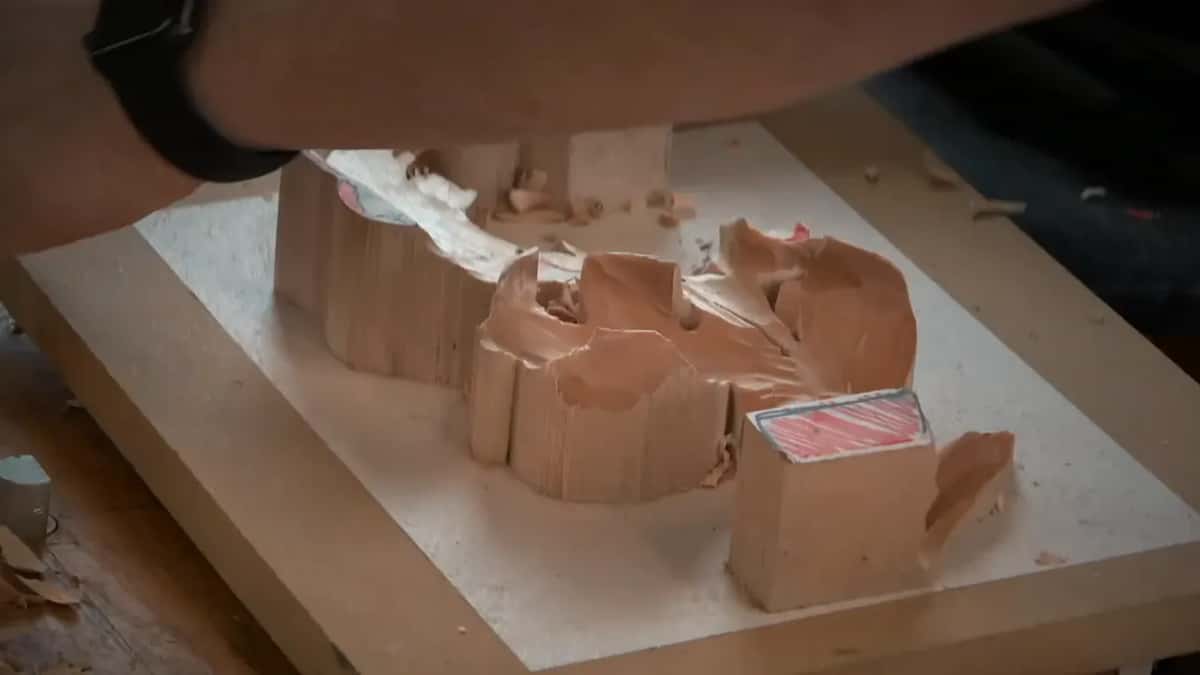
Next comes the flip. Plainly put: now I have to flip the piece and work from the opposite direction. I gave no reason on camera in this video. In the first video of this lesson I had come at a side from the opposite side because I wanted to create the true feel of a really rolling shape.
The same number 9 went in really carefully, right underneath, and I kept about six millimeters, a quarter inch. Be careful, I added, don't be too crazy about it, and go all the way like this. Those are the last words I say in this video.
Where else did I make a part rise and then drop?
The same movement shows up in my other courses, in different wood and on different parts. I picked the ones that sit closest to this curl, and each one is in my own words from that lesson.
What did I do in Acanthus over Moldings?
In Acanthus over Moldings I took a number 9, half an inch (13 mm), and said I would create that curl. It could start really low, I said, inside that petal or right in its center. I wanted movement like a concave, and that is the first cut. Next I wanted to raise it up like a convex, and after that it drops to the center. Not a really big curl, I said, just the overall.
The neighbor could ride the same way, which would give me two curly movements, and I was not going to force it. Later in that video I took a number 5, quarter inch wide (6 mm), and attacked it from above, even if it curls up and goes up there. I still wanted to do up and then down on one of the sides. Earlier in that video I had said I could attack a spot a little more, bring everything to the edge and make it more smooth, and maybe introduce some curliness. I would curl it even more. There is absolutely no limit to what you can do, I said, and then I added that there is a limit, of course. Look for these on the lesson 7 page of that course.

Which way did a furniture panel move?
A furniture panel asked for it too. We really need to make the movement go upward and then downhill again. A bigger tool would be better, I said, one of five millimeters (3/16 in), for a much bigger movement. That video is on the Furniture Panel 22 page.
Near some berries on a Hashemi flower I put it in plainer words. You can see this is low, I said, so this side has to be really low too, and I have to go up gradually and then downhill. That one is on the Hashemi Flowers lesson 19 page of that course.
How do you give a curl its shadow?
The Lily Box asked for a curl, so I marked where it would sit. It is going to curl a little bit inside, I said. A number 8 indicated the movement. This was not an undercut, I said, but a curl underneath. The number 11, 3 millimeters (1/8 in), made a curl underneath, gradually and without forcing too much.

About the shadow, I said this curl is going to give a beautiful shadow casting, a really, really nice shadow. Next came a gradual change from a curl to almost no curl, and I took the number 9, carefully. I could take care of the curl, I said, with some kind of number seven. See Lily Box lesson 10.
What about a curl that goes back the other way?
On a floral panel I said I could curl it backward. A small movement in the opposite direction could be excavated with that curl, and it would still look like it is curling. For the material inside I named a really small number 9, an eighth of an inch (3 mm), and then something even smaller. I also said I was going to create another small concave in that section, really small, but still beautiful. You don't really see it, I told the class, but it curls backward and runs right underneath. The lesson is the Floral and Molding lesson 7 page.
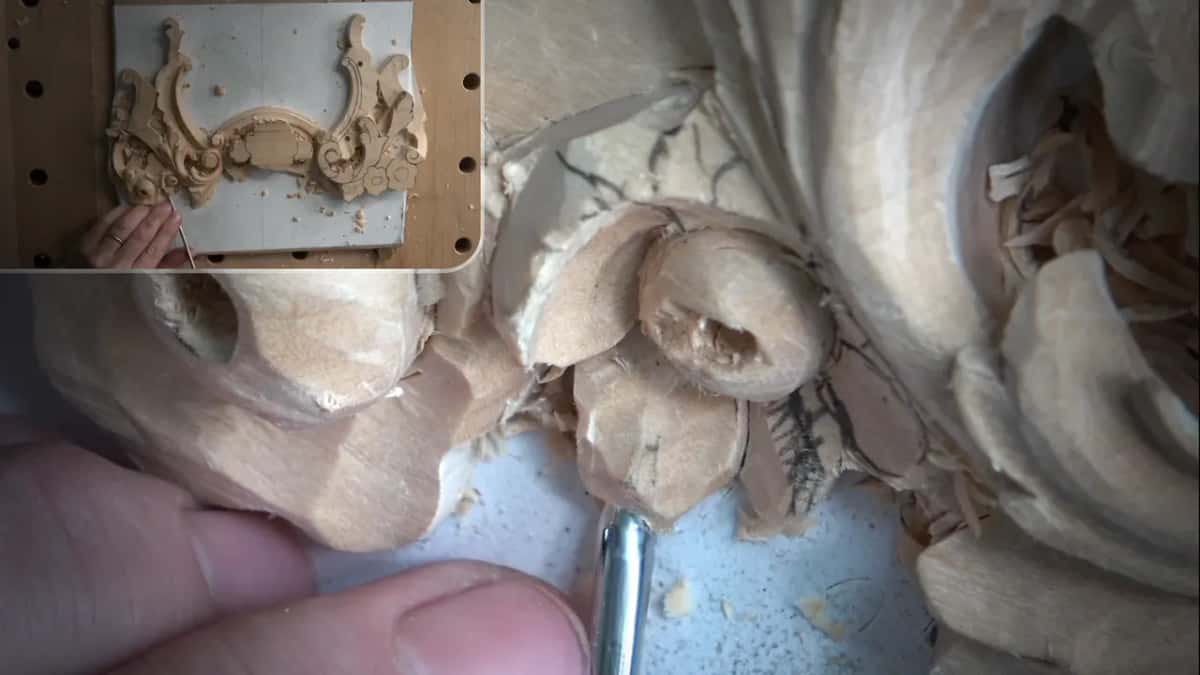
On the Tray of Blessing I offered to show another way to embellish a curl: curl this way and then curl slightly backward. I called it a more gothic approach, and I said the 15th and 14th century guys curled this way and then backward. It looks really cool, I said. I was careful there, since I did not know how much material I had and did not want to break it. Earlier in that lesson I named a number 7 at 45 degrees, in small, small cuts, because the area was somewhat stubborn with the end grain, and not to force it. I also said the curl has to go somewhere from there. You can watch it on the Tray of Blessing lesson 6 page.

How did one flower curl in?
In Hashemi Flowers 44 the plan was to make it look like it is flipping from inside and then goes upward, and to make it curl upward right there, just to take this ridge out. Almost invisible, I said. But I will know about it, and it makes me really happy to do details like this. I took a knife to create that curl. Later I said it could curl even more, a little bit on the inside, and that I would attack it with a 5 and clean it with an 11. See Hashemi Flowers lesson 44.
Why not dig a curl from the inside only?
On the Grape Onlay I called it a mistake I see very often: people dig from the inside and make a spoon effect, and to me it does not look natural. I dug from the side as well, using a number 9, 10 millimeters (3/8 in). I leave some of the material for the curl upwards, and I dug about half an inch (13 mm) from the upper point downhill. All of those parts are fragile, I said, and I had broken some just by misplacing them.

There I had no more than three millimeters left, one-eighth of an inch, and I had to be mindful not to excavate too much. I felt the tool itself. When the wood gives you too much resistance, I said, change the tool and take smaller chunks. I was not pushing, because pushing makes too much stress. For extra movements like these, it is sometimes a good idea to use somewhat smaller tools, since a lot less material comes off, and I called that safer. Slicing is the key. See the Grape Onlay lesson 14 page.

Which tools did each curl take?
This table puts each curl beside the tool and the size I said.
| Where it came from | What the curl or movement did there | Tool I used | The size or depth I gave |
|---|---|---|---|
| Modern Acanthus 3-3 | One side raised, one side knocked down | Number 7 | Quarter inch, six millimeters, left over |
| Its neighbor side | Only one side dropped, one high spot | Bigger nine | Twenty mm (3/4 in) wide gouge |
| The opening cut | Preliminary cut first, then the piece flipped | Same nine | Ten millimeters, 3/8 inch, wide gouge |
| Moldings, lesson 7 | Concave first, raised like convex, then dropped | A nine | A half-inch (13 mm) wide gouge |
| Furniture Panel 22 | A movement upward and then downhill again | Bigger tool | Five mm (3/16 in) wide gouge |
| Lily Box 10 | Curl underneath, fading to almost no curl | An eleven | 3 mm, one-eighth inch, wide gouge |
| Grape Onlay 14 | A curl in, dug sideways too | Nine again | A gouge 10 mm wide (3/8 inch) |
What will you check on your own curl before you dig?
Which part rises, and which part drops? Is there wood left on top, so the inside can still be dug? Would 6 mm still hold over your background? If the answers sound like yes, then you are ready to watch how I did it.
The order is on the wood in this video, and the third lesson page holds all three videos of it. The course page has the rest of the leaf. A curl like this sits on an acanthus leaf, in wood carving done as relief. Open the video with your Tuition and watch the curl rise and drop.
How it's done
- Start at the top. Begin at the top of the little part, using the nine.
- Keep wood for the inside. The inside still has to be dug, so go easy on the little part.
- Drop one side. Use the number 7 to take a side almost to the background, and keep the rest high.
- Stop above the background. Leave roughly 6 mm (1/4 in) of wood before you meet the background.
- Make the important cut. Make a first, preliminary pass with the nine that is three-eighths of an inch (10 mm), and keep some wood.
- Turn it over. Flip the work and come at it from the far side with that tool, right underneath, and be careful.
Frequently asked questions
Do you dig the inside of a curl first?
Start with the top, and not too much material should leave the little part, since the inside still had to be dug.
How much wood do you leave before the background?
Approximately a quarter inch, six millimeters, before I hit the background. The figure comes back on the number 7 side, on the neighbor and on the opening cut.
Which gouge starts the curl?
A number 9, 20 mm wide (3/4 inch), took the material off the top, and a number 7 knocked one side down, and the next cut used the smaller nine.
When do you flip the work?
What to carve next