
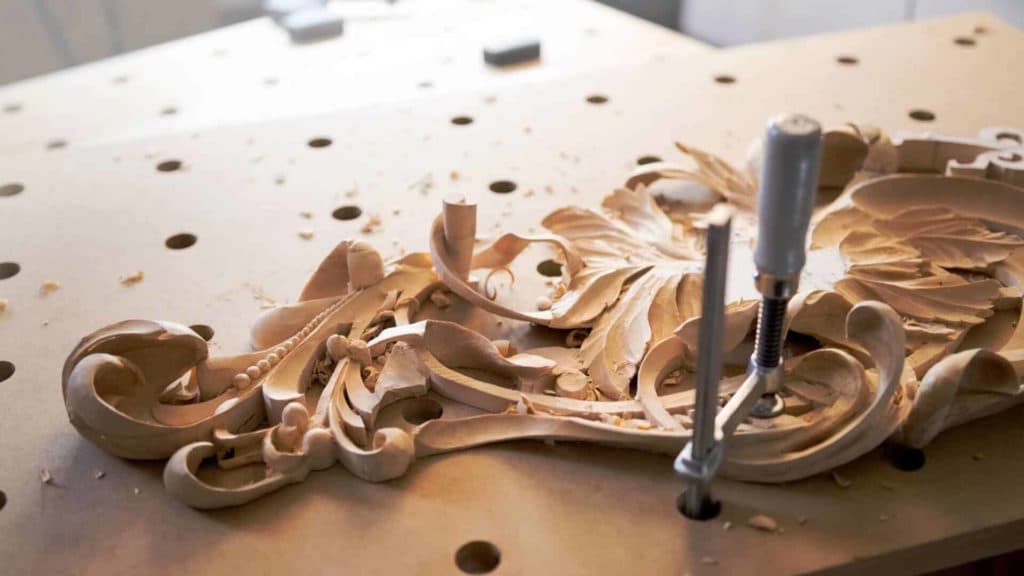
Alexander Grabovetskiy, woodcarver, School of Woodcarving · Published 2018
How do you carve beads and berries in relief?
Quick answer: A bead is cut free with a groove all the way round, then shaped by turning the work and taking one small facet at a time until the ball looks round from any angle. Tool marks stay on the surface. Neighbouring balls sit at slightly unequal heights so the group gains depth.
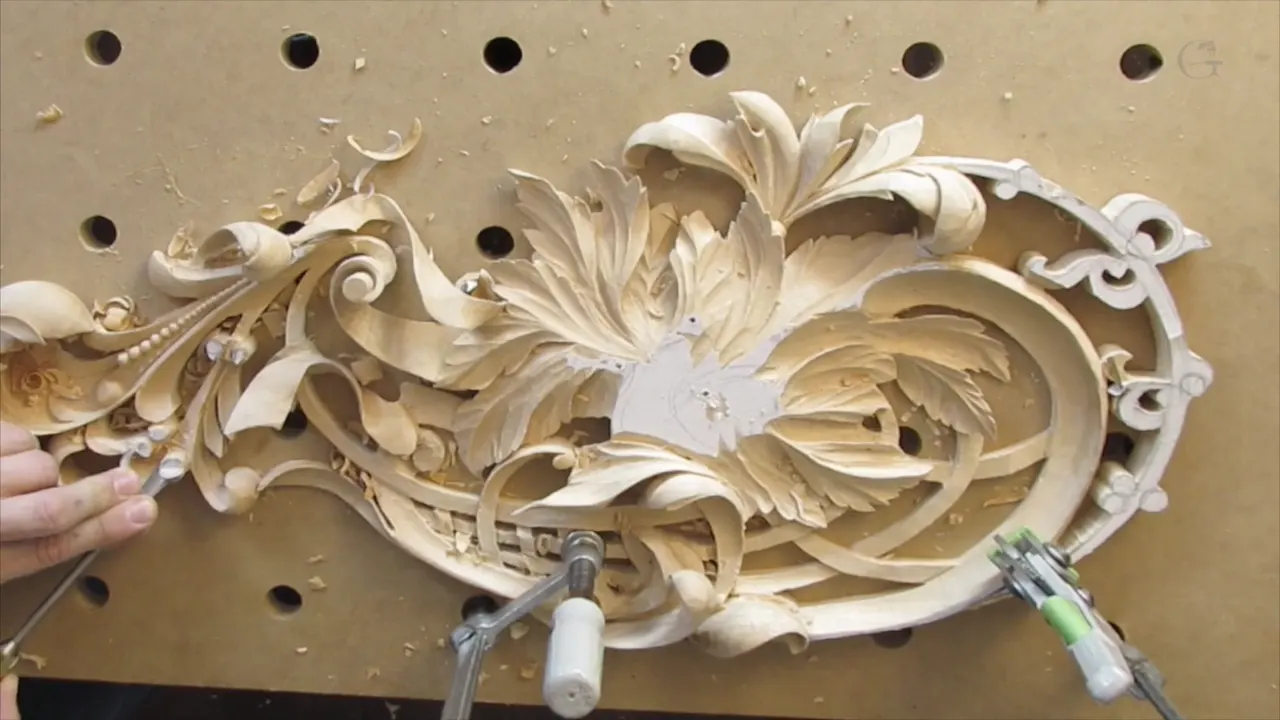
A carved bead is worked round with one small gouge until the ball looks round from any angle, and the tool marks left behind are kept on purpose. Cut each one free with a groove, shape it from every side, and set neighbours at unequal heights so the row gains depth.
Ask me what turns a panel of leaves into something people stand in front of, and it is not the leaves.
It is the small round things tucked between them. What to call the ones on this panel is beyond me, and I say so on camera more than once. Berries seems a legitimate name. Beads is what the same shape is called on a moulding. Either way, they make a world of difference to a design that would otherwise be nothing but foliage.

What a bead needs
- A groove right round it, cut before anything else happens.
- Shaping done from every side.
- A neighbour sitting at a different height.
- Tool marks left alone.
- A wall at ninety degrees where the ball lands on its background, cut with very little pressure.
Why separate before shaping?
You cannot round a shape still joined to everything around it. The V cut draws a boundary the gouge can work up to without running into the next thing, and on this panel I ran a number 16 at six millimetres right round each future berry before touching the form at all.
This is the same reasoning as why the V tool goes first, and on beads it is even more obvious: without the groove, every rounding stroke would be trying to stop exactly at a line it cannot see.

Can you use a mallet on work this delicate?
A small one, barely tapped. I picked up a twelve ounce mallet for the separation cuts and said out loud that I did not want to overdo it, and the taps were light enough that a viewer would struggle to call them blows.
The reason is control rather than force. A mallet at that weight gives a repeatable, tiny increment of depth, which is what a groove round a curve wants, while a hand push varies with how tired your shoulder is. The bigger question of mallet is settled elsewhere; here the answer is simply twelve ounces and gently.

How do you get a shape actually round?
You keep rotating the panel. Approach a bead from two sides only and it ends up a lozenge with two flat cheeks, because those are the angles the tool ever saw. So I turn it, take a small facet, turn again. Four times in a single circuit the grain changes under the edge, and a dull tool announces each of them.
No trick exists beyond that, and I have looked for one. Rotate, cut, rotate again, then check along the surface instead of down at it. Viewed from overhead a lozenge and a ball look identical.

| The stage | The tool I picked up | The thing to watch here |
|---|---|---|
| Outlining | A number 16 V tool at 6 mm | Grain, downhill |
| Roughing | The ten millimetre number 7 | Flats appear the instant you stop rotating the work |
| Dropping the ground | A quarter inch number 8 | End grain |
| Tight gaps | A Dockyard number 8 at 3/32 | Slow going |
| The base wall | Any small gouge, or a number 3 | Pressure |
Nothing on that list is exotic or expensive. The number 7 at ten millimetres does most of it, and I keep coming back to that one tool all session.
Should the ridges be sanded away?
Left, and left deliberately. Perfect smoothness is not the goal, and the small marks a gouge leaves behind are no failure of finishing. When light falls across the panel every one of those ridges casts its own tiny shadow, and the bead glitters slightly, the way a cut stone does, and my own word for it on the recording is diamonds.
Take that off with abrasive and you get a dull grey ball, an argument set out in making a leaf catch the light and stood on its head here. It is the same argument as whether to sand an acanthus leaf and whether to sand a finished carving, and beads are where it shows fastest, because a sphere in relief catches light from more angles than anything else on a panel.

Why not put them all on one level?
A row of identical heights looks like a machine made it. I deliberately set one bead lower than its neighbour, and the difference is small enough that from directly in front you would not name it.
Step to one side and the row suddenly has depth in it. That is the whole purpose, and it is why I say on camera that these details are not kept level with one another. The opposite problem, when two sides genuinely must match, is keeping two sides level, and the two rules only look contradictory until you notice one is about symmetry and the other about rhythm.

How low is low enough?
Far enough that the drop shows in raking light, which here meant taking one flank of the group almost down to the leaf behind it. Any less and the eye reads a single flat cluster.
The benefit is a three dimensional group rather than a decorated surface, and it costs you nothing except the courage to remove material you have just spent time shaping. That courage is most of carving shadow into relief.

Why does the ground between beads drop?
Dropping it lets the beads stand up without undercutting each of them separately. Lower the surface around a cluster and each ball is suddenly proud of its background by real millimetres, and that is the cheap way to get the same effect that hours of excavation would buy.

I say it plainly while doing it: taking this side almost down to the leaf behind means I do not have to excavate too much underneath afterwards. Depth bought in the background is depth you did not have to carve out from below a fragile shape.
How far down is a judgement about the whole panel rather than the cluster. The background here is already stepped from earlier workshops, so the drop has to agree with levels set weeks ago, which is a different discipline from a multi level background and harder to correct once wrong.
The vertical cut at the base
A wall at ninety degrees, so the bead stops rather than fading into its background. Made with a small gouge or a number 3, driven straight in, and that single cut gives the shadow beneath each ball its hard upper edge.
Pressure is the risk. By this stage there is very little support left under this part of the panel, and I say so at the time: a cut driven straight in invites you to push, and pushing is the one thing that cannot happen here. air carving describes the grip that makes it survivable.

Why vertical rather than sloped?
A hard shadow with a clean top line.
Slope it and the ball appears to melt away. A sloped face catches light the whole way down and reads as a gentle dish. The upright face goes black at the bottom, and the boundary between light and dark sits precisely where the tool stopped.

That line is the outline of the bead as a viewer perceives it, which is why I cut straight in rather than leaning the tool. Get it wrong and no amount of good modelling will save the shape. This is what undercutting does working at a very small scale.
The counterweight is strength. Cutting that wall around a bead on openwork takes support from a shape already standing on very little, so here I keep the cuts shallow and let the lowered background do the rest.
When part of the carving comes loose
Occasionally nothing at all is the right answer. A section of this panel separated from the main body while I was demonstrating a clamping position a few days before filming, and I decided against gluing it. It moves on its own, it can be lifted out, and the design does not require the two to be joined.
That will sound alarming and it should not. A break is not always damage. Some of them are the piece telling you where its real boundaries lie. When a break does need repair there is a method, and it is in when a carved part breaks.

Carving beside a loose part is its own discipline, though. Nothing supports the tool from underneath, so every cut shrinks, and the piece wobbles whenever a finger lands anywhere near it.
Which V tool, and why that angle?
Any V tool will carve a bead outline. Mine is a number 16, and its walls sit at about 35 degrees rather than the commoner 45 or 60. That lets the groove go deeper into a tight curve before the shoulders of the tool touch the sides. chisel geometry decides it, never sharpness.
Few makers grind that angle. Pfeil, which many carvers still call Swiss Made, does. The numbering itself is explained in air carving, and the practical point here is only that a narrower V reaches further into a tight curve.

When do you strop rather than sharpen?
The moment the surface tells you. Partway through this session the V tool stopped leaving a clean wall, so I stropped it on leather with green paste, and only from the inside of the V, which is what I say on the recording.
I use the green paste by Koch, a German make, and I have tried enough others to say it is among the best without claiming the rest are useless. What what stropping does to an edge does to an edge is worth understanding before you lean on the leather too hard.

Is a fishtail a different tool?
Catalogues say so and I largely do not. A fishtail narrows behind the edge so its corners reach places a parallel shank cannot. The sweep number means what it always meant.
I pick one up in this workshop, call it a straight gouge, and correct myself only to say that it is not much of a fishtail anyway. At the bench that is about the weight the distinction deserves. what sweep means has the full account.

When the wood feels like it is under tension
Stop, and take a smaller tool. If the wood is resisting hard enough that you can feel the panel flexing, that is not a sign to push, it is a sign that you are asking one cut to do too much.
Clean out the inside with something narrow first, then come back with the tool you wanted. The whole cut gets easier because there is now somewhere for the waste to go, the same principle behind the V cut and turns up in a dozen disguises on every panel.

Do beads belong on every design?
Where the foliage needs interrupting. A panel of nothing but acanthus movement becomes tiring to look at, and a cluster of round shapes gives the eye somewhere to rest before it goes on.
Classical ornament settled that a long time ago, which is why bead and reel mouldings exist at all, and why they turn up on buildings two millennia apart. Look at the carved frames in the V and A furniture collection, or the Grinling Gibbons drops where fruit and flowers interrupt the leafwork, and the same device turns up everywhere, including the Getty rooms.

What to try on your own bench
Carve three beads in a row on a scrap of basswood or lime. Outline all three with a V tool, round them, and set the middle one two millimetres lower than its neighbours.
Then look at the row head on, and afterwards from a low angle across the bench. All 49 workshops of Carving Hashemi Flowers are inside the school, and this is 19.

One thing the recording caught that I could do nothing about. Somebody in the neighbourhood started mowing their lawn a couple of minutes in, and it runs through most of the session.
They always choose the day I am filming. Murphy, or whatever the law is called. I apologise for it on camera and then carry on, because a panel at this stage does not wait for quiet, and neither, apparently, does anyone's grass.

Next workshop the far half begins, which means the whole sequence again, mirrored.

How it's done
- Outline every one. Run a V cut right round each future bead before attempting any shaping at all.
- Tap, never strike. If a mallet helps, use a light one and barely swing it, since the panel carries every blow.
- Drop the background. Lower the ground around the cluster so each ball stands proud without heavy excavation underneath.
- Round from all sides. Rotate the work and take a small facet each time, because two directions give you a lozenge.
- Check from the side. Look along the panel instead of down at it, since that view alone reveals a flat cheek.
- Vary the heights. Set one ball slightly below its neighbour so the group gains depth when seen from an angle.
- Cut the base square. Take a vertical wall where each bead meets the ground, using very little pressure.
- Leave the ridges. Stop before the surface goes smooth, since those small facets are what catch the light.
Frequently asked questions
Should carved beads be perfectly smooth?
Ridges left by the gouge are worth keeping. Each one casts a tiny shadow when light crosses the panel, so the bead glitters slightly instead of reading as a dull grey ball.
Why not set every bead at the same height?
A row of identical heights looks machine made. A small difference is invisible from directly in front and turns the group three dimensional the moment you step to one side.
Can you use a mallet on a fragile panel?
A light one, tapped rather than struck. Twelve ounces and very little swing gives a repeatable depth without sending a shock through the whole carving.
What to carve next