

Alexander Grabovetskiy, woodcarver, School of Woodcarving · Published 2021
When do you switch to a spoon gouge on a carved petal?
Quick answer: The move to a spoon on my Venetian rosette petal is what came once my straight gouge was less help. I named a number 7 and said a 5 or a 6 will work. Later a small one made two concaves in a spot I couldn't do the normal way, one on each side, with the middle left raised.
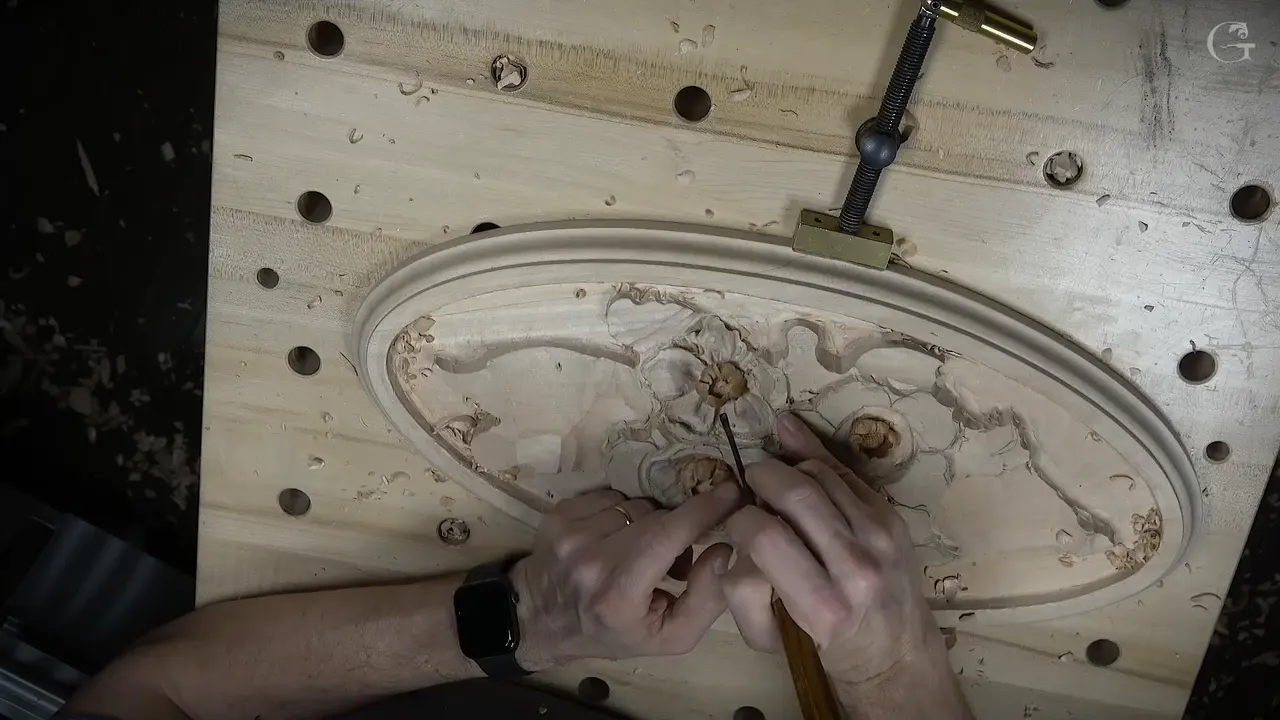
Taking up a spoon gouge in the middle of a petal is, on my Venetian rosette, what I did once the straight tool didn't help me as much. First a number 7 came to mind. I said a 5 or a 6 would work too. On the same petal, a little spoon later made two concaves in a spot where I couldn't do it the normal way.
This is relief carving of a flower. Carving a spoon is another subject. So, on this page, how to use a spoon gouge means how I took one into a petal on my oval rosette, and what I said about it on other work of mine.
This video is the third one in lesson 3 of Venetian Flowers Rosette, and the petal in it ends up raised, though not quite curled like the one before.
Have you started a petal's middle with a plain, straight gouge? Did it stall once the shape curved? Then a bent one may be the next tool in your hand.
I'll go through that petal in the order I carved it, then add what I said about the same switch on other carving of mine, in the Venice Room, on an acanthus and on a floral panel.

One petal, and where the spoon came in
- Flat first, so a number 9 knocked both sides down and left the middle raised.
- Once the shape began, my straight tool was less help.
- A number 7 spoon was the first I named, with two more sweeps beside it.
- A different spoon went inside, to clean.
- One spot wanted the spoon again, coming the opposite way.
- Where the normal way failed me, two concaves went in with a small spoon.

What did the petal need before any spoon went in?
Height in the middle. That petal was flat at the start of this video, and I said so on camera. Right now, just flat, and I don't really like it.
I said its ridge would be raised, and I didn't want the petal really, really flat. To fix it I got a bigger gouge. Any gouge will work, I said, and grabbed a number 9, and with it I knocked this side down, then that side, so in the middle it stayed somewhat raised. With the same gouge, probably, I'd get my raising motion.
I still wanted that raised part right in the middle of the petal, because it creates a somewhat beautiful motion. But it ran a little too high to the end, and that was not too good. So I got rid of it. Pretty much the whole thing went, and I said I'd do it a little different way.

How do you use a spoon gouge once the straight tool stops helping?
By picking a sweep and going in, and on my petal I named three.
Now I can start creating the shape, I said, and the straight tool doesn't help me as much. I'm going to need some kind of spoon gouge. A number 7, I said, or a number 5 will work also. Number 6 will work.
I was kind of debating, out loud, which tool would be the best. I'll probably take a number 11, an 11 of about a quarter inch (6 mm), I said, and I went at it with that. But careful, I added. The tool in my hand right after that, on the video, has a bent blade.

That's the effect I'm after, I said once it showed. Less curled than the previous one, I said, but it still has a raised part.
Right at the start of the video I had already put the two side by side. The side of a number 11 would do, I said, or even a spoon gouge, like a number 7 or so.

Which way does the spoon travel inside a petal?
Toward the center, on mine. To clean up inside that area I took a different spoon and went toward the center, just like that.

A little later it looked like an earlier pass had gone a little too deep. I need to work around that, I said. It's not a big deal. What I'll do, I said, is work just around it, a little deeper and closer to the middle, with the smaller tool. I can go as deep as I wish, as long as I'm happy with the overall bulging area.
One spot was super deep. No bueno, I said. But like I said, it's okay, it should not be a problem, and yes, I already got rid of it. After that I needed a spoon again, to clean all that mess, and I said I need to take that from the other side.

What goes into a spot the normal way can't reach?
A little one, on my petal.
Between the spoon passes, the number 11 had its own jobs. I took it again to dig much deeper where this part goes underneath another petal, then, I said, probably the smaller one, and one more pass so I'd know exactly where the boundary would be. I'm using small number 11, by the way, I said.
Then I said a 7 or a 5 would take off a ridge, and I'd clean underneath a little later. Farther along that same petal, I wanted a concave over that whole section, and another concave right next to it. I really want to make sure my middle part is raised, exactly the same idea I've got on the other petals, I said.
But that's kind of an interesting area, I said, and I can't do that the normal way. So I used just a small spoon gouge.
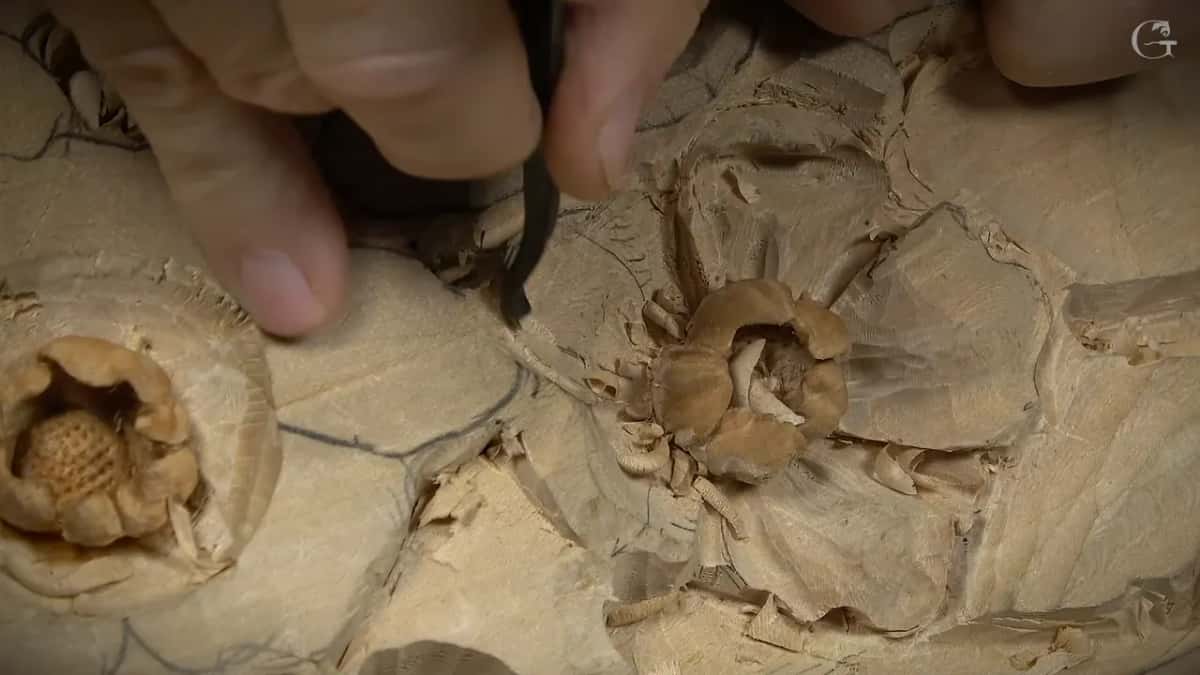
Concave number one, I said when the first was in, and then I needed to work on concave number two.
Later on, I'll get underneath and take care of that wall, I said, but in overall how it looked I was somewhat happy. Like I said, I want that middle part bulging. After that it was just a cleanup and blending, I said, and a back bend made sense to me for the blending.
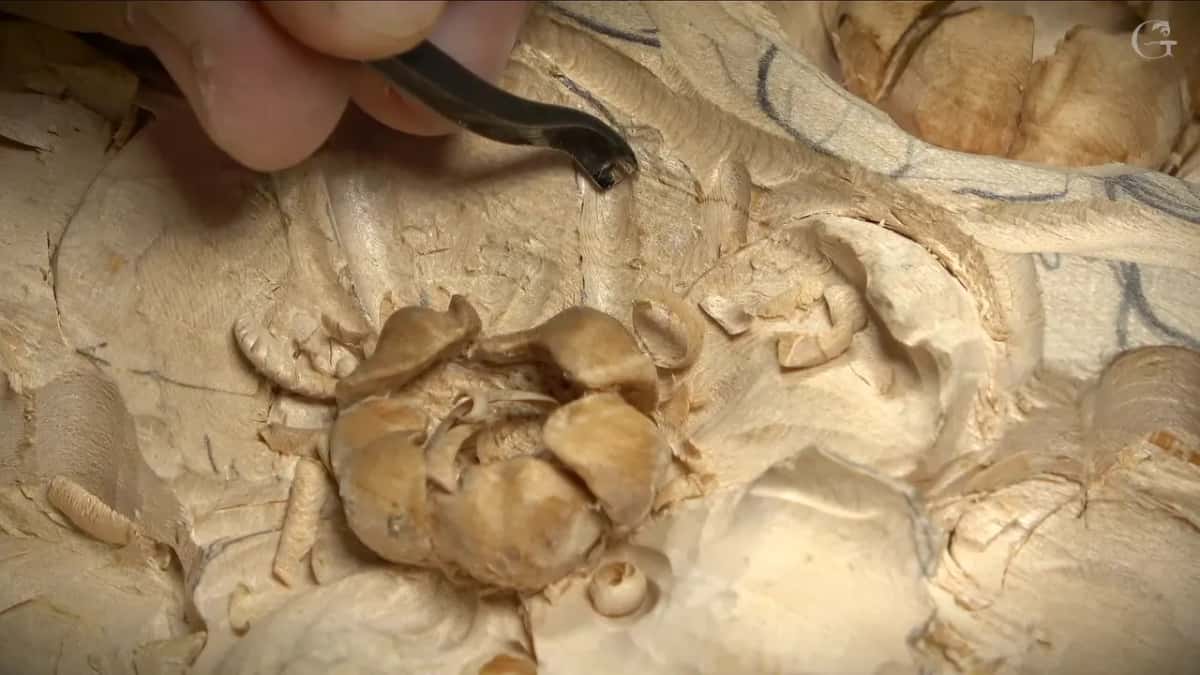
What gets underneath in a spot the normal tools can't clean?
An old, very small tool, in my case. In this section, I said, it's not easy to clean with just the normal tools. With the old antique tools, like I have right here.
It's one small, tiny antique tool, a really tiny one. You can see how small that is, I said, and it's just like it's supposed to be. About a number 9, I'd say.
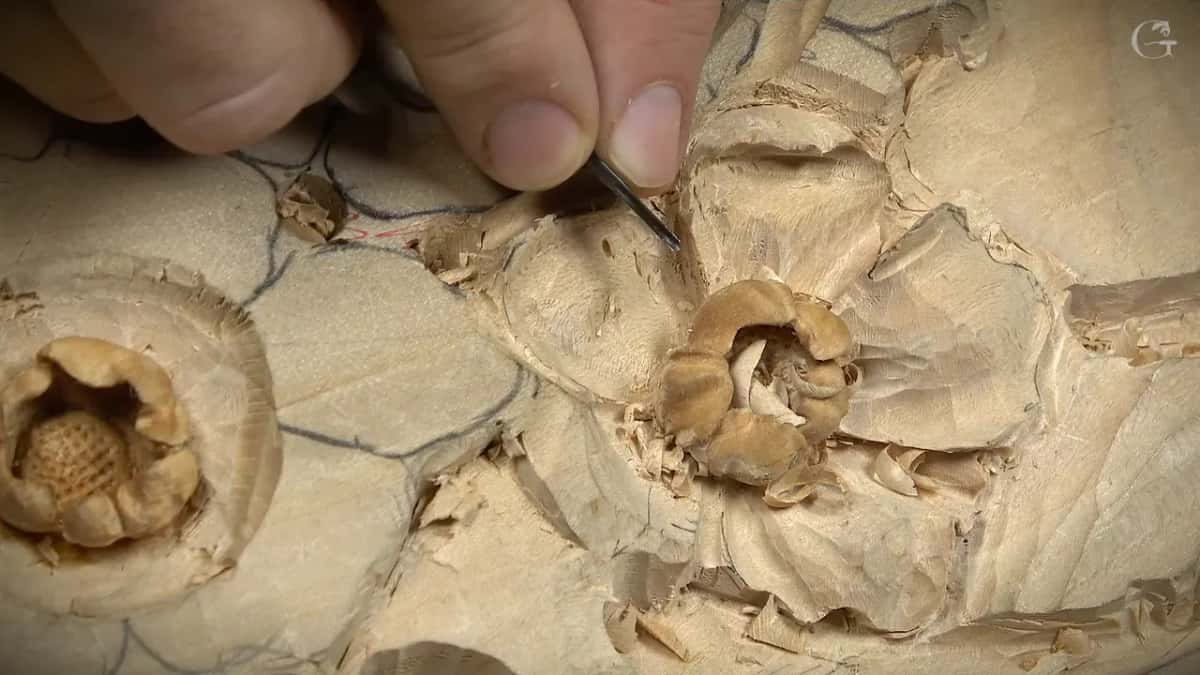
For me, a tool like that is just like a lifesaver. Just get underneath and get really deep. Again, no modern makers make those tools, I said, the modern tool makers, they don't make them. With it I can get in tiny spots, and it's beautiful, I said.
Next, I said, came exactly the same as on the earlier petals, just the concaves on the inside for that extra shadow. This one is done pretty much, I said then, and I wouldn't do too much to its edge, because I still had to work on those flowers.
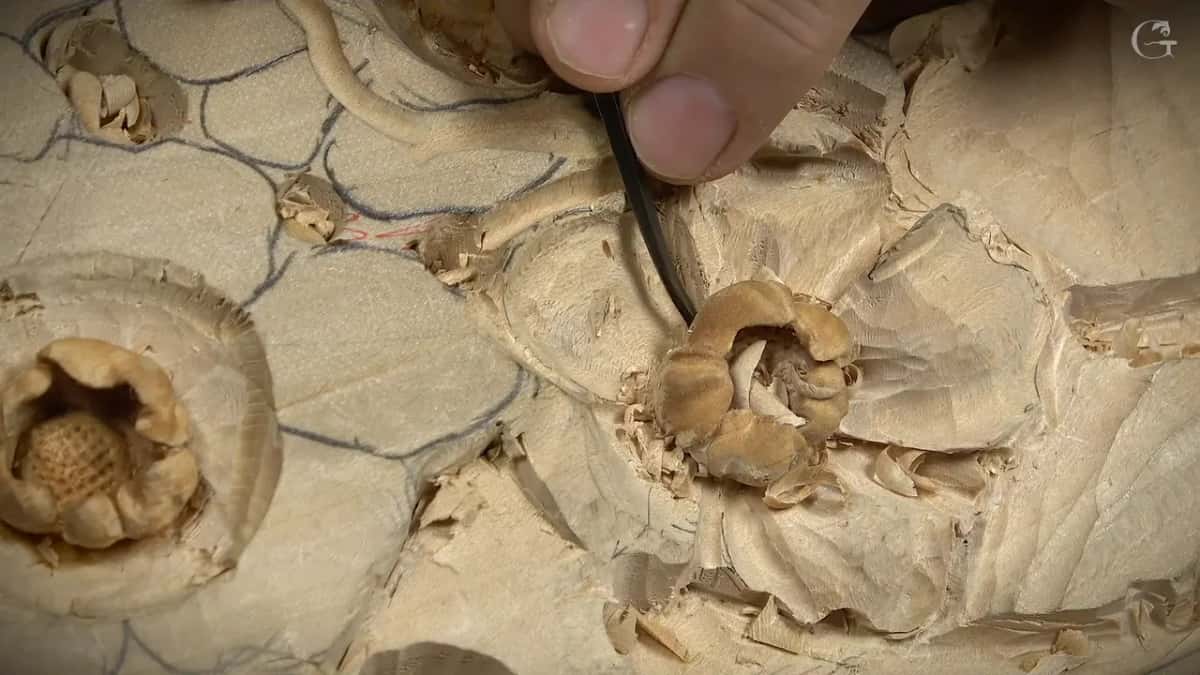
When does a straight tool stop working?
In workshop 74 of the Venice Room I said it in almost those words. I should probably take a spoon gouge, because the straight tool doesn't cut it anymore. It is not working anymore.
Then came the real question, what tool. I don't want to see a U shape on the inside, I said. Maybe just the number 9 of 10 millimeters (3/8 in), and see if I can blend it nicely. Because it really has to be just gradual. Three-dimensional, I said, but gradual.
Soon I said I had what I wanted to see, a really nice movement, and I was really happy with it.

Should you check the straight gouge first?
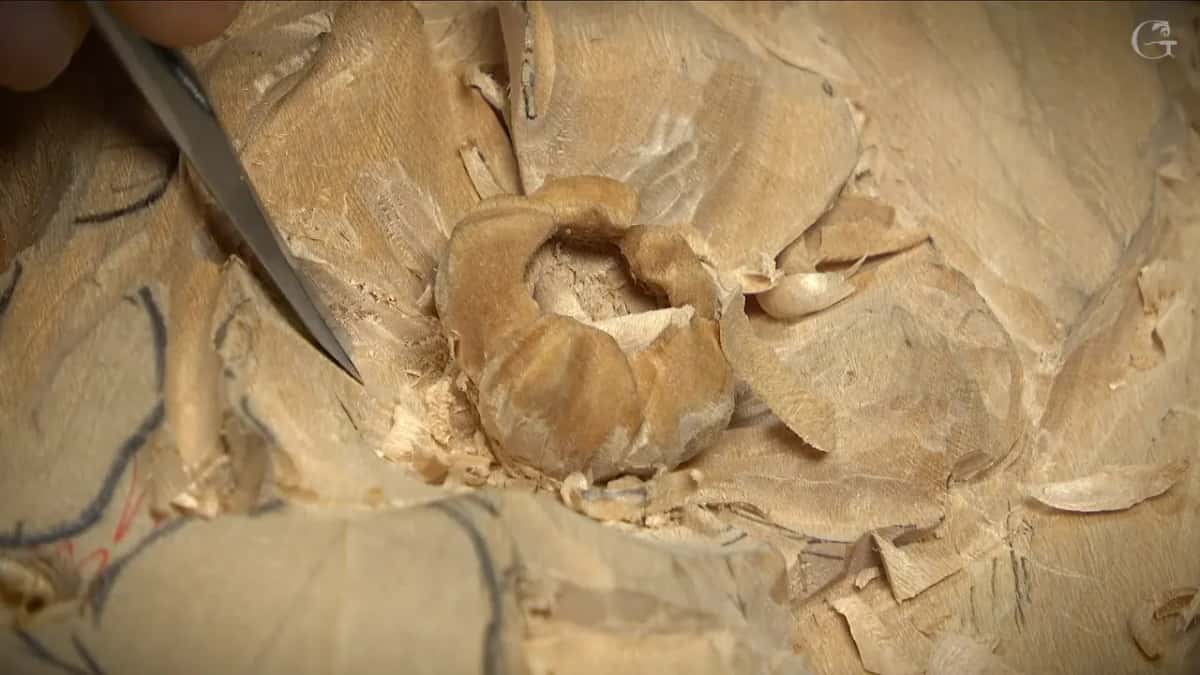
I did, in workshop 70 of the Venice Room. Let me see if the straight tool will be sufficient, I said, or I should switch to a spoon. A few seconds later came the answer, I think I need to switch, I said.
That pass went all the way to a hole about 25 millimeters (1 in) deep, I said. The spoon I took was a veiner in that case, maybe 7 millimeters (9/32 in), and a number 9 gouge would give me about the same result, I said.
Again, I must be really mindful, I said. Cannot forget. I needed a really clean transition from underneath there, because it would be visible. That's why I like those number 11s, I said. It gives me a beautiful transition.
Which sweep should a spoon gouge be?
Any of three, on my rosette petal, since I said the 5 and the 6 would work too, beside the 7.
Lesson 5 of Modern Acanthus had it plainer. If you have trouble with the straight tool, just grab a spoon gouge. Yours would be the 9, I said, and in my case, on that acanthus, it's the number 11.
Don't ask me why I brought the 11 and not the 9, I said. Because I like the number 11, and it's harder to find a number 9. I use them all the time.
And what I was after there was the shadow. I really want to see that shadow, I said, see that development of shadow, and the next pass would go underneath that movement. What the gouge numbers mean is laid out in the tools course.

What if the 11 comes in from the wrong side?
A tiny spoon did. On my Floral and Molding panel, to dig right underneath, I said I'm going to need some kind of spoon. It doesn't have to be a spoon, I said next.
So first I grabbed a number 11 of 3 millimeters (1/8 in) and went right underneath to remove some material. It was not really easy for me to work in the right direction there, I said, so I probably needed a different tool.
I used just a small spoon. Really tiny, a really nice and handy tool, I said. I had opened that package on a livestream that same day, and that tool is absolutely one of the best, I said. Then one of about two millimeters (5/64 in), also a spoon, the exact same idea.
Earlier in that video, with a back bent in my hand, I said you could do the same with straight tools, or with a small, tiny spoon, a number 3 or a number 2. Pretty much the same result, I said, though the back bent just makes life a lot easier.

Where the spoon came in, piece by piece
| Where | What happened there | Tool |
|---|---|---|
| Rosette petal, shaping | the straight tool helped me less there | a 7 |
| Same petal, inside | cleaning inside it, heading for the center | another spoon |
| Same petal, later | kind of interesting area, two concaves there | small spoon |
| Venice Room, 74 | straight tool no longer works, 10 millimeters | a 9 |
| Venice Room, 70 | straight tool not sufficient, maybe 7 millimeters | spoon veiner |
| Modern Acanthus, 5 | if you have trouble, yours a 9 | number 11 |
| Floral and Molding | 3 mm 11 not easy that way | tiny spoon |
The sizes in it are only the ones I said out loud. Where I named no size, there is none, and the Venice Room 9 is the tool I thought of, not one I called a spoon.
Do you need a spoon gouge for a petal at all?
On my own petals I left that open. In the first seconds of this video I said an 11 on its side would do, or a spoon gouge.
On the floral panel I said it doesn't have to be a spoon, and an 11 went in first. Modern Acanthus put an if on it. And earlier in this lesson, on another petal, I said different tools, just try what you have, and in my case right then it was a number 8 spoon gouge.
How I sharpen a bent one is in its own video, sharpening a spoon gouge.

Where would a spoon go on your own petal?
On mine, the small spoon went where the raised middle needed it. That middle part had to stay raised, and the small spoon then made one concave to either side of it.
The rosette goes on in lesson 4, the petals before this one are in lesson 2, and the whole piece starts on the Venetian Flowers Rosette page. All four videos of lesson 3 come with Access to the school. More flowers wait in Carving Flower Rosette.
Is there a petal on your bench with a flat middle? A bent gouge in your roll? Then you know which one comes out when the straight one stops helping.
How it's done
- Knock both sides down. A bigger gouge lowered each side of my flat petal so its middle stayed raised. Mine was a number 9, and I said any gouge will work.
- Take off a raise that runs too high. Mine went a little too high toward the end, so I took nearly all of it off and began a different way.
- Reach for a spoon. Once my straight tool helped less, I named a number 7 spoon gouge and said the 5 and 6 would do.
- Work inside the petal. A different spoon cleaned up the inside of mine, heading for the center.
- Use a small spoon in the awkward spot. Where I could not do it the normal way, a small spoon dug one concave each side, and the middle stayed bulging.
- Get underneath with a tiny tool. In one section the normal tools could not clean, an old, tiny tool of mine, about a number 9, got underneath for really deep work.
Frequently asked questions
Can the side of a straight tool do the job of a spoon?
Both work, by my own words on the rosette petal. An 11 used on its side, or a spoon gouge like a number 7, were the two I named as that video began. For the shape itself, a bit later, I named a spoon instead.
Which spoon sweep goes into a carved petal?
Mine had three on the list, a number 7 first, then number 5 and number 6. For an acanthus in another course I told you a 9 in your case and an 11 in mine. I like the 11, I said, and the 9 is harder to find.
What do you use where the normal way can't reach?
The small spoon did it on my petal. I wanted a concave on each side so the middle stays raised, and I called the spot kind of an interesting area. With that spoon I made the first concave, then the second.
What to carve next