

Alexander Grabovetskiy, woodcarver, School of Woodcarving · Published 2021
What do you do when part of a carved petal sits too high?
Quick answer: A carved petal standing too high at one spot is, on my Venetian rosette, one with too much wood there, which I saw once I looked at it from one side. I took some off and blended it smoother, then raised the edge slightly. Later a concave on that flower went nicely downhill, almost like part of an overall movement.
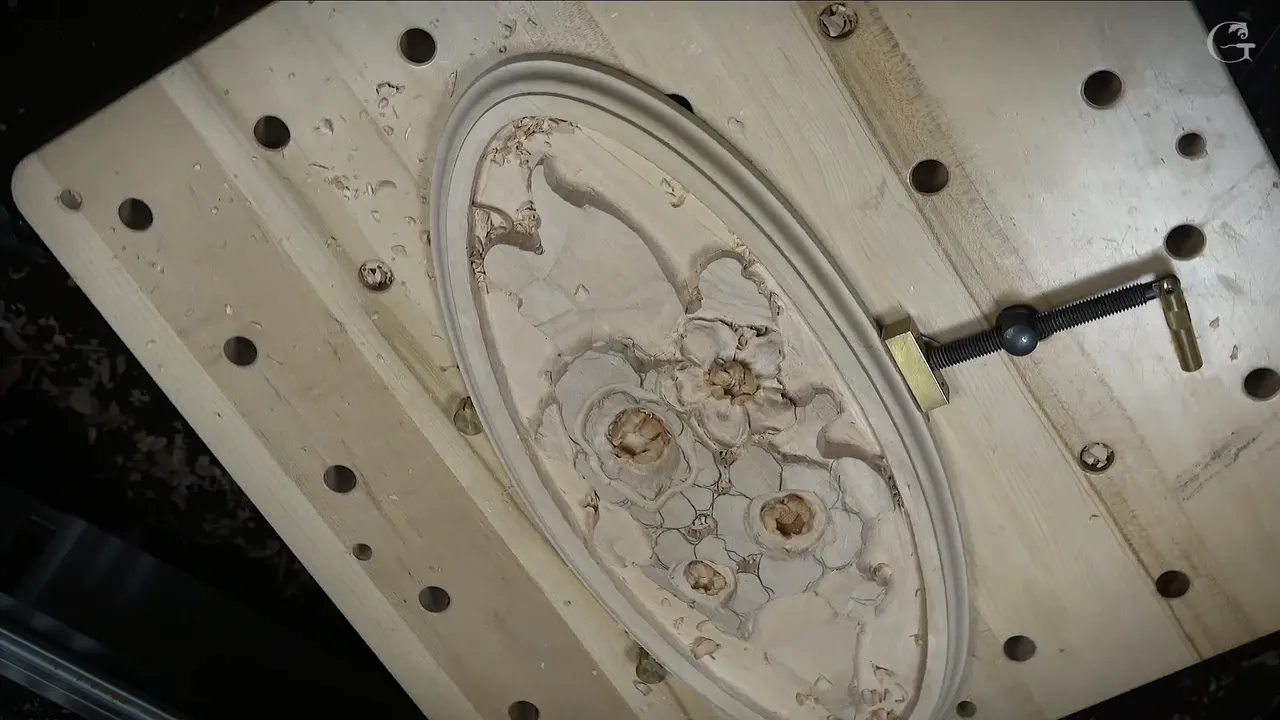
A carved petal that stands too high at one spot is, on my Venetian flowers rosette, a petal with too much wood there, and it showed in a side view. Some of it came off and got blended into a smoother transition. After that I raised the edge a touch.
Below are relief carving tips on that one problem, from this video and from other pieces I carved on camera.
This video is part 4 of lesson 3 of my Venetian rosette course, a panel in the style of Venice. I worked on one flower in it, and I said most of the other flowers on the panel go exactly the same way.
Has a petal of yours looked fine from above and wrong at eye level? Did you bend down to look, and see a lump of wood in one place? Start with the side view, then.

The fix for a high petal in six lines
- Look sideways first.
- Take part of the extra down so it blends nicer with the rest.
- Give the edge a little height back.
- The highest spot belongs in the middle, I said on a chamomile piece.
- Keep wood back for the undercut.
- Where the area is weak, a smaller tool is safer.

How can you tell a petal is too high?
Look from the side. On my rosette I said this part is kind of too high, and if you look from the side, you can obviously see I've got too much area right there.
On the second layer of my lily box, in lesson 6, I made the same check. I lowered one surface down. It looked like I was on the same level. Still, I made sure I was looking from a side view, this way and that way, to see how it transitions downhill. At one point it was still too high.
One was a flower and one was a lid, and the side view caught it on each.
Lesson 15 of Hashemi Flowers had a big number 5 of one inch in my hand, and I could now safely remove a lot of material, I said. Then I added, maybe I've raised it too high.
In the next video of that lesson, a number 5 of a quarter inch, or six millimeters, lowered a part down little by little. I didn't want to force it, although I could, because I had a support there. Approximately half an inch is what I left right there, from the bottom up.
What did I do with the extra wood?
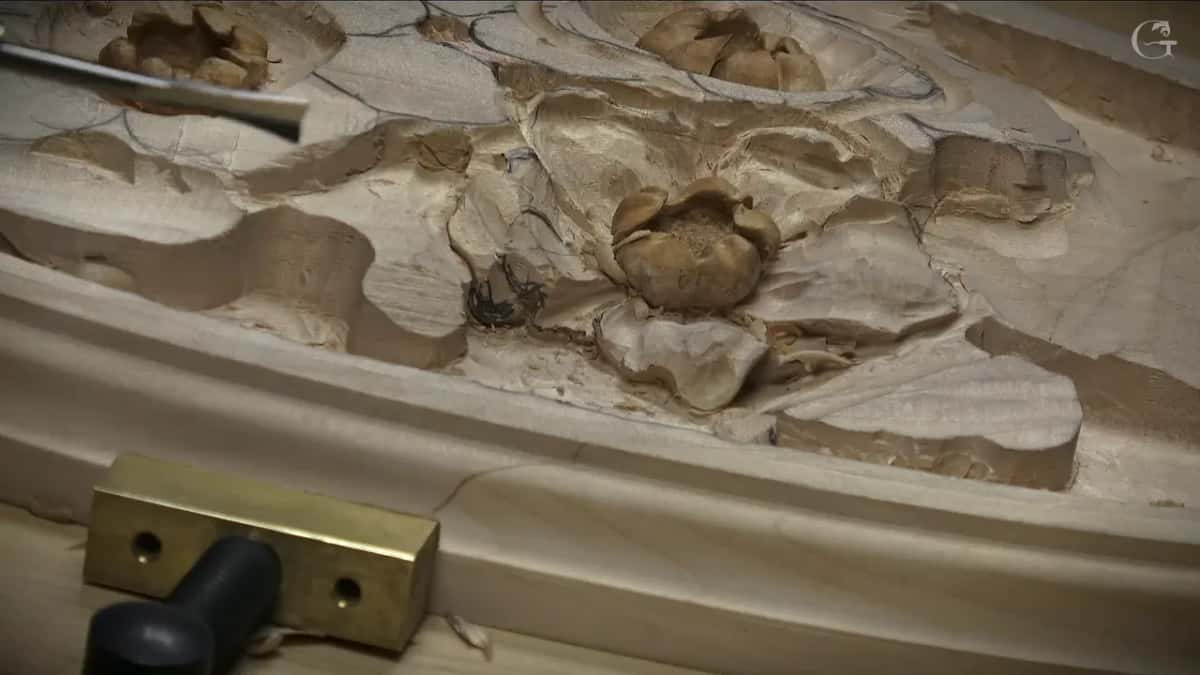
I took some of that stuff out, as I said on camera, and then it was going to blend nicer there too.
A back bend gouge was a good idea for that, I said, to blend it nicer, a smoother transition. On camera I named no depth for that pass. I gave only the reason.
Before any of that, I carved around the whole petal first. That way, I said, we can make the decision what I can do with it.
Not every ridge on that flower had to go. Just before, I looked at a ridge, and I could take advantage of it, I said, a really nice ridge. I blended it a little to see if I could curl it nicer, and it curled backward, all the way down.

What happened to the edge after the lowering?
It went up a little. At the area of the edge, I can make this edge raised up slightly, I said, and I did it right after the part came down.
See how nicely it transitions? Beautiful, I called it.
Next I took a small gouge to make a little deeper movement in that section, just for the shadow's sake. And I said I needed to blend all that. One area went lower, the edge kept some height, and the next section got a bit deeper before the blending.
How does a petal join the flower's movement?
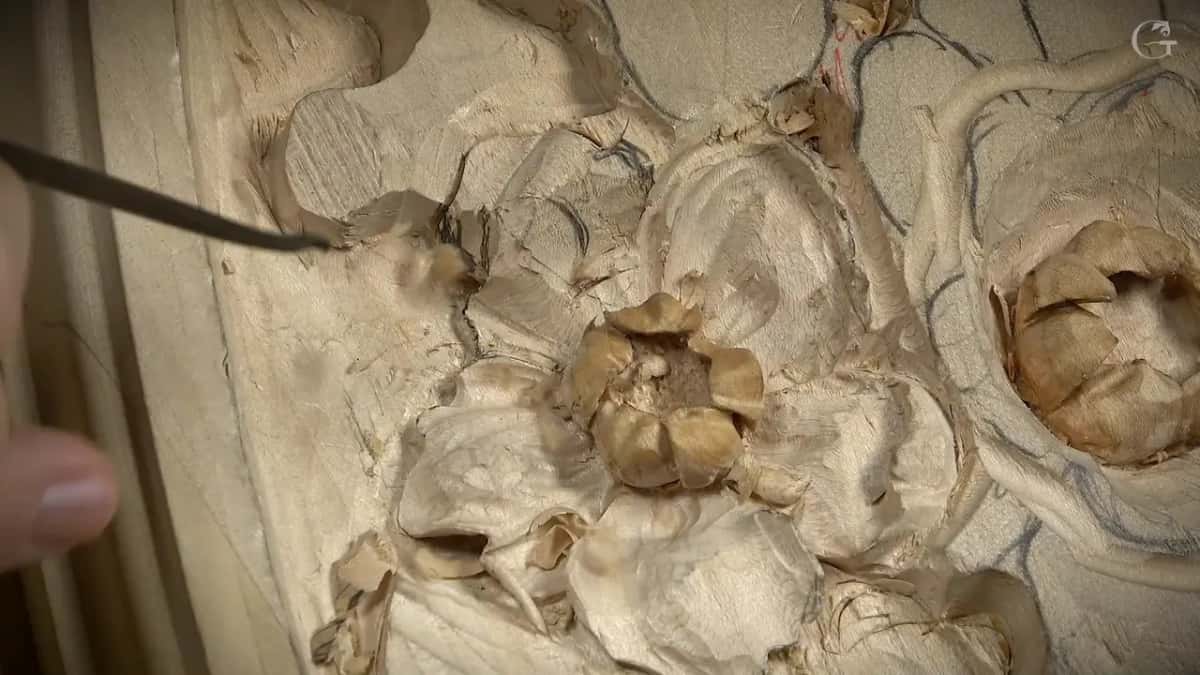
A concave carried mine there, a few minutes later on that flower. I needed a really nice transition right there, I said, so I made a concave in that section, with a small gouge again.
That's good, I said when it was in. It actually goes really nicely downhill, goes around, and looks like it's almost like a part of an overall movement. Then it just needed a slight undercut.

At the start of the video I pointed back to an area on the flower before this one. There I could make a small concave right at the edge and drop it a little closer to the background, I said. Still beautiful, still awesome. It would look really natural, and once it's undercut, really, really nice. So on that earlier flower, one small concave at the edge would take it toward the relief ground.

Is a high spot in the middle a problem?
Dead center is where I want the highest spot.
For my chamomile and bow rosette, in lesson 2 of that course, I was about to carve two leaves. One leaf was to wrap underneath a part beside it. But it was a little too high for my taste, I said. The highest spot should be right in the middle.
During lesson 6 of my floral and molding panel, the same thing came up from the other side. I knew it looked like I had a little too high right in the middle, and I said that is absolutely okay. No problem with that, I added.
A high middle was fine with me on that panel. With the chamomile piece, one spot stood up past my taste, and I set out to knock it down.

How far down do you take a part that is too high?
A quarter inch or so, on that chamomile piece. I wanted to knock it down approximately six millimeters or so, and I said I could safely do that, about a quarter inch.
Another part was going down too. I said I'd come at it from one side, but not to the ground, because I still had to leave some space for undercutting, maybe about an eighth of an inch (about 3 mm) in that case.
One part was then to go a little bit underneath another. A separation line was next, with carving underneath it, I said, for some shadow movement, from a number 11 of maybe two or two and a half millimeters. Later in that same video a flatter tool, maybe about a number 5, dropped it more, since, as I said, it was still too high.

For the floral panel, in lesson 14, there were two small acanthus pieces to carve. I had already measured how high one was supposed to be, I said at the start of that video. One side of a movement was going downhill, so that was going to be kind of a high spot. Well, actually, you know what, I said, I can lower it down a little bit.
A number 7 of 14 millimeters (about 9/16 in) went in, though a smaller one would probably do, I said, and it lowered the whole thing right there. I gave it a slope right away, and it sloped on both sides.
Why both sides? I had to undercut there and on the opposite side as well, and I still needed some connecting point underneath. Undercut it straight through, and there's no way I can glue that on the panel. So I said I would leave no more than maybe a millimeter and a half, about a 16th of an inch.

Does lowering a part spoil the movement?
Mine changed it, and I said it would not look as bad as you think.
For lesson 12 of Hashemi Flowers, working with the grain, I had to be careful, and then I had to lower one part down even more. I don't like that fact, but it is what it is, I said. So I removed it, just like that.
It's just going to be a little different movement, I told you. It's going to go downhill and grow up. Carefully, the waste came out after that.

Which relief carving tips matter when the high part is fragile?
Go carefully, and go smaller.
Back in lesson 24 of Carving Hashemi Flowers, three berries looked too high to me, so I had to lower them down. They just don't look right, I said. Too high.
Carefully, because it's really fragile there, and that area is a kind of weak area. Maybe I should use a smaller tool, I said, since the smaller one is safer. It was a number 5 at a quarter inch (about 6 mm).
Lesson 33 of that course had one spot that had to go downhill a little bit, and right then it didn't look too nice. A number 7 of 10 millimeters (about 3/8 in) lowered it, and at that moment I did not really worry how clean it was. I kept an eye on the thickness, though. No more than maybe 3/16 of an inch was left there, so I had to be kind of careful, and I called it a weak point.

In lesson 10 of the floral panel, a shell part was too high. Right before it I warned about a weak part with wood dug out underneath and grain running one direction. It is actually really, really, really easy to break, I said, so really be careful. Don't overdo it.
Back on the lily box layer, after lowering, I cleaned with half a millimeter again. Make sure you don't go through, I warned. The grain goes in all directions pretty much, and if you undercut and connect the opening on both sides, that area will be really fragile. And that piece will be used daily, I said.

Can you undercut a high spot instead of lowering it?
My lily flower got that. In lesson 11 of the lily box I was barely taking any material out, and it looked really nice to me. But for me, one space was looking too high.
Under that curl I had to undercut a little more, I said, and I thought we would be near the finish once I did. I did not want to overdo it. Maybe I shouldn't, I said, because I felt I was really close to the hole.

What about a ridge that stands too high?
Take it closer gradually. Also in lesson 6 of the lily box, the ridge of my second volute stood too high next to the main lid. I know it's almost impossible to see, I said.
That ridge had to come really, really much closer than it was. But it has to be gradual, I said, like a three-dimensional movement. Probably a number 9, and carefully, a little at a time, because it was catching the grain. It's really crunchy, I said, I need to really slice it.

Which tool took the height down on each piece?
| Tool | What it did there | Piece |
|---|---|---|
| A small gouge | made a concave that went nicely downhill | Venetian rosette |
| Flatter number 5 | dropped it, since it still stood high | Chamomile rosette |
| Seven, 14 mm | lowered the whole spot, sloping both sides | Floral panel |
| Quarter inch 5 | lowered three berries in a weak area | Hashemi flowers |
| Number 9, probably | took that ridge closer, little by little | Lily lid |
| Half millimeter tool | cleaned after I lowered one surface there | Lily layer |
Each row is a carving of mine, with the sizes I said out loud. Two of them carry millimeters, one a quarter inch, and the others no size at all.
Do you only take wood away from a high petal?
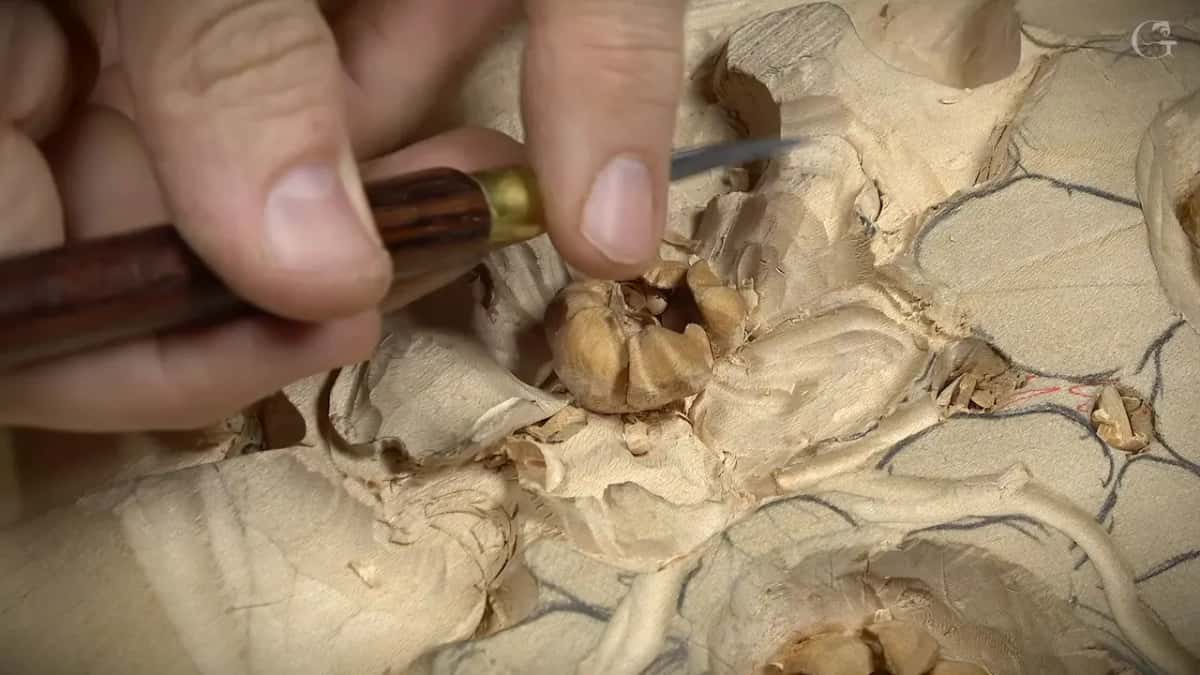
Later in this video I raised a side. I blended everything, went back to a smaller one, and raised that side slightly, just like that. That's going to give me extra movement, almost, I said.
On a Hashemi flower the wood came off the neighbor. For lesson 17 of Hashemi Flowers, I took down a little bit of one side, with a quarter inch number 5 for now. So that detail is going to pop higher, I said, and that makes it look nicer.
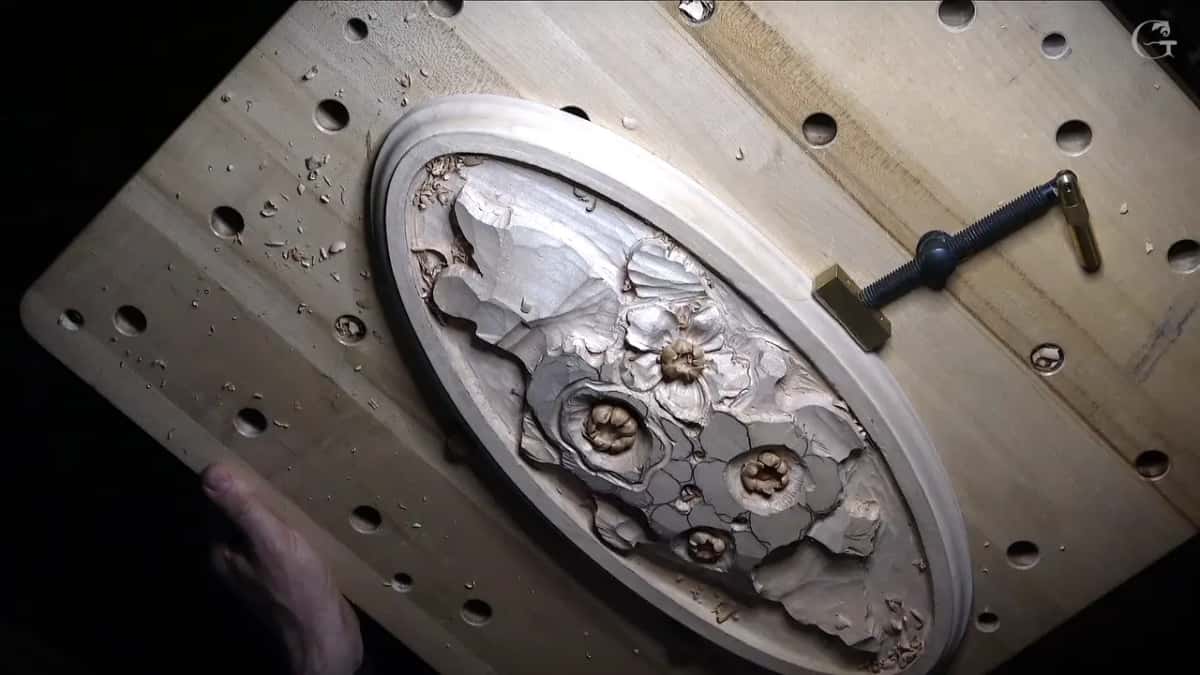
One edge on the rosette I did not fuss over. The future flowers are on my way there, I said, so I'm not going to worry too much about the edge of this one.
Earlier carving on this panel is in lesson 2, and lesson 4 carries it on. The whole piece is on the Venetian Flowers Rosette course page, and lesson 3 with all four of its videos opens with Access to the school.
Where do you start on your own petal?
With the side view. Find the spot with the extra, and bring it down so it blends. Then let the edge keep a little height.
Is there a petal on your bench right now that you have only seen from above? And a gouge in your roll smaller than the one that roughed it? Then look at it level with the wood before the next pass.
How it's done
- Check it sideways. Look across the petal from two directions. That view showed extra wood in one part of my rosette petal.
- Bring the extra down. Remove part of the extra wood so the spot blends nicer with what is around it.
- Hold back for the undercut. Stop before the ground. A glued acanthus of mine kept about 1.5 mm at most.
- Smooth the change. Blend the lowered area into a smoother transition.
- Lift the edge a touch. Let the edge stand a little higher, then look at how it transitions.
- Go smaller on weak spots. A fragile area wants a narrower tool. Mine on three Hashemi berries was a quarter inch number 5.
Frequently asked questions
How do I know a petal is too high?
Check a side view. On my Venetian panel that view showed too much area on one part of a petal, and I said you can obviously see it there. With a lily box layer I checked a side view both ways, to see how the surface ran downhill.
Should the highest spot be in the middle?
For my chamomile and bow rosette I said so, right before knocking one spot down about six millimeters, about a quarter inch. A floral panel of mine had a part whose middle sat a touch too high, and I called that absolutely okay.
How much wood should stay for undercutting?
Enough to undercut later. On the chamomile piece I said I'd keep maybe about an eighth of an inch, roughly 3 mm. For a small acanthus going onto a panel I said a millimeter and a half at the most, a 16th of an inch, so a connecting point stayed underneath for the glue.
What to carve next