

Alexander Grabovetskiy, woodcarver, School of Woodcarving · Published 2022
How big is a carving gouge that looks huge on video?
Quick answer: A gouge's size on video is smaller than it looks, and the veiner in this lesson was only 5 millimeters (about 3/16 in). On your screen it looked super huge to you, I said, while I see it smaller at my bench. I said the same in many other lessons.
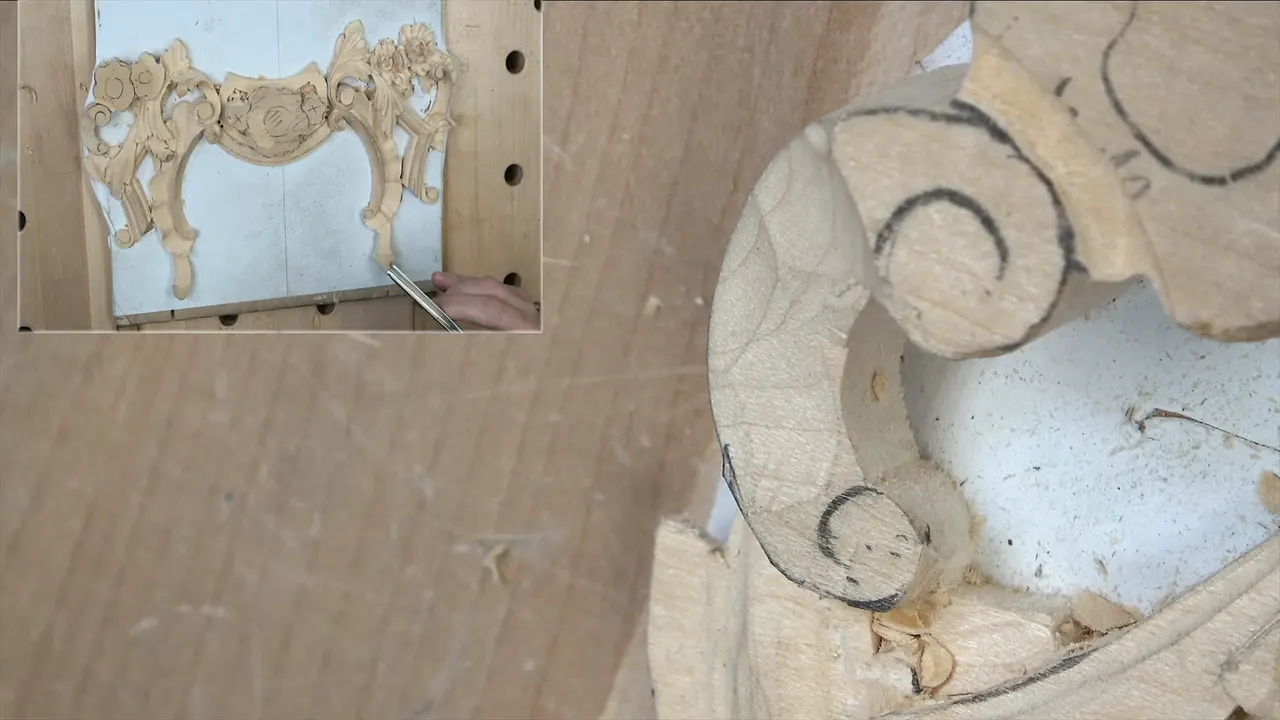
A gouge that looks huge on video is a small tool in my hand, and the veiner in this lesson was 5 millimeters (about 3/16 in). I told you it looks super huge, and that you see it bigger than I do.

Have you ever watched me work and wondered why I go so slowly with a tool that seems so wide? Could it really be that small? The question comes up often, and I answer it on camera in lesson after lesson. Here I line up the sizes I gave, in this lesson and in other courses, so you can hold them against the tools on your own bench.
What do these six parts have in common?
- My veiner.
- The wall left beside it, kept thin on purpose for a shadow.
- One volute.
- A round part from the Furniture Panel lessons, with a diameter I gave you.
- One thorn.
- The center of a flower on the Venetian rosette, with grooves running right to it.
Each one looked bigger on the screen than it was in my hand, and each time I said so out loud.
What was the 5 mm veiner doing in this lesson?
Cleaning. That is the short answer. My own word for the part is barrel, and "I don't know how else you can call that thing," I said. A convex and two concaves went around the curve, so the shape would not be so boring.
Opening the shape was a tiny number 9 spoon gouge. Two concaves came first, in both directions, and I told you I really had to be careful. Small bites, especially at the end grain. Really small bites.

Next I decided I didn't need that part too big, so I could remove some of it, down to about 1/4 inch, about 6 millimeters, and the concave would blend. For that I took a number 11 of 5 millimeters. It doesn't have to be 5 millimeters, I said, but I'll just do 5.
The plan was a number 5 of a quarter inch (about 6 mm), upside down, straight into the middle of the convex and all the way inside. The opposite side got exactly the same idea. I left the inside alone for the moment, since I knew a chance to clean everything was coming.

Whatever remained got cleaned with that 5 mm number 11 again. "So I hope you see how it develops the shape," I said. Then I stopped and talked about the size of the veiner, and these are my words.
"I know it's huge. It looks really, really huge on your screen, but I'm using only 5 millimeters veiner, and it looks super huge. That's why you don't see what I see. You see a lot bigger than me, which is okay."
Leaving it like that was not in my plan, so cleaning came next, then getting closer to the wood again, with an undercut still waiting right underneath the whole barrel.

How much wood stood beside the tool?
Very little. The lesson opens with a petal that has to go lower than the volute. Around the line went a number 11 of 7 millimeters (about 9/32 in), first of all. The center of the flower would stay at about the same height as the volute, while the petals would be lower.

Next, a number 7 of 14 millimeters, about half an inch, set the overall shape with a straight-down cut. Then came a pencil, to compare the piece with my previous one. That petal goes almost all the way down. I left approximately a couple of millimeters (about 0.08 in), and then it goes up.
On my earlier piece the next section measured about 5 to 6 millimeters (0.20 to 0.24 in), and it gets a lot smaller near the volute. It would lie flat and then curl. For this stretch a number 6 of seven millimeters or so (0.28 in) would do, I thought, though a number 9 could work too.

One side kept a thin wall, a couple of millimeters wide (about 0.08 in), because I still wanted to undercut it and make a shadow. Later a pass chipped the wood. That was a mistake, I said, though not a serious one.
My ninth lesson says the same about a small volute. "On the screen, it looks huge, but in real life, I am working with a really small detail." Between one point and the other it was only six millimeters, a quarter of an inch. "So really, it's not as big as it looks on the screen." I had another volute in that section, slightly bigger, at maybe 7 mm or so (0.28 in).
Why was I so careful with a pass that looks big?
The wood was thin. Other lessons say so too, and lesson 20 of my Furniture Panel course has me speaking to the people who wonder. Some of you, I said, look at a small screen, even a phone, and the part seems far larger than real life.
You would ask why I am so careful right there. My pick was a number 1 double bevel, because the spot was really shallow. We were talking about tiny spots, I said, with little material in that one. Even a TV or a computer shows it huge, I said, and I really don't have too much in real life.

Straight down on the line in lesson 36 went a number 3 of about half an inch. "Don't try to just remove all the material at once," I said. That part was only a 16th of an inch (about 1.6 mm). Some of you said there was no way. "Yes, it is really only millimeter and a half."
The first video of that same lesson has the same line, and a number 9 of 6 millimeters, about a quarter inch, went straight down at 90 degrees to the surface. Taking too much material was the danger, I said, since the part is a 16th of an inch (1.6 mm) "even if on the camera it looks big, but it is not." Weak was my word for it. Remove it little by little, and you will be happier.

How small is a 1 millimeter tool on your screen?
Tiny. Undercuts in lesson 19 used a 1 millimeter (0.04 in) tool, and I said you cannot be deeper than the background, so watch the depth. Through my camera that tool looks huge, and it's only 1 millimeter, then a number 5 of 6 millimeters (1/4 in) came out next.
A later video of that lesson put it another way. You see that huge on your screen, I said, but this part is only one-eighth of an inch, three millimeters. That was its diameter. The work was micro, I said, and that is why I was extra careful.
Over in lesson 20, a number 11 veiner of one millimeter went around an eye, and I called the pass almost micro. The screen makes it seem huge, but it is not, I said.

Under a line in lesson 22, an undercut began with just one side of the tool. That tool was 1 millimeter, I said, and the screen shows it far larger than it is in real life. My lamp magnifier came closer, since I really didn't want to mess up.
A number 1 cleaned a detail in lesson 21, and I reminded you it was micro. "You look at that detail on the screen and it looks huge, but in reality, you see much better than I see." My magnifier lamp was in front of me then, and it sometimes blocks my sound.

The flower in lesson 24 sat in really low relief. What you see on the camera, I said, is much bigger than in real life. Between the highest spot and the low spot it was about 1 millimeter, like 1/32 of an inch maybe. Really not much, and I tried to be as careful as I could, since I wanted no damage to it.

What do the Lily Box and the rosette show?
The same gap, in my own words each time. Over on the Lily Box, a straight-down pass made a thorn, and we were talking about extremely small details. Big on camera, I said. An eighth of an inch (3 mm) went right against the tip of my future thorn, and the thorn was barely bigger than that. Once I refined the stem and the thorn, I said, it might be about three eighths of an inch (about 9.5 mm).
Lesson 5 brought back a 1 millimeter tool. Through a camera it looks like I am using super huge tools, I said, and it's not. Up close, you see more clearly what is going on than I can.
Blending was the job in lesson 7. We were working on really tiny, small details, and watching it, I said, it looks really huge. It's actually really tiny and small. The concave that came next was a really tiny, small one.

Two millimeters (about 5/64 in) was my working size in lesson 11, and I was catching the grain, so I had to think about how to attack the spot. On a screen it looks huge, I said, and it isn't. Later in that lesson a really fragile part got rounded. Compared with my finger, I said, the whole bunch barely covers the tip of it, and it still makes a huge difference.
Over in the Venetian Flowers Rosette, the same size gap shows. Inside that flower ran concave grooves to the center, and the center was a dome, "just like a button." Those grooves were tiny. "On the screen, you look at it, and that's huge, but it's not that big." My gouge was not even a sixteenth of an inch, I said, pretty much just 1 millimeter. Maybe a millimeter .2 (about 0.05 in), something like that.

Does the size gap show up in the Gibbons class too?
It does. Lesson 15 of my Grinling Gibbons class in Maine has me saying that you see it much better than me. The part was only about 1/2 inch, like 12 millimeters, maybe 13. I said it could look huge on the screen, by the way.
One side came down to 10 mm (about 3/8 in) in lesson 13, for really good depth. A small tool then began an excavation a little deeper. Only 2 millimeters, I said, though the screen shows a giant. Forcing it would be a mistake, I said. The tool lay on my middle finger, and a finger of my other hand guided it, little by little, without pushing too hard.

A stick went under the part in lesson 14, to support the tiny separations, because I did not want to break it. The screen shows it huge, yet the tiny ones were less than 1 millimeter (0.04 in), I said.

Where did the screen fool you in each lesson?
Here is the list in one place. The first column names the lesson, and the rest give what I said and what I used.
| Lesson | What I said about the screen | Spot | What I used |
|---|---|---|---|
| Floral lesson 9 | The volute seemed big on screen too | Small volute | Tiny spoon gouge, really small one |
| Lesson 12 here | A veiner much bigger to your eyes | Volute barrel | Number eleven, used on the barrel |
| Furniture lesson 19 | Small part blown up on your screen | Its diameter | Micro work handled with extra care |
| Lesson 20 flowers | One eye, nearly micro, oversized on screen | An eye | Number eleven veiner for the eye |
| Panel lesson 21 | Micro detail made large by the screen | Small detail | Number one used for the cleaning |
| Lesson 22 undercut | Tiny tool, shown larger than real life | Initial channel | Just one side of the tool |
| Furniture 36 video | Weak part that the camera made larger | Drawn line | Number nine held straight down here |
| Lily Box 3 | A thorn that seemed large on camera | Future thorn | A straight-down pass for the thorn |
| Box lesson 5 | On camera my tool seemed far bigger | Second layer | The tiny tool used once again |
| Rosette lesson 2 | Grooves that seemed huge but were tiny | Flower inside | Small gouge used for the grooves |
| Gibbons lesson 13 | A deeper excavation that seemed large here | Deeper excavation | Small tool starting a deeper excavation |
| Maine class 14 | Tiny separations seen far bigger than reality | Little ones | Same tool with a support stick |
Anything left on the bench after this part?
An undercut right underneath the barrel was still ahead, and so was the clean up, I said. Later on I still had to undercut there, I said. Spending too much time cleaning on camera was not my wish, so that section got cleaned off-camera. Then I said the side was almost done.

Only a couple of flowers remained, and then clean up, clean up, and clean up. Those flowers were exactly the same as the ones on the opposite side, with some variation, and if you missed how I did them, you really have to go back and watch. Two of them I wanted to show you, because they are a little different.
Where does this part sit in the course?
This video is part three of lesson 12 in Carving Floral and Molding for the Panel. The whole lesson sits on the lesson 12 page, and lesson 9 holds the 6 mm volute. More of the same flowers wait in lesson 13.
The panel is relief work, one kind of wood carving, and a gouge is a curved chisel. Volute is the word for that scroll. My sizes come in millimeters and inches, so you get both. A magnifying glass or a lamp magnifier shows small work much as a camera does, and close-up photography shows it bigger still. Apparent size depends on visual perception and depth perception, and a pixel has no idea what a millimeter is.
Which of your tools looks bigger on your bench camera than it does in your hand?
How it's done
- Estimate across the spot. Look between the two points and guess the distance. In lesson 9 mine came to 6 mm (1/4 in).
- Compare it with something you know. A fingertip next to a fragile part showed its size, as it did for me on the Lily Box.
- Pick the small tool. A 5 mm number 11, close to 3/16 of an inch, did the barrel. For undercuts in the Furniture Panel course I used 1 mm (about 1/32 in).
- Take small bites. Small bites, I said, especially at the end grain. On thin parts go slowly, without pushing too hard.
- Watch the depth. On a 1 mm undercut on my furniture panel I said it cannot go deeper than the background, so keep an eye on what you are doing.
- Bring the lamp magnifier closer. I did that in lesson 22 because I really did not want to mess up.
Frequently asked questions
How big was the veiner that looked huge in lesson 12?
Five millimeters, a little under 3/16 inch. Viewers saw it as super huge, so you see more than I do at the bench. That number 11 helped with the barrel of a volute, and it came back a second time to clean whatever I had left.
Does the camera make a carving tool look bigger?
On my videos it does, and I said so in many lessons. Through the lens, a 1 mm tool looked like a big tool in lesson 19, and in lesson 5 of the Lily Box I said it looks like super huge tools. Lesson 11 of that box used a fingertip to show the real size.
Why do I carve so slowly when a part looks big on screen?
Thin wood leaves no room. Lesson 36 gave me a part of 1/16 of an inch, about a millimeter and a half, and I said not to remove all the material at once. Small, slow removals were safer, I said, and the carver ends up happier.
What to carve next