

Alexander Grabovetskiy, woodcarver, School of Woodcarving · Published 2022
Should you use a back bent or a spoon gouge to blend a molding?
Quick answer: Choosing a gouge for a molding took me two steps. Picking a back bent for the form came first, then a tiny spoon blended it, and the same spoon made the fillet on the other side.
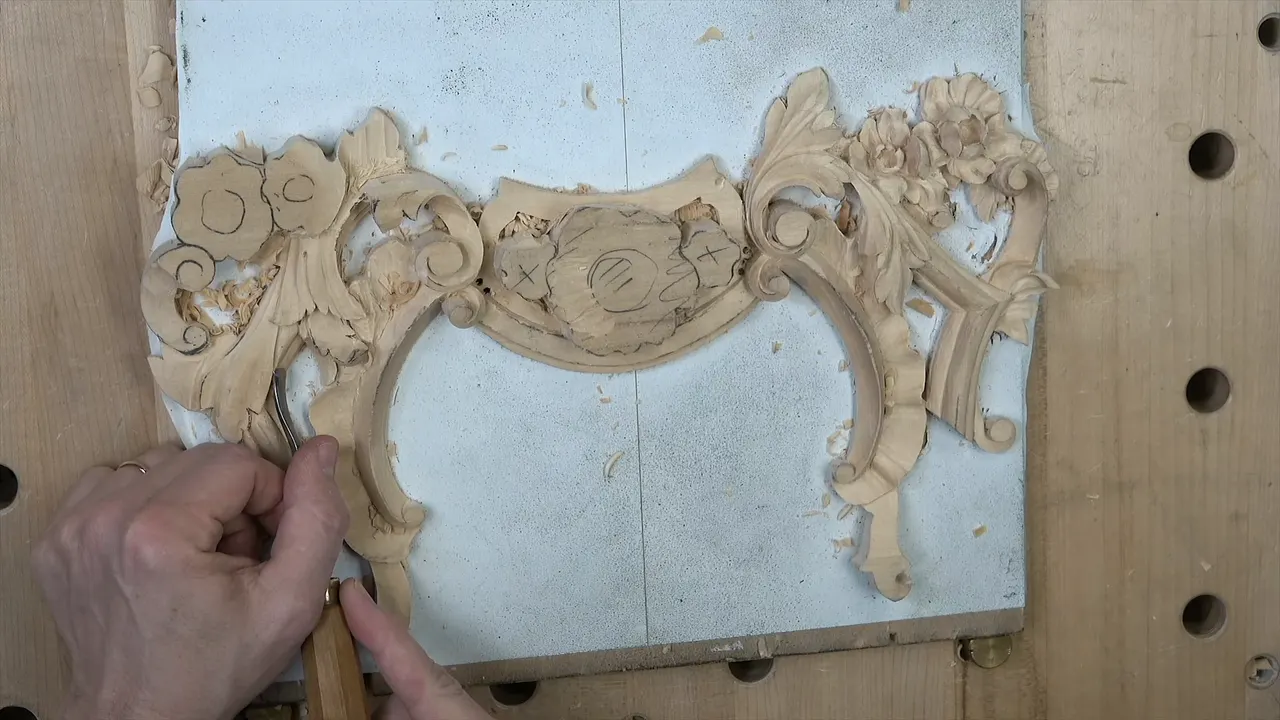
A back bent gouge reaches where a straight tool can't, and a small spoon blends what the first tool shaped. On the molding in lesson 12 of my floral and molding course I used both. I named a sweep number 3 back bent for the form. A tiny spoon, not a back bend, did the blending afterward.
Have you ever held a gouge over a molding and felt the handle bump something? Do you own a spoon gouge and no back bent? Or the other way around? I'll show you what I picked up on camera, in order, and where my other lessons say the same thing.
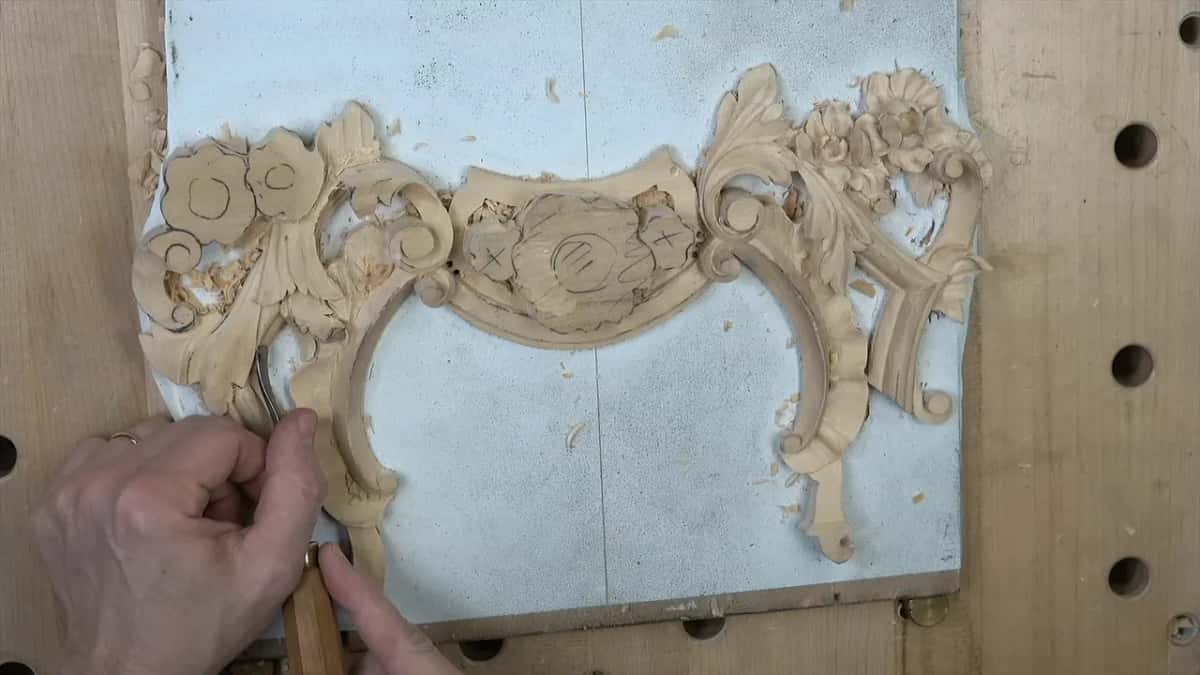
My answer in six short lines
- My first gouge was a back bent. It gave the molding its form in lesson 12, well before the spoon came out.
- I blended with a really tiny spoon, and I said it wasn't a back bend.
- An almost flat number 3 spoon, 1/8 inch (3.2 mm) wide, was in my hand on that molding, and I called it tiny.
- One line was out of reach, so I used a 4 mm spoon (0.16 in).
- In my Venice Room lessons I reached for a back bent when a part was in my way.
- A flatter spoon can blend too, I told you in the rosette course.
What is the difference between a back bent and a spoon gouge?
The bevel sits on opposite sides. In my sharpening lesson on the back bent gouge I laid the two side by side on the bench. Carvers call a short front bent a spoon gouge, I said, and there are medium and long ones too. A long bent starts almost at the handle and bends a long way. A short one bends close to the edge.
On a front bent, the bevel is on the back side of the tool. On a back bent it sits opposite, so the tool bends backward. Back bents come in two types, short and medium.
Workshop 52 of the Venice Room said it in plain words. Its main bevel is on the opposite side, because a back bend is bent backward. You can carve both ways with it, and clean, and create the fillet. Mine was 6 millimeters wide (1/4 in), with a sweep of 3, equal to a straight tool's sweep.
In Hashemi flowers lesson 5 the back bent in my hand was 10 millimeters (3/8 in). It is pretty much like a spoon gouge, I said, but the bevel sits at the upper part of it.
Which gouge set the shape of the molding?
The back bent did that first. The video opens with me saying, "Let's attack that molding right here," and that the final shape is "exactly the same shape as this side." My plan was a back bend for that, and I'd go carefully, just to establish my movement.
The acanthus there grows from underneath and wraps around that molding. The leaf was almost done. All I had to do was feel it and make a small undercut at the point of the leaf. With the back bend, sweep number 3, I planned to build the form up in small steps.

How deep could I go under the leaf point?
Only a little. A really deep undercut was out, I said, first of all because the grain direction goes that way. It would not be as easy as it looks. So I took a number 11 of 1 millimeter (0.04 in) and said that should be sufficient. Let's try.
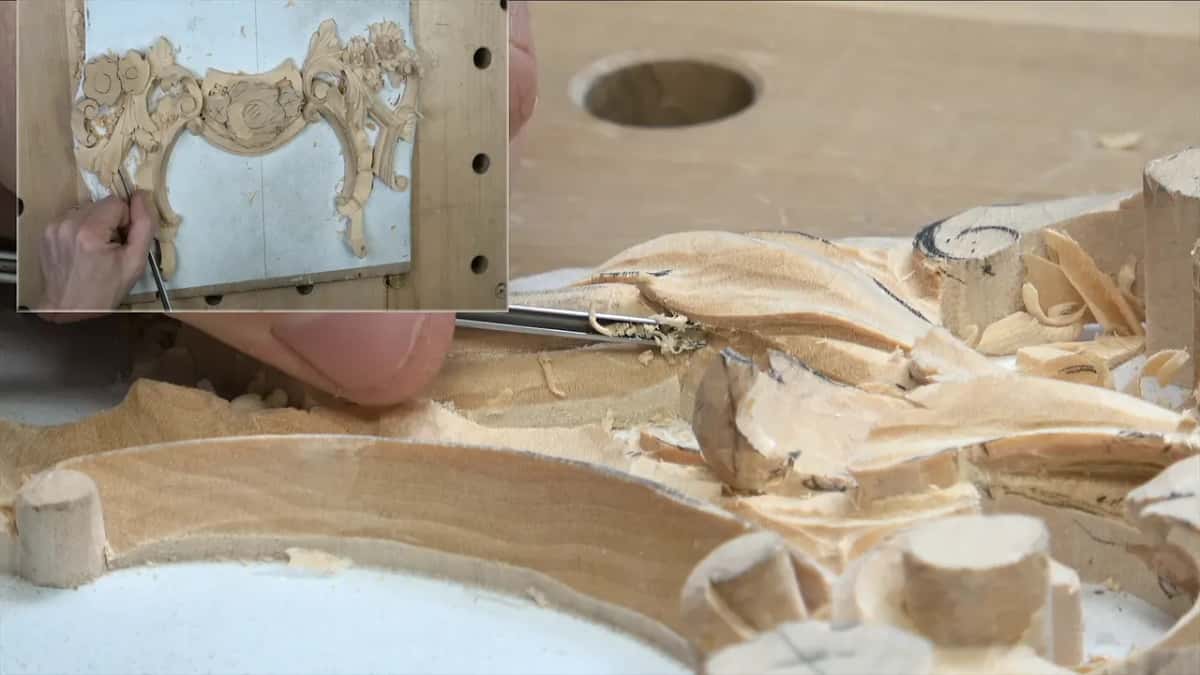
A second 1 millimeter tool, a little different, came next. That section was somewhat hard to reach, I said, and I'd probably need half a millimeter (0.02 in). "And that creates beautiful shadow," I said. "But I always have to be careful because I can damage overall shape of that molding."
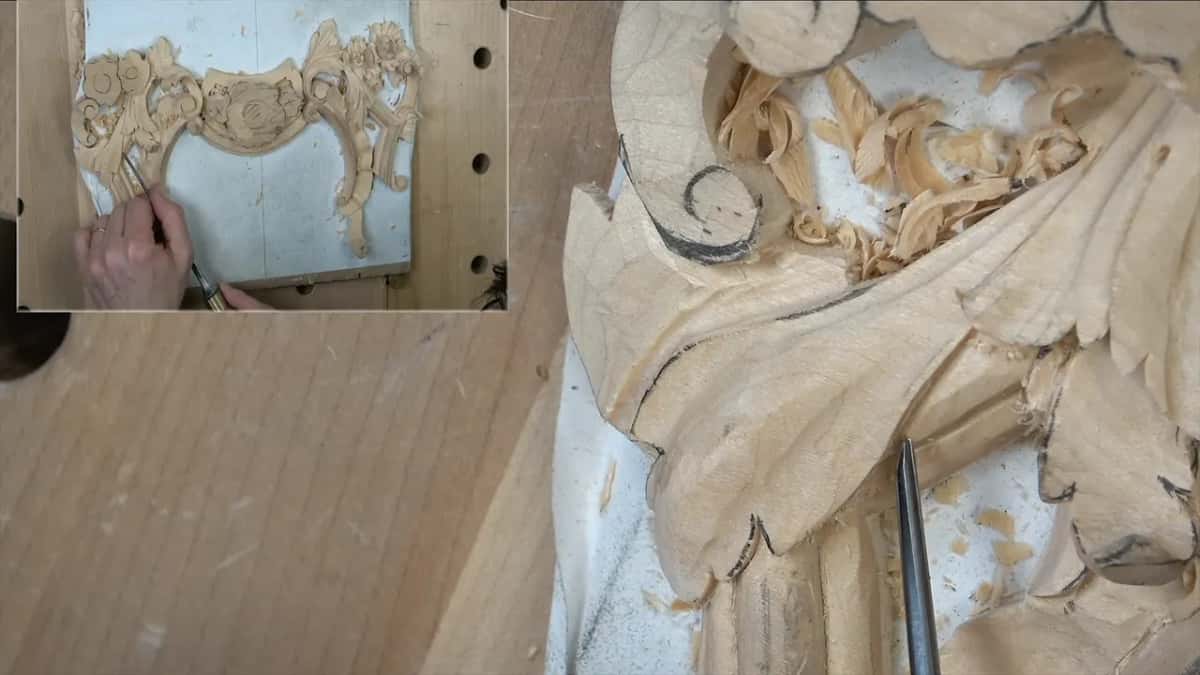
Even smaller came after that, less than half of that, I think. Going deeper, I said, can present a problem, because it's going to be too weak.
What did the tiny spoon gouge do on the molding?
Next it was time to blend. "I'm going to use a small spoon, really tiny, small spoon," I said, then added, "It's not a back bend, by the way, I'm using." I also had to attack the other side of that spot, and I said the same spoon could probably get it done.
The leaf is supposed to grow from underneath that area and wrap around that side of the molding, I said, and also go right on top of my future shell. Partially it was done, but underneath I had not done it yet. I thought that was good. "So don't have to overdo."
About the tool in my hand, I said, "That is, by the way, almost flat. That's number three and one-eighth of an inch." Really small, tiny spoon. That is about 3 mm.

Here is what I wanted you to take from it. You really don't have to have lots of tools to do the same operation, I said, but some tools matter that much. I told you to get some kind of spoon gouges. That way it is going to be "a lifesaver."

The molding's first side was established, and I hoped you saw what I was doing. The other side had to be exactly like the first, so I jumped over to it. With the same tool I could probably create that fillet, I said. "It's kind of hard to remove that stuff out, but see?" Then I said, "So now I created that."
Cleaning the edges could wait. A little longer on them later, I said, riding right at the edge for a really sharp-looking line with no visible movements. For now I brought everything to the edge with a number 1 chisel, a double bevel, really small. A knife could have done it, I said. For the clean-up right underneath I'd guess a small gouge, 1 millimeter (0.04 in), number 9, and I did not want to overdo it. The magnifier glass would come out later, I said, to get close and clean everything.
When did a straight tool stop short?
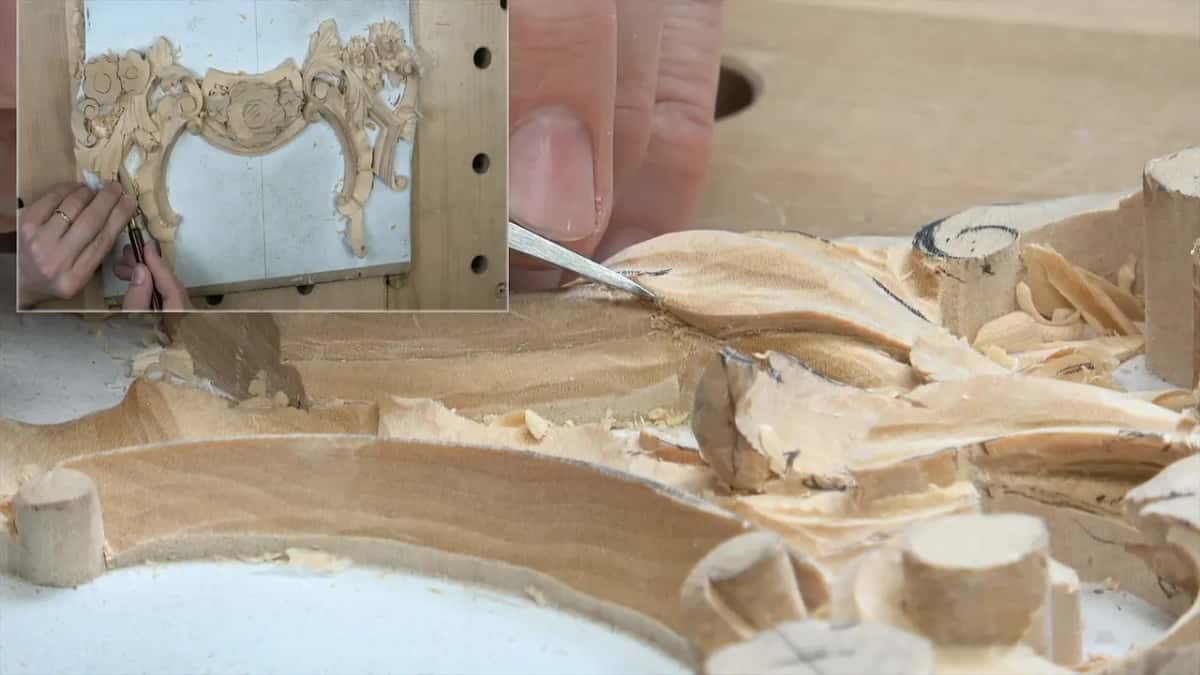
It happened on the second little leaf, the simple one. A convex ran down the middle with a concave on each side, and my number 11 for the hollows was 5 millimeters wide (3/16 in). I was using just a straight tool, I said, and it had some limitation. I couldn't get right up to one line. For that I needed a spoon, a small one, maybe about 4 millimeters (about 5/32 in).

"I'm going to use my new toy, number nine," I said. Four millimeters (5/32 in). With that tool I could get really close to that line, and really close to the opposite sideline. After that came the blend, again with a tiny spoon gouge.

The last video of lesson 12 comes back to it. Number 9, a really small spoon gouge, was my pick for two concaves on the barrel of a volute, and I said I had to be careful how I did it. Small bites, I said, especially at the end grain. Really small bites.
What did I swap when the first tool was wrong?
The little part on the other side was drawn to go right underneath that volute and sit a little lower, which I called really easy to do. First I tried a number 1 double bevel straight down, a push cut, if you can call it that. "So that is not good," I said. I needed a different tool. My pick, a number 3 of one-eighth of an inch (about 3 mm), would work much better, I thought.

A quarter-inch number 5 (about 6 mm) went around the volute. Number 5 or number 7, I said, since there was no marking on it, and I could barely see what was left. Then maybe a number 7 of 14 millimeters (a little over 1/2 in). From the opposite side I wanted a better tool, maybe number 9 at 1/8 in (3 mm). "Lots of junk inside, but I am happy how it looks."
Underneath that simple leaf I used a 1 mm (0.039 in) number 11 on its side, with the flute at approximately 10:00. I knew I was breaking the rule again, I said. My tool was really sharp, so I could go against the grain. Next I took an even smaller one, 0.5 mm (0.02 in), for a little deeper excavation. "I think that's enough," I said. I could have gone even more.
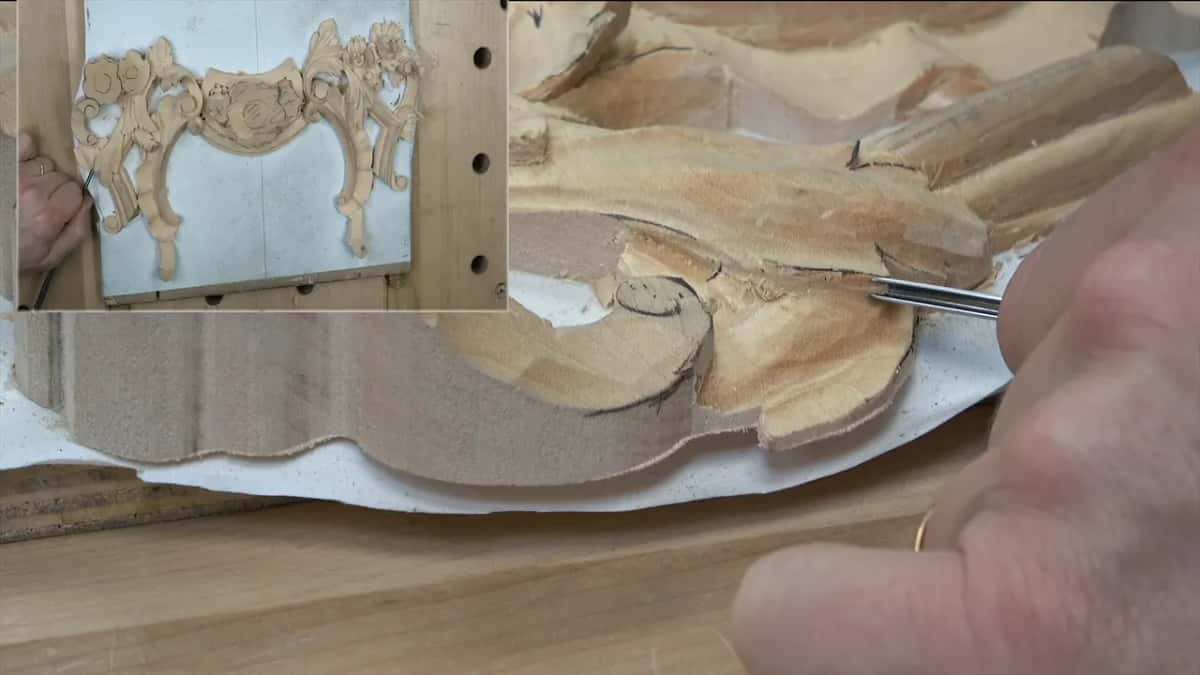
The 4 millimeter number 9 cleaned that spot a little. I left it like that, so I would not have to do too much to it. After the volute, I said, I'd be able to clean even more, and it was going to look really nice.

Can a flatter spoon blend when you have no back bent?
The Venetian flowers rosette course answers it. I was blending a deeper movement and said a back bend isn't required. If you do have a small spoon gouge, a flatter one, like a number 3 spoon, you can use it the normal way to blend that stuff.
The floral course says it too. In lesson 3 I said there are multiple approaches. If you do have a back bend, that would be really nice to use right now, I said. That is not the only way. Number 5, maybe a quarter inch (6 mm), was still possible, so I tried it. For a cleaner concave I said I'd take a number 5 of only 1/8 inch (a little over 3 mm).
Earlier in lesson 12 I blended a leaf with a back bent number 3, and I said it does not have to be a number 5 or a number 7.
What does a spoon do on a molding in the Venice Room?
Workshop 58 had me take a number 5 spoon and go in that direction, just to hit the high spots and get closer to the line. "See? It's becoming a molding." A bigger tool came next, a number 6, if it was going to fit inside. It wouldn't work everywhere, I said, but in some spots it would. The surface came out really beautiful and smooth, and then I needed the smaller one again to blend inside.
When does a back bent beat a spoon?
When a part is in the way. In workshop 59 a molding stood in my way, and I said, "I'll just use a back bend." It helped me a lot, I said, even with that molding there. I could still use it when I was almost parallel to the ceiling and still carve. I called it an excellent tool to have. If you're really serious about wood carving, I said, you should at least consider buying one.

Two pieces stood in my way in workshop 52, and I still had to attack that area. With a straight tool, I said, it was almost impossible. You either have a bent tool or a short bent one and carve between those pieces. Furniture panel lesson 21 was the same story. It would be really nice to have a back bent there, I said, because a part was in the way and it is hard to use a tool upside down. The one I grabbed was 2 millimeters (about 5/64 in).
I use a lot of back bends for my undercarving, I said in the sharpening lesson. In some areas, when you're carving complicated or advanced pieces, you can't even get without them.
Which gouge rounds the edge of a molding in the Venice Room?
Back bents came up again and again in these workshops. In workshop 58 the next step, if I wanted to stay true to the original design, was to fillet this side and that side. For me, I said, the best tool would be a back bend. Maybe a number 5 of about 10 millimeters (3/8 in).
Workshop 100 had me wanting a round edge on a part, and I said probably a back bent would be the best tool. I tried 5 millimeters (about 3/16 in) first. Later I took the same number 5 to blend again.

Over in workshop 103 nothing prevented me from creating a fillet on the right-hand side. Doing it with the back bend was possible, I said, although I would probably need to attack it from the right position. The 2 millimeter number 11 was probably a little small, so I said I would need 5 millimeters (about 0.2 in).

Then workshop 161 brought out my skewed back bent. That way I can work any direction, I said, and I could start filleting the opposite direction too. First I'd fillet all the way to the cut, then go a little deeper and carve a concave for that effect of the Roman ogee.
| Lesson | What the tool did here | Video | My words |
|---|---|---|---|
| Floral lesson 12 | Back bent first, for the shape. | Floral 12-2 | Establish that form, little by little. |
| Floral lesson 12 | A tiny spoon blended that molding side. | Floral 12-2 | That tool wasn't a back bend. |
| Rosette lesson 3 | A flatter spoon can blend that stuff. | Rosette 3-4 | No back bend needed, I said. |
| Venice workshop 58 | Spoon number 5 hit the high spots. | Venice 58-12 | It's becoming a molding, I said. |
| Venice workshop 59 | My back bent worked despite the molding. | Venice 59-4 | Helps me a lot, I said. |
Where else can you read about these tools?
A gouge has a curved blade, and a chisel has a flat one. A molding runs along a cornice or around an architrave. Mine is an acanthus leaf, and a carving that stays attached to its board is relief. Each linked name opens a short page about wood carving that explains it.
Do you have a spoon gouge on your bench today? Access to the school puts every one of these lessons in front of you on video, in the order I carved them.
How it's done
- Shape the molding with a back bent. First came the back bent, which I planned to work in a bit at a time until the molding had its form.
- Undercut a little at the leaf point. A number 11 came first, then a smaller one, and one smaller still. More depth, I said, can present a problem.
- Blend with a tiny spoon. The spoon was a small one, I said, and the same tool matched the molding's other side with a fillet.
- Bring the edge in with a chisel. A number 1 chisel, a double bevel, took everything to the edge. A knife could have done it, I said.
- Reach a close line with a spoon. My straight tool couldn't get close to one line, so a number 9 spoon of 4 millimeters (0.157 in) went in.
Frequently asked questions
Which blends a molding better, a spoon gouge or a back bent?
I used both on one molding. My first tool, a back bent, shaped it, and a tiny spoon took over for the blending. My rosette course says a flatter spoon gouge does the same job if you don't own one, and that you blend the normal way.
What is the difference between a back bent and a spoon gouge?
A spoon gouge is a short front bent, with its bevel on the back of the tool. A back bent has it on the opposite side, so the tool bends backward. I said front bents come in three types and back bents in two, short and medium.
When is a straight gouge not enough?
On one little leaf in lesson 12, a straight tool fell short of one line. A spoon of about 4 millimeters (about 0.16 in) went right up to it and to the opposite sideline. In the Venice Room it was a part in my way that sent me to a back bent.
What to carve next