

Alexander Grabovetskiy, woodcarver, School of Woodcarving · Published 2022
How do you lower the waste around a carved flower without reaching the final depth too soon?
Quick answer: Lowering the waste around a carved flower is a run of small passes that stops short of the final line. On my floral panel I made an initial cut, turned the piece to see the true depth from the other side, and used a router plane on flat wood that was left.
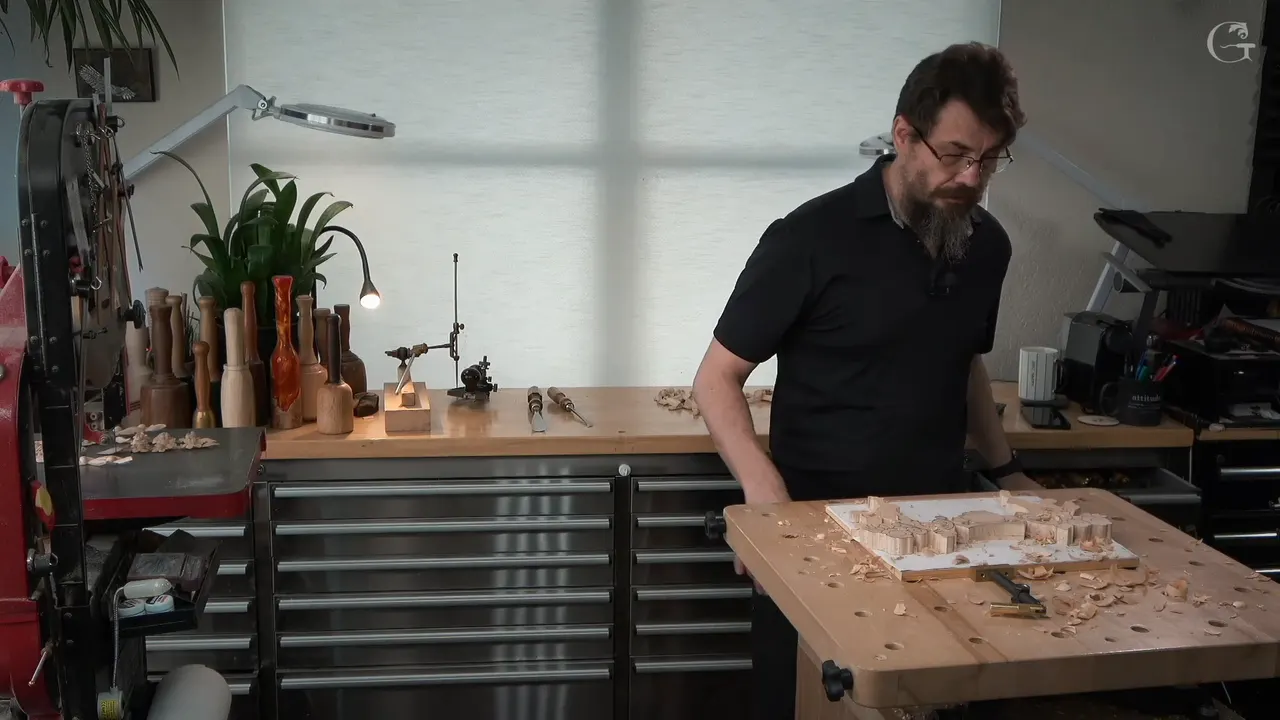
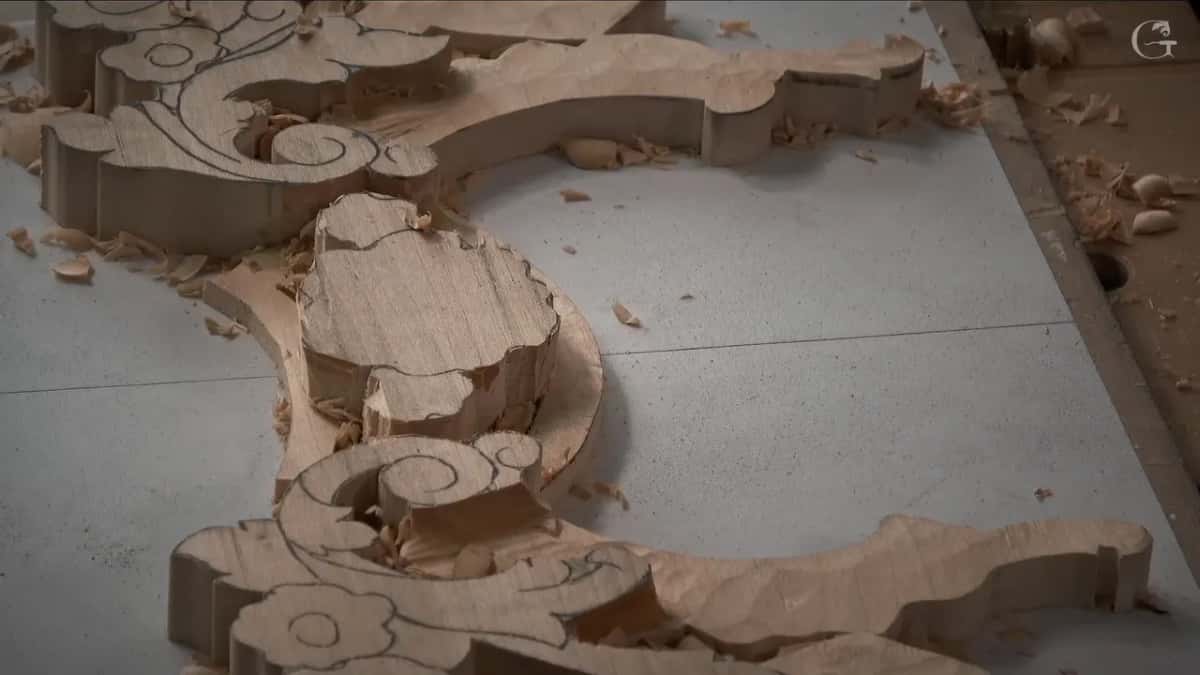
Lowering wood beside a carved flower is slow work in small passes, and the first ones stop well before the final depth. On my floral and molding panel I made what I called an initial cut. After that I turned the panel around, and the other side showed me how deep the inside really had to go.

Is there a flower on your board with a lot of wood still around it? Does your pencil line sit right at the edge of your gouge? Then give that line some room for now. This page follows the order I worked in, and the places in other courses where I said the same thing.
Seven lines on the first stage
- My opening pass stops short of the final depth, and I call it an initial cut.
- I turn the piece, so the opposite side shows the true depth.
- A number nine works crosswise to the grain, and each pass moves in toward the flower.
- The bite shrinks as the gouge nears the line.
- In my Furniture Panel course I said a messy look beats a pass that lands too close.
- A router plane checks height while flat wood remains to measure from.
- Smaller tools clear the tight spots.

Why not go to the final depth on the first pass?
One side cannot see the true depth, and the other side can. At the very start I said it. I don't really have to go all the way to the final depth, no need, because I can attack that from the opposite side now and then see exactly how deep my cut is supposed to be inside of those shapes. The first side got what you can probably call an initial cut.
I use that word in other lessons too. In the Lily Box course I took a number 11, 1 mm (0.04 in), for the initial cut, and planned to jump to a half a millimeter (0.02 in) next. Later in that lesson I said it again: that is just my initial cut, and with one millimeter (0.04 in) I really can't go very deep.
In Lily Box lesson 7 I called a pass my first initial cut, then said I needed to decide what would be my high point and what would be my lower point. That pass came before the decision.

In Lily Box lesson 9 I was careful not to lower the wood more than I had to. If the wood allowed it, I said, I would go really deep, but there, I think, it was not the wisest decision, because the area would turn too fragile.
In lesson 10 of Acanthus over Moldings my initial cuts were made with a 10 mm (3/8 in) number nine. I went right up to the line I had marked, which I said was about three millimeters (0.12 in) from the background.
Which way do the first passes go?
Across the grain, from the outside in, toward the flower. The same number nine of 10 mm (3/8 in) came back, and I made my initial cuts across the grain. Even over a really short distance I was still slicing and still rotating the tool. Going that way is something I always find much safer, I said.

Next I turned the piece. I rotated it, worked the other side, and told you it would be much easier for me from there. Later I said, let me rotate my table, and I worked from that side now. At another point I attacked from a couple of spots, one side and then the other.
Grain showed up again in part 3 of this lesson. I had to keep an eye on what it does. It was really important for me not to cross those two lines there, so I attacked from the other direction and carried the pass with the grain. See what happens with the grain, I said, and be wise about it.
If you want the slicing motion on its own, lesson 1 of this course has it. Here it is only part of a bigger plan.
How big is each bite near the line?
About an eighth of an inch deep, like three millimeters, is what I feel safe to grab. As I get to the line I take a lot less, maybe about a 16th, one and a half millimeters or so. In some spots my cut was no more than 3/32 of an inch (about 2.4 mm). I was still working in toward that flower, bite by bite.

My plan for these cuts was to get really close to my line, approximately six millimeters, even less, maybe five (about 1/4 in to 3/16 in), from the surface, at the highest spot of that detail.
Part 1 of this lesson shows me staying away from the line too, approximately. That was not really critical there, I said, but I had to go clear through. My left hand sat solidly on a block of wood, with my tool lying on my finger and my thumb on top, and that gave me great control of the tool.
In the Furniture Panel course, lesson 17 has me saying I really didn't need to get that near the final line, because even 1/16 of an inch (about 1.6 mm) is still dangerous.

How close should the gouge get to the final line?
I hold back. Near the end I said I didn't want to be so close to my final depth, since if I take too much, it can create a problem. We are carving, I said, and carving takes wood away. A smaller flat tool, a quarter-inch (6 mm) number two, then went a bit nearer the final line with a straight-down cut.
Furniture Panel lesson 16 says it more bluntly. Please do not go too close to the final line, I asked there. It is better to have that messy look as of now, because you can always clean it, and it is not a big deal. The mistake is carving too close.

Lesson 15 adds one more. I told you I was trying not to get right up to the final design. A gouge or a smaller blade can get me closer later, if I need to. As long as I got 80%, or a little more than 80%, consistent depth, I was okay with that.
In Venice Room workshop 45 my jig saw landed a little too near the final line, and I called that a problem, but not too big of a problem. Just go around and excavate, I said, and take the time.

Why draw the flower without its details?
I am still going to change it. I drew this flower on the wood without following all of its curves. All I needed was an idea of where the flower was going to be, so no details went inside. I do an original drawing, I said, but when I transfer that design to the wood, I don't need to spend more time than I need to. Near the double volute in part 1, I said I was going right to my line and was not afraid of losing it, because I could reestablish it.

The lines come back later. Back in part 1 I said I didn't need a so-called clean cut, and that I could reestablish the lines later on. Here, about eighteen minutes in, I said I had to reestablish my lines. I meant the molding line, how it is supposed to look.
In Greek Acroterion lesson 4 I said I would keep my high point on the outside and reestablish that line inside.
In Venice Room workshop 154 I reestablished my line, took my big number one without carving anything yet, eyeballed it, and double-checked with my calipers. They landed right on it. On the Venetian Flowers Rosette I kept my calipers set to the measurement, so I could reestablish the line quickly. It doesn't have to be perfect, I said.

The width of the molding on this panel came off the first piece. I measured the old piece line to line. That setting moved to the new piece. My finger butted against the edge worked as the guide while I drew my future molding. I can make mistakes, I told you, and I did, so I wanted to be sure I made none.
When does the router plane come out?
While there is still flat wood to measure from. Reaching for the plane, I said it was not late yet to use one, because I still had a flat surface, and that is easy for me. I lowered the blade until it grabbed the wood, but not too low. I double-checked, and yes, I was on the line. It might even be too perfect, I said, but it's okay.

Two spots were my reference. Because I had this spot and that spot, I knew I could make it almost perfect. If you are a woodcarver, I said, the router plane is a good tool to have. It is not just for furniture makers or custom woodworkers. And look how nice and clean the surface came out.

After that first pass I picked up a small tool, an eighth of an inch (3 mm), for the spaces beside it. At that point, I said, I really didn't need to, because I still had a chance to lower that down, but I took some of the material out.
To bring the molding part as low as the opposite side, I took a small number nine, 3 mm (1/8 in), and removed some material before I hit it with the plane. I wasn't sure I could even feed the plane in there, and I said I'd try my best.
Later, in part 3, I checked my depth again and was right on the money. Little by little, I worked the plane, because I didn't want the blade under my future detail. At one point I said that was maybe a little too deep, so I made the cut a little deeper with a number two and my mallet, because it looked like I hadn't done that enough, and went back to the plane. I was happy then, and I knew for sure that the height of that detail was exactly the same on the backside and on the front side. Lesson 3 picks up the same panel.
How do I clear waste from a spot my gouge is too big for?
I go down a size, then another. One side of this panel had some kind of mess, and a number three, maybe about seven millimeters (0.28 in), took some of the mess away. A flatter tool, maybe a number two, got me onto the line.

Then came the small ones. Into the cavities went a number 11, 3 mm (0.118 in), to remove waste, but that looked too big for some of them. I would need even smaller, I said. On one side the tool I had was fine. Then I got a one-millimeter (0.039 in) number 11, and even more waste came out.
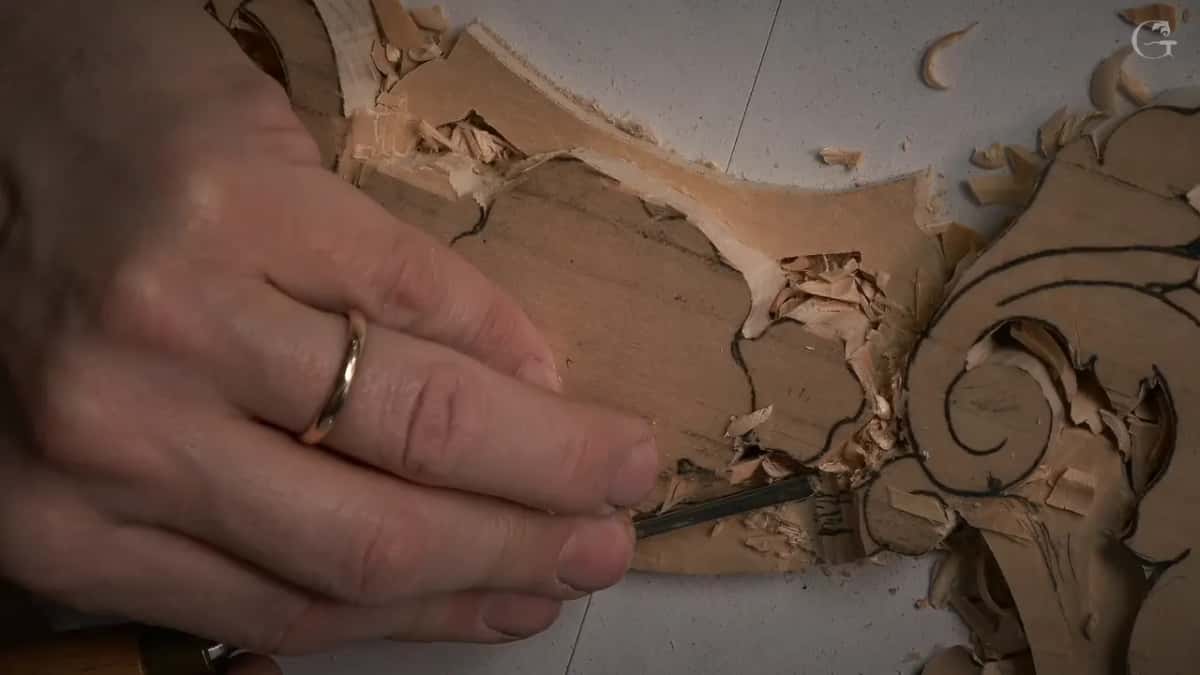
After I reestablished the molding line, I picked up the three-millimeter (1/8 in) number 11 again and removed more of the exposed material. Then a quarter-inch number nine, about six millimeters, went into the area to get a little closer to the molding below.
A spoon number 11 at two millimeters (0.08 in) came out in part 3. With a spoon I get into a lot more tight spaces, I said, where a straight tool sometimes can't go because something is in the way.
What does the number two do at the line?
It goes straight down on the line. I took a flatter tool, maybe a number two, and got on the line to make a down cut, a stabbing cut. I did the same on the other side. That came after I had taken the waste beside the line down. Obviously I could use a mallet too, I said, and sometimes that is a good idea.
That same tool met a line in part 3 that was really important for me not to lose. That number two went straight down, with the mallet. I warned you not to use too much force, because only five millimeters (3/16 in) stood on that opposite side, and you can easily go through. Don't bang with the mallet, I said. A little, little force.

Why not rush the first stage?
Once you take too much, you can't put it back. I don't want to rush it, I said, and there is no reason to. Even if there is a deadline, rushing is not really a good thing. As you know, woodcarving is an art of subtraction.

The order of the stages
The table lists each stage and where it came from.
| Stage | My move | Where | Why |
|---|---|---|---|
| Initial first pass | Number nine across grain, short of depth | Floral panel | Other side shows the true depth |
| Turn the panel | Repeat the cuts from the opposite side | Part two | Inside depth is easier to see |
| Smaller bites close | Bite shrank as the line got near | Lesson two | Close to the line, less wood |
| Stay off line | Accept a messy look now, clean later | Furniture Panel | Too close is the bigger mistake |
| Reestablish the line | Draw the molding line again after lowering | This panel | It was the next good idea |
| Router plane check | Blade lowered to where it grabs wood | Same panel | Flat wood still left to reference |
Where does this part sit in the course?
Part 2 of lesson 2 sits in the wood carving course Carving Floral and Molding for the Panel. Before it comes lesson 1, and lesson 3 and lesson 4 follow.
Want to watch every pass go in? All three parts of lesson 2 are in the school with Access.
How it's done
- Make an initial cut. Work the first pass crosswise with a number nine, and leave the last stretch for later.
- Turn the piece. Rotate the panel and make the same cuts on the far side, where the depth inside the shapes is easier to see.
- Shrink the bite. Grab about 3 mm (0.12 in) in the open. Closing in on the line, take a 16th (1.5 mm), and in a few spots 3/32 in or less.
- Check with a router plane. Where flat wood is still left, bring the blade down until it grabs, not too low, and confirm you are on the line.
- Go smaller in tight spots. Try a number 11 first, and drop to a smaller one where the bigger tool will not fit.
- Draw the line again. After the waste is down, reestablish the molding line, then close in on it with a flat tool, straight down.
Frequently asked questions
Do you have to carve to the final depth in one go?
No. At the start I said I did not have to reach it, because the other side would show me the depth inside the shapes. What I made first I called an initial cut.
How much wood should one pass take as you reach the line?
Three millimeters (about 0.1 in) felt safe to me. Nearer the line I took a lot less, maybe a 16th (about 1.6 mm), and in some spots no more than 3/32 of an inch (about 2.4 mm).
Should you stay back from the final line on the first passes?
I stayed back. Taking too much can create a problem, I said, because we are carving. In Furniture Panel lesson 16 I said a messy look for now is better than a pass that lands too close.
What to carve next