

Alexander Grabovetskiy, woodcarver, School of Woodcarving · Published 2022
How do you check that a carved wall is really 90 degrees?
Quick answer: Checking a wall is looking at it, then testing it with a square when a look is not enough. On my volute I said you really have to use your eyes. In my Venice Room course I held a square near my tool and found the cut went straight down.
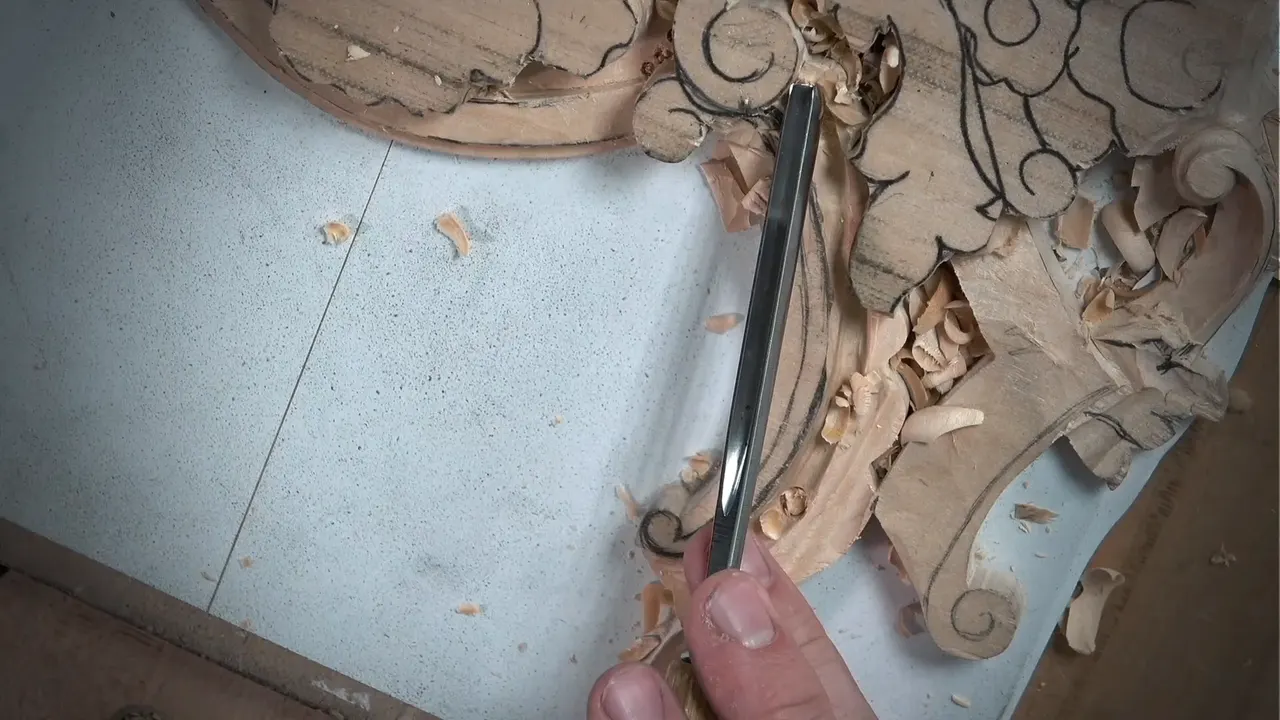
Checking a carved wall is looking at it first, then holding something straight against it when your eye is not sure. I used my eyes on the volute and told you so. In other lessons I reached for a square, a speed square, or a side view.

Ever stood a gouge upright to carve a clean wall, then wondered if it leaned? Ever lost a line because the wood under it went missing? Then you know why I slow down here. In this part of lesson 4 I come close to my future volute. I don't want to damage the side of it.
This wall protects a line on a lower level. I have more than one way to check it, and they come from different lessons.
Five lines on a straight wall
- A straight wall saves the line below it.
- A flatter tool carves it, and the tool stands straight down while it works.
- Here I checked it with my eyes.
- Other lessons add a square, a speed square and a side view.
- The pointing machine took the height again once the wall was down.
Why must the wall stand straight beside a volute?
It keeps that line on the lower level. Once the small tools had me beside the volute, I named the next job: a straight-down cut. Keeping that line is "really important for me," I said. For that I needed a flatter tool.
Later I had a number 2 of 30 millimeters (1.18 in) in hand, and I told you why I was doing that pass. I really wanted to make sure I was not losing that line on a lower level. Yet undercutting was the other worry. Placing the tool and just going like that, I said, "would be a big mistake." So I made sure the tool went 90 degrees down.

Which tools got me close to the wall without hurting the volute?
Smaller and smaller ones, because each one stopped fitting. Next I said it was time to switch the tool, since the tool in my hand just did not fit any longer. I took an antique, one of the Herring Brothers, a brand I kind of like. It measured about one-eighth of an inch (about 3 mm), maybe slightly bigger, and it fit perfectly. With it I could see how deep I was going. You connect pretty much those two points.
The next spot was too tight even for that. My number 7 at 14 millimeters (0.55 in), about half an inch in my words, took some material out. Then a number 11 at 3 millimeters (about 1/8 in) moved toward the side with short strokes. A smaller tool at the side seemed like a good idea to me. Even that one was a little big for one section, so I dropped to 2 millimeters (0.08 in). One and a half would work, I said, but I used the two.

Which tool carves the wall itself?
A flatter one. I kind of like one tool for this job, and you can use just its heel part and slice. It is not the only choice, though. Try a number 2 or a number 3, placed straight down and driven with a mallet. Just make sure you don't undercut it.
A bigger number 2 works even better. The bigger the tool you have, I said, the better the result. A different number 3 fit perfectly right there. A smaller one cleaned around it, and a 3 millimeter number 11 got me nearer the line. By then I figured I was really close.
Then came the big one, a 30 millimeter number 2 (about 1 3/16 in), kind of huge in my own words. I walked it around the wall and held it straight. That was enough for that side.

Can you check a wall with your eyes alone?
In this part I did. I told you to look and see if it's 90 degrees or not, and "you really have to use your eyes."
This course says the same from another side in lesson 10. There I cleaned the opposite side of a cut with a 12 millimeter number 2 (0.47 in), not exactly half an inch but pretty close. The tool really has to be 90 degrees toward the piece, I said, and I told you not to mess this up.
The warning shows up in lesson 1 too. I stood a number 7 straight down to establish the wall. Don't place your tool inward, I said. A big mistake, because you don't want to undercut it.
My Greek acanthus course names this pass in lesson 2. It is a wall cut, because a 90 degrees wall is left, a cut straight down. Later we undercut it and add more detail, I said, but for that moment it was my main outlining cut.

How do you check a wall with a square?
Put a square near the tool, look at the wall, and see whether it stands straight. My Venice Room course has the check in lesson 161. I needed to go a little deeper on one side, another 2 millimeters (0.08 in), and then I said 1 millimeter (0.04 in) would do. I asked how to check it. There are multiple ways, I said. I could pretty much eyeball it, or I could place my measuring tool, even just a square, any type. I held it near the tool and checked whether the cut went straight down. It did.

The speed square shows up in lesson 85. With a flatter gouge in hand I could see the wall was short of 90 degrees. A good idea, I said, is to check that with some kind of device, "just use a speed square." It read about 5 millimeters (3/16 in) off. The flatter gouge could take care of it, and I was pretty close.

Something there sounds backwards. I do that pretty much on purpose, I told you, and I know sometimes it doesn't sound right. It's better not to start at 90 degrees, and then get little by little to the final depth.
The reason comes in Lesson 106, in a few words. I wanted it straight because I did not want to go in and undercut. Undercut, and I lose that line and mess up the overall picture, or the overall design, I said. Take a small square, and check if you have 90 degrees this way or not. But I eyeballed it, carefully, with a single bevel chisel number 1. I made the same choice in this part.
What does a side view of the wall show?
A line that leans. I looked sideways toward one line in lesson 102 and saw it was not really 90 degrees toward the middle. So I fixed that section a little, to bring it back to 90. My ruler would help, because I had a middle line, and that gave me a reference point.
In the furniture panel course, lesson 18, I wanted to see if the wall was square, and I used a number 23 macaroni. You can lay that tool the opposite way, I said, to create your wall if it needs to be a little higher. From the side it just leaves a perfect 90 degrees wall on the inside. "That's what I'm after." Afterward I checked depth. I had left about half a millimeter (0.02 in), maybe even less, to the final depth, so I could still do a clean pass.

The Lily Box course has the plainest version. "It's almost impossible to see," I said, so I showed it from a different angle. "That is a straight wall. That's what you want to see." A wall like that keeps you from losing the edge.

What keeps a wall straight while the tool moves?
A rotating tool. On a straight-down cut closer to the lines in lesson 1, I was not pressing on my tool. I still made a rotation movement, a slicing cut if you wish, so the tool meets a lot less resistance.
A second way in comes from lesson 13. Lay a number 5 on the line and make a straight-down cut, but be careful. Or take a number 11 and attack with the tool's side, the left one in my case, like a left wing, going with the grain until you hit the line. I called that a legit way and somewhat safer. You don't push anything that way, while a straight-down cut still creates some kind of stress.
A finger can help too. In furniture panel lesson 17 I went inside right there and pulled toward myself while I tried to control my 90 degrees. I pressed from one side and from the other with equal pressure. That way I could control my cut much better. It was not that critical right then, I added, but it is a good habit to have.
Back in lesson 4, part 3, I told you to watch how I hold my tool. My left hand sat solid on a block of wood, either on the background or right on the design. That gives you a lot more control, so you can do micro cuts. On the long cuts I push with my whole body, not my hands, the same idea as a plane.

A V tool shows the angle without a square. My Greek acanthus course, lesson 3, a 45 degree V tool gives you more control, because you can see visually where your 90 degrees is. One side of the tool has to sit upright right there. A slight undercut from a small slip is not a big deal, I said, though I wouldn't do that yet.
A shaped tool can build the wall in. Over in my Roman acanthus course, lesson 16, I showed a number 23 of 4 millimeters (0.16 in). It has a wall and a bottom, so it just creates a 90 degrees cut automatically. If you have that tool, it's handy for cases like that.

Do you measure again once the wall is down?
I did, right after the wall. This part was going to be lower, and the volute's side was kind of flat at that moment, so I measured its height again. I wanted to be sure I had the right height. I got my pointing machine. It looked like I had already marked that spot, but I was not sure I was there or not, so I double-checked. I was right on the money, exactly at the spot. Just to see that it hits the surface makes me happy.

What came after the wall on this volute?
A long smooth slope uphill. My goal was a really smooth uphill cut, and I did not need to draw anything. I just eyeballed it, because I did not need to be crazy about it. Any flatter tool would work, like a number 3, but I picked a huge number 2 of 50 millimeters (about 2 in). The bigger the tool, the quicker the job, I said, and a really flowing transition uphill has a lot more chances to be nicer with it. I lost probably all my markings, which was okay, because I could mark them again.

Next I drew the volute again, 6 millimeters (1/4 in), the same as on the other side. I took the outside first with a number 2 at 12 millimeters (0.47 in), upside down, carefully, all the way to my previous cut. Can you hear how sharp that tool is, I asked. A really sharp tool leaves a beautiful, smooth finish.

A 3 millimeter number 11 (0.12 in) followed, for some more cleaning. Not much material was left, so I held back. I was already at the level of that cut, which might limit how deep I could go, and a little deeper would have been a huge mistake. The one millimeter tool after it (0.04 in) was not to make it deeper. It was more for cleaning. Next came a number 7 for the inside.

The checks in one table
| Check | Tool | Where | Why |
|---|---|---|---|
| Eyes on volute | My number 2 held at 90 degrees | Floral panel | Your eyes have to check it |
| Speed square check | The flatter gouge took care of it | Venice Room | The wall was not 90 yet |
| Eyeball, not square | The number 1 chisel with single bevel | Chisel lesson | A lost line spoils the design |
| Look from side | My ruler would give a reference point | Lesson 102 | The line was not 90 degrees |
| Number 23 macaroni | Laid the opposite way for more height | Furniture panel | It leaves a perfect 90 wall |
Where does this part sit in the course?
This is lesson 4, part 2 of Carving Floral and Molding for the Panel, a course on a molding and its flowers. Lesson 3 comes right before it. With Access you get the full videos of all fourteen lessons on this panel. Want to know your wall is straight before the next pass? Look at it, then check it.
How it's done
- Name the line the wall protects. Mine kept the line on the lower level.
- Reach for a flatter tool. Set a number 3 or a number 2 upright. A mallet helps if you want one.
- Look first. I looked at the wall before anything else, as I said on camera.
- Hold a square beside your tool. As I did in lesson 161, see if the cut stands straight.
- Try a side view. A line that leans shows up when you look sideways. I fixed mine and it came back to 90.
- Read the height again. I got my pointing machine and checked that the wall hit the surface where I wanted it.
Frequently asked questions
Do I need a square to see if a wall is straight?
No. In Venice Room lesson 106 I said you could measure with a small square, and then I eyeballed the cut using a number 1 chisel. In lesson 161 I did hold a square near my tool, and the cut stood straight.
What is a wall cut?
A wall cut is a pass straight down that leaves a straight wall standing. I named it that way in Greek acanthus lesson 2, and I called it my main outlining cut. We undercut it later and add more detail, I said.
Why would I start a wall off square on purpose?
In Venice Room lesson 85 the speed square showed me about 5 millimeters (0.2 in) off. I do that pretty much on purpose, I said. It's better not to be 90 degrees at the start, and then I get to the final depth a little at a time.
What to carve next
- Carving Floral and Molding for the Panel, the course page
- Floral and Molding lesson 4
- Floral and Molding lesson 3
- Floral and Molding lesson 1
- Floral and Molding lesson 10
- Floral and Molding lesson 13
- Venice Room lesson 161
- Venice Room lesson 85
- Venice Room lesson 106
- Venice Room lesson 102
- Furniture Panel lesson 18
- Furniture Panel lesson 17
- Greek Acanthus lesson 2
- Greek Acanthus lesson 3
- Roman Acanthus lesson 16
- Lily Box lesson 4