

Alexander Grabovetskiy, woodcarver, School of Woodcarving · Published 2022
What is an intersection in wood carving?
Quick answer: An intersection is the meeting point of two parts of a carving. Across my lessons it can be two leaves, which I call an eye, two grapes, a leaf and a molding, or one line slipping under another. The last kind is the one I carved on my floral panel, starting with a number 6 gouge.
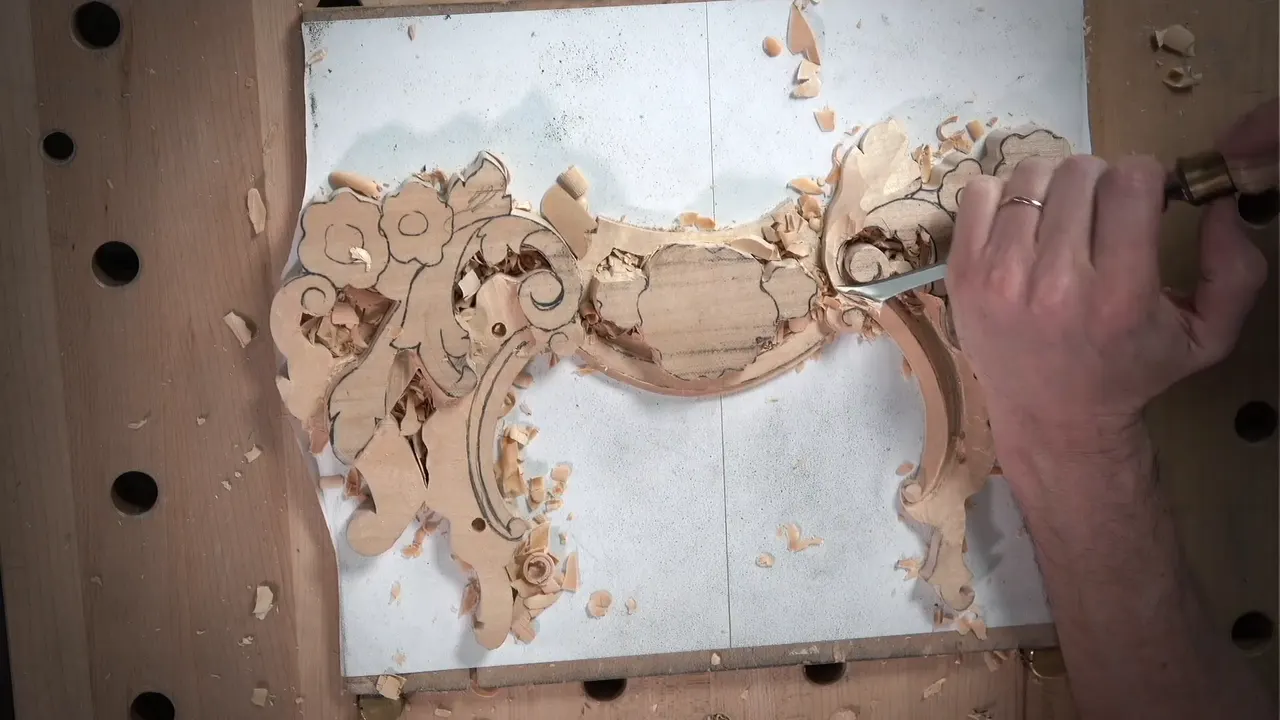
An intersection is the spot where two parts of a carving meet: two leaves, two grapes, two lines, or a leaf and a molding. In part 1 of lesson 5 of my Carving Floral and Molding for the Panel course I worked one of them, where a line had to slip under another one.

Ever carved two shapes that cross and ended up with a mess where they meet? Ever lost a fine ridge while you cleaned right beside it? On camera I said I wanted to keep that line, that ridge, safe. Here is how I got in there, and what the same kind of spot looks like in my other lessons.
What I do at these spots, in seven lines
- Look at the original piece first, and reference it before the pass.
- Take the first pass straight down.
- Attack the spot from the opposite side too.
- Swap the tool when the one in your hand does not fit the inside.
- Go carefully beside a ridge.
- At an eye or a pipe, the line stays high.
- Where grapes meet, aim for a triangle.
What is an intersection in wood carving?
Two parts come together there, and my lessons use the word for more than one thing. My grape vase course has me saying that wherever you see an eye, it is two leaves coming together, and in the same breath I called it an intersection.
This panel course says it again in lesson 11. I wanted a water drop shape right there, so I wanted an eye, and that is how it is called, I said, the place where two leaves intersect.

Lesson 37 of my furniture panel puts it in plain terms. The eye is what you get when two parts intersect each other, so you have a convex and a convex. To raise a convex, I make a concave on both sides of it. Any small tool will do, I said, and I grabbed a number 8, about 4 millimeters (0.16 in). The scale was small, and every little detail helps.
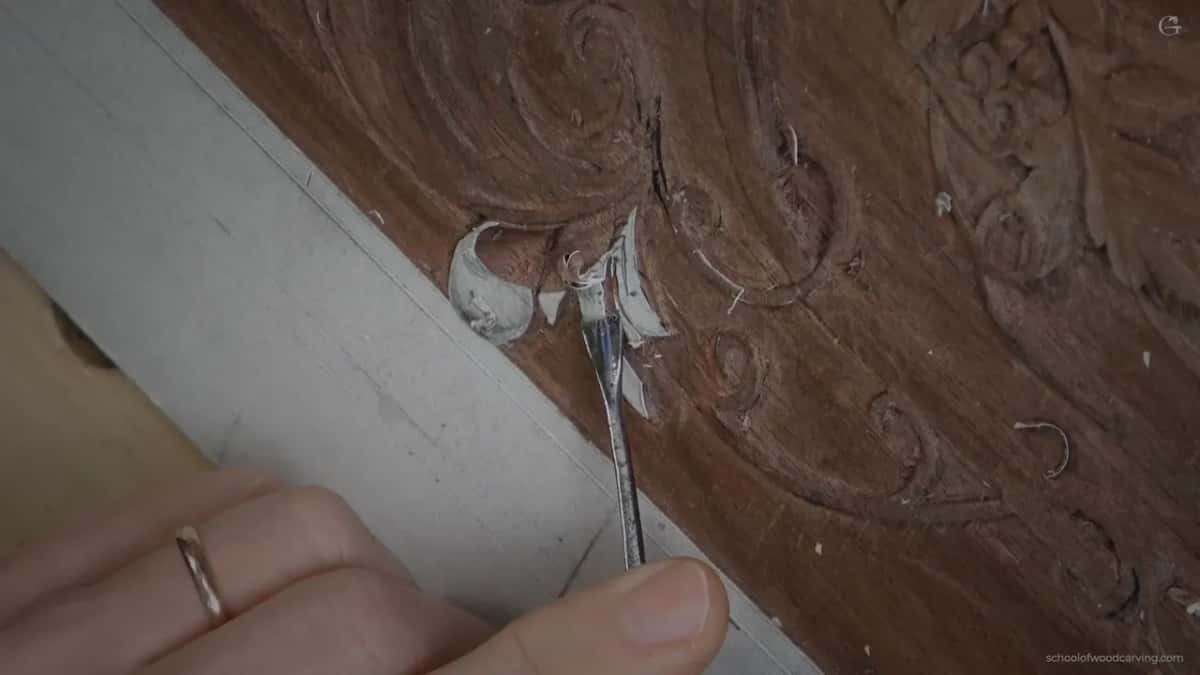
A molding gives a third kind. In workshop 86 of my Venice Room course I said one spot was going to be like a miter point from two sides, so the side beside it had to get a concave going in too. A little later I called that a true architectural part. If you are interested in architectural carving, I said, that is pretty much the way it is done.
Workshop 87 has a movement that ends at the intersection point. I double-checked where it was supposed to end, and it goes right to that spot. That part will be a crown, which is a cove, a concave, sloping downhill.

Leaves can meet a molding too. My chamomile and bow rosette, lesson 1, has a drawing where some molding hides right behind the leaves and some leaf parts go on top of it. Some parts, I said, intersect with the moldings, and the ridge itself is somewhat high, going upward at the ends because there will be some molding behind.
Grapes make a fourth kind. My grape onlay course, lesson 1, shows a mistake people make when they carve grapes. Between those grapes, the intersection is where it gets complex. It needs to be a triangle, so try to avoid a quad or a square, and aim for the triangles. In my Tray of Blessing course, lesson 8, I said a quad is really hard to clean, since you need to get to the point where the grapes connect.

How did I carve one line under another in part 1?
The part opens with a tool problem. The first tool was a little too big. On one side it was okay, so it would not matter if I only had to work that side, but on the inside it just did not work. I got something different, a number 6, about 12 millimeters (0.47 in), I would say. I checked, and yes, it fit really, really nicely.
Straight down, I said. Before the next pass I looked at the original piece for any sloping, and there was none, which is a good thing. Slopes sometimes create a problem. I love slopes, don't get me wrong, but sometimes they just create some kind of confusion.
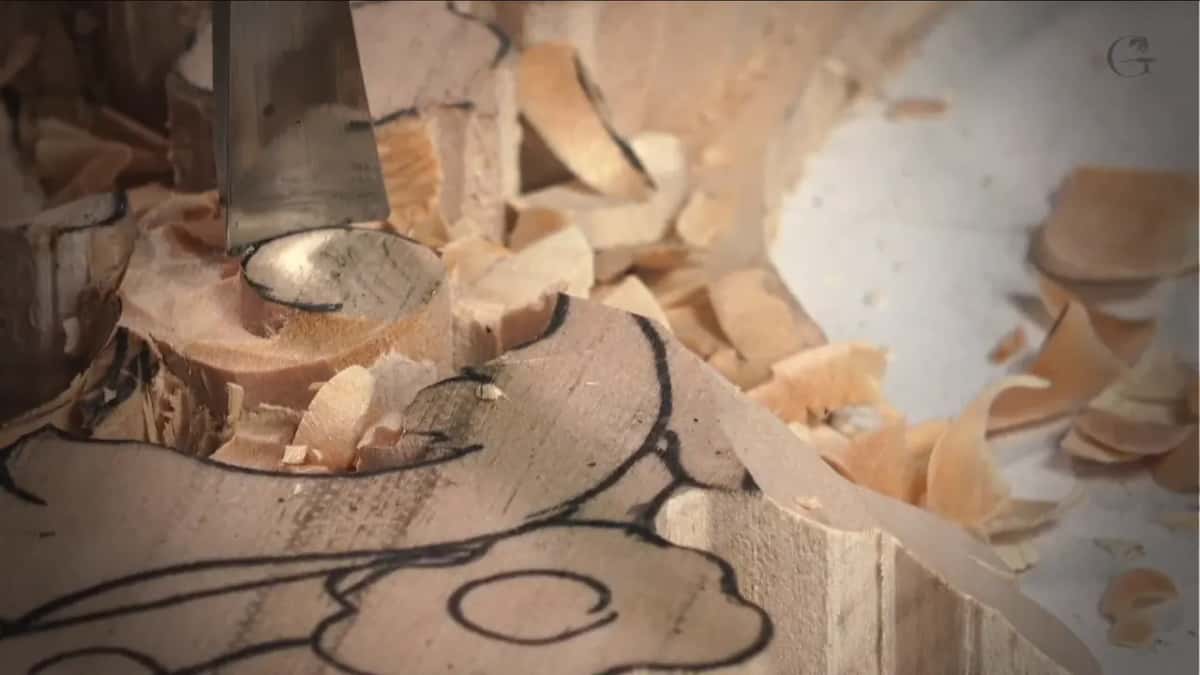
Then I repeated the pass, right down, and I came at it from the far side too. It gave me a really clean canvas. I kind of liked how they intersect each other.
Next I worked around that shape to make a deeper pass, about one-eighth of an inch (3 mm), just to create a shadow line. It runs the full length, and I said I should reference my previous piece for it. The wood beside it is not simply gone. It goes inward first, and then down to the floor, which I called a really interesting movement.
I stayed with the number 6 for that, little by little, without forcing. I walked around the shape, started my pass again straight down, and sliced it all around, without undercutting. That would be a big mistake. When I say that, I mean the tool needs to be straight down, without leaning that way or that way.

After that I went back over my previous pass to make it nicer and cleaner. If my hands covered the view, I said, my apologies, and you should understand why I do it. That gave me a really good starting point.
The intersection itself was waiting. I put that tool back where it belongs and told you I had to reference first. There did not look to be much space.
One part had to slope the opposite way. I could use a small number 1, I said, or a knife, and then I picked a smaller version of one of my other tools. The key word is carefully.
I looked at my previous piece again to see how deep it goes. It reaches pretty much that whole part. I thought about a number 2 or a number 3, then chose a number 5. Right there I watched how deep the tool went, because I wanted to keep that line, that ridge, undamaged. It cannot go too deep, so you have to be kind of mindful about it.
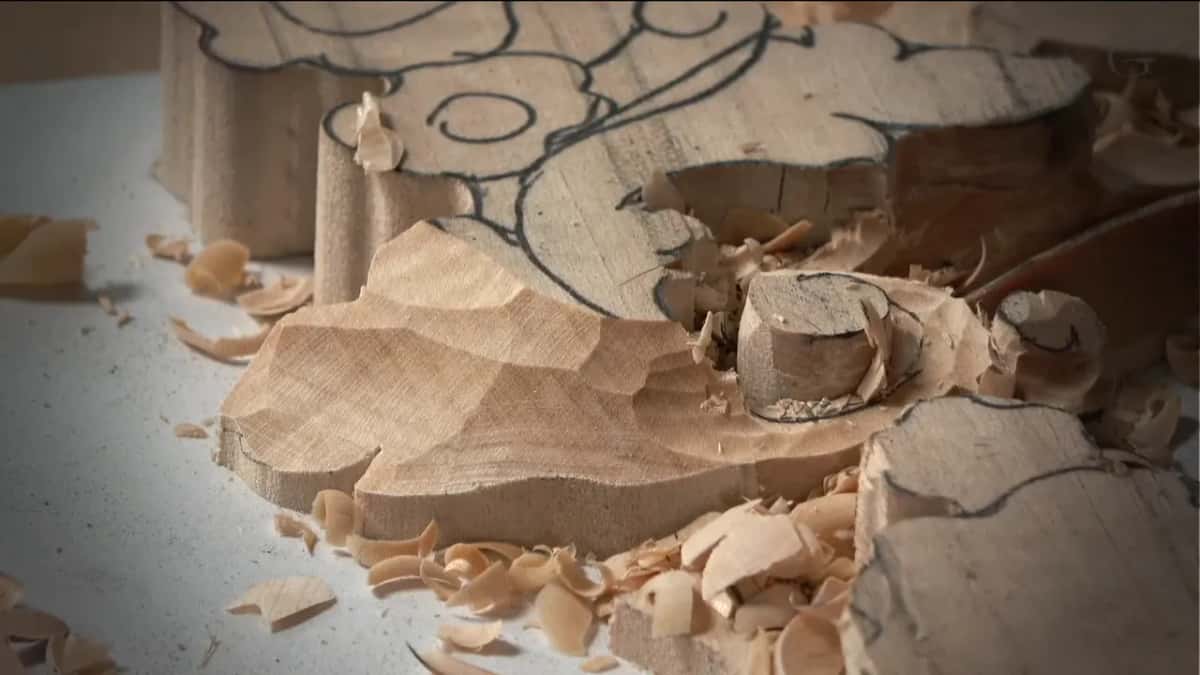
When I had gone as far as I could from one side, I attacked from the other side and worked that line from both. It looked really good, actually. I did not go deeper than I needed to, and nothing was damaged. That is what I am after.
My next check was how wide that part is supposed to be, and I was about the same. The camera sits somewhat in front of me, so you do not see the true width, but you should get an idea. Rearranging the camera every time is impossible for me, so please forgive me if you don't see exactly what I see.
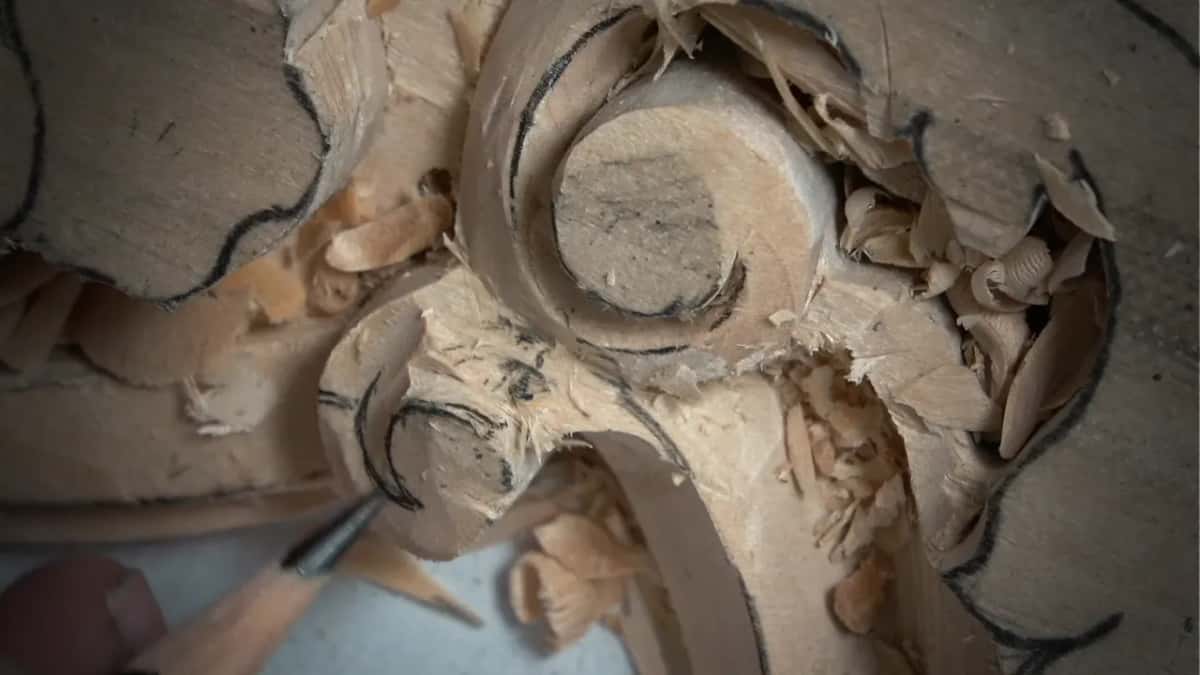
The second line needed to intersect really nicely and go underneath the first. With the same tool I worked my way in. I can use just the heel, only that part, when I need it.
Here the camera could not show it, so I grabbed my phone and flew around the carving. I had asked you before if flying around helps, and I got an answer, obviously. Sorry for the shaky picture, I said. I have to hold the phone at the right position so it does not blur and keeps the focus. Just that detail, I told you, those two intersecting parts, is worth learning. At the end I asked you to see how clean that pass is.

The slope came next. That part runs right underneath, with exactly the same detail as the one beside it. That line goes underneath, and then it goes up. At one spot it has only about an eighth of an inch (3 mm) and rises the whole way.
The upper part still had to go lower, so I wanted a smaller tool. Number 1 would do, I said, or even a knife. I went with the number 1, a double bevel, so a bevel on both sides, pretty much.
Something smaller followed, a small detailing gouge, a number 5, 6 millimeters (1/4 in). I worked around that part. The line must slip underneath that detail, I said, not at this side, and it has to go around just like that. I am not rushing anything, because it would be a big mistake to rush it.
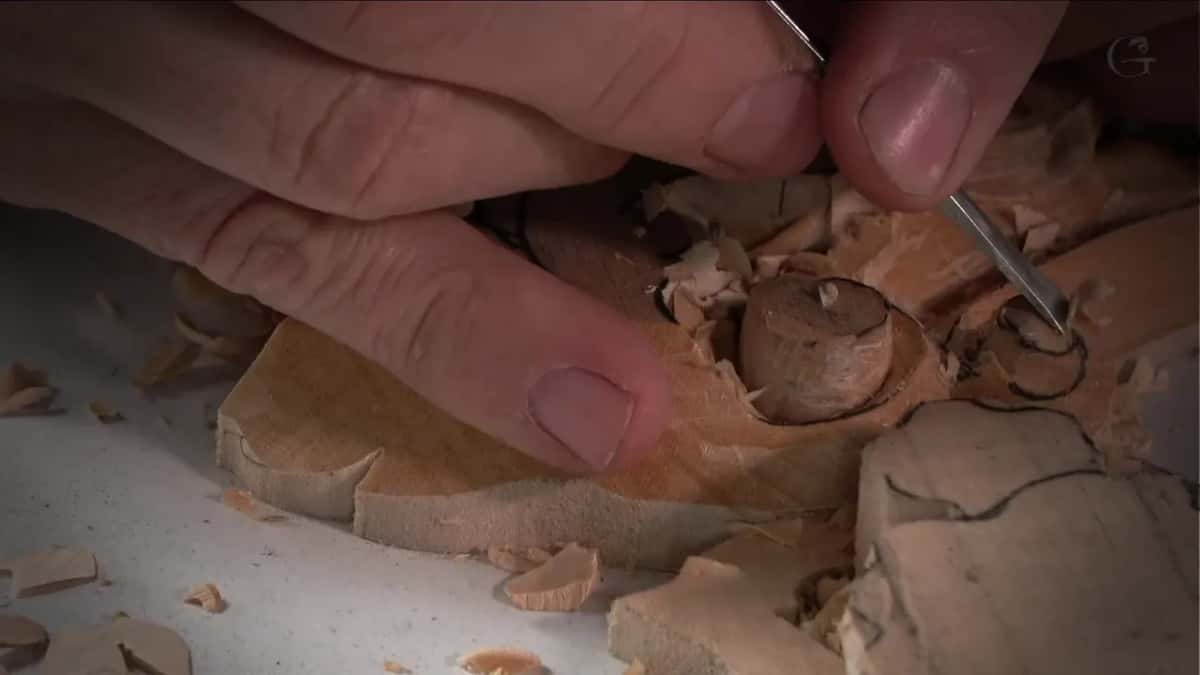
Carefully, I said, as I worked my way in. Even then I needed something smaller to reach one area, so I picked up a number 5 of one-eighth of an inch, three millimeters, and kept working my detail. It was looking messy, I said, but it would be okay.

The quarter inch number 5 (6 mm) came back out to make a concave, bit by bit. Then the eighth of an inch one, three millimeters, went in again.
Late in the part I asked if you could see it. It was almost there. I still had to work on the inside, and I wanted to make sure it looks like this part goes underneath that part.
I also tried something new. I showed a look from above in the corner, so you could see the area I was working on. I said my system might not handle it, and if it did not, I would drop it, because I did not want to overcomplicate my setup.
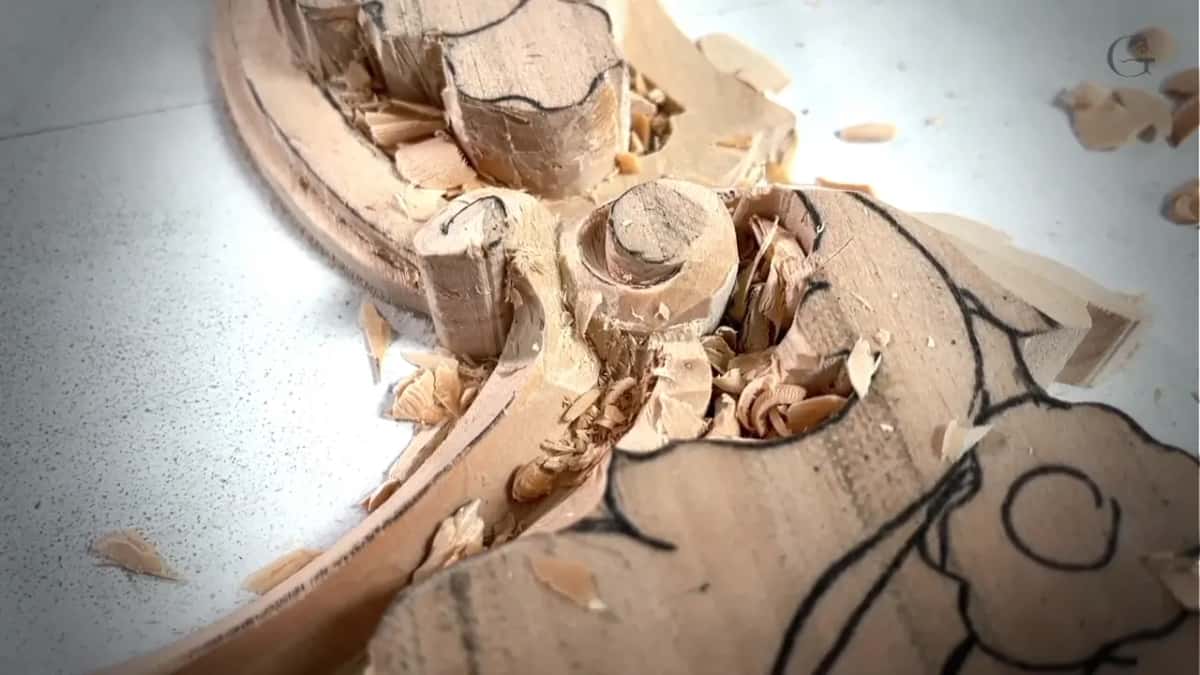
Last came one millimeter or even half a millimeter. That pass goes underneath, and I wanted that line to look like it goes right underneath. I was not sure which to grab. Half a millimeter would probably be sufficient too, I said. I placed the tool carefully, went the opposite direction as well, and said maybe even deeper. Next, I said, I would use a small number 5, a quarter inch (6 mm), to get right underneath.

Does the line always go underneath?
Not in my lessons. Here the plan was for the line to slip under the detail. Other lessons say the opposite. Part 3 of this same lesson has me saying that every time you have a pipe, that intersection line has to be higher, much higher than the rest of the leaf, so it has to be convex. Lesson 11 repeats it, with the intersection line higher than anything else, so it cannot slide under, or it will not look good.
Both are my words, from different lessons, and I will not squeeze them into one rule for you.
Lesson 19 of the furniture panel shows a molding in the same picture. I pointed at the intersections and said that molding is supposed to be slightly lower, and it still flips over and goes underneath, while another part is above that part. I have multiple spots like that everywhere.
Which tools get into an intersection?
The small ones. My lily box course, in lesson 2, has me spotting some intersections and saying I should use the same 1 millimeter (0.04 in) number 11 for them, with my passes right on the side. Be careful, I said, and don't press too hard. In workshop 59 a tool was a little too big, so a smaller one came later for stuff like seeing those intersections. A slightly longer concave between was what I wanted.
The grape onlay, lesson 3, adds a skew knife. I pointed the toe down so I could get in those intersections, and I took the triangle intersections a little deeper. That way I can create a really nice shadow. Earlier in that lesson I had said to get inside of that intersection from all of the positions.

Two movements were going to intersect in Maine lesson 8, and I wanted a sharp line between them. I rolled a number 7, 14 millimeters (0.55 in), backwards. Then a number 9, 10 millimeters (0.39 in), excavated right underneath that rolling motion.
| Spot | Tool | Where | Note |
|---|---|---|---|
| Inside the curve | Gouge number 6, 12 mm (0.47 in) | Part 1 | Yes, it fits really, really nicely |
| Detail under line | Number 5 at 6 mm (1/4 in) | Same part | It must go under the detail |
| Tighter spot still | Tool number 5, 3 mm (1/8 in) | Same video | I needed something even smaller there |
| Line beneath detail | A half-millimeter tool, 0.5 mm (0.02 in) | Last pass | Half would probably be sufficient too |
| Eye on furniture | Small number 8, 4 mm (0.16 in) | Lesson 37 | Concave on both sides, convex between |
| Rolling motion joins | Number 7 gouge, 14 mm (0.55 in) | Maine 8 | Two movements meet, sharp line between |
| Lily box intersections | A one-millimeter number 11 gouge (0.04 in) | Lily box | Be careful, do not press hard |
What goes wrong at an intersection?
I owned up to mistakes at these spots in my lessons. I told you in my Roman acanthus course, lesson 11, that I went too deep in one direction and destroyed the original eye in the pipe. This intersection is not as easy as it looks, I said, and I did not want to repeat it. Then a number 9, a quarter inch (6 mm), took what I left, and I carved concaves right there, carefully.

Workshop 53 has a line that intersects with another one. That is called a T-stop, I said, like a letter T, and it is no good. So I moved it. I shifted my middle line to make approximately a parallel between those two lines, and then it curves more fluent.
On the hazelnuts, lesson 5, I warned you not to dig too deep right away at the intersection of a bunch. You can always go back and fix the position. It is hard to fix once you dig too deep from the beginning. Mine sat about half an inch (13 mm) down, maybe 14 millimeters (9/16 in), and no more than that.
Where details intersect, in lesson 16 of the furniture panel, I popped a little section and lost a little detail. I made a mistake, I said. I should have relieved a little more.

Part 1 also has how I know when I am tired. If I look at my bench and see more than two or three tools, I am tired. I also said sorry for my mumbling that day.
If you want the wider picture, Wikipedia has overviews of wood carving and relief work. I gave depths in both millimeters and inches.
This part is one of three in lesson 5 of the course, and the whole panel runs through fourteen lessons. Other lessons I drew on include the Venice Room and the grape onlay.
Which intersection on your piece makes you slow down?
How it's done
- Check the original piece. Look for slopes on it, and reference it before you make the pass.
- Swap a tool that will not fit. Mine was too big on the inside, so a number 6 took over.
- Make the first pass straight down. No leaning that way or that way, and slice around the whole shape.
- Add the shadow line. Go a little deeper, inward first and then down to the floor, without forcing.
- Slope beside the ridge. Pick a smaller tool, watch the depth, and keep the pass shallow so the ridge is not damaged.
- Attack from the other side. When you reach the limit on one side, switch sides.
- Place the last line. Use a half millimeter (0.02 in) tool, place it carefully, then go the opposite direction as well.
Frequently asked questions
Where does an eye sit on a carved leaf?
An eye sits where two leaves come together, and I also called that spot an intersection. You have a convex and a convex there, I said at my furniture panel. A small tool, a number 8, makes the side hollows.
Should grapes meet in a triangle or a square?
Triangle. I said to avoid a quad where two grapes touch, since a quad is really hard to clean, and you have to get to the point where the grapes connect. In the tray lesson I said I try to get a triangle intersecting point.
Which tool reaches a tight intersection?
Small tools, mostly. On this panel I stepped down from a number 6 to two sizes of number 5, then to a very thin tool for the last pass underneath. Number 11 did the same job right on the side of those spots in my lily box lesson.
What to carve next
- Carving Floral and Molding for the Panel, the course page
- Floral and Molding lesson 5
- Floral and Molding lesson 11
- Vase with grape leaves lesson 2
- Grape onlay lesson 1
- Grape onlay lesson 3
- Tray of Blessing lesson 8
- Venice Room workshop 86
- Venice Room workshop 87
- Venice Room workshop 53
- Venice Room workshop 59
- Roman acanthus lesson 11
- Lily box lesson 2
- Furniture panel lesson 37
- Furniture panel lesson 19
- Furniture panel lesson 16