

Alexander Grabovetskiy, woodcarver, School of Woodcarving · Published 2022
What is a half millimeter number 11 gouge used for in wood carving?
Quick answer: This very small veiner is for small jobs, like separation cuts, undercuts, deep shadows and cleaning fuzz out of tight spots on a panel. In part 3 it cut a line by an overlap, shallow but still somewhat visible, and I did not need a wide cut.
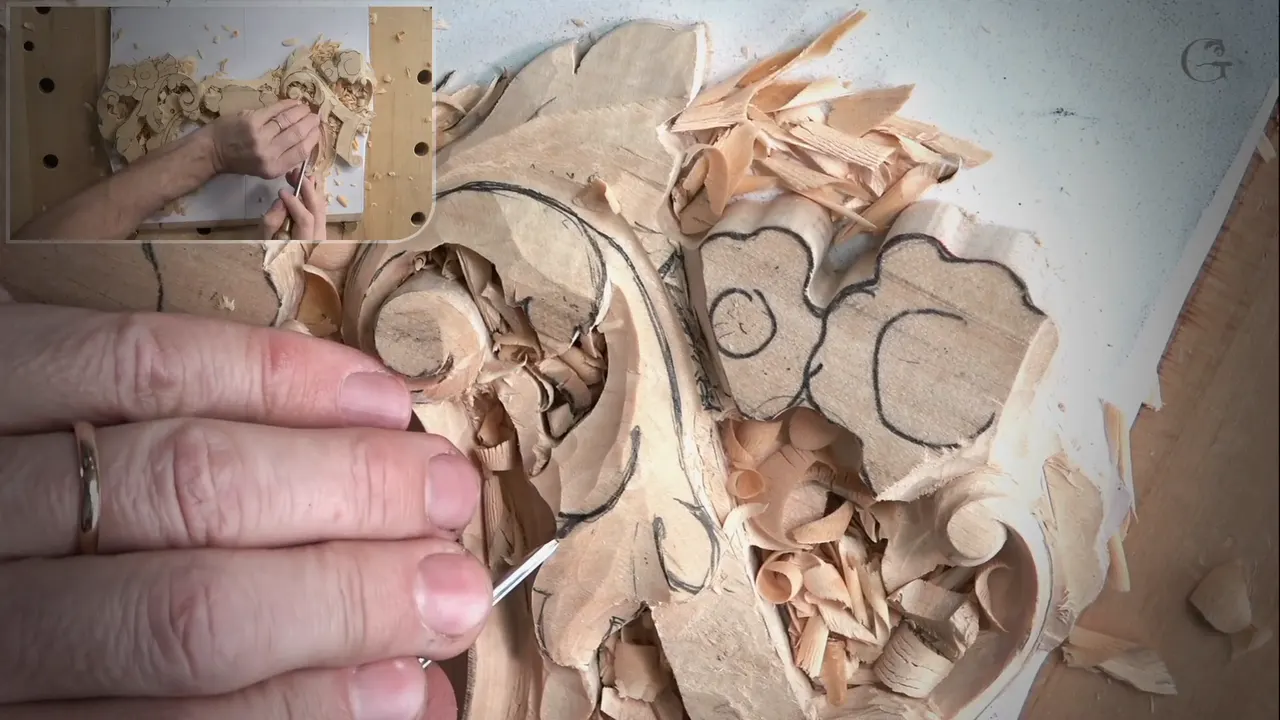
A half millimeter number 11 is a veiner I pick for tiny jobs, like a separation cut, an undercut or a dark spot deep inside a carving. It is half a millimeter (0.02 in) in size, and I use it on furniture and on flowers. I call it one of my go-to tools.

Ever carved a line so small that the next gouge in your roll was already too big? Want one part of a leaf to slip under the next? Then give this little tool a few minutes. You will watch it work in part 3 of lesson 5 of Carving Floral and Molding for the Panel. After that come my words about the same tool in other courses, and each passage says where it comes from.
What does the tiny veiner do in part 3?
It carves the line that makes one part of the acanthus look as if it overlaps its neighbor. Not as deep, I said, but still somewhat visible.
Other cuts came first. A 3 mm (1/8 in) number 11 outlined the part, and 5 mm (about 3/16 in) would work too, but I went with 3. Next, a 14 mm (about 9/16 in) number 7 made the sloping motion, and one part kept going deeper, down to about a quarter inch (6 mm).

Now I told you what I was building. This part overlaps that part, and right there is going to be an eye. That gave me a chance to create a separation. For the job I picked the half mil, number 11 of course, and attacked that line first.
The other side came next. Yes, I said, I am using only half a millimeter, 0.5 mil. A wide pass was not what I needed.

My first words were about a flatter tool. Then, you know what, a smaller one would do, a really, really small, tiny tool. I doubted you could see much from that angle. What I did was bring the line in and blend it right underneath, so this one feels like it really overlaps.
Across on the other side, I did exactly the same thing with the number one. A last pass with the tiny veiner cleared all that mess. Good, I said, and really good.
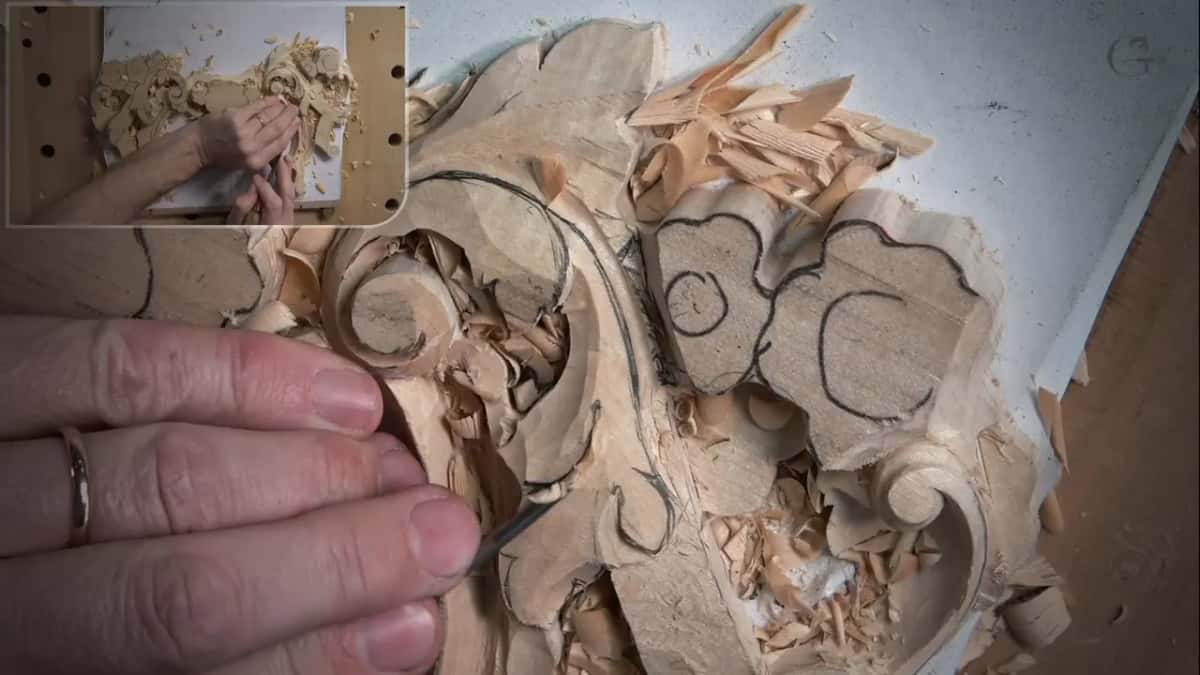
Right after that I talked about the pipe. A pipe is a convex movement, and to make it I carve concave cuts on each side. That story has its own home on the lesson 5 page.

The half millimeter in six lines
- Overlap line in part 3, not deep but visible.
- Separation cuts that are tiny get this size.
- Undercuts are its other big job, and a few lessons below show it.
- One small cut can leave a dark spot.
- Fuzz and old chips leave a tight corner with it.
- A rubber mallet is fine, I said, if I do not hit too hard.
When is a separation cut small enough for a half millimeter?
When it is tiny, I go straight to this size. In Furniture Panel lesson 21 I could take a section out, since that part was going to be a little lower, and then make the separation cut. Tiny, I said, so just the half mil would do. My name for it was a half a mil cut. The first cut went in, then that side too, and at least I was not going to lose that detail.

The other end of it shows in lesson 20. A big separation cut was out of the question, so a half mil it was. After that I explained the word for anyone who did not know it. I separate parts.

On a small flower in lesson 24, a micro cut went between the five petals. The tool was a half millimeter veiner, and I pushed it toward the center. I had to be really careful. A little separation was all I wanted there.
Thinking comes first in lesson 35 of the second furniture course. Before I make a cut, I have to think where the shadow is supposed to fall. The light most likely comes from above, so the shadow lands on one part, and that means this part overlaps that part. Next I picked the tiny number 11 for my preliminary cut. It does not have to be that size, I said, though I think it is a wonderful tool if you are in furniture making.

Blending followed, with a number 3, about a quarter inch, six millimeters, held upside down. The Chamomile and Bow Rosette course has the same step on petals. A small veiner, the half mil size, made the preliminary cuts between them. Those were preliminary, like I said.
How do you make one part look like it goes underneath?
I carve under it with the half mil. The Furniture Panel course, lesson 37, has my own question in it: how in the world am I going to make it feel like it's going to go right underneath? My answer was the tiny one, a number 11. In my opinion it is a must have tool, especially if you are a furniture maker. You get so much out of it.

The first pass went straight down. Keep an eye on how deep the background is, I said, because I cannot make the cut deeper than the background.
Two steps come from lesson 22. One part is the upper part, and the other goes underneath. A 1 mm (0.04 in) number 11, laid a little on its side, made the undercut right away from the first one. Then the tiny one followed.
Over on a Hashemi flower in lesson 49, one more part had to go underneath, so I undercut it. It is tiny and almost impossible to see, but those tiny details make a big difference. That tool was the half mil, and I dug deep underneath. Right there, I said, it looked really deep.
Same job, lesson 7 of this course. Another part had to go under, so I reached for a smaller tool, maybe 1 millimeter or even the half mil. Then I began to excavate right underneath. Lesson 11 had me say I could even undercut underneath with the half a mil. I forgot where I had placed it, but let me undercut little by little, I said. That was end grain, which I said is not too convenient to undercut.
How do you get a dark spot without a wider eye?
The half mil gives me a really dark spot without making the eye any wider. In Venice Room workshop 64 I did not want a really deep eye, but I still needed some shadow. Number 11 of course, in the tiny size. If you ask me whether it makes a big difference, I know for a fact it will. See how dark it is, I said.

Workshop 65 has the same trick. Pay attention, I said, because right then there was absolutely no dark spot, and in a second you would see one. The deep shadow came from the tiny veiner, and I had to control it, since I did not want to break anything. The difference is big, and it is one of my go-to tools.
Back in this course, lesson 7 went smaller still, with the same pass, much deeper, and I said it would create a really beautiful shadow. Over in lesson 12 a section was hard to reach, and the tool made a beautiful shadow there too. I always have to be careful, I said, because I can damage the overall shape of that molding.
One petal in lesson 13 got a groove, a concave right in the middle. An extra shadow spot, I said. I did not start from the edge, and I made a little deeper concave. Hashemi lesson 11 had me pick up two small veiners, one the half mil size and one 1 mm, and the 1 mm went first. Shadows and light are what it is all about, I told you, and every little detail like that matters a lot.
Can it clean the inside of a tight spot?
It can, and I use it for that too. In Hashemi lesson 44 I took the 1 mm number 11, then the half mil, only to clean old junk from the inside. That junk was already cut, I said, and was just gathering small chips. That small tool went deep.
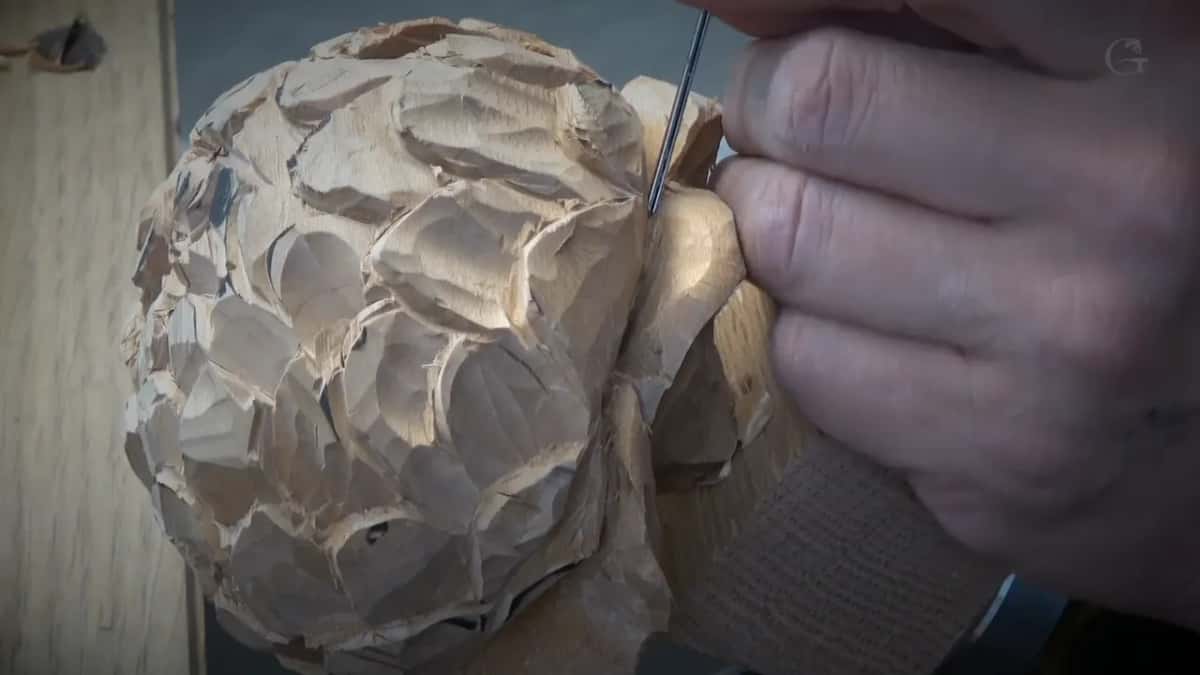
Later in that video, the 1 mm tool went in as deep as possible. I attacked from the other side, and the half millimeter followed to clean all that chunk out. I kept excavating until I could not see where it ended.
Two pieces that meet got the same treatment in lesson 47. After a number 11 I followed with the tiny size and tried to go even deeper. This tool goes really deep on the inside, I said, and you can barely see where the two pieces meet. A beautiful look. Right after, I cleaned the edge, and the same tool helped me there too.

Venice Room workshop 78 left me without much material, and I said I had to be really careful now. I wanted to clean around that section. We need the tiny one, I said, to remove all that fuzz. Lesson 19 had me reach for the same pair again, to clean all that waste out in both directions.
Where did I reach for it?
| Moment | What I did | Tool | Why |
|---|---|---|---|
| Floral lesson 5 | Overlap line, not deep but somewhat visible | Number 11 | Did not need a wide cut |
| Lesson 21, furniture | Tiny separation cut that keeps the detail | Half-millimeter veiner | Too small for a big cut |
| Lesson 37, furniture | Carve so one part goes right underneath | Number-11 veiner | Must have tool in my opinion |
| Venice workshop 65 | Deep shadow where no dark spot showed | My go-to | Makes a big difference, I said |
| Hashemi lesson 44 | Cleaned old chips out of a cut | Small veiner | Went as deep as I could |
What can go wrong with a tool this small?
You can go too deep. Furniture Panel lesson 29 is where I got carried away. I wanted to see that overlapping motion, so I took the half mil for a deeper pass underneath, and my excavation went really deep. A huge mistake, I told you. It was all right there, because I had wood left to fix it. In another spot it would have been a big mistake. Lesson learned, I said, don't exaggerate.

A small undercut was the plan in lesson 19, not much, and I said to be careful, really. Going through in that area would leave it too weak. The floral course says the same in lesson 12. I picked a different tool for the molding, actually smaller than the half mil, I think. Too deep can present a problem, I said.
Can you hit a half millimeter tool with a mallet?
You are not supposed to, I said in lesson 22, about those micro tools. With a rubber head like mine, I said, a mallet should not give you a problem, as long as you do not hit too hard.
A reason to like the veiner comes from lesson 24. I could point a gouge inward, which is much harder, and I could even help it with the mallet, but that is not the safest way. An edge can catch and break a section of the carving, and that would not look nice. So I take the veiner.

Is this the smallest tool, and do you need one?
Not the smallest, I said in Furniture lesson 19. A needle from a sewing machine already has a groove, much smaller than the half mil, and you can make a gouge from it. You create your own tool, and you can get really deep underneath. That one is finer still.
Which tools carry a flower? Flowers, I said in Hashemi lesson 49, need approximately four basic tools. I named a V tool, a 1 mm number 11, a 0.5 mm (0.02 in) one and, among the smaller gouges, an eighth of an inch (3 mm) number 8. Pretty much those four, five main tools are all you need for the flowers.
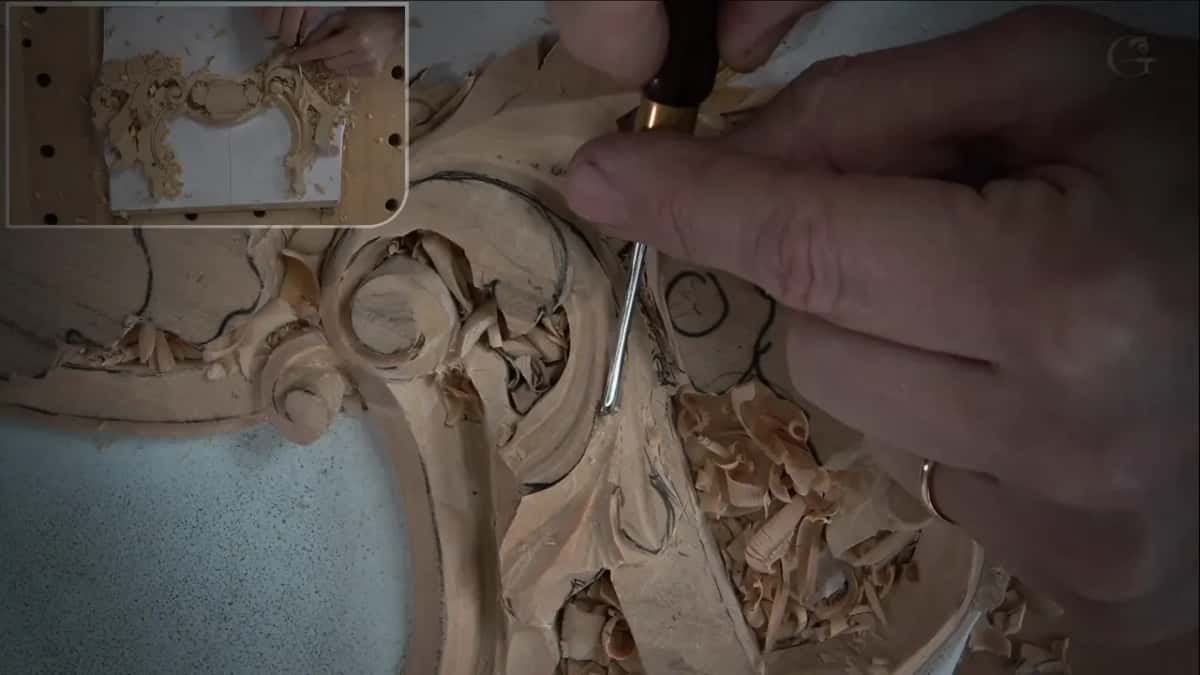
The Chamomile and Bow Rosette course has my own words on it. I really like that small number 11. If you have been with my school a long time, you already know I use it all the time, on all kinds of projects, furniture style or just decorative or ornamental style. I just love it.
Workshop 67 of the Venice Room puts a number on it. For that part of the carving most of my tools were number 11s, from the half mil all the way to 30 mm (1 3/16 in). Want the list of tools? Get all the number 11s. Back in part 3 of lesson 5, when the blending started, I asked for much smaller ones, a number 3 and a number 1.

Where does this part sit in the course?
Part 3 is the third video of lesson 5 in Carving Floral and Molding for the Panel. A gouge like this one carves relief on a furniture panel, and the shadow it leaves is the point of the work. Painters have a word for that play of light and dark, chiaroscuro. Read about wood carving in general there too.
Every size here is in millimeters and inches, my figure first. The mallet I mentioned has a rubber head, and the needle is the kind a sewing machine uses.
Which part of your own panel is tiny enough for this veiner?
How it's done
- Slope the lower part. A 14 mm (about 9/16 in) number 7 made the sloping motion, and one part went down to about 1/4 in (6 mm).
- Outline with a 3 mm tool. A 3 mm (1/8 in) number 11 outlined the part. I said 5 mm would work too, and I went with 3.
- Carve the line first. The tiny veiner attacked the line first. It came out shallow, but somewhat visible.
- Blend the cut underneath. I brought the line in and blended it right underneath, so one part feels like it really overlaps the other.
- Do the other side. Across on the other side I did exactly the same thing.
- Clear the mess. Another pass with it cleared all that mess.
Frequently asked questions
Is this tiny number 11 a veiner?
Mine is. In the Furniture Panel course I called it a veiner outright, and in this course I called it a number 11 veiner. My number 11s come in many sizes, and I named them in the Venice Room.
When do you pick the half mil over 1 mm?
A tiny separation gets the smaller one first, as in Furniture lesson 21. For an undercut or a cleaning pass I often start with the 1 mm (0.04 in) and let the tiny one follow to go deeper, as in lesson 44 of the Hashemi course.
Can you use a mallet on a micro veiner?
Not supposed to, I said in lesson 22, about micro tools. A rubber head like mine should not give you a problem, as long as the hit is not too hard. In lesson 24 I added that a mallet with a gouge can catch an edge and break a section of the carving.
What to carve next