

Alexander Grabovetskiy, woodcarver, School of Woodcarving · Published 2022
Why does my carving gouge dig in too deep?
Quick answer: Digging in too deep is what my gouge did on the back of a Gibbons layer whenever I pushed it forward. A raised handle does it as well, I warned the class in Maine. My answer was a hand solid on the board, a low gouge, a small rotation, light passes, and coming back from the opposite direction.
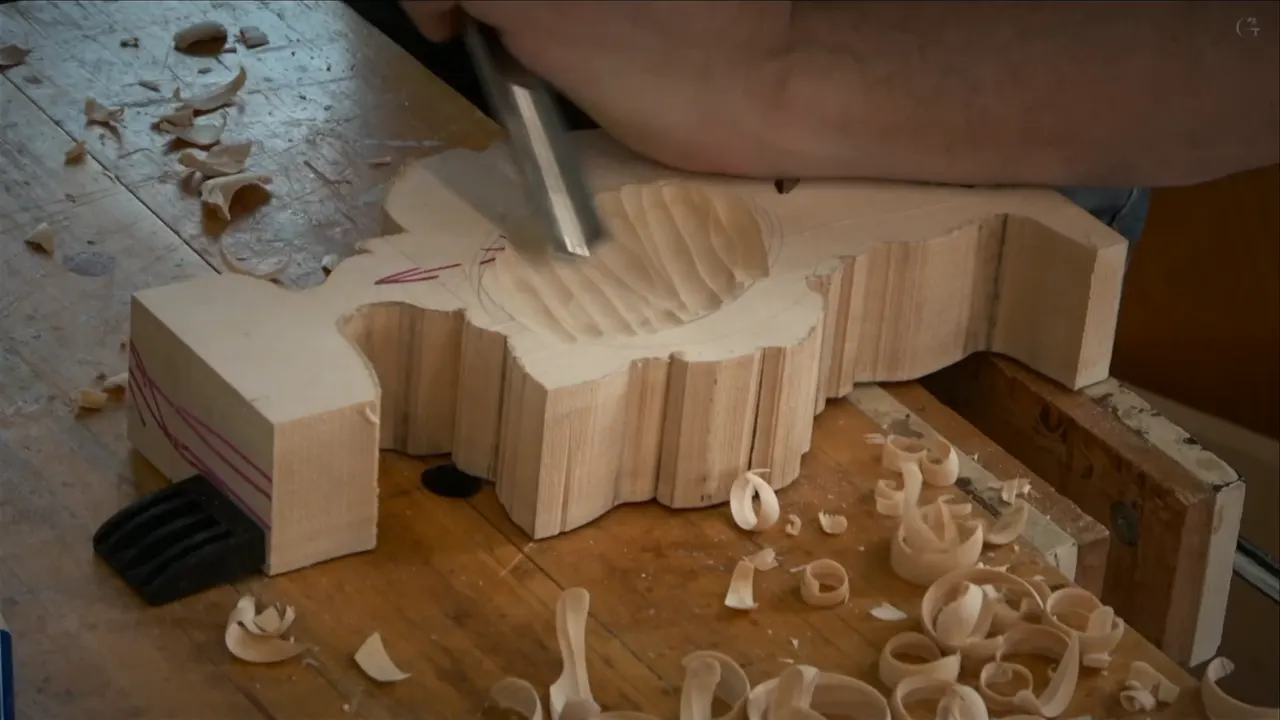
A gouge that digs in is a gouge whose pass keeps heading down when you wanted it to travel along. In my second Maine class on a Grinling Gibbons panel it happened on the back of the top layer. Push my gouge forward there, I told the class, and it would only go deeper. I switched and came at that spot the opposite way, then cleaned it. Much of how to use a carving gouge on a hollow like that is a few plain habits at the bench, and the ones I showed that day fit in one short video.

Have you felt a gouge glide along and then suddenly bite? Did one side end up deeper? Then you have met the trouble this page is about. I will give you what I did that day in Maine, plus the same moves on my tray, on two acanthus courses and in my tools videos, with each lesson named so you can go and watch it.
Six habits that keep a gouge from diving
- Pushed forward on the back of my Gibbons layer, the edge went deeper, so I changed sides and came in from the far end.
- One hand stays planted on the board.
- The handle stays low, because lifting it gave me a cut too deep right at the start.
- Each pass gets a rotation, beginning at one point and ending at another.
- Gradual, in small passes.
- Past a high spot, a straight tool digs in where a back bent can safely reach.

Why does a gouge keep going deeper as you push it forward?
Forward pressure on that hollow was the trouble, and I said so on camera. The piece in my hands was the upper layer of a layered relief, turned face down, and the job was a shallow hollow on its back so it could sit right on top of the first layer. I gave it no more than about half an inch (about 13 mm) and asked the class to feel the 3D of how deep they were going.
Be logical, I said, think about how it flips. If that goes that direction, my cut goes in the opposite direction.
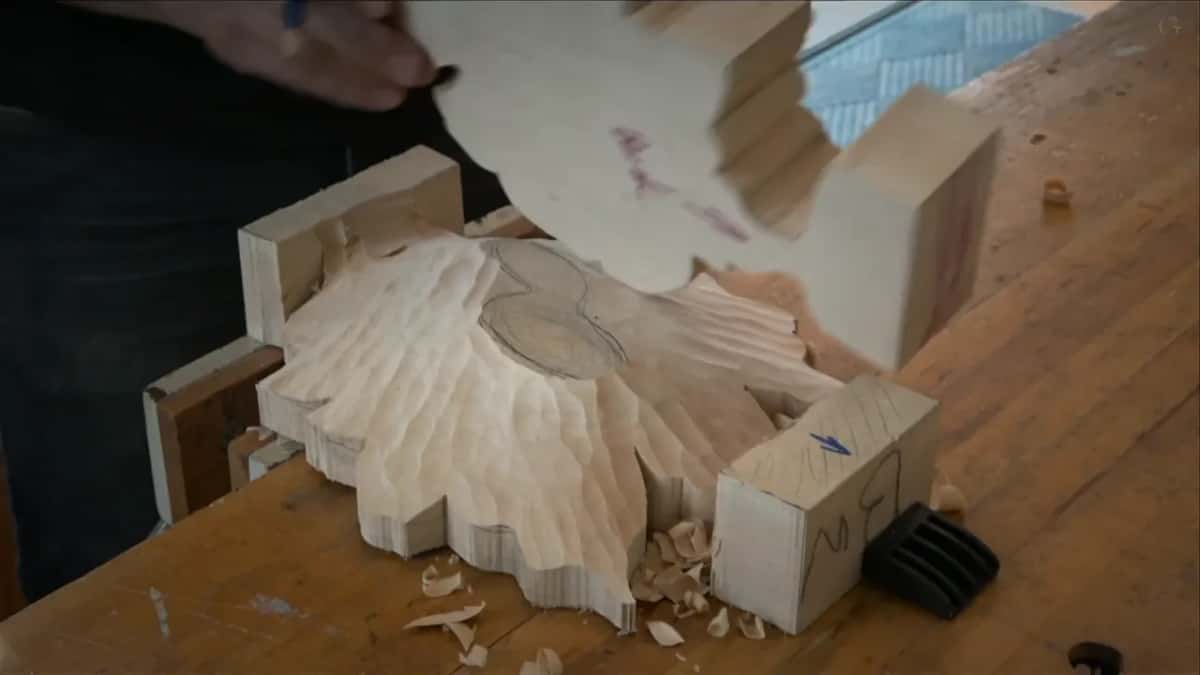
Partway in, the problem showed up. If you see what happens right now, I said, if I push my gouge forward it's going to dig even deeper. That means you have to attack from the opposite direction. I came back into it from the far end and kind of cleaned it, and the hollow went on from there.
That was the whole move. A new direction into the same spot.

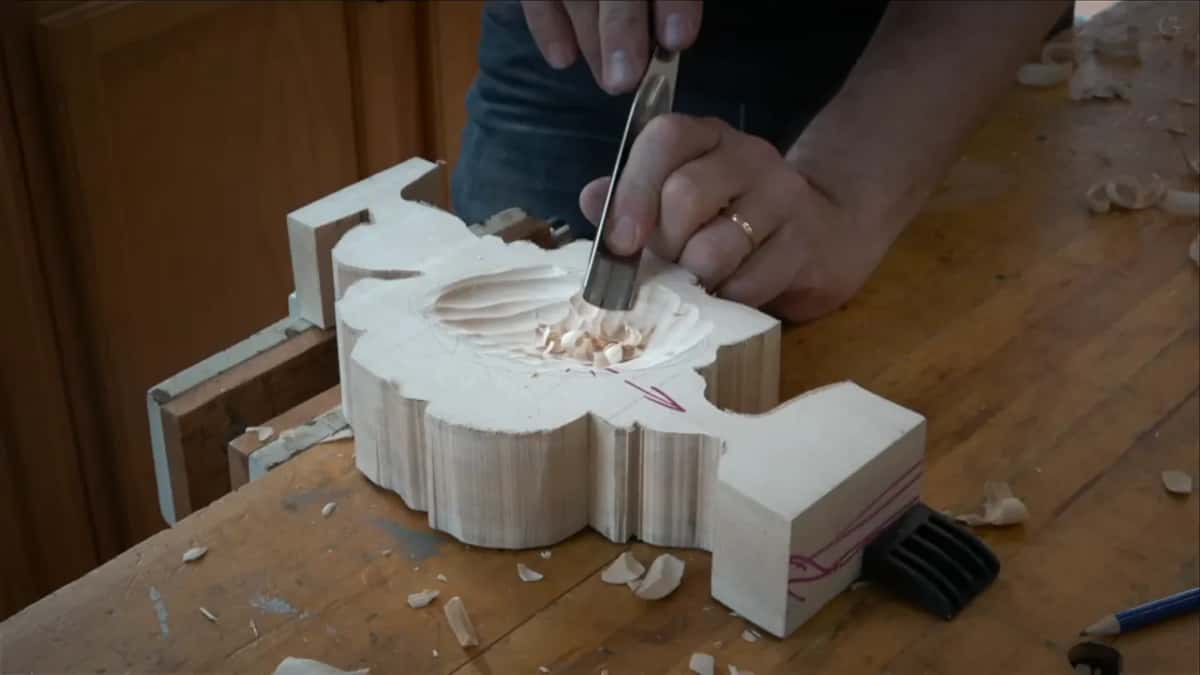
Does a raised handle make a carving gouge dig in?
Raising the handle came up three times in that one video. If I raise my gouge and start carving like that, I warned them, I'm going to create a big problem, and it's going to be too deep a cut. About a minute later I said it to the room again. Please do not raise your gouge high. Make it a really nice transition, just a beautiful gradual movement.

The first lesson of my Cabernet Sauvignon tray, a whole different project, had almost the same words in it. Don't raise your handle up, I said, and I gave the reason. Raise it and the cut goes too deep at the beginning, and that is really hard to clean up. That tray was a hollow too, and its shape had to be really flowing, not a straight cut. So we went toward the center first and then attacked again from another side.

The first of those three warnings had a name in it. Hold your gouge too high and try to travel inside, I said, and instead of a nice transition you get a really deep spooning. I kept a spooning effect off a grape leaf in lesson 9 of my grape onlay, so I will leave it at that.
My modern acanthus lesson 3 put a name on the way back out. Go in and escape, go in and escape, and that move is what I call the escaping cut. If the wood fights you there, I said, don't dig deeper, change, rotate the piece and come in from the other side. Close to the Maine answer, too.

How do you use a carving gouge with one hand on the board?
Lock one hand down and drive with the other. In Maine it was a good moment, I said, to explain the left hand, if you are right handed. That hand has to be solidly placed on the board itself. And don't raise both hands in the air. If you want the cut to be accurate, one of the hands sits right on the board, and that way you can control it.

Later in the same video I was working my tool a little differently, using just the fingers. I still kept my left hand really solidly in place on the workbench.

My tray lesson put it more bluntly. There is no such carving technique as air carving. My left hand, since I'm right-handed, is locked in position, and for a left-handed carver it is the other hand. That way the tool is under control. Treat your tool as your soldier, I told them, and you conquer the territory. It has to obey you.
For the floral and molding panel, lesson 4, the hand sat on a block of wood, either the background or the design itself, and I said that gives you a lot more control, enough for micro cuts. In lesson 1 of modern acanthus I added one detail. Keep that hand as close as possible to the blade. Mine sat on the handle.
What does the small turn of the gouge do?
A rotation steers the pass between where it starts and where it ends. When you carve, I said in Maine, you have to do that rotation motion, and that creates the cut. I started from one point and I ended on another point. Raise the gouge in the middle of that and you are back to the too-deep cut from the section above.
The tray lesson added the other half. By the end of the rotation you escape the cut at another side of the tool, I said, and that is really important. Later, hollowing the same tray, I called it rotation or slicing, how it's called, and showed how quickly the material comes out. That stage, I said, is roughing out, or boasting, as they call it in England. Be careful not to destroy the edge, I added. You don't have to be perfectly right on the edge, but still you don't want to destroy it.

Why go little by little on a hollow?
Taking less is what I asked the Maine class for. Make sure it's gradual, I said, little by little, and you don't have to remove a lot of material at once.
With the Byzantine acanthus, in lesson 10, I said don't get too deep cuts. Those first ones were just an indication of the movement, nothing more, because we don't want to lose the overall shape. Otherwise it gets too stripey. I don't like too stripey.
Back in that same acanthus lesson, I said that when you take less material, you get the job done faster, and I joked that less is more.
In workshop 48 of the Venice Room I picked up a different number 5 and said I did not want to dig in. I wanted to blend there, and I did not want too deep cuts inside of the concave.

What do you do after the gouge has already gone too deep?
On my furniture panel, lesson 15 I caught one myself, right on camera, while I was working the background around a molding. I made a mistake, I said, which I should not. That was my molding, and that spot right there was too deep, about 1/32 of an inch (about 0.8 mm). That meant the overall height of that molding would go to 3/32 of an inch (about 2.4 mm), lower than the part next to it. I should have paid attention.
Sometimes the fix is to stop and clear the way first. On lesson 5 of my grape onlay I was all the way through on one side and attacked from a second angle, and not rushing it was probably the most important part of that operation, I said. From that side, if I kept digging, my bulging was on the way, and it would go too deep in that area. So I took some material out first, probably with a number 5.
And on the tray I reminded everyone that you can flip the work as many times as you wish and come at it again from a new side.
When does a straight tool dig in behind a high spot?
Right behind it. In my back bent video I showed a high spot with an area right behind it that I still had to carve. Attack that at the right angle with a straight tool and it will dig in, I said, so it won't let me carve it nicely. My back bent is raised above the wood there, so I can safely attack that part. That is one of the reasons I love that tool, and it does undercutting too.

Can the bevel make you lift the handle higher?
In one tools video it did. For hardwoods I use, most of the time, a really short bevel. With a bevel that short you have to raise the tool a lot, and in that video I raised it high and was still not grabbing the material. When you carve every day and have to raise your tool too high, you raise your elbow and your shoulder too. Do that many hours a day and you get tired.
What came after the hollow on the Gibbons layer?
The front. That video was two steps, the back side and then the front side, and I kept reminding the room which one we were on. Make sure you are working on the backside, please. The hollow itself was only a preliminary, about half an inch, and the true fitting of the two layers comes later.

Then I flipped the piece, looked at it from above and found the high spots, the same idea as on the first layer. My main guy is a tulip. I left about one inch (about 25 mm) around it untouchable, for now at least. How the first layer got its dome is in class 1, and blending the two layers is class 9.

One more thing from the start of that video. During the rough chopping before the hollow I told them not to try to be so accurate. Just chop the thing. Right then it was only chopping off whatever we were not going to use, so there was no reason to spend all day long on it. This is woodcarving with a gouge and a bench, nothing fancier.
Did the same trouble come up later in the Gibbons course?
It came up again in class 3, where I opened with a plug and a warning. Try not to abuse your tool, I said, and don't create too deep a cut. A quarter inch (about 6 mm) was the deepest I went with that first plug, and then a little at a time, just go down. Abuse the tool, I told them, and you're going to break it.
Later in that class I was going slow on an outline. Don't create too deep of a cut that's going to create a problem later on, I said. Every cut I made there was a kind of scooping out, and even on a short one I still made it a slicing cut. The most important part, I said.
Class 10 had the push problem in plain words. That would be a mistake if I would just push it, I said. Half a minute later I went at it the other way with the same tool, a number 16 of 35 millimeters (about 1 3/8 in). Mine is antique, but you can do it without antique tools.
One was my own, in class 11. I had excavated too deep underneath one part and left it paper thin, so I made the decision to break it off completely. That exposed my first layer and a flower under it, and I kind of like that.
Class 11 had the handle problem too. Early in one video I had a tool from the French brand Auriou and was going to attack from the side, aiming at one little spot, and I said not to rush it. Later, aiming at a spot again, I said I cannot raise it like that. Need a spoon for that? Use a spoon, I said, because sometimes there are some limitations.
And in class 14, working next to the background, I asked them to make sure you don't cut too deep. Leave that background undamaged, unless you want to texture it.
Where the dive showed up on my benches
| Trouble | Fix | Where |
|---|---|---|
| Gibbons back hollow | pushing forward made it dig even deeper | Maine class 2 |
| Raised gouge handle | the start of the cut goes deep | tray lesson 1 |
| Behind high spots | straight tool digs in, back bent attacks | tools course video |
| Molding gone low | whole molding height came down to 3/32 | furniture panel 15 |
| A bulge ahead | took some material out first, number five | grape onlay 5 |
Tuition opens the full Maine videos, with every class of the Grinling Gibbons course and the hub lessons named above. One handle broke off my own blank in that video, by the way, and the first words out of me were that I just broke my leg. Not my leg, I said a second later, but the handle.
How it's done
- Set the other hand down. My left one goes flat on the board or the workbench before the gouge moves.
- Hold the gouge low. Up high, the edge buries itself at the start of the pass.
- Turn it through the wood. A rotation, a start point and an end point.
- Go a little at a time. Gradual. There is no need to pull out a lot of wood in one go.
- Watch for the bite. When pushing forward starts taking the edge deeper, stop going that way.
- Come back from the other end. Turn around and work back into it, or flip the piece over as many times as you want, then clean it.
Frequently asked questions
Should you keep pushing a gouge that has started to bite deeper?
I change direction instead. Working the back of my Gibbons layer, more forward push would only take it further down, so I switched ends and cleaned it up. My acanthus course from a 1903 design words it another way. If the wood fights you, rotate the piece and try a fresh angle.
Which hand stays on the board if you carve left-handed?
Your right one. I'm right-handed, so the left one is locked in position on the board, and on the tray lesson I said that for a left-handed carver it is the opposite hand. Whichever hand it is, keep it solid, because a locked hand is what keeps the tool under control.
Should the steadying hand rest on the wood or on the tool?
Either works for me. My floral and molding panel had it on a block of wood, either the background or the design. For modern acanthus I put it on the handle and said to keep it as close as possible to the blade. Both hands in the air is no good.
What to carve next