

Alexander Grabovetskiy, woodcarver, School of Woodcarving · Published 2022
How do you make a hole in wood without power tools?
Quick answer: Opening a hole by hand is, on my Gibbons panel in Maine, gouge work. A single 10 millimeter number 9 (3/8 in) dug out a deep spot in about a minute or so. I stopped short of the workbench and left the rest for the back side. A hand fretsaw or hand drill can do it too.
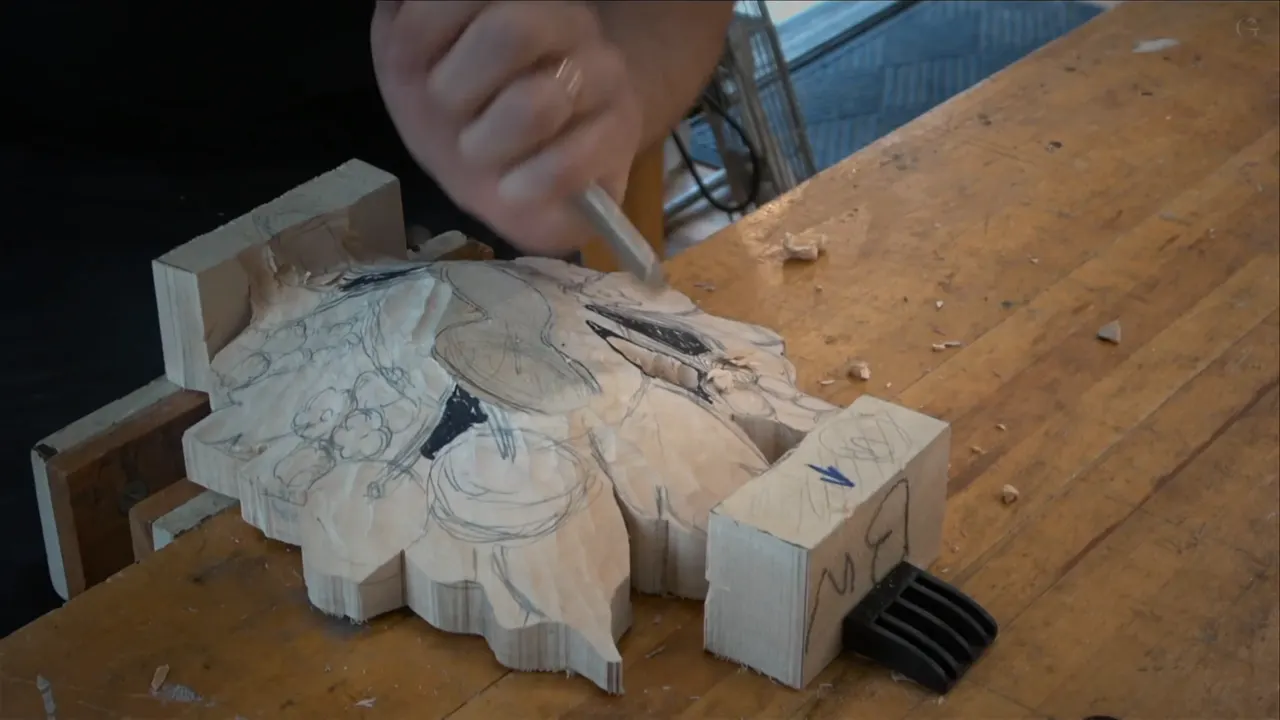
Making a hole without power tools is, in my second Maine class, the work of one gouge. A number 9, 10 millimeters (3/8 of an inch), went into the spots marked black on our Grinling Gibbons drawing and took the wood out without a drill or a saw. A frame saw with a really thin blade, a hand fretsaw or a hand drill can do the job too.

Ever look at an old carved panel and see dark holes going deep between the flowers? And did you wonder how anybody got in there before power tools? I asked my students in Maine nearly the same thing. In the 18th century they did not have the blades we have now, so how would they attack those areas? Then I picked up the gouge.
Six things from that class about holes
- Spots marked black meant deep excavation, and those came first.
- A scroll saw was the easy way here, since the piece was not big.
- Drilling could probably work, though not in every spot.
- My gouge was the 10 millimeter number 9, the one on the list for the class.
- Tight corners don't need the full rotation to free the plug.
- I planned to stop each hole early, because the workbench was right under it, and come in from behind later.
How do you make a hole in wood without a drill?
The scroll saw came first on my list. Our blank was small enough for one, so sawing those spots out would have been the easy road. Now think bigger. Say the panel is huge. How would you get that under a scroll saw?
Next was a frame saw, the old style from the 18th century. A blade for it now can be as thin as half a millimeter (about 0.02 in), and a blade like that lets you go as deep as you wish. Back then, I said, they did not have blades like that.
The drill came up next. On our panel you probably could drill those spots. But sometimes the movements around a spot make it impossible.

| Tool | What I said in Maine | The catch |
|---|---|---|
| Scroll saw | The easy way on a small piece | Not for a huge piece |
| Frame saw | Reaches deep with a modern thin blade | No such blades back then |
| A drill | Could probably do it on this panel | Movements around can block it |
| Drill press | A walk, then a bit to set | You must leave the bench |
| Hand drill | Absolutely fine, like any other hand tool | Same angle limit as drills |
| Number 9 | Quick, and it was on the list | Mind the workbench under it |
Wikipedia files the fretsaw as a bow saw, named for fretwork and made for work with tight curves. Its scroll saw page says that machine can run on electric power or a pedal, and that its fine blade gets through wood more easily than a hand coping saw or a fretsaw.
Why did I reach for a gouge and not a saw?
Picture a true woodcarver, with nothing around but gouges and a workbench. What do you do? You take a gouge. I put it to the class just like that.

The tool in my hand was a number 9, in my case 10 millimeters. Watch how deep I can go, I told them, and how quick. See how fast you can just remove the material, I said while the chips came off. Faster, I said, than any scroll saw. Keep digging and in a couple of minutes you come out the other side.
Then the drill press. My answer was a question. Why? That machine means a walk over to it and a bit to set, and so on. With the gouge, one spot took me about a minute or so.
And a plain hand drill? That is absolutely fine, I said, and so is any hand tool you have.

I call this a plug cut, and the name is simple. A plug of wood comes out. See, that is the plug, I said, holding the little piece up. How the gouge goes in and turns is a whole lesson in Carving Furniture Panel 26.
Eleven classes later, in Maine class 13, I said it again. I call it plug cut, because that small plug just pops out. A plain drill could work too, I said, but I didn't see any advantage in that case. The gouge was already through.
Saws still had a job on this panel. In Maine class 6 the piece went to the band saw to cut around it, and I said a scroll saw works too. Be careful, though, because by then it is becoming more fragile, and you can just break it.

Do you need a small gouge for a small spot?
One student asked what to do in a little area without a small chisel. You don't need one, I said. First of all, you have 10 millimeters, right? It was on the list.
Then I asked for the bigger chisel. Can you see that on the screen, I asked the room. Right there, you don't have to do the full rotation. Work just this side, and you are still able to get that plug out of the wood.

That gouge needed sharpening, by the way. Like I said, though, no full rotation is needed, and it's still possible.
When the sharpening came up, I said it was up to you. I would probably just buff it for now, otherwise you are going to be behind.

Why stop before the gouge goes through?
Going through from the front was easy, and I still held back, because the workbench sits right under the piece. My plan was approximately 7/8 on each hole, and then leave it like that.
Later, once we work on the back side, you can get to that hole from behind, and you don't have to be exactly in the hole.

I didn't go far on most of them, because I still had to develop the back side. One spot I took right through. My scrolling is done, I said. Exactly the same goes for all of those areas.
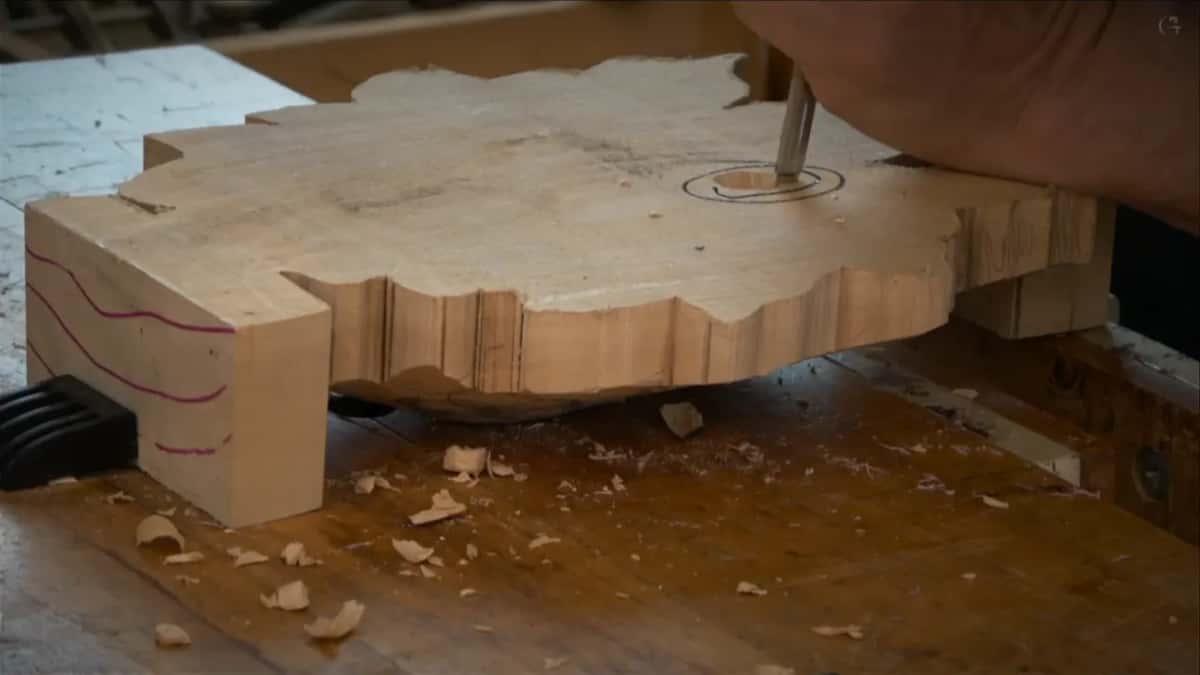
Sometimes I stop short for another reason. With a Hashemi flower I thought it would be more stable to drill a spot but not all the way through, because I didn't want to make it weaker. Maybe I'm just trying to be overprotective, I said.
Can a hand fretsaw make the openings instead?
All of my pierced work in Russia, I did with a fretsaw, just by hand. I told that at the start of my Lily Box course, because I do realize not all of you have a scroll saw.
A normal fretsaw is not that expensive. I believe I paid maybe $20 for mine. By hand it should not be a problem for you, although a scroll saw is much quicker.
And there is a story. When I came to the United States, my first woodworking tool was a cheap scroll saw from Lowe's. It was all jumpy and shaky, and getting the blade in was really hard, so the old fretsaw was a lot easier for me. Later on I upgraded and bought a really good one.
I cut stock two inches thick on a scroll saw. The stock for that box was about 20 millimeters (3/4 of an inch), a little thicker.

Wikipedia's page on openwork lists wood among the solid materials people make holes and gaps through. And in a relief, says another page, the carved parts stay attached to a background of the same material.
Is a power saw ever the better choice?
For speed, yes. In my V-tool sharpening lesson I put it this way. A coping saw can make the cope for a crown molding, and a jigsaw gives the same result. With the coping saw you spend about five minutes, and with the jigsaw half a minute, maybe a minute, so you save five times your time. And time, we know, is money.
For the scrolling on my floral panel I planned on the Pegas scroll saw I really like, because its blade is so tiny. A scroll saw lets you do loop cuts and water drop cuts, and get all those cavities and niches in one pass, so there I would just use it.
During workshop 76 of the Venice Room, somebody asked if a scroll saw can take two-inch thick stuff. Yeah, absolutely, I said. Scroll saws differ, of course, and I've got a really good one. A band saw would probably have been the quickest.
For my Modern Acanthus the bigger chunks went to a band saw before the scroll saw, I said, and I told you to keep those legs. Power is not free of risk, either. In my Byzantine acanthus course I called the scroll saw one of the safest tools. But don't be dumb, I said, because you still can damage yourself.
Where does a hand drill fall short?
On that same panel the board was only three-quarters of an inch (about 19 mm), so a spot with no scroll saw was not a big problem. A plug cut does it, I said, until you hit all the way through. So you don't really need a scroll saw there. Or drill it. A hand drill, or even a screw gun with a drill bit, lets you drill multiple holes and get rid of the majority of the material.

Drills have their limits, though. In workshop 54 of the Venice Room I said that in some spots you could just drill it. It does not work in every spot, because a drill has an angle limitation. My next tool was a smaller number 9, an eighth of an inch (3 mm), and went on digging deeper.

Another time, in workshop 79, I weighed two ways. I could just drill it, though I wasn't sure of the angle, if I'd be able to catch that spot. Or I could start digging in, with tinier tools the closer I got. Once I had measured the depth, a drill was really easy for me, because a hole to a set depth shows me exactly the position to be in. I put tape on the bit at approximately three-quarter of an inch (about 19 mm), just eyeballing it. Not the full amount, because I really wanted to check first.
Back on the floral panel, in lesson 4, with approximately a quarter inch (about 6 mm) to go at one spot, I could have taken the gouge and started digging. I showed a different method instead. You can drill a hole and establish a few spots that way, and I really like the pointing machine for it, because you drill to the point and set the needle to the height. You could use just a hand drill, which is absolutely fine. Just make sure the bit is wider than the needle.
Wikipedia describes a drill press as built for quick, easy holes that run straight and square to its table. Its page on the drill adds that drills were powered by hand before mains power came along.
Why carve holes into a panel at all?
For the shadow. During a live stream in April 2020 I talked about a plug I had taken out earlier. I wanted to pop that detail, and I needed to frame around it with shadow. I highly believe wood carving is about the shadows and the lights, and how it's going to hit the light.
In that same workshop 54, a little earlier, I went deeper, and deeper, and deeper, and then it was time to remove the plugs. It's going to give me beautiful shadow, I said. It's deep, but I can go even deeper if I wanted to.
I have to be really mindful when I do it, though. I have to really think about the grain of the wood, so carefully, carefully, carefully, I dig it out like a plug.
Why do the deep spots come first?
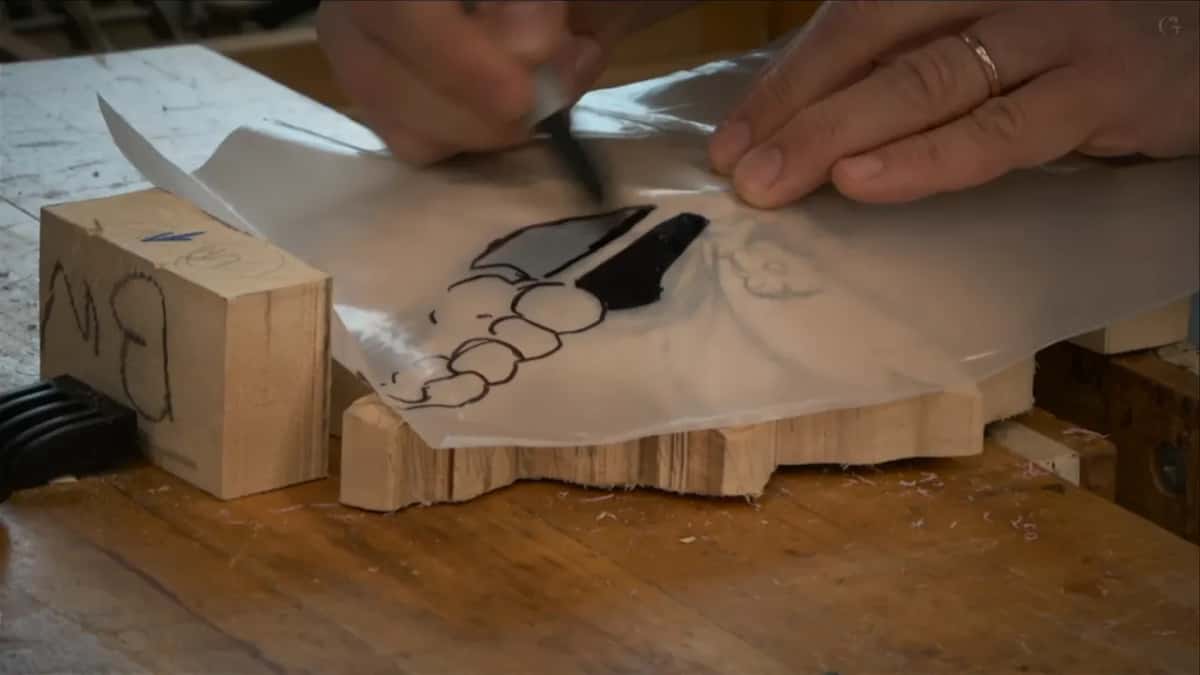
On our drawing, black meant deep excavation. Really deep. My marker stopped before the edge, since I had no more plastic, and the edge doesn't need it anyway. Excavate those first, I told the class. They are really important.
Carbon paper took the drawing onto the wood, and a line that came out a little off was absolutely fine with me. The gouges move lines around anyway. So go pretty much deep, and then jump on the details. See how quickly you can remove it, I said at the end of that video.

Later in that live stream a number 9 went in for a deeper shadow. I can go as deep as I wish, I said, and that's how I create those deep excavations. Earlier that day I called the plug cut one of the ways I really prefer.
Class 2 is one of eighteen in the Grinling Gibbons course, and Maine class 2 is where these holes get opened. The full videos are behind Tuition.
How it's done
- Mark the deep spots in black. On the plastic, I filled the spots that need deep excavation with black marker.
- Trace it with carbon paper. A line that lands a little off is fine. The gouges will move it.
- Take the gouge you have. Mine was the number 9 from the list, 10 millimeters wide, and a small chisel is not needed.
- Lift the plug. Set the gouge in the middle of the black area, take the plug out, then carve toward the hole.
- Ease up in a tight corner. Where there is no room, I skip the full rotation. Working one side still frees the plug, even with a gouge that needs sharpening.
- Hold back above the bench. I go approximately 7/8 and leave it, then reach the hole from the back side later.
Frequently asked questions
Can you carve a hole through wood with only a gouge?
Mine went right through with one number 9 in my second Maine class. Most spots I meant to hold back, because the bench was under it, and those get reached from the back side later. A plain hand drill would have been fine too, I told the class.
What size gouge do you need for a small hole in a carving?
In Maine I used a number 9 at 10 millimeters (3/8 of an inch), the one on the class list. A student without a small chisel asked about a tight area, and I told them a small one isn't needed. Skip the full rotation, work one side, and the plug still comes out.
Is a hand fretsaw good enough for pierced carving?
Every pierced piece I made in Russia, I sawed with a fretsaw by hand. A normal one is not that expensive, and I believe mine cost maybe $20. By hand it should not be a problem for you, though a scroll saw is much quicker, and mine takes stock two inches thick.
What to carve next