

Alexander Grabovetskiy, woodcarver, School of Woodcarving · Published 2022
Why should some flowers in a carved cluster sit lower than others?
Quick answer: Setting some flowers lower than the rest is how a group carved in relief keeps an organic look. In Maine class 3 of my Gibbons course, one section had movement going on underneath, so I lowered it. Carve those flowers exactly like the others, I told everyone, and they look almost childish.
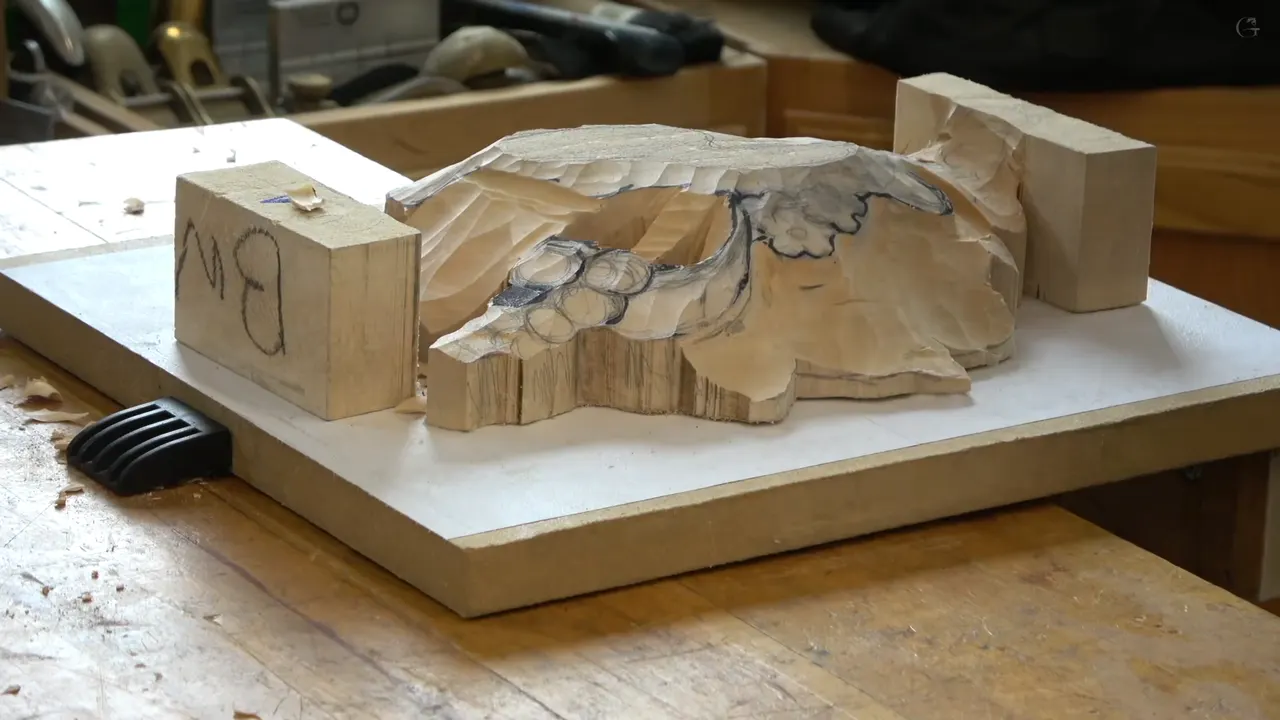
Setting some flowers deeper than their neighbours is what keeps a group of them looking organic. In class 3 of my Grinling Gibbons course, the class we filmed live in Maine, one area of the flower group sits somewhat lower in the original design, so I lowered that area before anything else happened to it. On these relief carving flowers the depths went in first and the details came later.
Have you carved a few small flowers side by side and found they all ended up at one height? Did they look stiff when you stood back from the bench? Then give them their depths before a single petal goes in.
Below you'll find each depth I gave that group in Maine, which gouges set them, and what I said about the same trouble on other pieces of mine.

Depths I set around the flowers in class 3
- One high spot stays put.
- Next to the flowers the wood comes down gradually, one side and then the other, toward the background.
- One part of the group sits lower, since something happens below it.
- A stem dives in from nothing.
- Each flower gets its 3D form before any detail goes on.
- Approximate is fine.
Why do flowers carved all the same look childish?
In the picture of the original, one area of those flowers is somewhat lower, with some movement going on underneath, and we were going to lower that down. If we do exactly the same flowers in this area, I said, it's not going to look organic. Childish, you know, almost.
A few minutes earlier the same thing came up somewhere else on the panel. That area belongs to that lower movement. It's connected, I told them, so I took it down slightly with the same gouge, to give some indication that there's stuff happening down there.

Before any detail, we made the full 3D shape of those flowers first, just like a grape, pretty much, and then we put the details in. Maybe a simplified form, I said, not necessarily to the degree of the picture.
Later I put it in plain words. What I'm after is a 3D look. And a little after that, now we start to work on the true three-dimensional stuff.
Then I joked about it. We are trying to release those flowers, just like Michelangelo looks at the stone, sees the stuff in the stone, and releases it. Feel like a Michelangelo, I told them, and then I said it was a joke. Nobody has interviewed him. You can see whatever you want to see in the stone.

What depths work for relief carving flowers in a group?
Here are the numbers I gave in Maine, approximately, as I said them. They start at a high spot and end a quarter inch (about 6.35 mm) above the background of the relief. The white under the carving in most of these pictures is paper, glued onto an MDF backer board, the paper sandwich I explained partway through this video.
The second step began with a bigger number 9, 3/4 inch, 20 mm. I took those shapes down pretty much to about a quarter inch (6 mm). Gradual, I said, but still lower. One side at a time.

On the other side I did the same thing with two shapes that look alike, like parsley leaves. Let's do it about a quarter inch (close to 6 mm) from the background, I said, but really gradual. The parsley leaf itself is carved later in the course, in class 14.
Then the flowers. If you look closely at the picture there is a stem, and it goes approximately half an inch (about 13 mm) down. The stem won't sit on top, I told them. We are working in full 3D, so it starts at nothing and goes all the way down to that. In one place I did not go deeper, because the upper piece covers it there and I'm going to blend the two together. How a stem gets undercut until light shows behind it is in class 5.

Between those flowers a smaller number 9 dropped the wood slightly, maybe to a half inch (12.7 mm), and later on maybe a little more. Another area went almost down to that quarter inch mark.
In one spot I first said this side is going to be like three quarters of an inch (about 19 mm) down, while the other side goes all the way, a quarter inch (roughly 6 mm) from the background. Then I changed my mind. Maybe not the full three quarters, I said. Let's do a half inch (close to 13 mm) in this spot, and keep the quarter inch on the other side.
Where does the high spot stay?
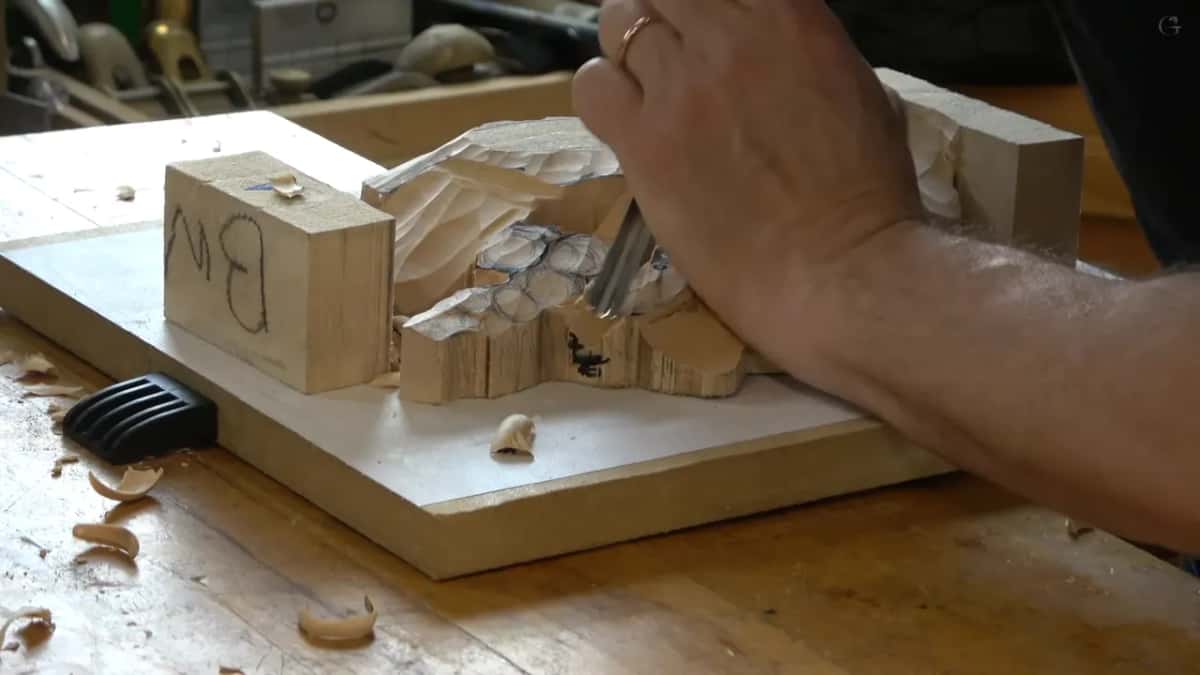
Where I chose it before lowering anything. Partway through class 3 I showed one area and said that one is the high spot, and around it the wood went down to a quarter inch (near 6 mm). Still doming, I said, still creating some kind of motion from above down.
Back in class 2 I had already named the main guy, which was the tulip, and a secondary guy somewhere else on the board, and the rest of it came down.
Class 7 said the same about the tulip. The tulip is the highest spot, I said in that class, it's the main idea. Doesn't matter what other flowers think, the tulip was still the main idea.
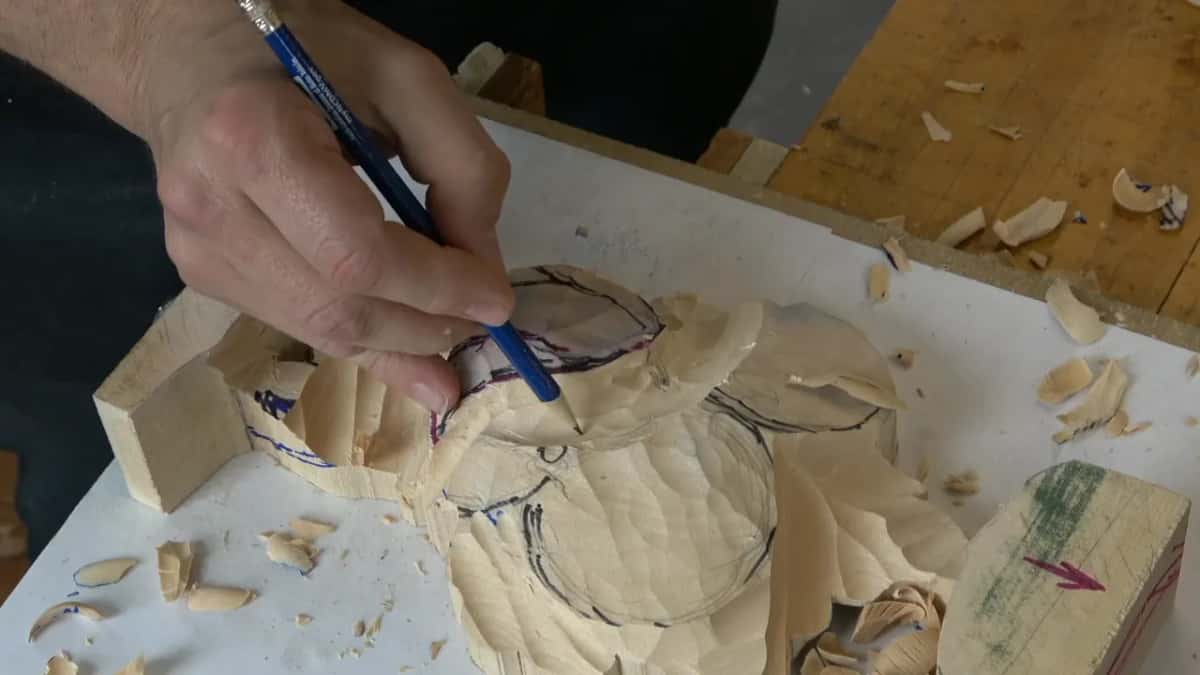
And even there the depth went in by stages. I had dropped one space approximately 1/2 inch (13 mm), the connecting point for a stem, with flowers growing from somewhere underneath. The tulip is about an inch and a half (about 38 mm) wide, which means the final connecting point is going to be about three quarters of an inch (19 mm). For now I was going to do only half of it, and leave roughly a quarter inch (6 mm) for later development.
Should the ground come down all at once?
Gradually, one side at a time, and quickly. Those two steps should take no more than 15 minutes, I told the class, and don't get into the zone, or flow, whatever you call it. We had to work on the details later on.
I was careful in one place, too. Careful, I said, I don't want to lower too much there. I'll probably change the design slightly, I said, rather than create overcomplicated stuff in that spot.
What happened to a flower I called too childish?
It got changed. Twelve classes later, in class 15, I showed everyone the original again, semi original, because by then we had made the panel wider. Overall, let's say about 80 percent was still authentic to the original Gibbons work.
One flower in it, for me, was just too childish. I really don't like how it looks in the original, I said, and I want to make changes. Below it, some flowers are sticking out from right underneath, and we would still be able to add some kind of lower there. But I wanted to do something else, a little more complex.
The center would stay in about the same position and look a little different, narrow and close to the petals, growing up and opening up.

Do my other carvings follow the same rule?
I've said it on several of them. On a flower in lesson 2 of my Venetian flowers rosette, the center hole I had opened with a plug cut sat on one level, even sloped a little, and I don't like that. I wanted to go up and down, with concave and convex movements. Some high spots, some low spots, otherwise it's not going to look organic.

A Venice Room piece got the same verdict. In workshop 59 I still didn't like one chunk and thought maybe I should get rid of it. It just doesn't look organic, I said, it doesn't flow together. Then one part goes underneath and the other flips this way, and I think it looks much better that way.

Class 4 of the Gibbons course compared it with the way a child does it. For the outside of a petal you can do a simple round look, or you can give it some waviness. The simple way is what the child does, I said on the iPad, and waviness gives a more natural, organic look. The waviness itself belongs to class 4 and class 8.
I said it the other way round on a table apron. In workshop 16 of my dining table apron course it doesn't have to be perfect, because it's done by a human being. You can make it as perfect as you can, but it doesn't mean you have to make it sloppy or childish. If it's not too perfect, that's fine. My teacher told me once that if you like what you've done, you are not a master anymore.

How do you see whether the depths worked?
Look from the side. On my Hashemi panel, lesson 19, I had berries to carve. Let's make it lower, I said. The reason I'm going low is that it gives me more of a three-dimensional look. The berries won't sit on the same level. One will be lower, and another one higher.
A few videos later I had to decide which one goes lower and which one higher, and I took one out, and I explained why. The difference is still detectable when you look straight at the piece, just not as noticeable. Look from the side, and you'll see the big difference. That is why I don't keep those details at the same height.
Lesson 28 of that course was about digging a ball inside each of those flowers for a socket, and I said the leaves would sit at different levels, so it would look true 3D. A number 8, one inch (about 25 mm) wide, was the tool I picked to dig around those leaves.
Even a background can get it. On a furniture panel I wanted one middle section a little deeper, more than an eighth of an inch (about 3 mm), because I don't want to see exactly the same level everywhere. I said I'd go 5 mm (about 3/16 in) deep there, half of the panel, which was 10 mm (about 3/8 in) thick.
Lesson 21 of that panel put it another way. As you know, I'm all about the shadows and lights, I said, and there are five different levels of shadows you could create.
On the Gibbons flowers, the smallest one got its number in the next video. That one is about 1/4 inch, I said, which means this part has to drop pretty much to a quarter inch, around 6 mm.
Every depth from class 3 in one table
Each figure here is approximate, the way I gave it to the class.
| Where it was | What I did there, and with which gouge | Depth reached |
|---|---|---|
| The high spot | Stayed high while everything around it came down | Highest spot of that area |
| Shapes beside flowers | The wider number 9 brought them down gradually | About 1/4 in (6 mm) |
| Two parsley-like shapes | Same gouge, other side, down toward the background | Quarter inch, or 6 mm |
| A little stem | From nothing, then the smaller number 9 there | About 1/2 in (13 mm) |
| Between the flowers | Dropped slightly with that nine, maybe more later | Maybe 1/2 in (13 mm) |
| One deeper side | First three quarters, then I changed my mind | A half inch, 13 mm |
| Its shallow side | Taken much lower, right beside the deeper side | 1/4 in (6 mm) left |

Which gouges set the heights of those flowers?
Three of them. The bigger gouge, a number 9 at 20 mm (3/4 in), took the wood around the flowers down. If the tool is a little too big, grab the smaller one, which in my case is a 10 mm (3/8 in) number 9. Going across the grain was much better on the stem, and even with small passes I was still slicing.
Then a number 7, 14 mm (about 9/16 in), blended that area into the deeper part I had dug, starting at nothing. Watch what I'm doing, I said. Long pass or short, I am still slicing, and I'm not pushing. I use the muscles of my palm and kind of squeeze the fingers, and that gives me the slicing motion.

How exact does each depth need to be?
Approximate. Of the stem I said about half an inch, and that approximately is enough. One spot changed while I talked, three quarters first and a half inch after that, and another I said I might drop a little more later on.
And none of it was the final detail yet. When I finished blending I put the line back on, and that line has to stay right there, because that part becomes part of the outside. The little guy beside it belongs to the same movement.
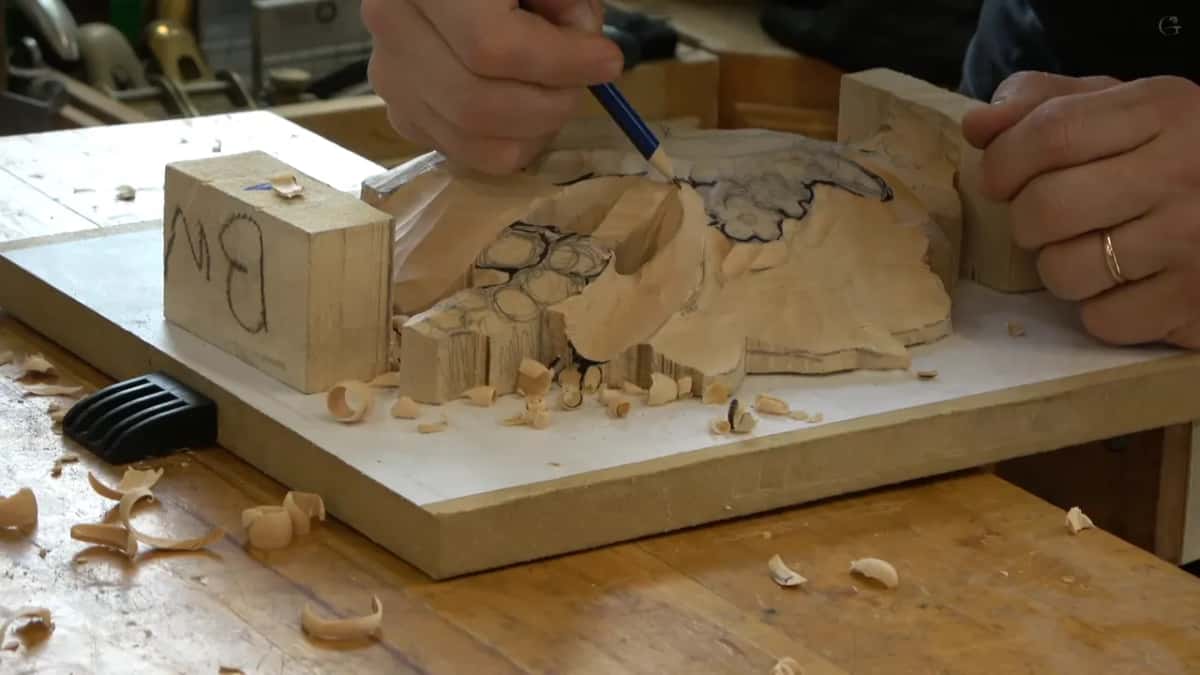
The rounding of the blooms comes next, in the last video of class 3, on the lesson page for class 3. If a group of flowers at more than one depth makes sense to you now, every class is open behind the tuition page.
How it's done
- Pick the high spot. I decide where it is, and everything else falls away from it.
- Lower each side gradually. My big number 9 takes the wood beside the flowers down gradually. The other side comes next.
- Drop what sits underneath. Where the design has something below, I lower that area of the flower group, so it won't look childish.
- Shape before detail. Full 3D shape first, just like a grape, and the details come later.
- Blend with a number 7. My 14 mm (9/16 in) number 7 blends the lowered area into the deeper part, slicing with the muscles of my palm.
Frequently asked questions
Why do the lower flowers sit deeper than the rest?
One section of the original sits lower, with something happening below it. In Maine class 3 I lowered that section and told everyone that carving those flowers exactly like the others would not look organic. It would look almost childish, and I was after a 3D look.
How low did the lowest parts go?
Roughly 1/4 inch, about 6 mm, above the background. I took them down gradually with that big nine, first one side and then the other, and kept a high spot. Two of those shapes looked like parsley leaves to me.
Do the depths need to be exact?
Approximately is fine. The stem, I said, did not have to be perfectly a half inch. Another spot started at 3/4 inch (19 mm) in my plan and ended at a half inch, about 13 mm, with the other side much lower.
What to carve next