

Alexander Grabovetskiy, woodcarver, School of Woodcarving · Published 2022
Is there an easier way to carve a small filler flower?
Quick answer: An easier way to carve a filler flower is the second one I showed in Maine. A number 7 works on one corner, going right around and then to its middle. After it, a 3 mm (1/8 in) number 11 works around them. There's more than one way, I said, and that's up to you.
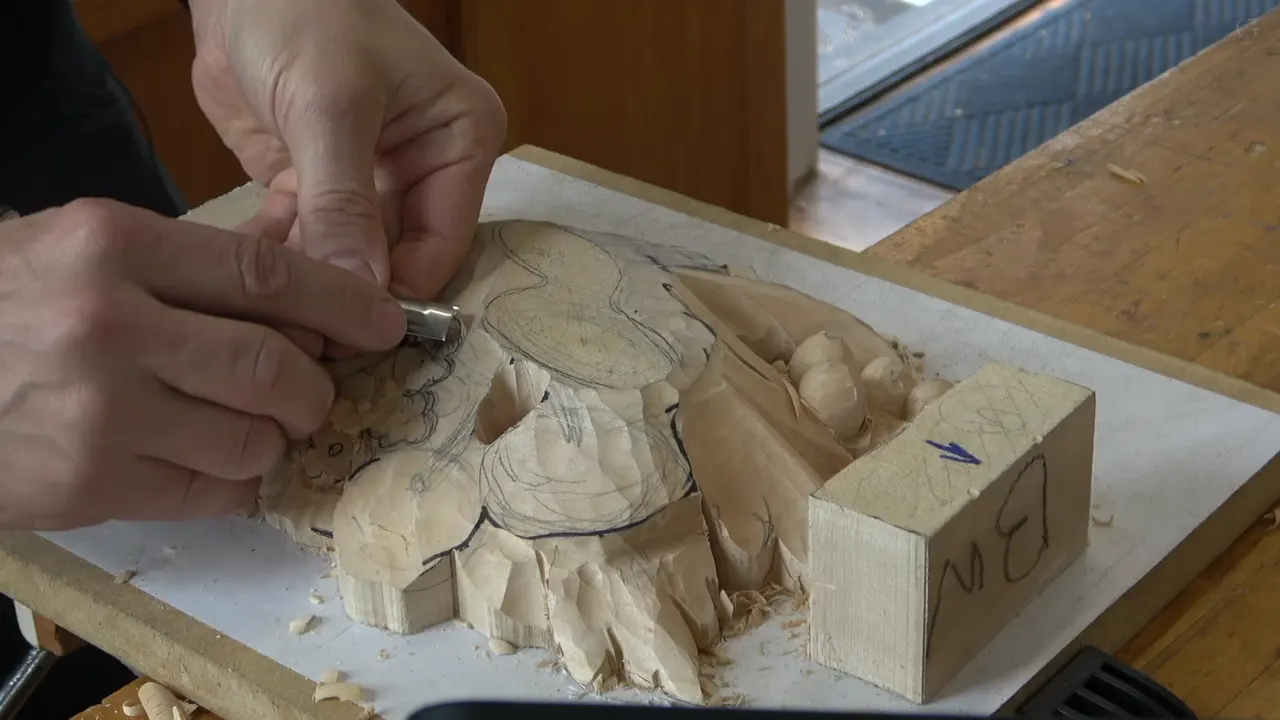
The second way I showed in Maine for a filler flower is a number 7 on just a corner, going around the design, and after it a 3 mm number 11 (1/8 in) around the flowers. Maybe it's gonna be easier now, I told the class at the start of class 5 of my Grinling Gibbons course. This page is about how to carve flowers into wood when the flower is small and its only job is to fill a gap in a layered relief.

Got little flowers drawn into the gaps of your design? Would it help to have a second way at hand? Then here is the one I showed next in Maine, and the same idea on flowers small enough to sit in a clamp.
Below are the tools I named and what each one did.
The second way, in six lines
- Class 4 ended on the first way, and class 5 opened with another one.
- The number 7 worked on one corner only.
- Then it went around the flower, and later to the center.
- Round, like a little cup, it makes a nice spot.
- A 3 mm number 11 then went around them, and I cleaned it.
- Which way you take is your call.
Where did the second way start?
Right where the first one stopped, at the end of class 4. Class 4 ended on the words it is the one way, you could do it the other way, and the first video of class 5 picks up from there with that was the one way, let me do another way. Same flowers, second road.
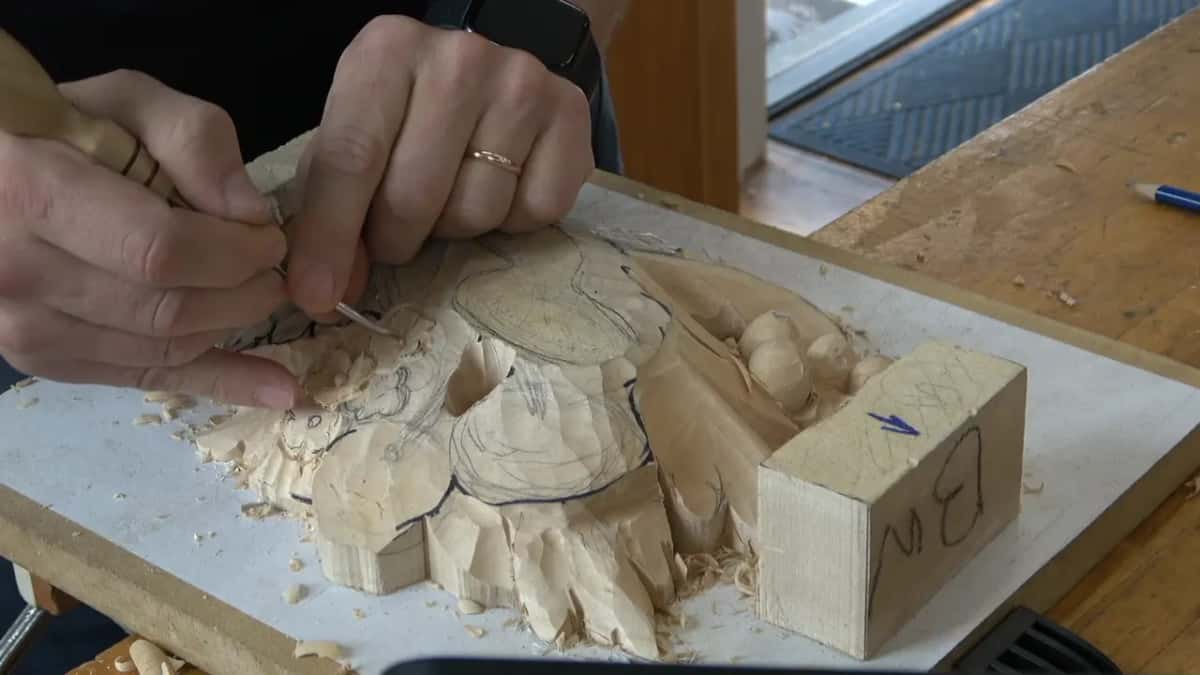
In the first frames of class 5 the work is right on that group. A gouge goes in low against them, a fingertip rests on one of them, and a pencil marks the little circles.
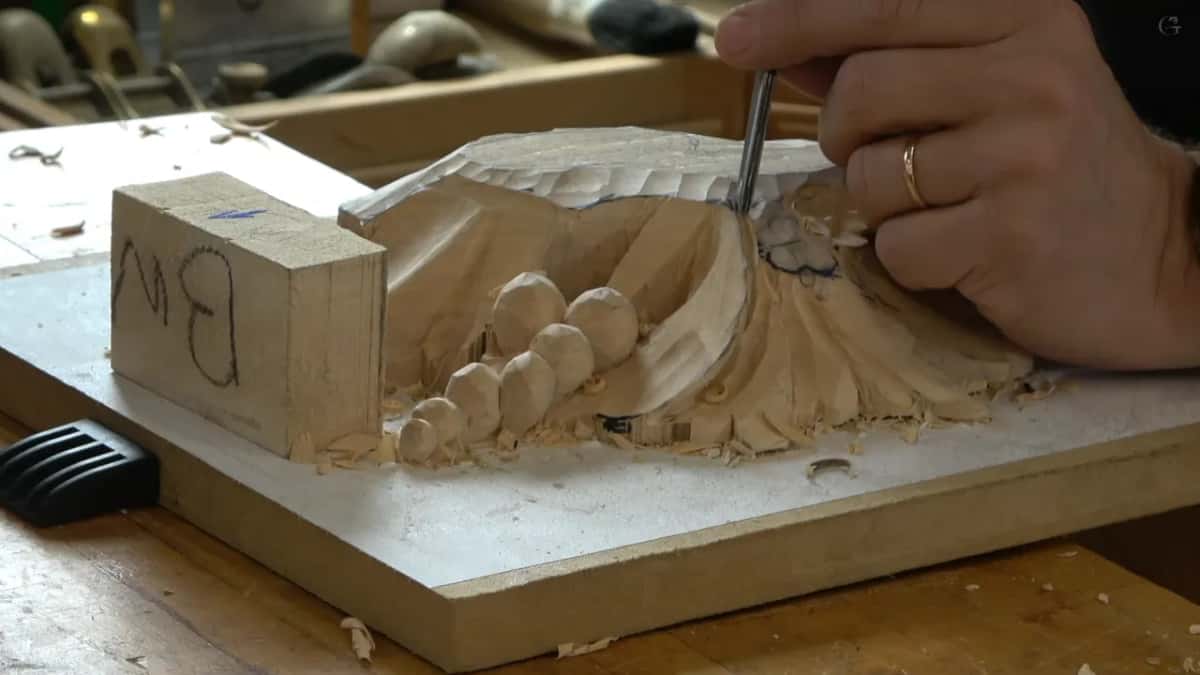
My panel has those flowers in a tight group at one end, drawn in pencil as little circles. Filler flowers. In design principles, lesson 4 I said I sometimes put really tiny flowers in to help the big one show, and we call them filler flowers, just to fill the space.

A whole lesson of them sits in the Lily Box course. Wood carvers had to fill some space, I said there, and they needed something to fill it with, so they put in the filler flower. Really common in furniture making, I said, especially in France in the 18th and 19th century. Wikipedia has a page on French furniture if you'd like to look at that period.

How does the number 7 go around a filler flower?
On one corner. The number 7 came up early, and I said just a corner with it, so you're actually using the tool. Then around the design. I'm just going around, I said, and a bit later the tool went to the center, like this.

That technique has a limitation, I said. The rest of that sentence is lost in the recording, so it stays off this page.

On lesson 15 of my furniture panel I was going around a shape with a number five at 12 millimeters (about 0.47 in). Though I should use a different tool, I said, probably a number seven and 14 millimeters (about 9/16 in) around here, to give me a much better result. Earlier in that video I had said take the matching curvature gouge and just follow along the design, and that it can be done other ways.
How far to tip the corner of a gouge is a subject of its own, and it lives in class 3. This page stays with where the corner goes. Around it first, then to the middle.

For the middle of a flower on the Lily Box, in lesson 12, I did the same move. Let me go around, I said, using only a point, the corner of my tool, and make kind of a V cut. Not much. We're talking about hair, no more than that, just to give a visual separation.

On another of those flowers I worked toward the center again, and slowly. I don't want to rush anything, I said, just a slight pass inside, and I don't really worry if I'm hitting a little bit of my petal. My concern was getting an equal amount of lines, because it's like mathematics.
What does a cup shape give a filler flower?
A spot. You do that like a cup, a circle, I said, and you can do a really nice spot, exactly the same idea as on a big one.

In the frames from those minutes the gouge stands straight up over the flowers. It's pressed down into them, with the fingers wrapped low near the edge.
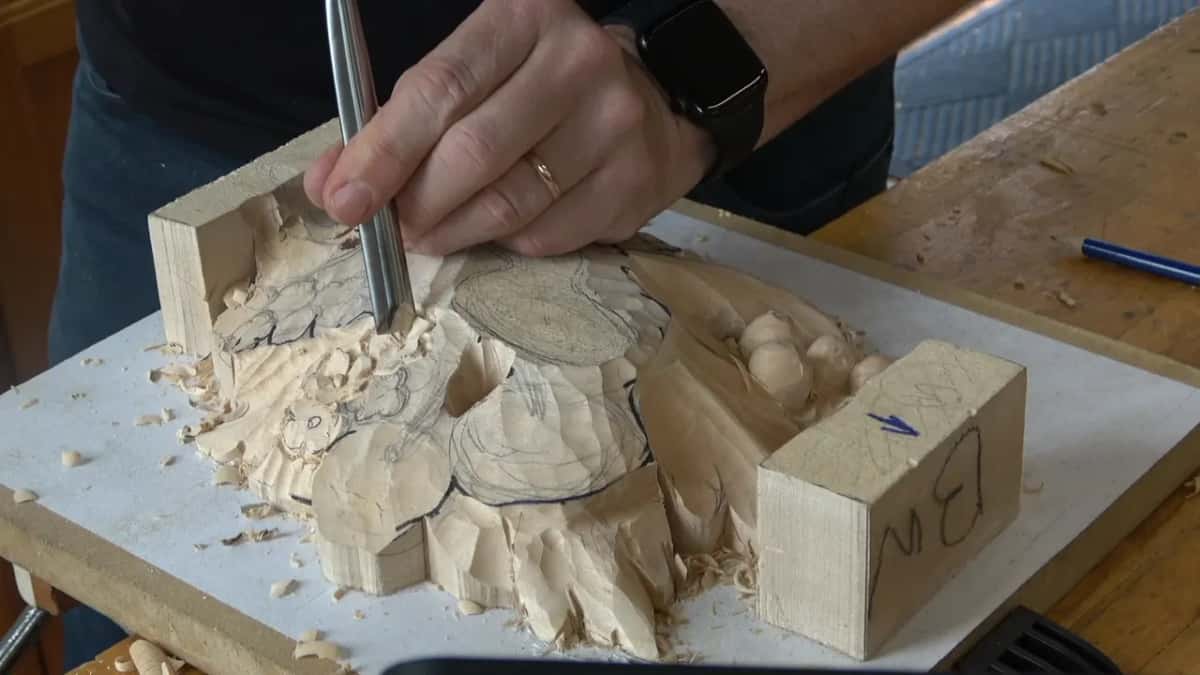
I outlined a little around the middle part of one flower on that box first, and I said I knew exactly what it would be, this dome. Then a concave. Little by little again, because I really can't force it.
Another flower there got a number 7 of about 5 millimeters, 3/16 of an inch, for the middle dome. Just the shape for now, no details. I could leave that middle part simple, and many of you probably would, I said, but with better detail in the middle dome it'll look much, much better.
What follows the number 7?
The small eleven, 3 mm wide, about an eighth of an inch. Take a look right here, I said, around those flowers, and then I cleaned it, down into a deeper area.
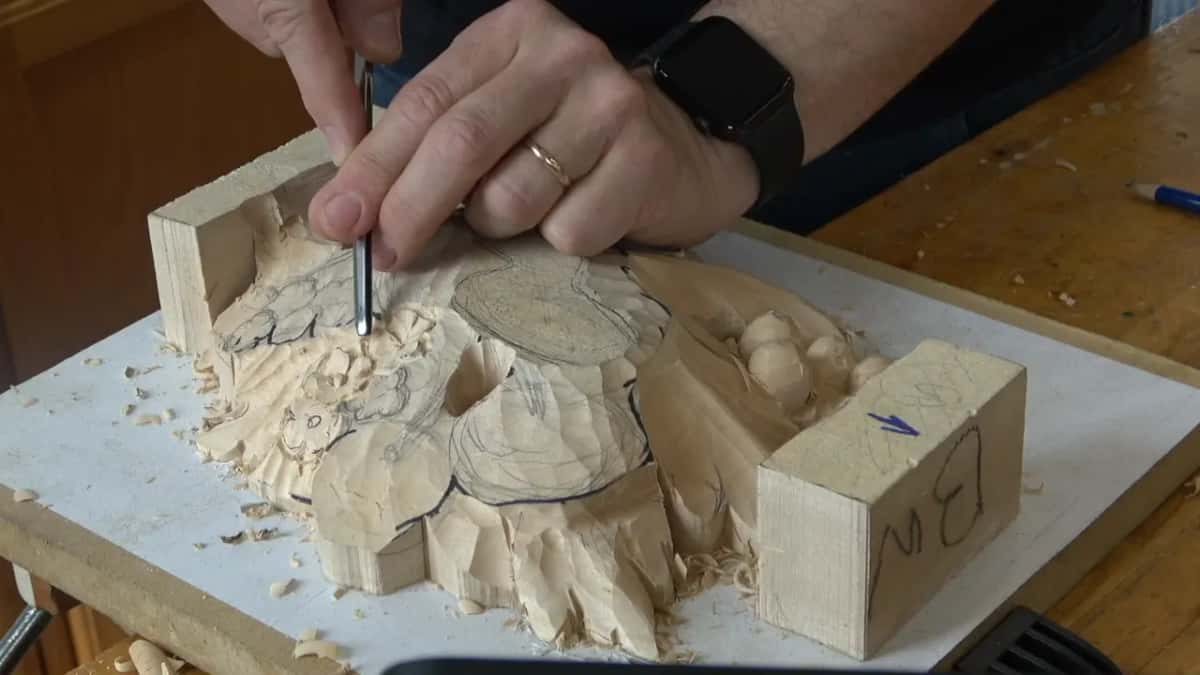
With the small tool in my hand then, I said, I can get in those small tiny areas. One flower had another close by, right underneath. That way it creates more shadows.
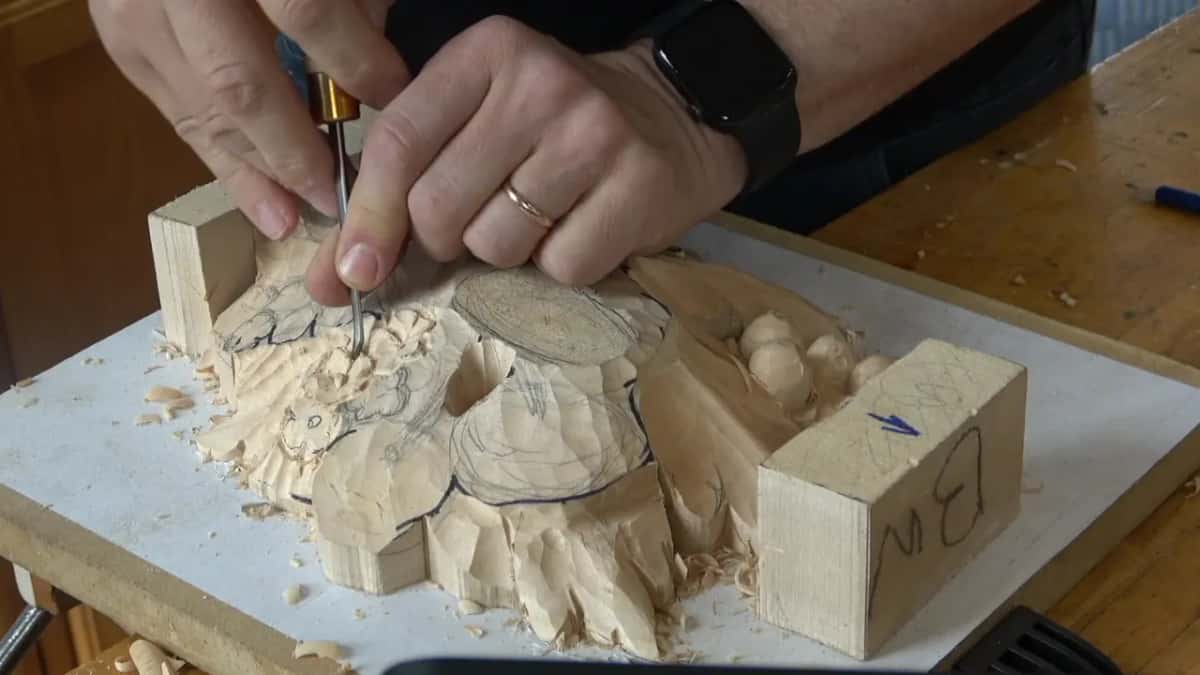
The Venice Room, workshop 70 has the same small eleven opening up a section for shadow and lightness. Other ways exist, I said there, but this one is logical for me, so I'll use a smaller tool, 3 millimeters, number 11, the same veiner I used before.
On my furniture panel moldings in lesson 19, one of the ways I gave was an eleven of 1 millimeter (about 0.04 in) for the outline, no deeper than 1/32 of an inch, about 0.8 mm. A couple of ways work there, I said. Both of them are actually right.
The rest of that Maine video is shadow on the panel and a stem opened from both sides, all on the class 5 page. One spot I kept from going too deep. Even so, that shadow makes a huge difference.
Why show a class two ways to carve the same flower?
A different approach, I said, and I wanted to make sure you understand there's more than one way to do it. And then, that's up to you.
I've said as much on other pieces, and then picked one and carved it. On Hashemi flowers, lesson 10 I said please don't get me wrong, other ways get the same result, and what I'm trying to show you is my approach. That came after a V tool, number 16, 6 millimeters (about 1/4 in), for my preliminary pass. After that, a number five, moved gradually downhill.
In chamomile and bow rosette, lesson 3 I didn't need pencil lines for the division marks on the beads. I can use a knife, I said, so I put them in with just the knife, for you wonderful people to see the other way of doing things.
Earlier in that lesson I said I'd shown many times how I do beads, there are other ways of doing them, and I'd show it again anyway. I left about 3 millimeters, 1/8 inch, for the border, and I eyeballed it. For me, eyeballing is probably one of the best methods.
Greek acanthus, lesson 13 has me take the knife for the first pass under a leaf. I just like to use the knife a lot, I said, although it's kind of dangerous. And on the side of a volute in Lily Box lesson 6, a couple ways we can approach, I said, then took a number nine at a quarter inch (about 6 mm) and worked my way around.
Does a filler flower still need waviness?
I like it to have some. On one Lily Box flower I didn't keep the outer line at one height, and I gave it some kind of waviness, even on a small flower like that. I know it's not a big flower. A really minor one, but I think everything counts. Every little flower counts.
That flower goes underneath the lily, so I could bring it really close. It doesn't have to do exactly the same, I said, and I can keep this ridge higher and go lower a little bit on this one.
From above it still looks like an oval. From the side it has a really nice, interesting movement, and I could push that movement even more if I had to. I did that one with just a knife.
A later flower had a paper-thin spot on its edge, and no more than a knife went there. Even with the knife, I said, I can go around. Right then I made a big mistake. Huge mistake, maybe not that big, and the piece was still in place. On another one I said let me take care of this wall, I can probably just knock it with a knife. Again, carefully. Got to slice it.
One petal that looked a little dull had a thick spot, and I took advantage of it. I took a number eight and gave it an extra concave movement, all the way to the edge of that wall, and I took it to the extreme.
Inside the flower there are a couple of ways too. A lot of people just make crossing lines in the middle, and I called that a mistake, then took the word back. Well, it's not really a mistake, I said, but in real life you won't see anything like that.
That box has four petals on its small flowers, which is rare, and we're trying to do some rare stuff, I said, even if those flowers are just fillers. The main flower on that box is a lily.
Which number 7 fits a flower this small?
A small one. Mine on the Lily Box was supposed to be a quarter inch, but it's a little smaller, about five and a half millimeters (about 7/32 in). You can call it six, you can call it five, I said. I'm okay with both of them.
Step one on another of those flowers was a number seven, let's say a quarter inch (about 6 mm), or a number five, or a number six, just to remove some of the excess.
Near a big wall that's almost impossible to see on camera, I said maybe I can use a number seven and make an even bigger convex. Round that all the way in. The whole petal just rounds inward on the inside. Beautiful.
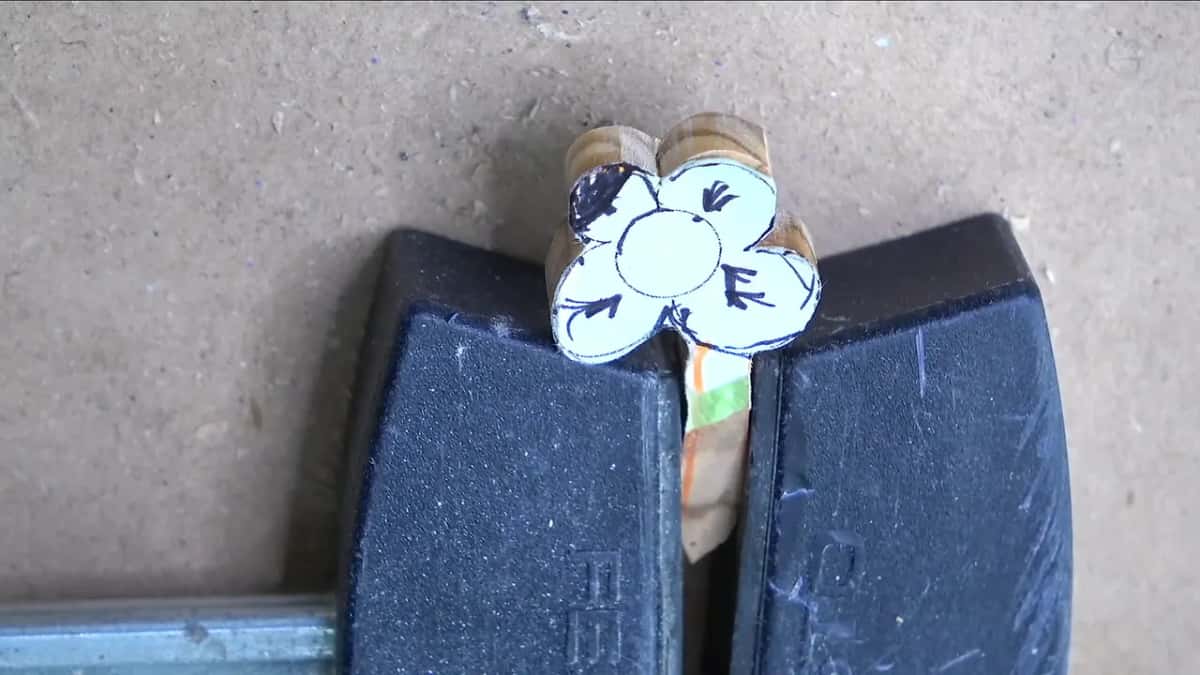
I had left only about 5 millimeters, 3/16 of an inch, of thickness on one flower, because it goes on the side. The bigger flower close to it stays thicker. This one doesn't need a lot of material. And I left part of a leg on it, something to hold on, so I'm able to clamp it and work my way in.
| Tool in my hand | What it did on the flower | Which piece |
|---|---|---|
| A number seven | worked on one corner, then went around | Gibbons, Maine class |
| Eleven, 3 mm | 1/8 inch, went around them, then cleaned | Maine, class 5 |
| Small seven, 5.5 | millimeters, a little under a quarter inch | Olive wood box |
| Seven, 5 mm | 3/16 inch, shaped the dome, no details | Lily Box 12 |
| Just a knife | gave the small flower a side-view movement | Lesson 12 flower |
| Eleven, 1 mm | a shallow outline, 1/32 inch (0.8 mm) | Furniture panel moldings |
What if the flower breaks while you carve it?
It happened to me on the Lily Box. I went around one flower with a number 7, almost a quarter inch, to make the dome shape, and then, oops, that's what I didn't want to happen. I pushed too hard. I guess inside there was some crack.

But I'm safe, I said, because just that leg broke, and at least I had done the main shape. I worked on with my hands, holding it just between the fingers. Maybe it's actually a good thing, I said, because now I can show you that way, and you've got to be really careful when you do it.
Sometimes it's wiser to do the smaller details once that piece is glued in place, I added, because it'll be a lot more solid.
Later on the same flower I said I told you those pieces are fragile. This one was a little bigger than the one before, so I thought maybe it's not as fragile, but you can't tell what is inside the grain. I think there was a micro crack in the grain, and that applies to this olive wood.
If a second road is what your own small flowers were missing, every class of the Grinling Gibbons course is open with tuition.
How it's done
- Pick up the number 7. I use one corner of it, and that way you're actually using the tool.
- Go around it. I'm just going around, and a bit later the tool goes to the center.
- Make the cup. Like a cup, a circle. You can make a really nice spot that way, the same idea as on a big one.
- Bring in the small eleven. That small one, 3 mm (about 0.12 in), goes around those flowers. Then I clean it.
- Take the way that suits you. There's another way, too, and which one you use is your choice.
Frequently asked questions
What does the second way look like on a filler flower?
My number 7 works on one corner, goes around, then to the center, and a 3 mm eleven, an eighth of an inch, goes in around each flower afterward. I showed it in Maine once the first way was done, and I said maybe it's gonna be easier now.
How wide a number 7 do I need for tiny flowers?
Mine on the Lily Box was supposed to be a quarter inch and came out about five and a half millimeters, a little under. Six or five, I'm okay with either name. Another got a 5 mm one, 3/16 inch.
Why would a teacher show two ways to carve one flower?
Showing a different approach helps you understand there's another way. On my Hashemi flowers I said the same thing and then named mine: what I'm showing you is my approach. Right after that I picked up a number five and went on carving.
What to carve next