

Alexander Grabovetskiy, woodcarver, School of Woodcarving · Published 2022
Where does the small concave cut go inside a carved petal?
Quick answer: A small concave cut inside a carved petal is a shallow scoop in the middle, after the sides are hollowed. In class 12 I planned it at about 1/16 inch (1.6 mm), found the spot by dividing a line about 60 to 40, and cleaned the ridge with a skew chisel.
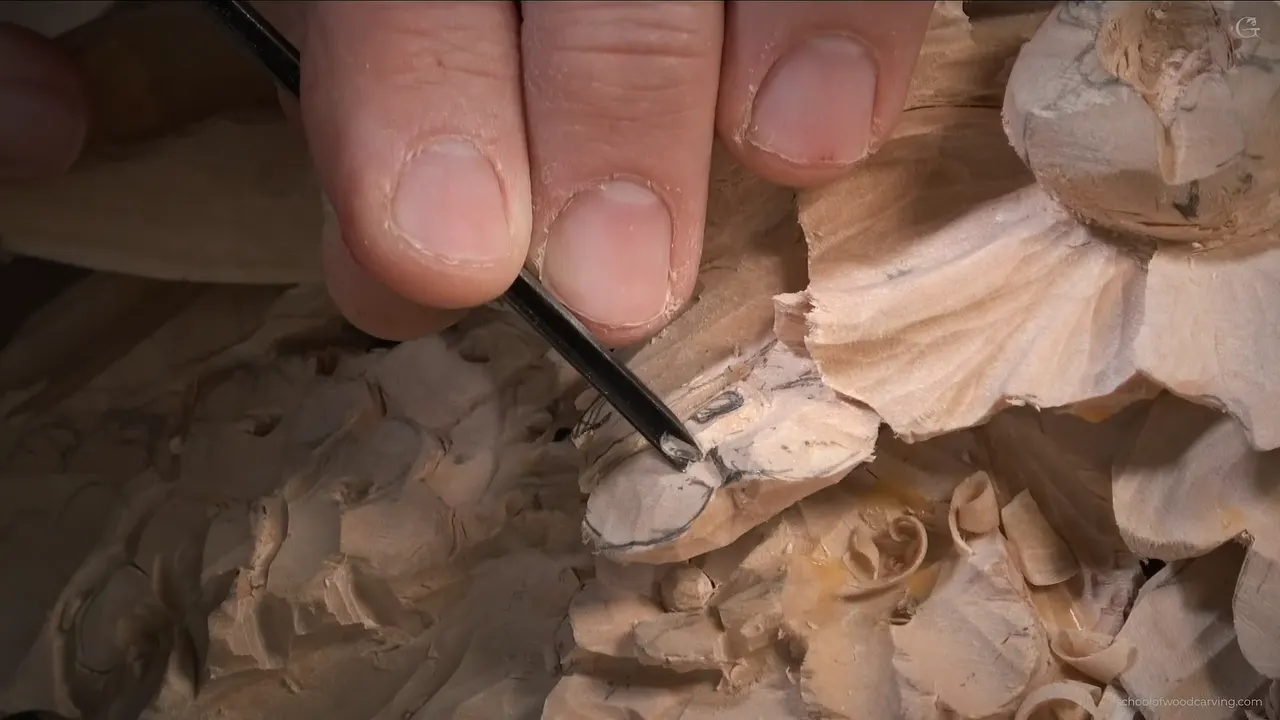
The concave in the middle of a carved petal is a shallow scoop, and it throws a shadow. On my Grinling Gibbons panel in Maine I put one in a petal only after its sides were hollowed, and little wood was left under it.
Ever hollowed a petal and found the middle still flat, like a plate? Wondered how far from the edge the little scoop belongs? The second video of Maine class 12 gave me a number for that, and I said it out loud while I carved. Here is how the petal went, one step at a time.
You get the order I worked in, then the tools, then the ridge the scoop left behind. After that come the other lessons where I talked about a hollow at the center of a petal, each one linked.

Where the concave goes, in seven lines
- Raise the center first and hollow the sides deeper.
- Blend each hollow out to the edge, and bring that edge higher.
- Plan a shallow concave for the middle.
- Find its spot by dividing a line in a golden ratio split.
- Blend the ridge with a skew chisel.
- Strop more often once the work gets small and the details start.
- Do the same on the next petal.
What did the petal look like before the concave?
It had no movement yet. About three and a half minutes into the video I said the edge looked like a brownie to me. I wanted two sides going one way and then the center, almost like a clover shape, though nobody has to copy a clover exactly, just some kind of wave. The neighboring shapes all moved in one direction, so it made sense to follow them.
The separation came before any of that. My plan was a petal that feels like it lies on top of its neighbor, which meant deciding which one sits higher, because that is how the shadow gets cast. A number 16 went in with the flute turned to the right, at about two o'clock, maybe 2:30, and the cut ran right underneath and began to cast shadow. Little material sat below, and full undercut was out of reach, which was all right as long as some shadow fell.

For the edge I wanted a small, not tiny, tool. On screen it was a number 4, and a number 3 if you buy a European pattern. Little movements went in first, and the pencil mark looked huge next to them. Dockyard made the next one, a small gouge, a number 8 or 9 in my words, held upside down for the first hollows, and a number 1 double sided chisel blended them.

My plan for the center line was simple. Pencil could not stay on it, so the movement had to come from the tools. Then came the sides. I would get my center raised up and the sides somewhat deeper, a concave on each side, and those two hollows would create the movement. Did I have plenty of material for that? Probably not.
Refining waited. You can spend a lot longer and polish all of it, I said, but I did not see the point yet, because I would clean everything later and still try to stay as close to the shape as I could. If a pass came out rough, I told the camera not to worry about how it looked, since I would be able to clean it.
Concave number one went in against the grain, which I said is why the sharpness of the tools matters so much.

How do you finish the sides of a petal before the middle?
Blend toward the edge, then raise it, and the petal looks much better that way, at least in my imagination. I could not press on it, because it was so fragile. A little later I said I thought I had reached that curliness.

The second side raised a different problem. Working with the grain might be easier, and give a cleaner pass, but the petal was thin, and my pressure moved it. It could break at the connecting point. Going against the grain put less downward pressure on the petal, and with sharp tools that still worked fine.

Why does a petal get a hollow at its middle at all?
A real petal has one, on a lot of flowers. Petals start out folded, I said, and as each one grows outward it opens up. Not every flower has the hollow, though. Then I asked myself whether it really matters, and answered that I think it gives me a little more natural look. That is the reason I gave.
How a real flower opens is botany, and a plain reference does it better than I can. What I can give you is what I did in wood.
How far from the edge does the concave sit?
Inside the center of that petal I planned a smaller cut, maybe a 16th of an inch (1.6 millimeters) of concave. Then came the number. I said that if I take this line and divide it 60 percent from one point to the other, and leave about 40, or 38, I will be in a golden ratio. In the same breath I admitted I did not really have to be in it here, but it was okay.

The golden ratio is near 1.618, and a split near 60 and 40 is a close, easy way to put a mark there. On camera I did not say which line on the petal I divided, so I will not guess. The other lessons below show the same habit on other pieces.
In Tray of Blessing lesson 6 the same movement came back on a smaller scale. Golden ratio, 60 and 40, I said, and you owe people no explanation of why you did it that way. More pleasing to the human eye, I said, and I pointed at the extra shadow and called it really good. In lesson 3 of the same course I figured the main concave would go a little closer to one part, the same split again, and said it works when you look from above, even if it is not logical from the side.
In Venice Room workshop 53 one cut went a little too deep, so I started over with a clean canvas and recreated my middle line. I said I still try to be in a golden ratio, even when you do not see it, and that if I take two points, the future points are shifted a little, and that makes six parts out of ten.
Does the hollow run to the center?
On one rosette I said no. In Venetian Flowers Rosette lesson 3 I wanted extra shadow on the side of a petal, so I picked a smaller pencil and drew a small concave there. It does not have to go all the way to the center, I said, and if it does it does not look as nice.

A different rosette points toward the middle. In Chamomile and Bow Rosette lesson 4 I wanted a concave on the inside, deeper the closer it sits to the future dome and a lot less concave near the edge. I called it a folding spot that would give me really nice movement, and I took a number 11 of 2 mm (about 5/64 in) for it.
Two courses, two answers. One holds the hollow back from the center, and the other deepens it toward the dome. Both came from me, on different flowers.
What does the scoop do to the light?
It gives shadow. The cut did not look really nice yet, because I had not spent the time blending everything. Still, that concave gave me a really beautiful shadow, and I liked it. The ridge it left behind was another matter. I disliked it, though I said I did not see a problem with that.

How do you clean the ridge a concave leaves?
A tiny skew chisel from Dockyard, about a 16th of an inch, or 1.6 millimeters, did it. One of the tiniest skew chisels you can get, I said, and good for tiny detailing work. With it I could blend everything nicely and get underneath.
The rest of the cleaning waited. Later I would pull my magnifier lamp close, get really close, and blend it nicely. On camera I skip it some of the time, because the lamp blocks my camera and it is not convenient for filming.

The slow cleaning happens off camera, I said, so you do not need to see it. And while I work on details, I spend a little more time stropping my tools.
Do you repeat the concave on the next petal?
Right after the first petal I said I would do exactly the same on the next one. The concaves went in again, one side first and then the other, with a gouge from Dockyard. Then I said I could probably attack the edge.

What did the rest of class 12 add to the concave?
The first video of class 12 had a flower with almost no wood left in the center. I changed the style of that flower, and the preliminary cut was no more than a millimeter before I blended it inward. Taking too much matters to me there, I said, as much as I would like to, because I had already excavated too much underneath. It would have helped to think about all of these details ahead of time.
The third video found a thin layer of wood in one section, and I saw a chance for a deeper concave there, because it would give me a better shadow. Why not use that material, I asked. It dropped straight down, and I liked the shadow, even if it did not show well on the screen.

Where else did a petal get a hollow in its center?
In a lot of places, and a lily is one. In Lily Box lesson 11 I said that when you look at the real flower, at the middle there is some kind of concave going on, and I wanted concave cuts there to give a little twisting look. Keep an eye on the direction, I said, because that little detail is really important.
The deep one is in lesson 12 of the same box course. I saw the overall movement and said I could bring a little curvature to a really deep concave, so I planned a bigger gouge, maybe 1/8 inch (about 3 mm), to dig my middle concave. On a flower with five petals, I added, you do not get the opposition idea that four petals give you.
The extreme version is in lesson 11 of that box course. The real flower has that extreme concave on one side, I said, because the petals come together there, and I kept checking. I had a good amount of wood on the backside and could go even more extreme, but I still had to leave some material for the final detail on the inside.

A Hashemi petal got one too. In Hashemi Flowers lesson 47 I called the petal kind of rough, but I really liked that concave right in the middle of it, something different from the rest. It had to go underneath the next petal, so a separation cut came again.
On the furniture panel the shape was already set. In Furniture Panel lesson 29 the petal would be the same, with a raised center, convex, and a concave at each side. My concave cut there came from a small Dockyard gouge, and I said I wanted the petal curlier.

Where the middle hollow came up, in one table
Nine lessons, each with the line I said in it.
| Where | What I said | Detail |
|---|---|---|
| Chamomile Bow 4-2 | deeper near the dome, lighter at edge | a spot that folds |
| Venetian Rosette 3-1 | one small hollow on the petal side | not to the center |
| Lesson 12.4 Lily | a deep one right in the middle | following the overall movement |
| Lily Box 11.13 | the real flower has a middle hollow | for a twisting look |
| Lesson 11.1 Lily | extreme concave where the petals come together | leave wood for details |
| Hashemi Flowers 47.8 | I like that concave in the middle | different from the rest |
| Furniture Panel 29-2 | a raised center, concave on both sides | already set up there |
| Tray lesson 6-1 | movement at a smaller scale, golden ratio | pleasing to the eye |
| Venice Room 53.5 | the middle line, six parts of ten | near the golden ratio |
Most of this I said while I carved, so the wording is loose. The ideas still hold together. The hollow sits in the middle, it fades out near the edge, and the wood decides how deep.

My own Maine lessons nearby are class 11, class 12 and class 13, and folding petals on a flower are in class 5. The whole class is on the Grinling Gibbons course page.
Class 12 goes on from this petal, and Tuition opens all of it, so you can watch the center line, the ridge and the skew chisel in real time.
How it's done
- Raise the center, hollow the sides. Leave the middle higher, and make the sides somewhat deeper with a small gouge before any small concave.
- Blend to the edge, lift the edge. Take the hollows to the edge, then lift the edge. A thin petal will not take pressure.
- Mark the spot for the small one. Split a line near a golden ratio, and plan a shallow concave mid-petal.
- Carve the concave with a small gouge. I used Dockyard gouges, about a number 8 or 9, for the small hollows, one side at a time.
- Clean the ridge. Take a skew chisel to the ridge, then wait for the magnifier lamp to refine the rest.
- Repeat on the next petal. Use the same tool and the same plan, then look at the edge.
Frequently asked questions
How deep should the hollow of a petal be?
On my Gibbons petal I planned mine at maybe a sixteenth of an inch, about 1.6 mm. Little wood sat under it. In the first video of class 12 my preliminary cut was no more than a millimeter.
Where do you put the concave inside a petal?
I took a line on the petal and divided it about 60 to 40, and said it did not need to be a golden ratio here. On a chamomile rosette I made it deeper nearer the dome, and lighter toward the edge.
Which tool cleans the ridge left by a concave?
A skew chisel from Dockyard blended my ridge and reached underneath it. A magnifier lamp came later, off camera, for the slow cleaning of everything else.
What to carve next