
Alexander Grabovetskiy, woodcarver, School of Woodcarving · Published 2021
What does "gone" mean when a wood carver says it?
Quick answer: "Gone" is my word for wood I want off a carving. Workshop 120, video 2, is where I said it, because I wanted really deep shadow. I planned to put my outline on the line itself, so that I would not lose that line, even if I had to lower a part later.
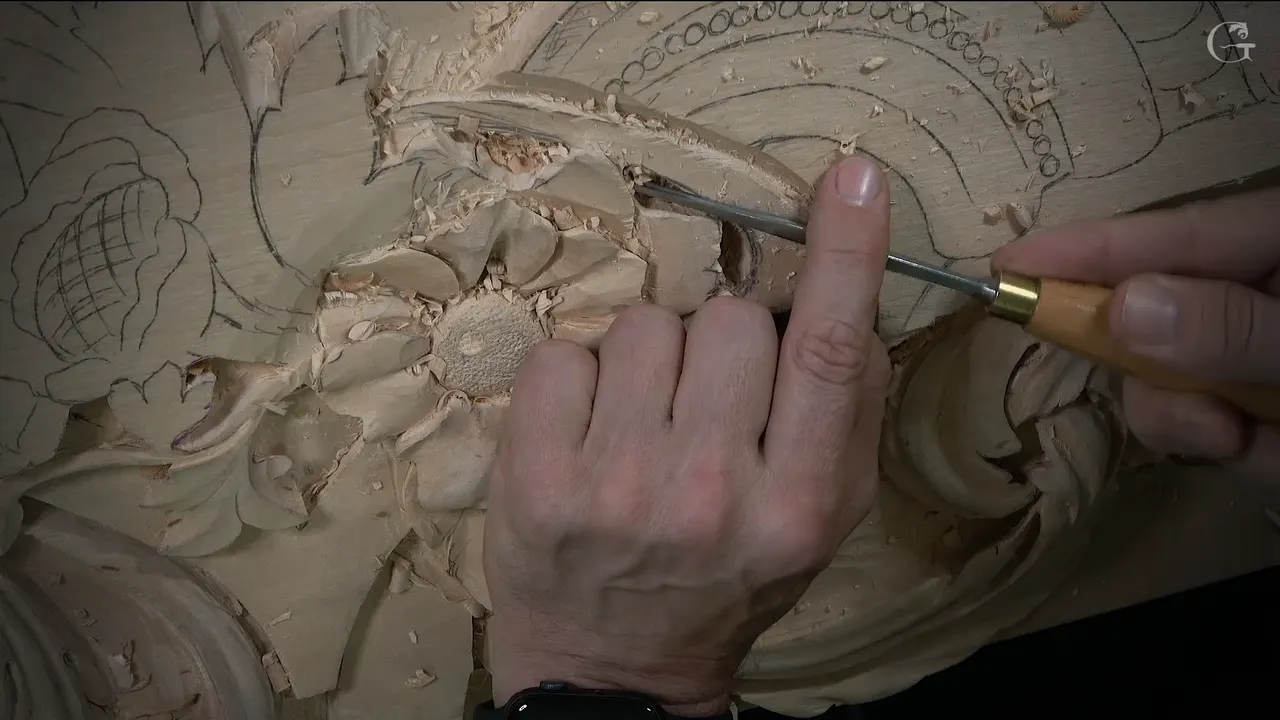

In Venice Room 120, part 2, I said it right after describing a movement that ran to the middle: "So that needs to be gone." The page starts at that bench. From there it follows nearly the same words through other lessons, about ridges, walls, humps and messes, and says where each one comes from.
Have you ever stood over a half-carved panel with a gouge in your hand and known that one lump had to come off before anything else made sense? Did you look at it from two sides first? Then you know the feeling behind my words, because you have stood in that spot.
What happened in workshop 120, part 2?
The video opens with a question to myself. "How about shadows?" The same would work "this way too" and "just cut it from both sides." Here I let myself off the hook. I really did not have to do it "in all of the areas." My reason was short. "I think it just adds some more interest."
It might look rough at first. Once everything was cleaned and the "extra material removed," I said, it was "going to look awesome." Then I said I would switch sides, "from opposite side."

A number 9 of one-eighth of an inch (3 mm) was next. I planned to "just drill it." With a "rotation motion," I said, "I'm all the way through." Both sides were already visible to me. "I can already see on both sides."
Nobody was going to tell me I had glued that piece on, "because it's not." Some glue was still coming, in a spot "you don't see." The overall picture would explain it, I said.
My next job was inside. I needed to "excavate inside right here and give some shape." For that, a number 11 at 7 millimeters (0.28 in) would do some "preliminary" removal, and after it I would "chop that right away."

The plan sits in the next line. "I've got an idea, pre-established idea. So now I can just do straight down cuts and continue development." A number 2 of 10 millimeters (0.39 in) was the tool in use. That number 2 "would be equal to number three" from other makers, I added, and "in England, they do differently." Then, "let me clean it."
Inside was a mess, and it had to come out. For that I planned a number 11, 4 millimeters (0.16 in), used "carefully." The next line shows how that went. "Not carefully. See, I just broke the edge because I wasn't too careful." That was "okay in this case," I said, "but in another case, it would be really bad."

That tool was "a little too big for that," so I said I should use 2 millimeters (0.08 in). "And let me excavate a little deeper." A "deep shadow" was the aim. Underneath, I planned a number 9 gouge for "a plug cut, deep cut going in."

Then came a summary. "So I've got the preliminary shape." My problem was the wood around it, I said. "Before I can just roll it this way, I really need to establish surrounding area."
Where is the line in that video?
It follows right after. "That movement going to go all the way to the middle." Inside, there would be "some kind of shell" and one part would be "higher than that part." My aim was "really deep shadow this way" and the line came next. "So that needs to be gone."
A cost came with it. I might "lower down this part little later" and "I'm okay with that." My way in would be an outline. "Going to outline first right on the line, straight down cut, 90 degrees." That would give me "that line, which I'm not going to lose."

The same applied to a small shape beside it. Remove first, then make a straight down cut. It would be "much easier for me not to lose the idea."
What did the other two videos of lesson 120 add?
Part 1 has a slope. "I could go even deeper because I do have a slope downhill this way." That meant "even deeper shadow." Every little bit helps, I said, and soon after, "It is enough." Part 3 brought a different worry, "much deeper shadow, even if I have to lose some inner details." Still, "I still want to see a shadow spot."
Where did a ridge fit in?
The plainest is part 6 of workshop 70. "I don't really need that ridge right here, and I need to blend it." It had to feel "like it is growing from underneath." So the ridge "has to be gone." My first guess for the job was probably a skew chisel.

Next came a plain description. "I'm actually just blending that in." The concaves and convexes could wait until later, and "for now, it is good."
Video ten of workshop 47 has another ridge, and my first guess there was a back bent. Soon I changed my mind. "I could attack from other side and still get the same effect." After that, "it feels like it's growing in."
The eighth video of workshop 53 has a ridge I had just made. "Don't worry about the ridge I just created," I told you, because it would be gone "once I'm going to establish my pipe."
What about a wall?
Hashemi Flowers 47, video 5, shows a wall. "Obviously, this wall has to be gone." That meant "a lot of undercutting I have to get done." My tool was a "micro gouge, one-eighth of an inch" (3 mm), and I would go at it "carefully."

Lily Box 7, video 7, has a wall too, and it was "a waste," I said. I was "carving against the grain," so I told myself to be careful, and my plan was number 11 for some of it, then "maybe smaller tools," maybe a number one "and double bevel," to start my undercut.
Hashemi Flowers 4, video 1, puts it plainly. What you see right here, I said, was "gone completely." A knife was my pick, from "the backside of it," though any gouge could "gradually remove the waste what I don't want to see." Or I could "flip that upside down and attack that from opposite direction."

The Byzantine course has one too. In lesson 9, video 2, the goal was "that first dome" and "everything else right here" had to go. The edge advice was to get "as close as possible to the edge, but not too close" with "about five millimeters, six millimeters, about quarter inch."
What did a chunk or a hump look like?
In workshop 78, part 5, I called it "that chunk" and warned myself to be "really careful how I do it." The next line is my plan. "Let me try along the grain if it's going to work or not."

A hump turns up in workshop 96, part 8. "So it's a big hump." A lot of material had to go, I said, and for that I would take a "big gouge, number seven," to start "removing across the grain."
Some wood stayed on purpose in part 2 of workshop 124. I would leave "some meat at the end right here," but the "majority" was to go. My concern was one spot. "Now, I do not want to lose that spot, so I need to create the plug cut." I said ten millimeters for the number 9 first, and then I changed my mind. "I'll take about half an inch or so" (13 mm).
In workshop 87, video 5, I measured the opposite side and found myself "right on money." And "I knew that in the beginning, so that is not the final height." I had thought a higher spot might look good. "But no."
Where do mess, pencil and glue fit?
A mess is in video 12 of Furniture Panel 21. My wish was "all that mess" gone "right now" and I said the tool hardly mattered. "I don't really have to. Any gouge will work. It just happened to be on my bench." My verdict was that this part "bugs me" and it was "a little too high yet."

A mess comes back in video 3 of Venice Room 131. "I'll take number nine. It could be number 11." Then I named a goal, "a better shape first."

Venetian Flowers Rosette 4, video 3, puts a mess beside the flowers. A big tool was out. "That would be big mistake if I would use it." So a smaller version, "like a six millimeters" (0.24 in), was my plan.

pencil shows in video 6 of Furniture Panel 21. "Okay, just the pencil marks. They got to be gone." One spot looked "not too clean cut" to me, and I said a little sanding could take care of it, but "it's still not that nice." So I planned to "attack it" with "just a small knife."
Venice Room 94, video 7, was about glue. "I need to blend now, the middle part and all that glue," I said, and I wanted that glue gone. I would not "destroy my middle line." It had "a really nice arch or arc" and I did not "want to lose it."
What about a triangle, a void or a tiny section?
The triangle in video 5 of workshop 54 got the line twice in a row. After it, "I can undercut deeper, actually." A second plan followed. "Probably right away, I could create a shadow in this triangle."
In video 4 of lesson 41, I said I could "eliminate the voids" and the line came twice there too. My first move was an outline. "Let me outline first outside."
A tiny one is in video 1 of Greek Acanthus 14. "That's a tiny section." A knife was enough for the start. Then came the next tool. "And for this, I'll take just a small gouge."
Did it ever mean something else?
No. In workshop 62, video 12, I corrected myself in the middle of a line. "So that's all going to be gone. Not be gone, but going to be concave."
In the same course as this lesson, number 116 has the same turn. "Not gone," I said, "much, much lower." So I was "not afraid of lower that down right away." For the job, a number seven of three inches (76 mm) would "get rid of some of the junk I don't really need."
How much a must matters shows up in video 3 of workshop 127. The wood was not a must, I said, "but still." My reason was plain. "It's a good idea to remove it right there."

Over in lesson 27, I made it stronger. A part was "not kind of" a need, I said, and "it's got to be gone."

I took it back in lesson 14, video 7. "Oh, not really, actually. It's actually underneath." Over in lesson 51, video 10, I said it can wait. A part would "be gone" and I could excavate "as deep as I wish" with number 11, "off camera."
Why did the wood have to go?
I gave reasons. For the look, I gave this one in the second video of workshop 95. "Otherwise, it's not going to look as nice." My pace mattered too. "Without any quick movements, without rushing." And I pointed at the fibers breaking "because of the grain direction."

Video 9 of workshop 39 has a small plan. "I actually can make it a little bigger," I said, and a number 11 would excavate it, "carefully."
Venice Room 15, video 7, gave the logic. "Otherwise, it just doesn't make too much sense." Next, a warning, because "I don't want to destroy my details right here."

What do these lines add up to?
In lesson 120 it was shadow. Elsewhere it was ridges, walls, humps, pencil, glue, a triangle and a mess. Sometimes the wood was not to be gone at all, and it would go lower or turn concave instead.
The table has everything. Each row names a lesson and the wood in question.
Every one of those lessons in one table
| Lesson | What it was about |
|---|---|
| Venice 120 | What I pointed at, for deep shadow |
| Workshop 70 | A ridge, with a skew chisel in mind |
| Class 47 | Another ridge, from the other side |
| Hashemi 47 | A wall, with a micro gouge |
| Hashemi 4 | What I pointed at, by knife |
| Lily Box 7 | A wall, carved against the grain |
| Byzantine 9 | Everything past the first dome |
| Lesson 78 | A chunk, with a try along the grain |
| Lesson 96 | A big hump, across the grain |
| Panel 21 | Mess first, then pencil marks |
| Rosette 4 | Mess right beside the flowers |
| Venice 94 | Glue beside my middle line |
| Workshop 54 | A triangle, then a shadow in it |
| Greek 14 | A tiny section, with a knife |
| Class 116 | Not gone, but much lower |
What stands in the way of your next movement? The full set of videos for this panel sits inside one tuition plan. The Part 10 course page holds workshops 110 to 121, and lesson 120 has all three videos. More wood carving and relief waits there.
How it's done
- Name the goal. First I named the goal, deep shadow. Only after that did I say the line about the wood.
- Outline the line. An outline would go first, along the line itself, so I would keep it.
- Start with a bigger tool. My plan for the first removal was a number 11, and a number 2 was in use after it.
- Go smaller near the edge. A slip broke an edge, and a smaller number 11 came into the plan. Digging a little deeper came after that, I said.
- Make the plug cut. Underneath, my plan was a number 9 gouge for a plug cut, a deep cut going in.
Frequently asked questions
Which wood did I want off in workshop 120?
I did not name the spot. The line came after a movement that ran to the middle and some kind of shell inside. Deep shadow was the aim, and I planned an outline right on the line, then a cut going straight down at 90 degrees.
Which tools came up in that video?
Gouges numbered 9, 11 and 2. With a drilling motion, my 9 went through the piece, and I planned it again underneath for a plug cut. My 11 came in several widths, and after a slip I said a smaller one was needed.
Did "gone" ever mean something else?
Sometimes. In one lesson I said "not gone," and the wood would be much lower. In another I said it would turn concave. In a third I took it back with "not really, actually," because the wood was underneath.
What to carve next