

Alexander Grabovetskiy, woodcarver, School of Woodcarving · Published 2020
What does a real-time carving video show that a short clip leaves out?
Quick answer: A real-time carving video is a lesson filmed while the work happens, with pauses, slips and tool changes left in. An edited clip keeps the good result. The full version also shows the carver deciding where to carve, what to try first and when to stop digging, and those choices are the hard part to copy.
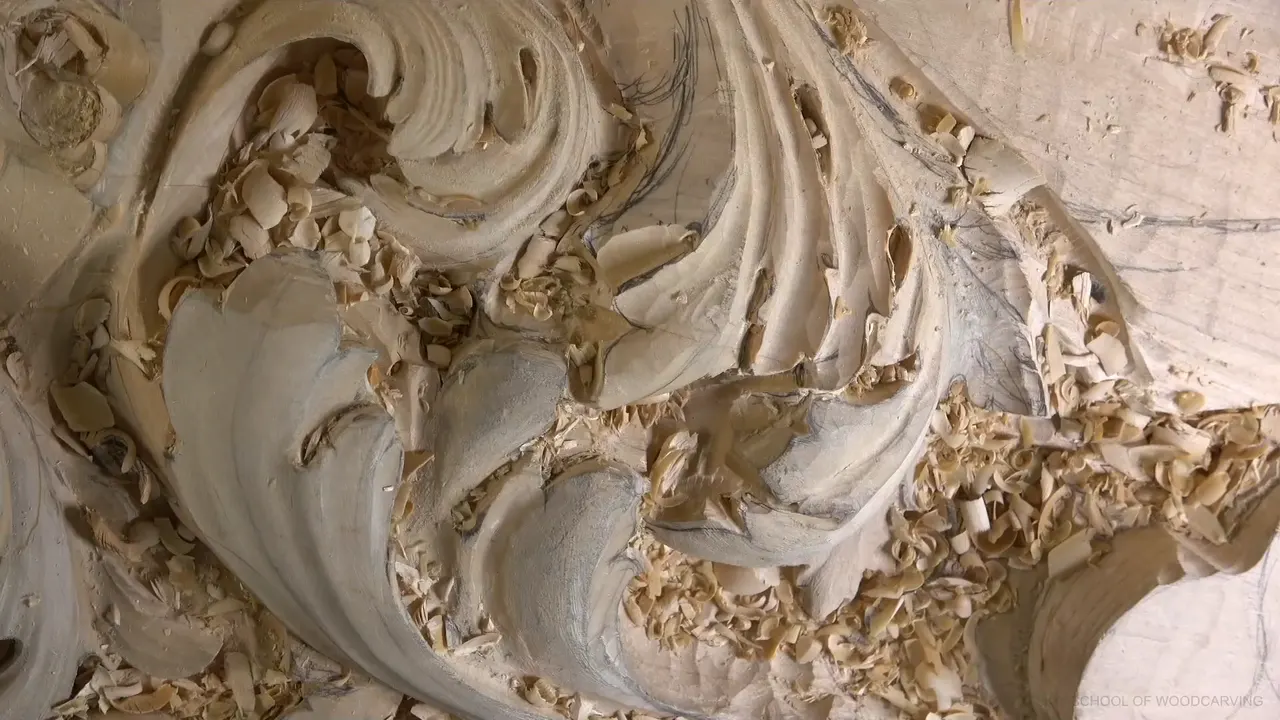
A carving lesson filmed in real time is the whole job with nothing trimmed away, so you see me stop and decide, slip and repair the damage, and pick up the wrong tool before the right one. Most short wood carving videos only have room for the finished shape. Workshop 30 of the Venice Room keeps it all, twelve parts of me digging under one acanthus leaf in relief on a ceiling board.
Have you ever watched a carver make one clean pass and wondered how he knew to put it right there? Would it help to see the tool he tried first, and the one he put back? Then watch the slow minutes. I put it plainly in part 30.3, that if you skip it, you can skip important details.
I know your evening is short, and I said as much on camera, that not every one of you can watch many hours a day. You get the seven moments from workshop 30 that an editor would cut, each with the part it sits in, so you can go straight to it.

Seven things workshop 30 keeps that a clip would cut
Almost two minutes of thinking before one division, pencil lines rubbed out and all.
A slip, and a wider eye.
Three tools tried on one small edge, a knife and a number five before the back bent.
A line left uncut on purpose, because I am going to lever the gouge against that side and can destroy it easily.
The pocket that stops at about an inch (25 mm), and why it stops there.
My hands in front of the lens, and what I say when you cannot see.
A dull edge, and a crowded bench.
What happens before the first pass on a division?
Thinking happens, and in part 30.1 it takes almost two minutes before I knock that side down.
I could start undercutting under one part of the leaf. I stop, because I still have to decide how it should be divided, and right now it does not look too good. How I want to do that, that's the question, I say. I rub out the pencil marks and keep thinking.

Two ways get weighed out loud before that side loses any wood. One way follows logic, some kind of division where the movement seems to ask for one. The other way goes all the way through, and I think it's going to be better that way, so that is the one I carve.
Then comes the part a clip would keep. I knock that side down, carefully, and leave the edge curly instead of carving a sharper separation there. Cleaning that edge can wait. I can do that later with no problem, I say, and go straight to digging underneath with a 3 mm (1/8 in) number 11.

How does a slip look when nothing is edited?
A slip looks ordinary, a warning to myself and then the accident a few seconds later. I was undercutting a wall in part 30.2 with a number five and said I have to be careful not touching that, but I just did.

Right away I named the tool I should have used, a back bent, because it would be much safer there. I looked again and said, twice, that it doesn't look too good anymore. I really didn't want to lose that detail. So I made the eye there a little wider and knocked out just the side of it.
The eye came out bigger than I planned. I didn't plan to do that big, but it's okay, I said, and I have to deal with the mistake I just created, and I think it looks good. Turning a slip into part of the design has a lesson of its own, and so does knowing when it is too late to fix one. A clip would show you a nice wide eye and no reason for it.

How many tools does one small repair take?
Three, in that same part, one after another on the same small edge. First a small knife, a tiny one, to hit that side. Then I changed my mind, and said I could probably use number five, just the gouge, but carefully, really carefully, and take care of this edge.

Next I started to say something smaller, stopped in the middle of it, and said I don't want to make the same mistake again. The back bent went in and got that wall clean. Seconds before all that I had corrected myself. I started to say you always have to think about tools you use, then said I shouldn't say it that way, I should say I have to think about tools I'm going to use.

Tool changes like that run all through workshop 30. The very first part has me grabbing just a flat for one spot, and I admit right away that it's not the best tool, and that the best would be a number 11, as always, a spoon. A number seven, or even a number three, can hook out the waste better than the number 11 after a back bent undercut, I say in part 30.4, because the number 11 is going to miss it. The only reason I like the number 11 is its really nice smooth transition, and in some spots I don't care about that. All I care about there is the deep shadow.
A quarter inch (6 mm) number five will not work in one tight spot of part 30.9, so a quarter inch number nine goes in, and I add that it's possible to make mistakes with the bigger tools. Later, in part 30.11, I go for a small Dockyard gouge to make some separations more pronounced, then say no, that is not the right tool, and take a 2 mm (5/64 in) number 11. And in part 30.6 I pass on the spoon gouge for a medium bend, because the medium bend gives much better leverage in that hard spot.

What a back bent gouge is for, and how a long bend spoon differs from a short one, are covered in other lessons.
Why leave wood standing that will come off later?
Leverage, and I say so in part 30.7. I had not worked the details on that piece yet, because I knew I was going to dig some of it out, and I did not know how deep I would go. I still needed that material for leveraging, I said, because I'm going to crank against that.

Next I showed you a line on the board. I had not carved to that line yet, because I was going to lever against that side, and I can destroy that side easily. A part later I checked first, whether I can leverage against this one or not, and I can, so I went up. On a trimmed clip that line just looks forgotten.
Why a carver keeps wood for later passes is covered well elsewhere, in the lessons on why a shape breaks on its second side and why an outline cut stops above the floor. One more reason of my own comes in part 30.10. I'm not taking too much right now from this piece, I say, because I can carry that piece inside even more if I need to.
When do you stop digging deeper?
I stop when more depth would make the finishing harder, and in workshop 30 I say that out loud more than once. Getting deep takes force first. For the big opening in part 30.5 I take a number nine and a much heavier mallet and go hit, rotate, hit, rotate, the plug cut I explain in another course.

Then the doubt starts. I tell you in part 30.6 that I'm not sure how deep I should go, and I can't decide whether to connect two openings, because it might look too empty inside. Maybe yes, maybe no, I say, maybe it will give extra depth. Back in the second part I had gone a little deeper when I didn't have to, because I think it will be the focal point for the shadow, with the light coming from one side.

By part 30.9 the pocket runs about an inch (25 mm) down, one inch almost, as I put it. I could go extreme and farther still, and I ask myself whether I really need to. Of course not, I decide. It's going to be harder to finish, and I don't want to do that.
The paint has to reach down in there, on this ceiling, and I said that back in the first part too, when I thought about reaching it with the finish. How much undercutting is enough, and what undercutting means at all, are subjects of their own.
What can a camera miss in a carving lesson?
A lot, and I tell you when it happens. My hands cover the work in the first part, and I say sorry that I'm covering with my hands, but I have to. In the ninth part I work a spot where I can't even put the camera in, which is okay.

More than once I tell you that you don't see it, then tell you what is down there, deep, in the sixth part, and really smooth and nice in part 30.8. Where I wiggled the gouge under that leaf, it left a really rough surface, so I went back from the right position and made it smooth. Some chips won't come out with the brush, so I blow them out.

The board fights the camera too. I'm butting against my ceiling part in part 30.4, and in the third part I carve toward myself, because I can't really rotate this piece and would rather not walk around it. When the lens can't reach the bottom of a pocket, my words still get there.
Why show a dull tool and a crowded bench?
Both belong to a real working day, and neither gets cut out of workshop 30. Part 30.2 ends with me saying I need to sharpen this one. The number five needs sharpening too in part 30.10, I say, then I attack from the opposite position, with the grain, and the surface comes out much cleaner, like a finished one almost. My sharpening course is where a dull edge gets a proper fix.

Tools pile up as well. In part 30.8 I admit I've got too many tools out, and a part later I stop to get rid of them and reorganize, because that many tools out is not good. How I lay tools out on a workbench is its own lesson in the tools course.
Which moments in wood carving videos get edited away?
The quiet ones, mostly, where a carver stops to decide. A jump cut or a stretch of time-lapse can squeeze a slow hour into a minute, and a pause is the easiest thing to lose. Set beside what a trimmed version would keep, the seven moments look like this, one row each, with the part number first so you can find it.
| Moment | Workshop | Clip |
|---|---|---|
| Division in 30.1 | Pencil lines rubbed out, two ways weighed first. | One side, already knocked down. |
| Slip in 30.2 | A number five touches the edge I protected. | Wider eye, looking fully planned. |
| Repair in 30.2 | Knife, then number five, then the back bent. | Whichever tool finished the wall. |
| Line in 30.7 | Left uncut, because the gouge levers against it. | An edge that looks forgotten. |
| Depth in 30.9 | Stops digging where finishing would get much harder. | Deep pocket, and no explanation. |
| Camera in 30.1 | Hands cover the work, and I say sorry. | A hand hiding the gouge. |
| Bench in 30.9 | Tools pile up, so I stop to clear. | Clean bench, sharp tools, always. |
Read the last two columns side by side and a trimmed version looks easy to copy. It shows where the tool ended up and none of the reasons it went there.
Can you learn carving just by watching?
Watching teaches your eyes, and a board teaches your hands. I learned as an apprentice. At sixteen I was the only apprentice of a fine art master in Russia, and he taught me to think like a tool.

In part 30.3 I gave my reason for filming this way. It is like you being with me in the shop, pretty much, watching what I'm doing. I respect your time too, and I said so. Feel free to skip if you need to, but if you skip it, you can skip important details. I would encourage you to watch completely, but again, if you don't have time for it, that's okay, too. Then put the video away and carve.
Two articles on the site take the broad question about learning wood carving from a screen, one on what lessons you watch online can and cannot do and one asking whether there are video lessons for advanced techniques.
Where should you start after watching?
Start with one part, and pick it from the table above. Watch that whole part without skipping, then carve the same move on a scrap of wood before you open the next one. If you have no course yet, this page helps you pick a first one.

If a tool name here meant nothing to you, the tools course walks the whole rack, and the lessons map lays the courses out side by side. Workshop 30 sits between the workshop before it and the one after.
Near the end of the tenth part I call those really small, tiny details, but they add up. They really add up. Then I count out loud over the last ones. One and two and three.
How it's done
- Choose one part. Pick a single part built around a move you want to learn.
- Follow the eyes first. Before a chip comes off, see where the carver looks and listen for what he is weighing up out loud.
- Log each tool change. Jot down every gouge that comes out, and the one it replaced.
- Rewind the hidden bits. When fingers block the view, go back and listen again.
- Try it on spare wood. Put the screen away, make the move yourself on an offcut, and compare with the video only after your own pass is done.
Frequently asked questions
Is it okay to skip parts of a long carving lesson?
Skipping is fine when your time is short, and I say so on camera in workshop 30. Watch the parts where a tool changes, though, because a skipped minute there can hide the reason for the next move you try at home.
Why does a carver talk while he carves?
Talking covers what the lens misses. Deep under a leaf the camera sees a handle and a wrist, so the words have to say which gouge is working, how far down it went and whether the surface in the hollow came out smooth.
Do lessons filmed in real time show mistakes?
Early in workshop 30 there is one. The number five touches an edge it was meant to miss, and the fix goes knife, then number five again, then back bent, and ends with a wider eye than planned. Seeing the whole repair shows what a working carver does after a slip.
What to carve next