

Alexander Grabovetskiy, woodcarver, School of Woodcarving · Published 2022
Does a carved curve have to be round the first time you carve it?
Quick answer: A carved curve is not round after my first pass, and on this floral panel volute I was fine with that near 5:05. Other tools gave the roundness later, and a sharp pencil put it back on the wood near the end. I was still okay with the shape then.
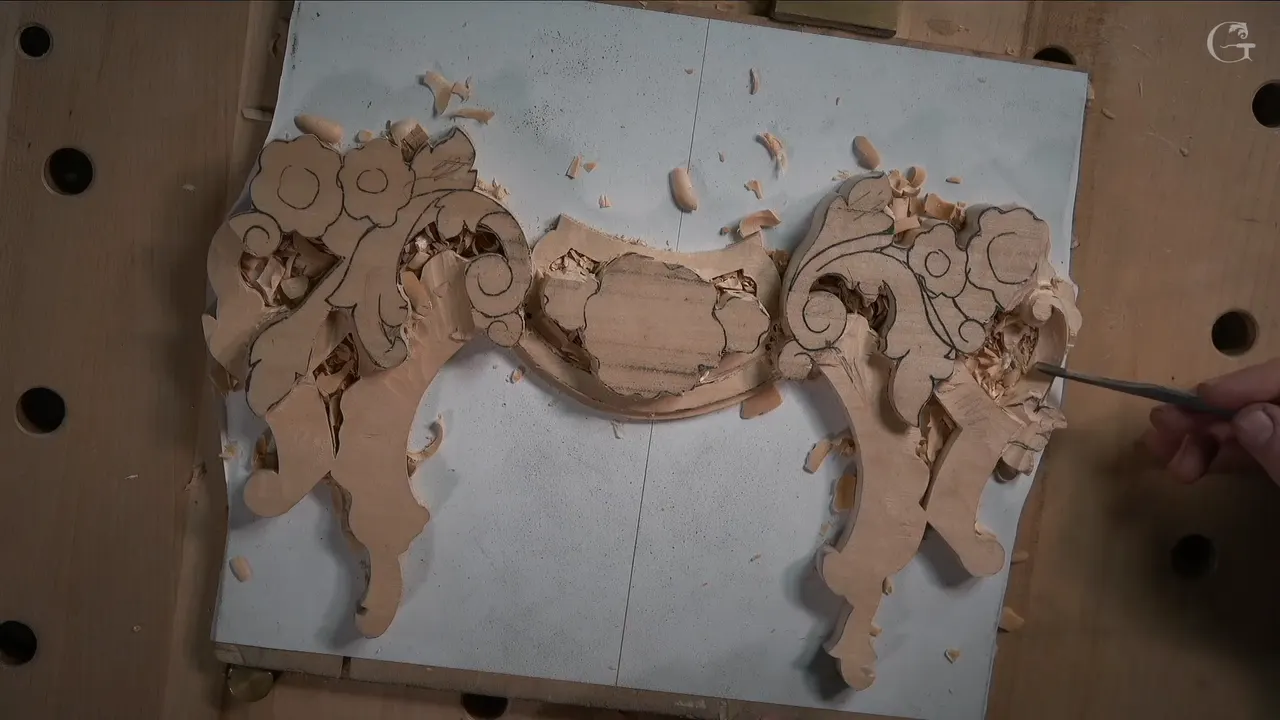
Roundness on a carved curve is a later pass for me, and my volute was not round yet at 5:05 in this video. I called it absolutely not round, said that was okay, and said I would fix it. Lesson 3 of my floral panel course holds the whole run, and this is the third video of it.

Have you ever stopped halfway through a curve because it looked lopsided? When one flat spot shows on your first pass, do you want to push harder? I felt the same pull. I took small bites, stayed on the line, and let the roundness wait.
The curve in six lines
- I stayed on the line and made a concave inside it, without forcing the wood out.
- Taken with a number 9, tiny bites opened the first pass from one side.
- Roundness waited for a later pass.
- Wider tools came last, and a number 7 of 14 mm (a little over 1/2 in) reached the line.
- The pencil, sharpened well, brought the roundness back before the refining began.
- I ended the video by saying we were just setting stuff in, with details still to work on around it.
Does a carved curve have to be round the first time?
Mine was not, and I told you while I carved it. Bites were tiny with my number 9, and I said near 5:05 that the overall movement was absolutely not round. Okay, I said, absolutely fine, so I'll fix that.
Around the curve once more, I said I must be really careful how I approach my convex.

Why not push it round right away? Force was something I turned down more than once. Early on I put it this way: "I'm not forcing all that mass out, so no reason for me to force it." Later I said it of the number 9: absolutely no reason for forcing it.
Round came back into the talk by 8:28. The concave went around, and I had just said that is good, it is what I'm after. Overall roundness needed fixing, I said, and I just needed a different tool. Near 17:40, cleaning the surface, I said you can see it is not close to be round, and I'm okay with that.
What did I carve first, before any roundness?
The line, and the hollow just inside it. In the opening seconds I said I was still staying on the line while I made a concave on the inside, and that it was hard to see from where I was. For the cleaning, maybe a number 2 or number 3 would work, I said, in a quarter inch (6 mm).

That's good, I like it, I said around 1:18, and I had the initial volute, though it was not the end yet. That volute was going to be really interesting.
My previous piece came next, to show you how small this part was going to be. It's only about six millimeters (about 1/4 in), I said, so I would leave some space for it. In profile it would drop about three millimeters (1/8 in) into a concave. A convex of approximately six millimeters, a quarter of an inch, would follow, and then another concave.
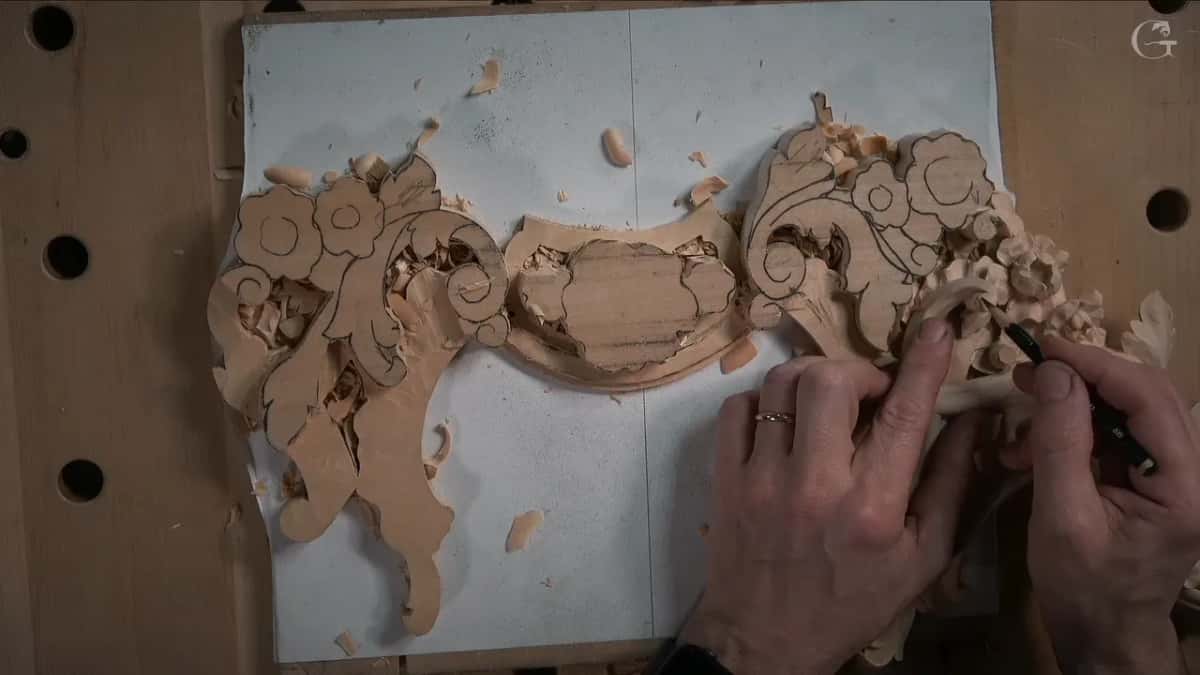
My finger went on the wood to place a line. I could skip it, I said, but maybe it would help a little.
Which tools did I use as I came toward the line?
First came a number 9. The right tool, I said near 3:48, was a number 9 of a quarter inch (6 mm), and the first pass could attack from the side. Damage to my concave was something I also wanted to avoid, and the pass had to go all the way around. Small bites, I said, really tiny bites.

Next I needed something different to take out some of that flower, a tool of three millimeters (about 1/8 in). Against my previous piece, I said it looked safe to drop that flower a little lower. Near 6:09 I said probably the number 9 at six millimeters (1/4 in) first, going around carefully in little bites.

By 6:47 a slightly bigger tool seemed right, and I said possibly a number 9 at 10 millimeters (about 3/8 in) to take down some of the future petals. Then came the line I want you to hear. I am staying away from my final line, I said. Important for me not to mess up. Really important.
Next, probably a number 7 of 14 millimeters (a little over 1/2 in) in this case, and I said to get right on the line. That is good, I said. It is what I'm after, so you get that concave around.
How did I fix the roundness once the concave was in?
With another tool first. Just before 8:37 I said you know what, I just need to use a different tool. I tried one, said maybe this one will work, and then said yes, it will work.
The upper concave was in by 9:18. Now the lower one had to come, and I said it would probably be somewhat challenging. The lower one began with a number 9 of 1/8 inch (3 mm), and I warned you that my hand would most likely cover the view. It need not be really deep, I said. Just establish the idea, and that is enough for me.
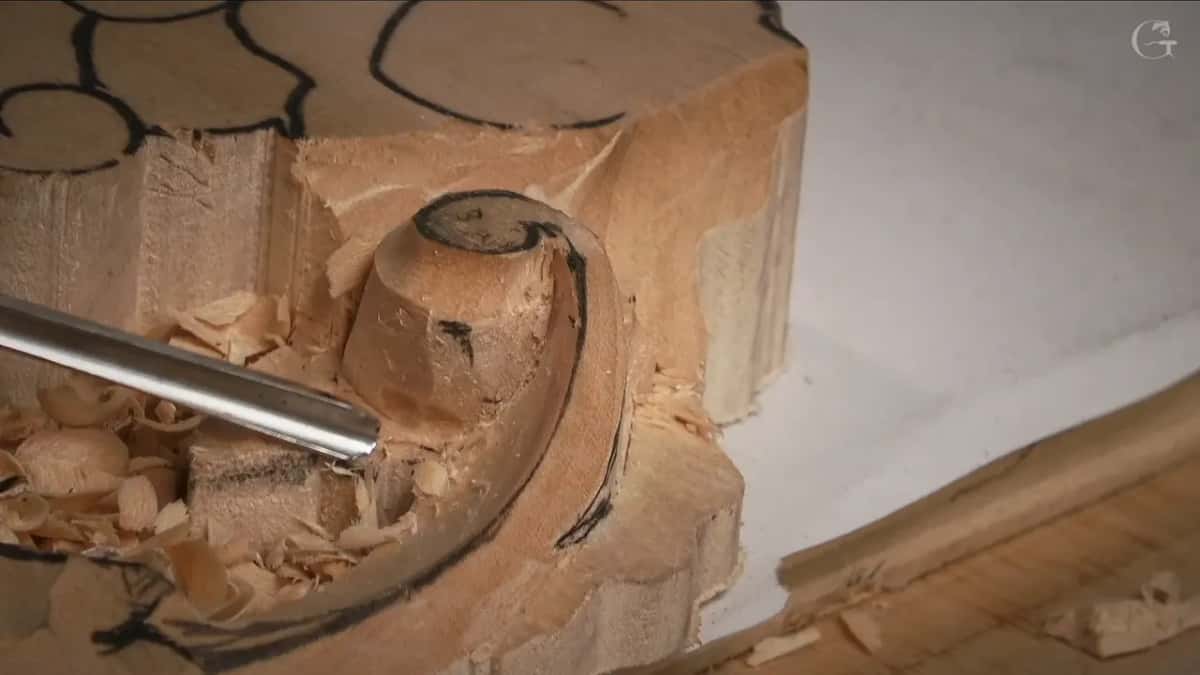
An acanthus leaf sat right below, so the same tool lowered this part slightly, to separate my acanthus from my volute. Acanthus movement was not my job yet, and all I needed was pretty much separation.

Then came a cleaning pass right along the side. That part was already convex, I said, but I needed to make it even more convex. One of the approaches was a fillet cut with the same tool, little by little.
Multiple approaches exist, I said. If you have a back bend, it would be really nice to use right now, but a number 5 could still do it, so I tried one, maybe a quarter inch wide (about 6 mm). I did not want to rush at anything. A number 5 at only one-eighth of an inch (3 mm) could probably clean it even better, I said near 14:29.

Why reach for a small knife near the line?
By 15:06 I could get really close to the line, and in my case the line was a little too thick. Happy with what I saw, I said. Maybe I had to grab a small knife, and sometimes small knives, I said, they really do the trick.
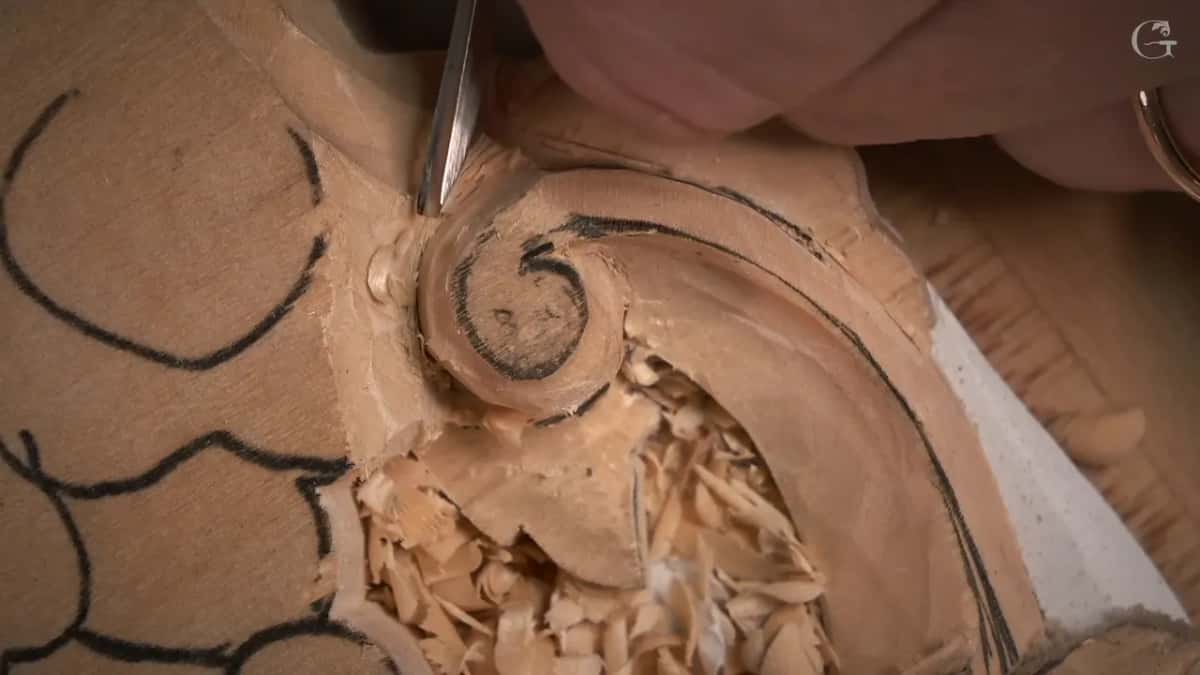
A really, really tiny knife, I said near 16:04, to clean it, take facets out and bring the edge to the line. Later my cleaning tool had to attack that surface completely, because it did not look nice. That way you can see much better what I need to fix as far as the roundness.
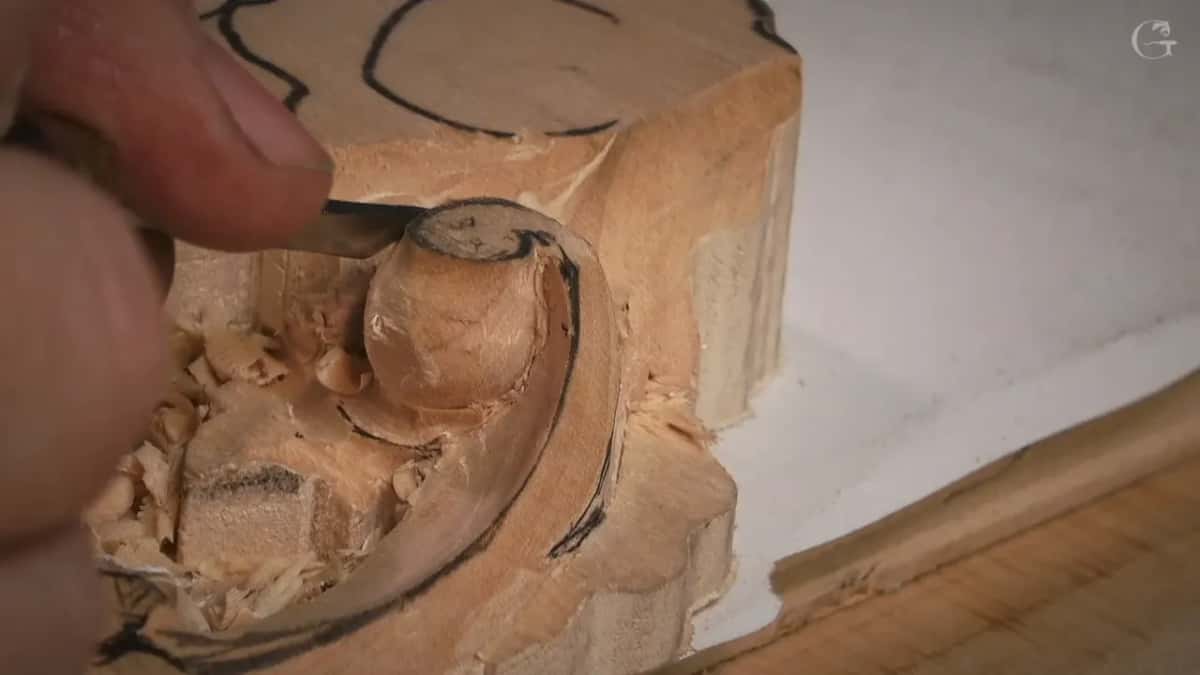
A smooth transition downhill was what I wanted, and I said so twice. Around 17:17 that knife needed to be sharpened a little bit, or buffed. Right after, the curve was still not close to be round, and I was okay with that.

How did the sharp pencil bring the roundness back?
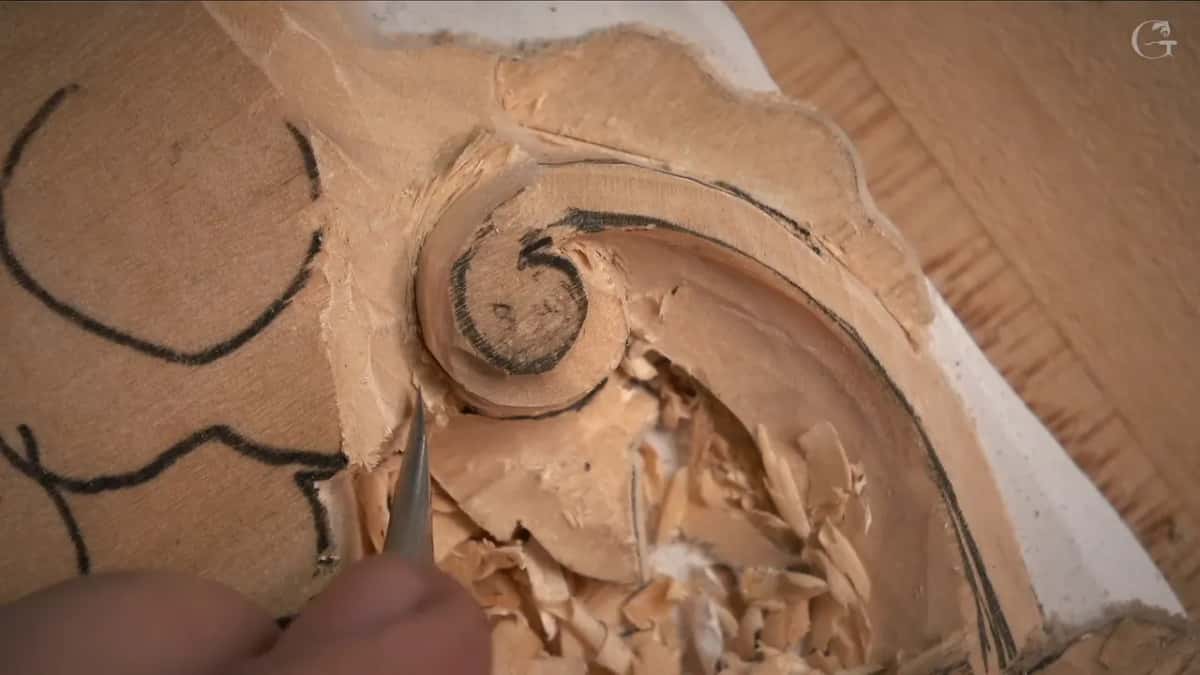
Let me get my pencil really sharp, I said near 17:48, and I can reestablish my roundness. My hair may cover the design, I said, and I apologized, because it just sometimes happens.

Refining came next. I would try a knife first, I said, and it is always better to use some type of tool, maybe just like a number 7. My fingers and the tool covered the spot, but you get an idea. An even smaller tool, a number 5 perhaps, followed. That's much better, I said.

When is a curve good enough to leave for now?
Around 14:50 I said that once I work on a flower, "I'm going to always get to the final, I should say, destination." As of now, I said, I was somewhat happy.

A little more time cleaning everything was coming, I said near 19:44, and I would get closer with my face and maybe use some kind of glasses. I can see much better that way. You should be able to get an idea what we are after.
Then I showed you the whole detail. I still had cleanup to do a little later, but in overall, I said, that is how it looks. See, it just rolls like that and then goes like this. I'm really happy about this detail.
More cleaning was coming, I said, to make it really nice and smooth. But now, near 20:46, we're just setting stuff in, and we still have to work on some details around.
Where did the roundness come from on the grape onlay?
In Grape Onlay lesson 2, part 3, the order was alike. Some more roundness went into one section, I said near 6:50, using a number 5. Closer to 8:49 I said I used a number 5 for blocking in, but for the roundness I can use a number 7. Before that I said you could find the tool which is going to match the curvature, and I tried a number 7 at 14 millimeters (0.55 in).
Slicing, I called it, somewhat like micro passes, almost. You are not trying to reach the final, final shape of it, I said. Earlier I said to clean it slowly, like onion skin. The grape on that onlay lost its extra wood in thin layers, one skin at a time.

Why did the lily flower start with straight down cuts?
In Lily Box lesson 11, part 8, ninety degree cuts ran everywhere. I established it like a canvas, I said, as I say all the time, and with this canvas I can always work. Filleting was the plan, to give roundness to all of those shapes I just created.
A chamfer came first, I said. By creating a chamfer I can do more chamfer, but with a different angle, and give that fillet look. A chamfer is a beveled edge where two faces meet, and the round look came after it. A gouge could do it too, I said. Nothing wrong with the gouge, but this was just initial.
A back bend, I said, a number 5 of 3 millimeters (0.12 in), could create even more roundness. Why a back bend? I just think it is safer, I said. Checking the grain constantly came up near 11:16. If it starts catching, I said, maybe I need to turn the piece and work from another angle, and so far it looked okay.

Which comes first on a bud, the boundary or the round shape?
In Venetian Flowers Rosette lesson 5, part 1, I started a bud. First I needed to establish roundness, like the overall 3D shape, I said near 7:42. A straight down chop came first. I wanted to see a somewhat final boundary, and it gave me a really good idea of the boundary where I should stay.
Later the roundness had to look really full. Not like half a flower, I said. Roundsy is the word I wanted, and I know there is no such word. In that bud the chop came first and the round shape came after it.

Must the roundness be true?
In Hazelnuts lesson 5, part 1, I said the next step was just to create a roundness. I said it doesn't call for the true roundness, but still. Some of the waste came off using a number 11 of about 15 millimeters (about 0.6 in), and I added that the size did not matter much, but still.
A hazelnut is a round shape, and that step still did not ask for a true one.
What happens when the round shape opens a flower?
In Maine class 11 of my Gibbons course, a back bend went in upside down, to avoid losing that roundness. The goal right now is to create that roundness, I said near 10:49. A little later I said that as I create it, my opening becomes wider.
The overall shape of the flower was what I was after. Keeping that roundness on it was the aim, and a back bend made it much easier to reach that result. Look at how deep the shadow casts, I said, beautiful.
| Lesson | Step | Video | Next |
|---|---|---|---|
| Floral lesson 3 | I sank the first concave without forcing | Floral 3-3 | Roundness came later, with other tools |
| Grape onlay 2 | My number 5 blocked in each grape | Grape 2-3 | Number 7 then gave the roundness |
| Lily box 11 | Straight down cuts first, then a chamfer | Lily 11-8 | Fillet cuts gave the round look |
| Rosette lesson 5 | A straight down chop showed the boundary | Rosette 5-1 | The roundness came after that boundary |
| Hazelnuts lesson 5 | Roundness did not need to be true | Hazelnuts 5-1 | My number 11 took the waste |
What else sits near this lesson on the site?
Neighbors of this lesson sit close by. Lesson 2 gets the background flat, lesson 4 carves to an exact depth, and lesson 12 blends a molding. The floral and molding course holds all of them in one place. In Byzantine Acanthus lesson 7 I said that first we take out the whole thing, and then we round it or fillet it.
For words I used above, a volute is a spiral, scroll-like ornament, and the page ties it to the Ionic order. Relief carving, moulding, curvature, a sharp pencil and a small knife each have a short page too.
Which curve on your board would you leave a little lopsided until the second pass?
How it's done
- Stay on the line. Make the concave inside it without forcing all that mass out.
- Start from one side. A number 9 took the first pass in tiny bites, and I told you I did not want to damage my concave.
- Work up to the line. Wider tools followed the tiny bites, and the number 7 came last at the line.
- Fix the roundness with another tool. A different tool was all I said I needed, then I sank a shallow lower concave.
- Redraw, then refine. Sharpened well, the pencil put the roundness back on the wood, and then came the refining.
Frequently asked questions
Is my carved curve wrong if it is not round after the first pass?
Mine fell short of round after the first pass, and the lopsided look did not bother me. Other tools worked the roundness in later, and near 17:40 it was still far from round.
Why take tiny bites next to a line you want to keep?
Small bites, really tiny bites, was how I worked beside my concave. I was staying away from my final line, I said, and it was really important for me not to mess up. Later, probably at 14 millimeters (0.55 in), I took a number 7 to the line.
Do you need a back bend for a convex?
A back bend would be really nice to use, I said, and a number 5 could still do the job, so I tried one without rushing.
What to carve next