

Alexander Grabovetskiy, woodcarver, School of Woodcarving · Published 2022
Should a carved line ever be straight?
Quick answer: A straight line in carving is something I try to keep off slopes and hollows. In lesson 3, part 2, I said I don't like straight lines, even if you're looking from the side, so my rising line gets some curvature. Other places keep one on purpose, and I name them.
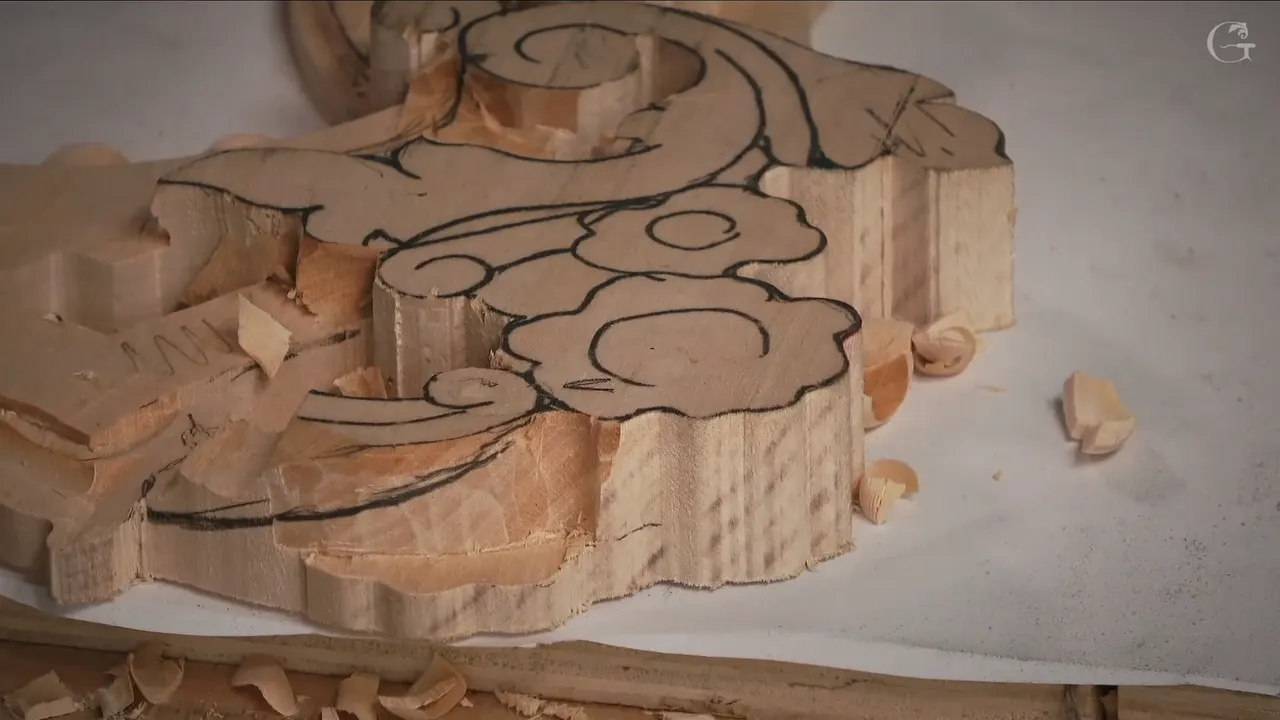
A straight line in carving is something I try to keep off a slope or a hollow. In lesson 3, part 2, I said it plainly (05:48): "I don't like straight lines, even if you're looking from the side." A big number 7 was running along the line right then, and the camera showed the left-hand side.

The camera did not catch everything in this wood carving video. I took a side look near 01:30, again at 09:44 and once more at 10:19. At 10:23 I told you I really needed to see it, and that I didn't want to cover my camera.
Have you carved a slope that looked fine from above but wrong sideways? Do you want a rise that eases uphill instead of running like a ramp? Then follow my slope first, one tool at a time, and after it the lessons where I made the same call.
Six short lines about this slope
- The rise goes smoothly uphill and carries some curvature (01:36).
- The number 7, 28 and a half millimeters (about 1 1/8 in), ran along the line (05:22).
- My ridge measured about 3 mm (an eighth of an inch) one way; near that part it was maybe 2.5 mm (about 3/32 in), and I drew it to keep it in view.
- Instead of following my drawing, I would lift the line slightly, I said (08:47).
- A 12 mm spoon gouge, a number 3 (about 1/2 in), made the long concave, and I kept it shallow.
- A few lines do stay straight on purpose, and a table near the end names them.
What does my slope do when I look at it sideways?
It rises with a curve. The transition has to go really smoothly uphill, I told you, not like just a straight line (01:36). I promised to show it, and then I did (01:51), and showed that the line does not climb as a ramp: "So it has some kind of curvature." Really important for me (01:58).
Before that, I went back to my previous piece with my trusty pointing machine and measured the depth between the leaf and the lowest spot. Almost there, I said, and I almost messed up, really close (01:04). Then came "there's my line" (01:13), and what was left was to create a beautiful movement.
The first gouge in this part was a number 9 of about 10 millimeters (3/8 in), the true half circle, in my words. No forcing yet (04:36). I was only establishing my first pass, until I got really close to the final picture.

Then the big number 7 took the line the whole way along. I wanted it nice and flowing (05:36). Seconds later came the sentence I care about most. Straight lines are not for me, I said, even when you look at the piece sideways (05:48).

Next I drew the ridge, since I need to see it, and I said sorry if you couldn't see it on camera (06:36). It measured approximately three millimeters (1/8 in) one way and ran a little wider in one spot. Closer to that part it got smaller, maybe about two and a half millimeters (about 3/32 in), though I added that I don't know (06:48). I thought it was good (07:09).

"That is going to be my volute," I said (07:22). Like every volute, this part has to slope one way and then go up. Any tool will work for that, and a flatter one would be really good, probably a number 2 (07:45).

I changed my own drawing. This side dropped all the way down (08:03), so I needed a second line, and that line had to flow. Next came a flat statement (08:47): I'm not going to do what I drew. I'm going to raise it a little higher.

The attack had to come from the opposite side (08:56), because the first side was not good for me.

Just before 10:00 I checked the side view and said it does look good, except that I was still not too happy with the overall movement. Slightly deeper, maybe. I drew that, looked again from that direction, and showed you what I did: I lowered it slightly down, just a little bit (10:36).
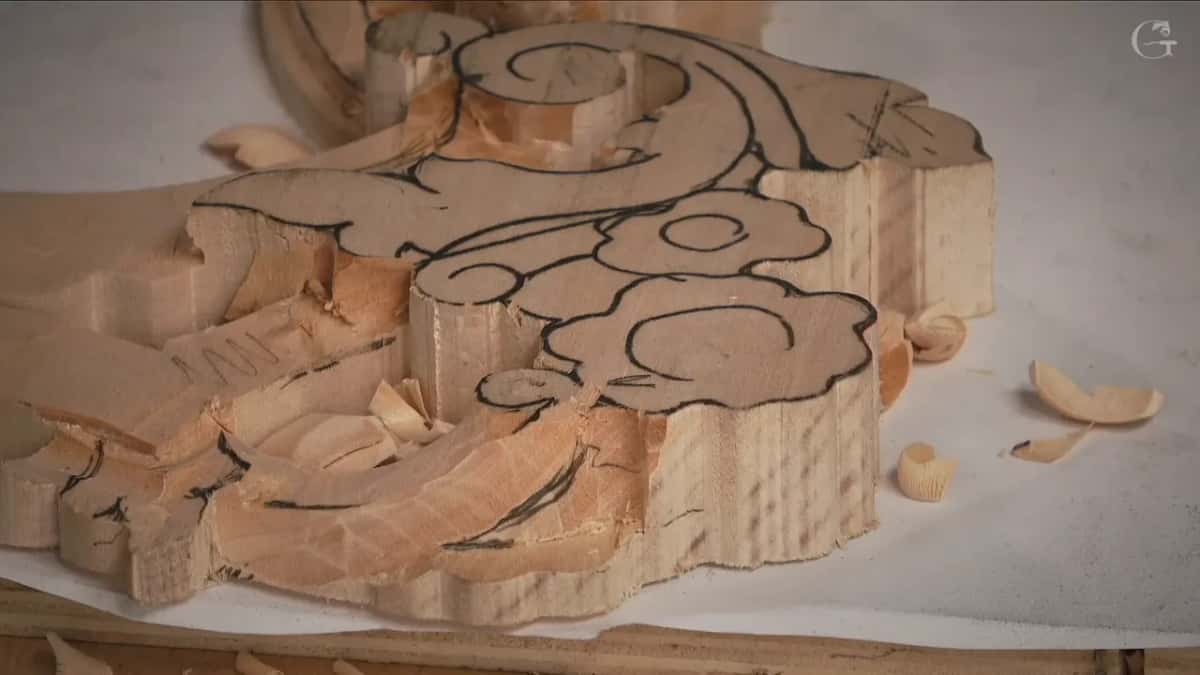
Maybe the number 7 again for the area around it, I said (10:47). For what I called my future acanthus, which is really tiny, I needed much smaller tools, I said, a number 9 of a quarter inch, 6 millimeters, and that's probably sufficient (11:22).

What about the part the camera cannot reach?
My phone helped twice. Near 02:17 I showed a trick for flipping a piece the opposite direction: take a picture of the piece, hit edit, flip it. "That would be my acanthus movement," I said (03:31). Later there was no way to get the camera into an area like that, so I grabbed my iPhone and apologized for how shaky it was (11:57).

On the phone I showed the volute I had just pointed at, the lowest point of that overall side. My line starts there and runs almost to the background (12:42). Once more it has to be really nice and smooth, I said, so it can't run straight (13:07).

All of that section was going to be a concave, I said. I named probably the number 7 for it (13:16) and described the effect I'm after: almost laying flat, then raising up, then curls (13:37). I could not hold the phone and carve there, so I asked you to picture it. From above, you could see it.
Near 14:10 I picked a number 3 of 12 millimeters, about half an inch, a spoon. Careful, not rushed, I said. Little by little, the concave came. It's still concave, not as deep, equal to a number 3 gouge concave (15:07).


I said I'd do the opposite direction too, all the way to the background (15:23). By 16:16 I could see that effect already taking place.
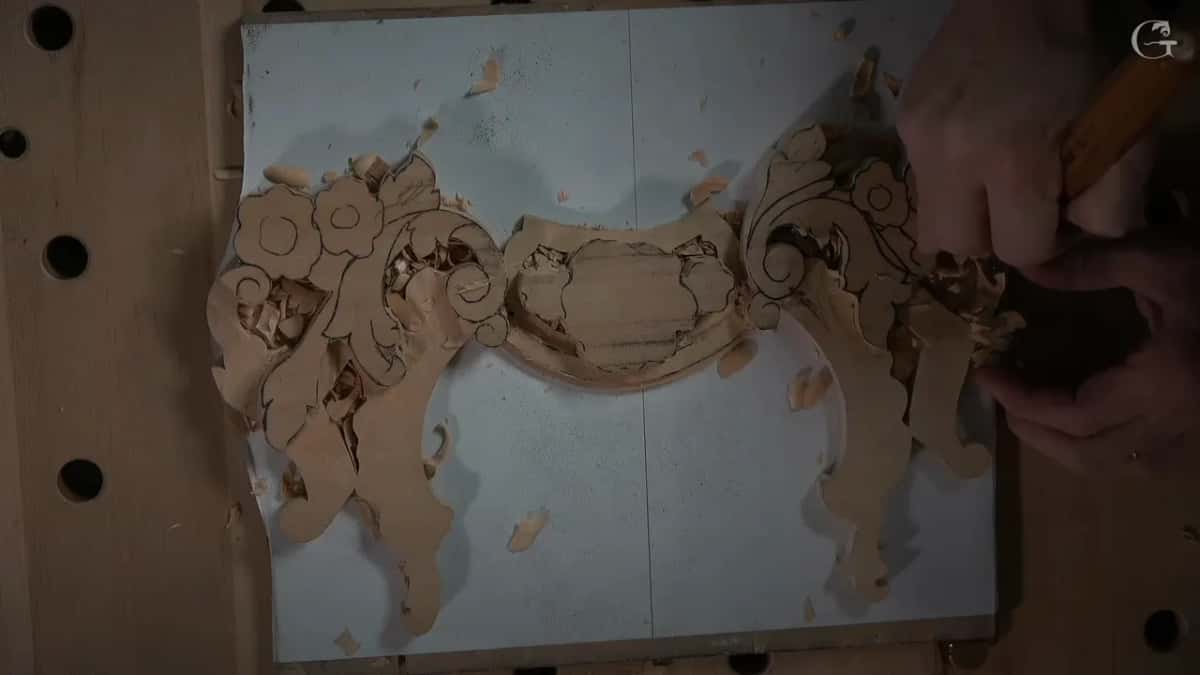
Could I go deeper? A number 5 or so might give a more pronounced concave, I said (16:24), and then: let me think if I should or not. Maybe a number 7. Overdoing it was my worry, and by 16:51 my answer was that the number 7 will work, a little later.
How did I handle the twist and the shaky corner?
A smaller tool took the twist, probably a number 11 of maybe 3 millimeters, an eighth of an inch. Little by little, I said, and without a lot of force, because this part has a twist and is not a straightforward, really easy job (17:01).

After it came a number 3 of about 6 millimeters (1/4 in) for a straight-down pass, probably. I was barely removing wood, because this area is kind of shaky and it's easy to make a mistake. "No, no mistakes allowed," I said (18:56). By 19:18 I mentioned a really good tool for that spot, a skewed gouge, maybe a number 7. The video stops there.

Why do I check the side view so often?
The camera and the top view miss things that I can see sideways. In Venice Room workshop 28, part 1, you can hear me say that you don't see that from the camera, but I see it (01:20). The movement was not flowing nicely, and I needed to take care of it. "When I'm saying flowing, I'm talking about curvature," I explained (01:45). A page on curvature says it measures how far a curve deviates from being a straight line.
Acanthus over Moldings lesson 10, part 2, gives a clean example. A part can look okay from above and wrong in a side view, I said (12:00), and I needed it to go really nicely downhill. Look from different points of view, I added, and when you work in 3D, check the side too (12:22).
A hump hides the same way. Part 10 of workshop 42 of the Venice Room has me saying that seen sideways it has a little hump, which I don't want to see (01:10). Then, near 01:41: "That's why I see what you probably don't see."
Can a line look straight on camera and still curve?
It can. Part 8 of workshop 57 has me happy with the overall curvature (04:14). Even when your camera shows a straight line, it's not, I said. It actually curves.
Workshop 58, part 2, goes further. The angle makes it look nearly straight, I said (05:30), but that's not true. Just the angle of the camera. In real life it is different, absolutely different. By 06:01 the overall development was no longer a straight line, because it repeats this curvature. A page on perspective explains foreshortening, where a shape along your line of sight looks shorter than it is.
Does anything in nature run straight?
Furniture Panel 8, part 2 (04:12): "In nature, in a creation, you can't find any straight lines." Everything has an arc or a sweep or a curl, I said, with lots of dots and lots of curves. In art you get three more elements: vertical, horizontal and diagonal lines. This part is a human part, I said, and this part is a divine part.
Workshop 115 says it a little softer. Along the edges I did not want somewhat straight lines (06:35), because otherwise it won't look realistic. "There is nothing in real life, almost nothing, really straight line," I said, and then: "Probably some stuff is, but not much." One says you can't find any, the other says almost nothing, and I print both. The Principles of Design course puts one word to it, arabesque, in Principles of Design lesson 4, part 2 (00:20): nothing is straight.
How do I fix a line that is almost straight?
I look, say so, and change it. In Furniture Panel 22, part 3, I called one spot almost a straight line, and that just doesn't look good (02:46). Out came a number 11 of 3 millimeters (about 0.12 in), and then: "Now it's not a straight line" (03:21). Gradually downhill, I added.
Furniture Panel 29, part 2, has the same eye (10:30). Lay my tool against that line and there it is, I said: not enough waviness. I created a movement, and it already looked much better. Another straight one turned up.
Venice workshop 17 (part 11, 00:44) shows the other kind of fix. One line there was almost straight, so not good. An extra eye would be nice, I said, but I don't want to lose the overall flow. So I chose a long concave, with a number 6 of about a quarter inch (6 mm), starting really far out, and it would still leave me some ridge.
The side of a pipe is another place. In Venice workshop 14 (part 3, 03:22) I said first of all I need to make sure it's not a straight line. Some curvature, going downhill. Too big, that number 11, so I went to 5 millimeters (about 3/16 in).
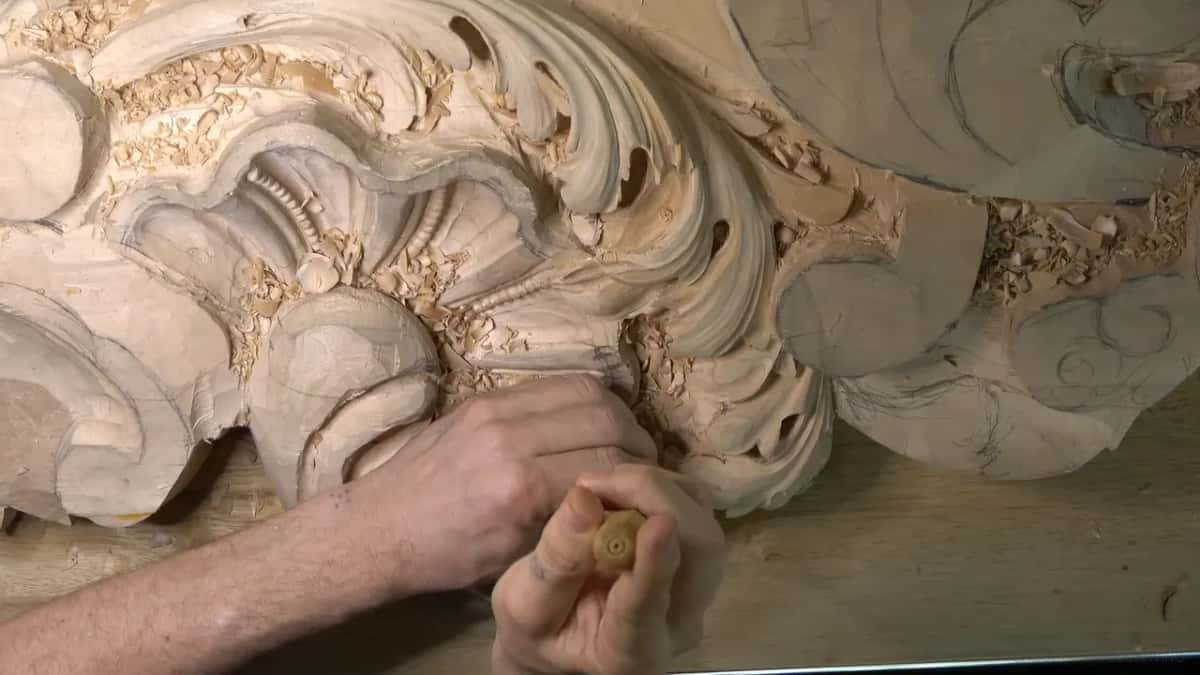
Floral and Molding lesson 7, part 2, covers a petal. As you look right now, it's just too straight, I said (01:56), and I wanted waviness there. I would get the smaller number 5, or even smaller, like 1/8 inch (3 mm), and I said it would be really good. Near 05:50 I added: avoid straight lines, make a wave, make an arc.
When do I leave a line straight?
A straight-down pass can leave one. A big number 1 of 3 1/8 inches (about 80 mm) went on the line in workshop 153 (part 1, 06:07). That way it won't be wiggly, I said, so I expected a perfect straight line, or at least close to perfect. There is a corner, there is the edge.
Workshop 79 (part 9, 02:05) brings in a block plane: just at the edge it could give an absolutely straight line. After that I knew it was absolutely straight, right on the money.
Sometimes a straight line is a first step. Workshop 80 (part 1, 05:06) shows me holding off on a pronounced concave. For me it's better to create a straight line first, almost straight, and then create a final movement.
Part 2 of workshop 159 (03:51) has me reaching for a number 1 single bevel to strike on the line, as accurate as I can be, straight down. And lesson 15 of the Furniture Panel course, part 1 (00:49), needs a marking gauge to mark those straight lines, and a decent one will do.
| Place | What I wanted | Video | Point |
|---|---|---|---|
| Rising line uphill | A smooth rise that has some curvature | Floral 3-2 | Not just a straight line up |
| Pipe side hollow | Some curvature going downhill, 5 mm tool | Venice 14.3 | I don't want a straight line |
| Flower petal edge | Waviness made with a small number five | Floral 7-2 | It looked just too straight there |
| Almost straight line | A long concave, quarter inch number six | Venice 17.11 | I wanted to keep the flow |
| Straight down wall | Number one set right on the line | Venice 153.1 | Close to a perfect straight line |
Where else do I say it?
The transition should be really nice downhill, a beautiful arc, with no straight lines, I said in Byzantine Acanthus lesson 6, part 3 (00:36). In Floral and Molding lesson 4, part 1, it comes at 06:00: I really don't like the straight lines. And in workshop 12 in the Venice Room, part 9 (03:07), I tried the bigger number 5, 35 millimeters (about 1 3/8 in), because right now it's straight, and I want a nice flowing movement.
Do you have a slope on a relief carving that looks fine from above? Would you give the side view a look before your next pass, the way I did at 09:44? Then turn your board and decide with your eyes. The video behind all of this is the second one in lesson 3, and access to the school opens every video of this course.
How it's done
- Check one side. I looked at the panel from one side before I judged the line, and I checked again after I changed it.
- Begin with a half circle. A 9 at about 10 mm, three-eighths of an inch, with no forcing, set my first pass.
- Follow the line with the big gouge. The 7 at 28.5 mm, a little over an inch, went the whole way, and I watched that the line stayed nice and flowing.
- Draw the ridge. Close to 3 mm (1/8 inch) in one stretch, then about 2.5 mm (0.1 in) nearer that part, drawn to keep it in view.
- Change the drawing when it is not right. My plan was a slightly higher line, and I attacked from the opposite side.
- Hollow with a spoon gouge. A 3 of 12 mm (about 1/2 in), taken slowly, kept the concave shallow.
Frequently asked questions
Should a carved line ever be straight?
A few of mine are, along edges and walls. In the Venice Room I set a number 1 on the line and said the result would be perfect, or at least close to it. On slopes and hollows I want curvature.
Why look at a carving from one side before the next pass?
A flaw can hide from above. In the Acanthus over Moldings course I said a part can look okay from the top yet wrong in a side view. Different points of view matter, I told you, and so does the side when you work in 3D.
Can a curve fool the camera?
It can. A Venice Room workshop shows it: I said a line looked nearly straight on camera, and that was just the angle. Real life was different, I said, and over the whole piece the curvature repeated. Another workshop has me saying the same about overall curvature.
What to carve next