

Alexander Grabovetskiy, woodcarver, School of Woodcarving · Published 2022
How do you carve a petal movement you can only see from the side?
Quick answer: A petal curl seen only in side view is a movement that goes up, goes back, and goes up again, so it hides from above. On my second flower I marked it in pencil, hollowed it using a 2 mm (0.08 in) number 8, then shaped the ridge using a number 5 upside down.
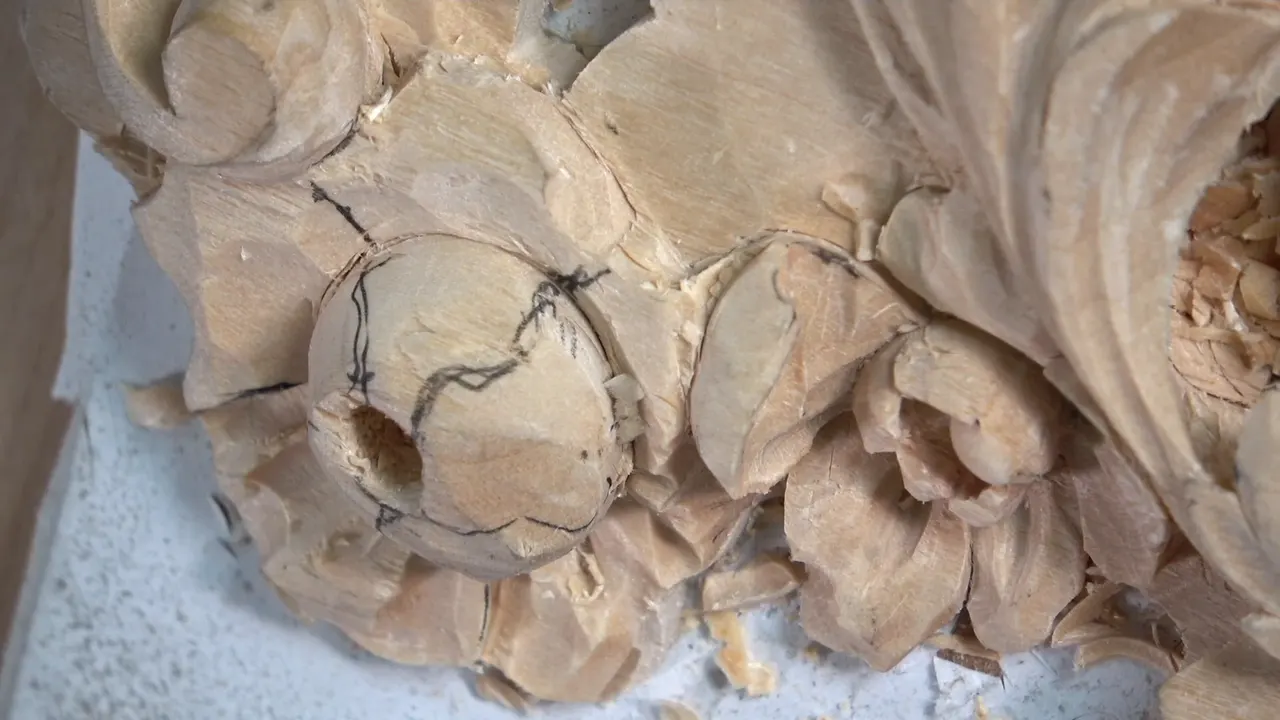
A side-view petal curl is a movement that rises, comes back, and rises again, so it hides when you look down on the flower. On the second flower of my floral panel I marked it with a pencil, hollowed the inside with a number 8 of 2 mm (5/64 in), and shaped it with a number 5 turned upside down.

Does one of your petals look flat from straight above? Would you like it to throw a deep shadow? Then draw the curl first and carve toward your pencil, the way I did on this flower. Below you get the tools in the order I picked them up, the moment I connected my phone, and the same kind of move in other courses of mine.
The petal curl in six lines
- I put a pencil mark on the petal to show where the curl would go.
- The curl climbs, turns back, and climbs again, and the ridge stands up.
- A 2 mm (about 0.08 in) number 8 hollowed it.
- A smaller gouge, maybe 1 mm (0.04 in), could go deeper, I said.
- Upside down, a number 5 blended the hollow, and the same tool raised the ridge.
- In side view the curl makes a huge difference.
What do you draw on a petal before you carve a curl?
The first flower was done, completely, and I had started on the second one. I had recorded some of it, but I lost some footage, maybe about 15 minutes, so I explained what I had done right there. A pencil mark. The idea is the same, I told you, a concave, another concave and a convex, and I was not going to do too many movements. What made this petal interesting was a movement I was going to create, and I wasn't sure you could see it. So I put a pencil mark on the petal to give you an idea.
Then I explained it. That curl goes up, it goes back, and then it goes up again, and the ridge is raised. I was going to excavate it. Look from above and you don't really see it, I said, but from the side it makes a huge, huge difference.

You also saw the previous flower. It needed cleaning, so it was not perfect, but in my opinion it would look really good. You can be free and create whatever movements you like, I told you, if you get the main idea of little ridges raised on both sides. What you do outside that is up to you, so be creative.

Why did I connect a phone while I carved the curl?
To show you exactly what curl I meant. At 02:44 I connected my phone, and I said you should see it somewhere right there. That was the part I was working on. I would not do it all the time, I told you, but I thought it was a good idea so you would understand.

It did not go smoothly. The phone froze for a couple of seconds near 06:10, so I said I would try to avoid freezing my phone. You should be able to see it, I said, that is raised up just like that. By 07:17 you did not need the side view anymore, I said, so I disconnected the phone and carried on with the normal cameras.
Which tiny gouge hollows the inside of a curl?
A really small one. I took a tiny gouge, in this case I would say 2 millimeters (0.079 in), a number eight, and I excavated right on the inside. I would have to work around, I said, and maybe get an even smaller gouge, maybe 1 millimeter (about 0.04 in), to excavate even deeper.

There will be a chance to undercut it from the backside later, I said. See how deep a shadow it creates? I asked you that near 03:46, and then I took the concave even more inside, just like that. It is a really, really nice and interesting move, I said, and you only catch it in side view.
How do you blend the hollow and raise the ridge?
I got a number five to blend whatever I had to blend, and I turned it upside down. Inside, I said, I was also going to create a concave. Next came the ridge. Wherever you see the marking of my pencil, I said, it would be raised up a little bit, and the same number five would do that.

I thought that would create a beautiful movement, and yes, I had plenty of material, so I could be creative. From there it was a matter of blending. The other side needed the same treatment, and I told you there is no end, absolutely no end, to what you can do with that stuff.

A number nine again, I said, would make a little deeper concave on that side and take out some of the material. Then a new thought came. I could leave that ridge and make some kind of convex. Why not? I said I would grab maybe a back bent to attack it. By 09:33 that is how it looks from above, I said, and it will look good. Cleaning was still ahead of me.

Do I carve every petal of a flower on camera?
Not every one. The other petals I would work on myself, I said, and not record them, so you could get the idea of what I'm after. Convex, concave, convex, I said, with small concaves and small convexes going around, and one of the petals goes underneath another one, exactly like what we worked on before.
Five flowers on this panel will be exactly the same, I said at 11:03, and the other two will be different, with a center that is not the same. Those petals I would also work on off camera, I said, because I did not want to make mileage of footage you could not watch. Near 12:12 I said getting the phone again to fly around would help, so you could see what was going on. That part goes right on top of the volute, I said. Close by there will be a leaf, or a couple of leaves, I don't know, and the space between the acanthus and the flower will get some kind of leaf too. Lesson 13 comes back to the flowers later.

Where else did I carve a movement that hides from above?
More than once. I keep coming back to the same move, and I said so in other courses. Here are the passages, each one with its lesson, so you can watch the full videos if you want to see the hands.
In Venetian Flowers Rosette lesson 3, part 1, I showed you a section that gives a really nice movement. If you look from above, I said near 02:30, you don't see it, but looking sideways it creates a beautiful look. That part naturally rises up, so I could add extra shadow along the petal's side with a small concave: remove all that, then dig inside.
Smaller tools were next, I said, a number 11, much smaller, maybe 2 mm (about 5/64 in). The first concave does not need to run all the way to the center, because if you go that far, it's not going to look as nice. My tool was a little dull, so I buffed it. You can already see the shadow casting near 04:24, I said, and that extra shadow makes a big difference.
The inside came after that. It goes downhill and raises up a little, I said, so I made a preliminary excavation and a preliminary undercut, with much deeper work later. Working from two sides, I hoped you could see a really pronounced letter S curvature. Still not done, I wanted extra movement, so a little deeper concave went on one side to make an extra dark spot. It looks more natural, I said.

In lesson 2 of the same course, part 2, five petals were enough, but it was not the end yet. The petals needed movements on their sides, concaves and convexes, I said near 12:43, because otherwise it would not look as nice. The area looked a little mushy, so I made sure my tools were really sharp.
For the first concave I could curl it, I said, though that needs an even smaller tool, like a number nine, micro tools pretty much, whatever you have. Number 11s in 2 millimeters (0.079 in) or 1 millimeter (0.039 in) work too. They must be sharp, absolutely sharp. At this stage, I told you, be creative and think about how it is going to curl.
In Hashemi Flowers lesson 45, part 7, I used a gouge again and brought it all the way to the hole in the center. All my cuts were going to the center, I said, but I could curl it a little bit inside, and maybe even a little on the side. Against the grain there, I said, but I was okay with it. An even deeper concave was next at that point, and maybe an even deeper twist.

In the Lily Box course, lesson 12, part 3, my flower was almost done. That is the big movement, I said near 16:40, and you can detect it from a side view. I know I really didn't have to do that, I told you, but I really liked it. I was not sure you could see it.
| Lesson | Movement | Time | Tool |
|---|---|---|---|
| Floral panel 8 | A curl that goes up, back, up | Near 01:23 | A tiny gouge, a number eight |
| Rosette lesson 3 | A small concave gives some extra shadow | Around 02:54 | A much smaller number 11 gouge |
| Rosette lesson 2 | Concaves and convexes along the petals' sides | About 12:43 | Micro tools that must be sharp |
| Hashemi lesson 45 | It curls a little inside and sideways | Past 10:02 | One gouge working against the grain |
| Lily Box 12 | A big movement seen in side view | By 16:40 | I used just the gouge there |
One more tool note. If I have a high spot and still have to reach and carve an area, I said on my back bent tools page, a straight tool at the right angle is going to dig in. With the back bent, I said, the tool is raised above, and I can safely attack that part. I showed you in profile.
What came next in this video?
A molding. I said around 13:41 that I was ready for it, a profile with a small volute going along it, and a leaf. On that side all that was left, I said, was a shell, leaves, another shell and another small acanthus movement. Then I turned around and told you we would concentrate on the molding.

It's a clover molding, I said, though I did not know if you knew the name. It has a convex, a convex, and another convex, pretty simple, not as complicated a molding. The middle part is a convex. In Acanthus over Moldings lesson 2, part 1, I called clover the common name for a molding with a convex right in the middle and both sides going downhill.
The side of the existing piece came next, and you can see the edge. I left about maybe a millimeter (1/25 in) or so of material all around, I said, so it was not my final, but it is the type of movement you will have. From above, there is a miter going one direction, then a piece, and then another miter going the other way.
The extra material is for the miter. I have to carve other moldings, and I want some room to play around and make it look really nice when it gets mitered. A volute is going to sit on that side, and the opposite side gets exactly the same idea.

Measuring came first. I wanted to know how wide the molding would be, and I used just the calipers, always, always the best tool, I would say. I double-checked on both sides. First came a little more than three-quarters of an inch, then no, exactly three-quarters of an inch (about 19 mm), which I called perfect.
Some of that wood had to come out first, I said, and I had to hold the tool perpendicular. My pencil needed sharpening, I said, though I would just eyeball the line, because it was not that sharp. In lesson 6 of the Acanthus course I started shaping the side of a clover with a few chamfer cuts, and said that just by doing multiple chamfers I can create half a circle. You don't detect that because of the camera position, I said, but it does go downhill.

Where does this video sit in the course?
This is part 1 of lesson 8 in Carving Floral and Molding for the Panel. Lesson 7 comes before it and lesson 9 after it. Outside pages can help with a word, and there are short ones on relief, wood carving, chiaroscuro, the chisel and curvature.
You'd like to watch that curl in profile on my phone, wouldn't you? With Access you get the full videos of all fourteen lessons on this panel.
How it's done
- Mark the curl. Draw a pencil mark where the curl climbs, turns back, and climbs again. The ridge stays raised along that mark.
- Hollow the inside. Excavate the inside using a number 8 of about 2 mm (0.0787 in). Maybe 1 mm (0.0394 in) goes even deeper with a smaller gouge.
- Blend using the number 5. Turn the number 5 upside down and blend the hollow. Add a concave on the inside too.
- Raise the ridge. Take the same number 5 and lift the ridge a little bit, wherever your pencil mark runs.
- Look in profile. Check the curl in profile, the way my phone showed it. Looking down from above, you don't see it.
Frequently asked questions
Which gouge hollows the inside of a petal curl?
A really small one, a number 8 in my video, and I said I might need an even smaller one, maybe 1 millimeter (about 0.039 in), to excavate deeper. Undercutting from the backside comes later.
Why did I connect a phone while I carved?
To show you exactly what curl I meant. Not every time, I said, but the view helped you understand. By 07:17 I disconnected it, because you did not need the side view anymore.
Which tool raises the ridge on a petal?
The number 5, the one that blended the hollow, flipped over. Wherever my pencil mark ran, I said the ridge would be raised a little bit, and I thought it would create a beautiful movement. Later I said the ridge could stay and become a convex.
What to carve next
- Carving Floral and Molding for the Panel, the course page
- Carving Floral and Molding for the Panel lesson 8
- Carving Floral and Molding for the Panel lesson 7
- Carving Floral and Molding for the Panel lesson 9
- Carving Floral and Molding for the Panel lesson 13
- Venetian Flowers Rosette lesson 3
- Venetian Flowers Rosette lesson 2
- Hashemi Flowers lesson 45
- Acanthus over Moldings lesson 2
- Acanthus over Moldings lesson 6
- Lily Box course
- Back bent tools page