

Alexander Grabovetskiy, woodcarver, School of Woodcarving · Published 2022
Which gouge hollows both sides of a pipe on an acanthus leaf, a spoon gouge or a straight number 11?
Quick answer: Hollowing both sides of a pipe is how I make the pipe stand up on an acanthus leaf, and I did it with a spoon gouge. My own was a number 11. The class got a number 9 spoon gouge. The 3 mm number 11 was not for those two concaves, I said.
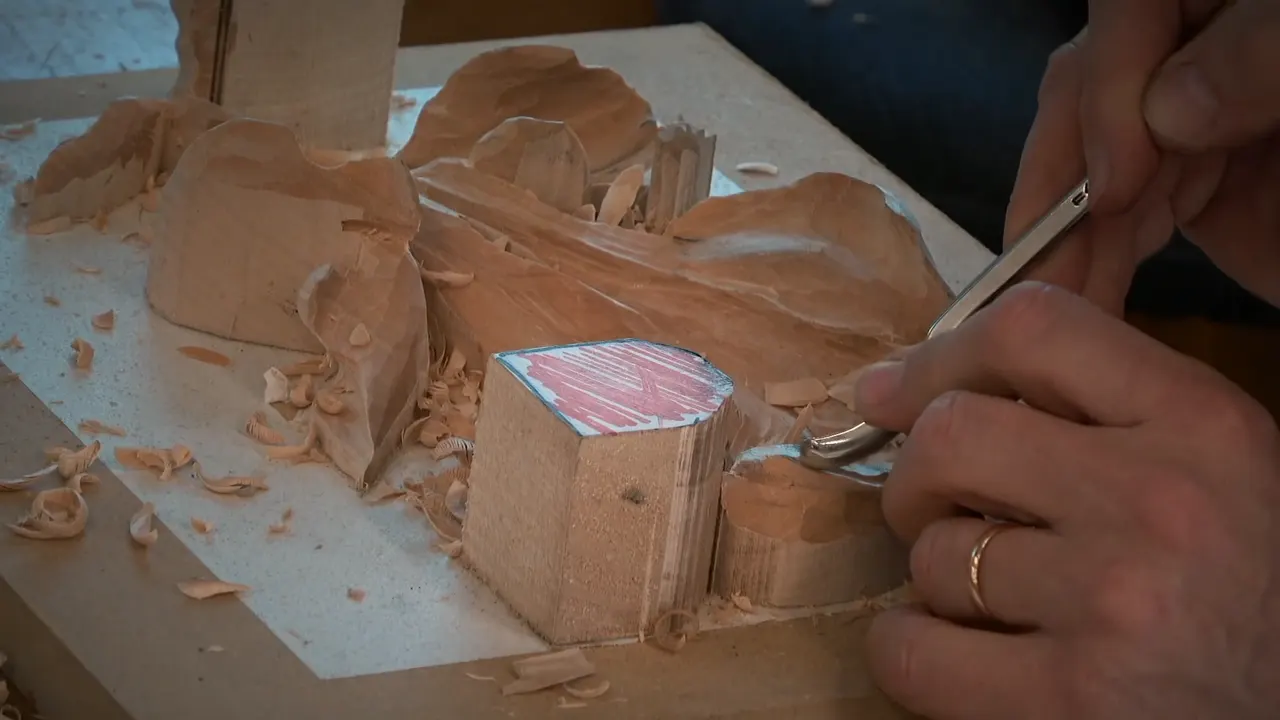
The hollows beside a pipe on an acanthus leaf want a spoon gouge, and in the second video of lesson six I told my class to use a number 9 where I used a number 11. The 3 mm number 11 stays out of it, I said, because the result would not look as nice. This is part of Carving Modern Acanthus, my acanthus leaf class on a design from 1903.
Ever stood over a leaf with two gouges in your hand, unsure which one belongs by the pipe? Would you like that pipe to stand up without ten minutes of cleaning afterward? I will show you the tool I picked, the one I skipped, and where else I did the same job.

Which gouge hollows the two sides of an acanthus pipe?
A spoon gouge. Twice I said it, and the second time was plain. Just before the hollows I had talked about the eye. Every time we have an eye, I said, it is the overlapping motion, and we are supposed to have a pipe. Even if I did not draw it really clearly, there is supposed to be one.
Two concaves make the pipe, one on each side. Mine would run in that direction, I said, and then I picked up the gouge.
Here is the line that answers you. I am using the same number 11 in my case, and you are going to use a number 9, but the spoon gouge. Earlier in the same video I had put it nearly that way, a spoon gouge in your case and a number 11 in mine, when I dropped the whole section almost to the background.
Look at the frames from the stretch where I carve the hollows and then clean them up a bit. The gouge in my hand has a blade that bends near its tip.

Why skip the 3 mm eleven for those two hollows?
A different number 11 had come up earlier. Early in the video I said I would take a number 11 of 3 millimeters, about 1/8 in, and make a first pass with my flute at approximately 11 o'clock. Eleven three, I said, that is 11 3.
For the hollows I gave a warning. Do not use number 11 and 3 millimeters for those concaves, I said. The result is not going to look as nice. A bit of the sentence around it is lost in the captions, so I will not guess at it. The warning itself is clear.

How deep should the two hollows be?
Shallow. I was not making a deep pass, and spending my time cleaning that stuff was not something I wanted. An indication of that movement was all I wanted.
A deep hollow leaves a lot to clean, and that is why I stayed light. The wood pushed back on one flank of the leaf. I said so out loud: yes, it fights me, because I am carving against the grain.

How far toward the pipe can the hollow go?
Stop short of it. Leave some material, I said on the Roman leaf. Don't go all the way to the edge, I said, this is the edge right here. Leave some material between your hollow and the top of the pipe, because we are still going to need that material later. Really important, actually.
Those sections got cleaned with the same tool as before, a number 5 of a quarter inch (about 6 mm). I had to be really careful, I said, since I was working underneath. Later we would recreate those concaves, and for now my goal was a flow, really smooth, going underneath and nicely flowing. That one plays out in lesson 11 of that course, if you want to see it.
What blends the hollow once it is in?
Number 7, 14 mm wide (9/16 in). I turned the tool upside down, I said, and blended that concave. Then I cleaned a little more.
Cleaning around my pipes on that leaf, I took a quarter inch tool and worked upside down. I looked for the right position, because I had to make a smooth transition. It should feel like it goes downhill, I said, really smoothly, and then I took those ridges out.
The lesson six page shows the same flipped seven round the top of the leaf in the first video. Back in this one I said to take this ridge slightly inward, and that you will see exactly what I am doing once you come to the video.

What does the pipe look like when the hollows are in?
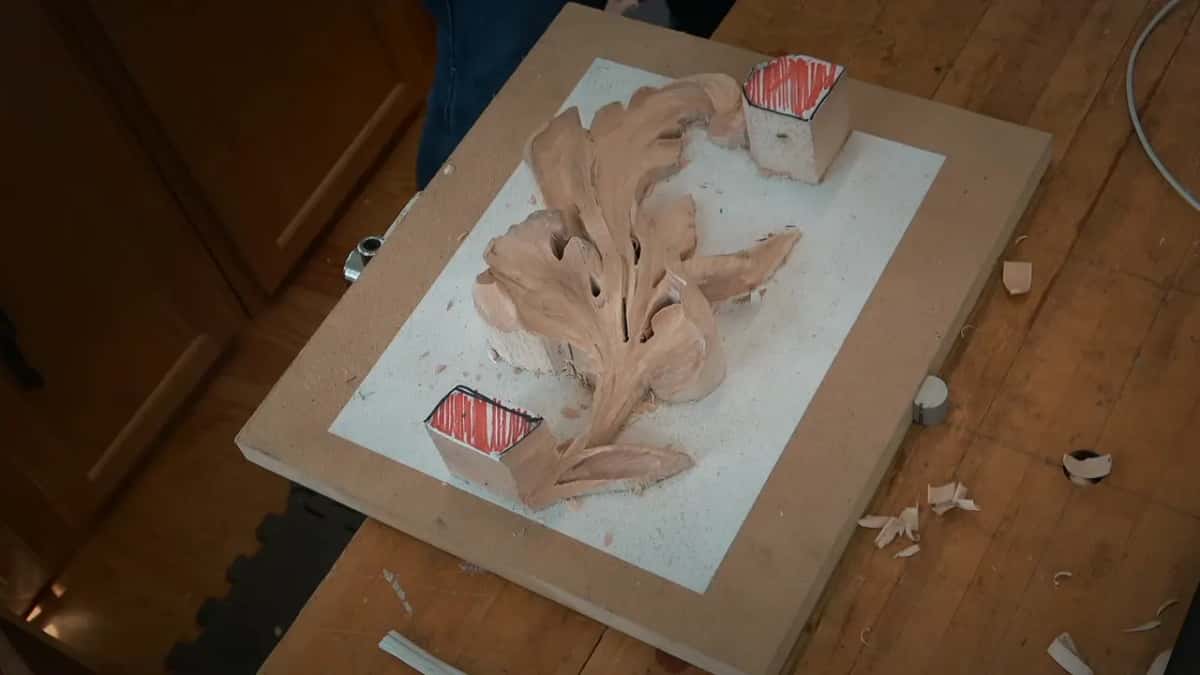
It stands up between them. What lies on either flank of the pipe is what I carved, and the pipe is what remains.
That was the motion we were after, I said.
At the start of the Corinthian course I drew the same thing on paper. Almost every acanthus leaf has a special detail called an eye, I said, and every leaf has a pipe. The pipe looks like a pipe, a raised part, with a concave on this side and a concave on that side. It always goes to the center line. I drew it in Corinthian lesson 1.

How do other leaves size the gouge to the pipe?
The tool follows the pipe. In the Roman course I said that a number 9 of 10 mm (about 3/8 in) was a little too big for the pipe in front of me. I took a smaller one, a number 8 at 5/16 in (about 8 mm). A quarter inch number 9 (about 6 mm) came next, and it was just a perfect fit. Lesson 6 of the Roman course has it: watch that one.
Farther along the same leaf, around the long pipes, I picked the number 9 and a quarter inch again and pushed it forward. Later in that course, on a finer pass, I took a 3/32 in gouge (about 2.4 mm) and carved my concaves right on the side of those pipes. That one sits in lesson 13 there.
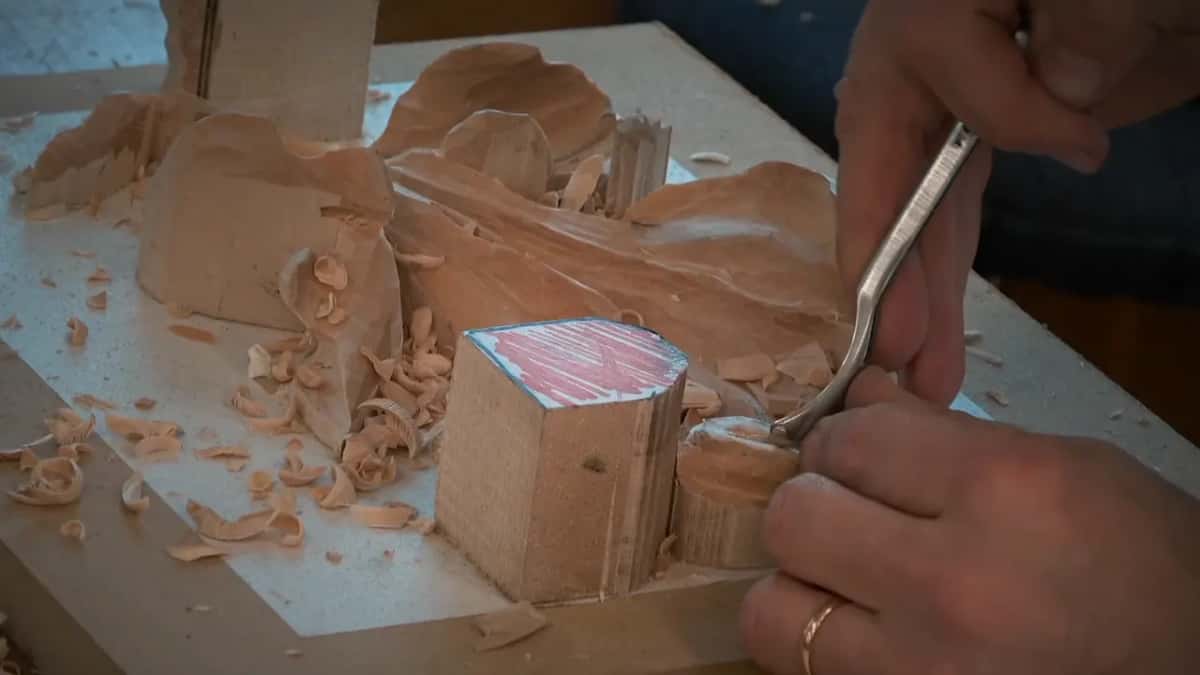
Smaller still, in Roman lesson 14, I used a 1/16 in tool (about 1.6 mm) for a little deeper excavation on the sides of the pipe, and a number 3 to make it a little softer. You could still detect a pipe. I didn't want to overdo it, I said.
Over on the Greek leaf I wanted to exaggerate a small detail that sat next to the pipe. A really tiny gouge did it, about 3 millimeters, maybe 2.5, with no marking on it. I carved a concave really close to the pipe and then went even smaller, a number 5 of 3 millimeters. Find it in Greek lesson 7.

Does a big pipe get deeper hollows?
They do, when the leaf has the wood for it. My Byzantine leaf got an over exaggerated pipe, a huge one. If you have a big concave, like three quarters of an inch (about 19 mm), I said, that is a good time for a big tool. Don't be afraid. We have lots of meat, I said, and that is why we did not take the first layer all the way through.
Further on I said that here I probably had to switch to a smaller one. I also said not to be afraid of going too deep, since the carving is supposed to have three dimensions, and we are after all the shadow we can get. Byzantine lesson 4 has it again: I will go a little deeper if I need to, for an exaggerated pipe. That is a different call from my light hollows on the modern leaf, and the difference on screen is the thickness: here I said we have it. Watch it in lesson 8 of the Byzantine course.
In the Byzantine course I put the question to the class myself, in lesson 10. What do we do when we create a pipe? We create two concaves on the sides. Probably a number 9, 10 millimeters (about 3/8 in), I said, and the concaves were not going to be as deep anymore, but still concaves.

Which side does a gouge leave clean?
One side is clean and the other is rougher. When you work with a gouge, I told the Roman students, one side is always a clean pass. The grain direction changes the opposite way, so sometimes you attack from two sides. Keep an eye on which side is clean, concentrate on that side first, then go back from the opposite direction and clean the other. Find it in lesson 5 of the Roman course.
Back on the Greek leaf I said it again: you always carve one side clean and one is not. A habit goes with that. Over on the Byzantine side I was making a rotation movement and trying to get my pass as long as possible. For some areas I would need a smaller tool, but it needed sharpening first. See Byzantine lesson 4.


Does every acanthus leaf need a hollow on each side of the pipe?
The old leaves had them. A concave inside the leaf is unique to the Greek and later the Roman design, I said, and the same technique showed up on grape leaves. The Byzantine leaf used it too. They always used a concave inside. Later, European acanthus leaves would be carved differently, more European and more modern.
Same Roman lesson, another caution. A Roman acanthus has a concave inside the leaves, I said, and then I corrected myself. Well, it does not have to have one, don't get me wrong. By my own words, then, the hollow is not required. Every eye gets a pipe, though.
A blue marker on a drawing showed the same pair in the Byzantine course. To create that convex, I said, we need concaves right on the sides, and they run straight the whole way. Don't do it this way, I said, because that would be a mistake. That sits in Byzantine lesson 3.

Can you hollow a pipe with something other than a gouge?
You can. Over in the molding course I said that to create a convex you have to create two concaves. In Acanthus over Moldings lesson 3 I put it just that way on a pipe running underneath a part of the leaf, and I added that I had told the class many times.
Later, in lesson 10 of the same course, I used a knife just to prove the point. You do not have to have special tools to get the work done, I said. Even with the knife I could create concaves and convexes, though I did not like how it flowed at one spot, and I said where the high spot would sit.
And on the floral panel, in Floral and Molding for the Panel lesson 9, I carved a concave, then another, and I did not want to force it. Can you see how raised that micro pipe is, I asked. That is what I was after. Another concave on that side stressed the movement. Not really a pipe, I said, but still like a micro pipe.
Where did I use which tool? A short table
| Where | What the tool had to do here | Size | What I said while I worked on it |
|---|---|---|---|
| Modern acanthus 6 | A spoon gouge with a bent blade | Eleven, nine | Not too deep, just an indication |
| Roman acanthus 6 | A smaller gouge than my first try | Quarter inch | It was a perfect fit here |
| Roman acanthus 13 | A small gouge right at the pipes | 3/32 inch | My concaves went in right there |
| Finer Roman pass | A deeper pass, then a softer one | Sixteenth inch | I don't want to overdo it |
| Greek acanthus 7 | A tiny gouge next to the pipe | 3 mm | One side carves clean, one not |
| Byzantine acanthus 8 | A big concave for a huge pipe | 3/4 inch | Don't be afraid to go deep |

What should you look at on your own leaf?
Where is the eye on your leaf, and does it have its pipe? Is there room on either side of that pipe for a hollow, or does one side run into something? Does any gouge in your set bend at the tip, and what does it do when the grain fights back? If your answers sound like yes, the second video of lesson six is waiting for you.
The video is the second of three, and the sixth lesson page holds all of them, along with the Carving Modern Acanthus course page. The craft behind it is wood carving, a branch of sculpture and woodworking, and the verb is carving. A gouge belongs to the chisel family, the shapes it leaves are convex and concave, and a relief lives on them. An acanthus reads through its shadow, and the tool leaves shavings behind. Open the video with your Tuition and watch which gouge I pick up.
How it's done
- Mark where the pipe goes. Look for the eye, because every eye gets a pipe. Carve a hollow on each flank and the pipe stands between them.
- Pick the spoon gouge. My number 11 did it, and a number 9 spoon gouge went to the class. The 3 mm tool stays out of this job.
- Carve the first hollow. Work in light. An indication of that movement was all I wanted, so there was little left to clean.
- Watch the grain. My leaf fought me, I said, since I was carving against it.
- Blend the hollow. Turn a number 7 of 14 mm upside down and blend the concave. Then clean a little more and take the ridge slightly inward.
Frequently asked questions
What tool carves the concaves beside an acanthus pipe?
In my modern acanthus lesson my own tool was a number 11, with a number 9 for the class, the spoon gouge. The gouge in my hand has a blade that bends near the tip. One hollow sits on each flank.
Can the 3 mm eleven carve those hollows?
I said to skip it, since the result is not as nice. I had named that same tool earlier for a pass with the flute at about eleven o'clock.
How deep should the hollows beside a pipe be?
Light, on the modern leaf. Cleaning was a job I wanted to avoid, so I made only an indication of the movement. A big Byzantine pipe was different, and I said we have thickness there.
What to carve next
- Carving Modern Acanthus, the course page
- Carving Modern Acanthus lesson 6, with all three videos
- Carving Roman Acanthus lesson 6
- Carving Roman Acanthus lesson 11
- Carving Roman Acanthus lesson 13
- Carving Roman Acanthus lesson 14
- Carving Roman Acanthus lesson 5
- Carving Greek Acanthus lesson 7
- Carving Byzantine Acanthus lesson 8
- Carving Byzantine Acanthus lesson 10
- Carving Byzantine Acanthus lesson 3
- Carving Byzantine Acanthus lesson 4
- Carving Corinthian Acanthus lesson 1
- Acanthus over Moldings lesson 3
- Acanthus over Moldings lesson 10
- Floral and Molding for the Panel lesson 9