

Alexander Grabovetskiy, woodcarver, School of Woodcarving · Published 2021
Should a carved acanthus leaf be sanded smooth?
Quick answer: Sanding is refused outright on work like this. Facets left by a gouge get taken off with that same gouge, turned sideways and swept over the wood. Abrasive blunts every sharp junction on a panel, and a blunted one throws no shadow, which wastes all the modelling underneath it.
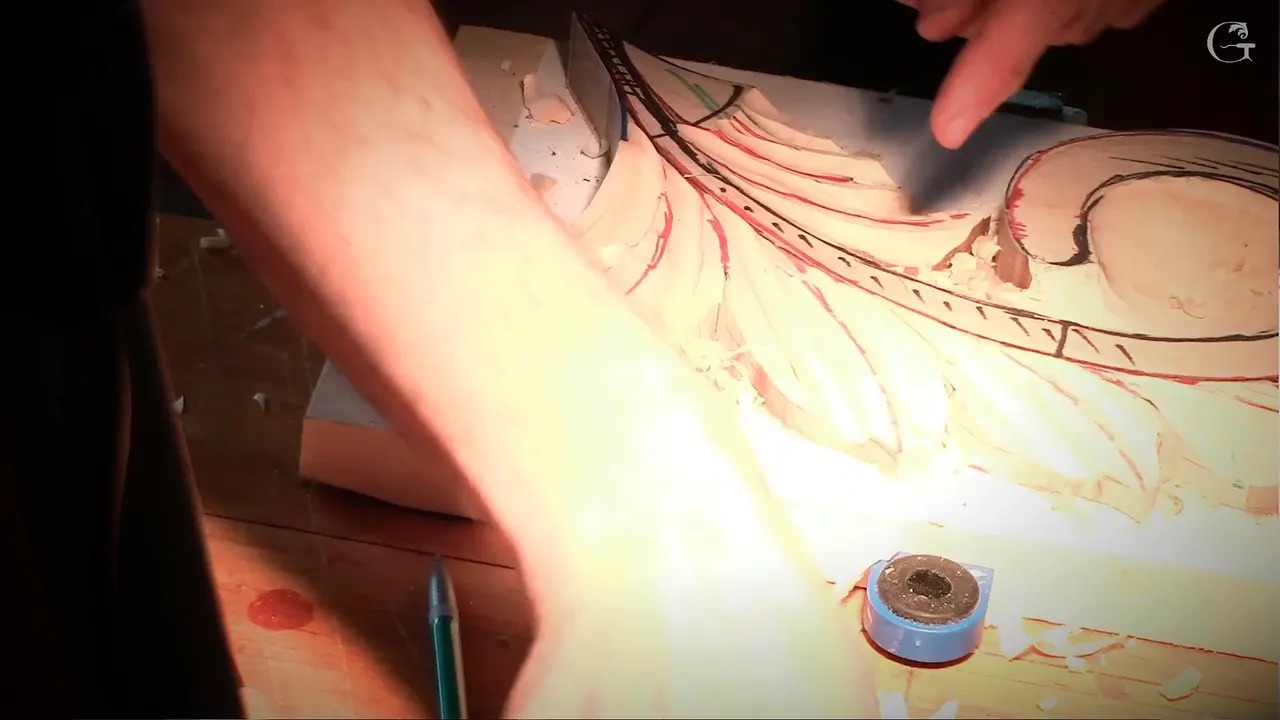
Sandpaper is not coming near this panel. Facets left by a gouge come off with the same gouge, swung sideways in a rotation across the surface, and the result is a skin that catches light in a way abraded wood never manages. I have called sanding offensive in front of a class and I meant it.
Today every surface on the first layer gets modelled properly. The pipe gets raised and widened, the ridges are put where they belong, and by the end each leaf reads as three separate pieces instead of one lump.

Almost none of it involves pushing. Held upside down and shaved along a surface, a gouge behaves quite differently, and that one movement carries the whole session.
Key takeaways
- Steel removes facets, and paper never touches them.
- A pipe must be wide, because a narrow one reads as an accident rather than a deliberate raised run along the leaf.
- Ridges stand high, without exception.
- Concave, convex, concave repeats across every leaf on the panel, and once you see that rhythm the whole design stops being complicated.
- Relieve every triangle before removing a shaving of it.
- Separations get cut vertical on purpose, since undercutting arrives in a later session and a sloped wall gives it nothing to work with.
Why not simply sand it?
Think what abrasive does to an edge you spent a morning creating. Sandpaper takes the sharpness out of every junction on a panel, and a junction with no sharpness left throws no shadow whatsoever, so the modelling underneath might as well never have happened.
Carved surfaces are meant to be cut rather than worn away, and the difference in how those two hold light is obvious in a room while being almost impossible to photograph. Stand in front of both once and you will never confuse them again afterwards. It is not a subtle thing at all.

A movement replaces the abrasive. The whole tool swings as it travels, wiping facets off in passes rather than cutting fresh ones, and the surface behind it comes out gorgeous.

Does that mean cutting against the grain?
Sometimes, yes, and deliberately. I do it on camera during this workshop and say so out loud, because the alternative is leaving a facet where a facet should not be.

A student watching names it better than I did: the blade is travelling sideways. Against the fibres at that angle, with an edge in proper condition, the wood gives up cleanly rather than tearing.
Sharpness is what buys the exception. Try the same movement on an edge that needs stropping and you will get exactly the mess the rule about grain exists to prevent.


How wide should a pipe be?
Wider than your instinct says, and this is the first correction I make in the session. A tiny teeny raised line is not a pipe, it is a scratch that happens to be convex.

Width is what makes it read from across a room. The acanthus tradition put these runs in so the eye would have something to follow, and something three millimetres wide follows nothing.
Turn the lights off to check. Kill the room lighting, let one source rake across the panel, and the shadow will tell you instantly whether that pipe is genuinely convex or merely flat with edges.
Where does a ridge belong?
Standing high, always, wherever the hollow beside it went deeper. I am after that ridge from the first cut of the day. Let it sit low and the surfaces either side have nothing at all to fall away from.

Digging harder on one side is all it takes. The tool works the low ground while the ridge simply survives, and by this stage of the course that ought to be an old idea rather than a new one.


None of it needs pressure. Waste comes away with the tool barely loaded, going deeper where the ground is low, and the cut left behind is clean enough to leave alone.

Why does a falling cut ruin an overlap?
Sequence is read by the eye as height. When a surface falls away where it ought to climb, the leaf that was supposed to pass in front of its neighbour now appears to slide behind it, and the relief loses the one thing it was built for.

It happens constantly and it is easy to miss. I caught one in my own work here and said what I always say, which is that the raised part has to rise.

The fix is next door, as always. Cut the neighbouring hollow deeper and the climb reappears, and no material needs adding anywhere.

| Part of the leaf | Shape | How it arrives |
|---|---|---|
| Pipe | Convex, and wide enough to follow | Shaved with the tool upside down until the hollows on both sides leave it standing proud |
| Middle | Convex | Same again |
| Eye | Left alone today | Nothing touches it at this stage, and the hollows nearby simply work around it |
| Ridge | High | Dig one side deeper |
| Separations | Vertical walls | Relieved with stabs first, then opened out little by little with a number two |
How smooth is smooth enough?
Every junction on the panel has to become a smooth transition, with no sharp facet surviving anywhere on a surface that is meant to curve. That is the standard, and it is higher than most people expect at what is still a middle stage. The surface coming off the tool by the end of an afternoon like this is genuinely gorgeous.
Depth is allowed to win over tidiness, though. If a hollow needs going deeper and that creates a little damage on the way, take the depth, because the shadow it buys is worth more than an unmarked surface nobody will study from six inches.
Everything here serves the shadow, and one measure settles nearly every argument about how far a cut should go. This panel has no other referee. Use it.
Which tools does this actually take?
Two, swapped constantly. One for the hollows and one for the raised work, and the swapping is what keeps either of them from leaving a signature all over the panel.

A number two goes in at an angle rather than straight. Held over like that it slices; driven in square it simply compresses the fibres and leaves a bruise you then have to cut away.
A three millimetre eleven cleans up to the black line. A number seven at fourteen millimetres, turned over, kills the extra edges left behind by everything else.


A knife or a skew does the blending equally well. Use whatever your hand already trusts, since nothing about this movement belongs to one particular tool.


Why divide each leaf now rather than at the start?
You would have missed the point entirely. I could have drawn all the separations on day one and had you cut them out on a scroll saw, and you would have learned nothing about carving a solid piece of wood into three pieces that look separate.

Three divisions per leaf, and then each of those splits again. Where they fall is judgement rather than measurement, and the logical spot is usually obvious once the surfaces around it are modelled.
Nobody hands you a proportion for it. You calculate approximately what looks logical, which sounds unsatisfying until you have done twenty of them and your hand starts putting the marks in the right places without consultation.


What is a relief cut?
A few stabs straight down into each triangle before any material comes out of it. Three millimetres of number eleven, dropped in vertically, and that is the whole operation.

Skip it and the points break. Drive a gouge in sideways at a triangle and the carving splits along the grain ahead of your edge, taking the very point you were trying to make.


One of mine went during this session. I had not relieved it deeply enough, which is the commonest version of this fault, and the answer is simply to relieve more than feels necessary.
A bigger tool and a mallet speed it up. Only where the tool is genuinely large, though, since a mallet behind a small gouge is a way of breaking things faster.


Can you use a V tool for this?
Somebody in the room asks it every time and the answer is yes, absolutely, go ahead if you own one. A vee cuts the initial separation perfectly well and it is faster than stabbing in with an eleven.
One caveat, offered rather than imposed. Authentic Byzantine carvers had no vee tools at all, so a panel cut entirely with one will carry a character those workshops never produced, and whether that matters is your decision rather than mine.
I stay with the eleven out of habit and stubbornness. The result is the same and the route is the one the original carvers were forced into, which for a course about their work seems the honest way round.
Old habits also carry information. Every constraint those workshops lived under shaped the ornament we now copy, and working inside a few of them teaches more about why a Byzantine leaf looks as it does than any amount of reading would.
Why do the walls stay vertical?
Undercutting comes later and it needs somewhere to start. A sloped separation gives a tool nothing to get under, so the walls go down square today and get their angle in a future session.

Cutting downhill into the backing board is fine and expected. That board is there to be cut into, whether it is plywood or a scrap of basswood, and a cut that runs off the edge of your work into it has done exactly what it should.

Do you photograph the work as you go?
Students in the room are welcome to come and take a picture of the marked board on a phone, and there is a scanning app somebody recommended to me for exactly that. Keeping a photograph beside the bench beats trying to hold a plan in your head for three hours.
My own reason for it is different. A photograph taken from a metre away shows you faults that are invisible at carving distance, and a panel that looks correct under your nose will occasionally look badly wrong on a screen.
What if there is something hard inside the wood?
You hit it, something chips, and you carry on. Partway through this session my edge ran into something buried in the board that behaved like a piece of metal, and after thirty years of carving I still had no idea what it was.
Boards arrive carrying histories of their own. A tree stands in one place for a century while things happen around it, and occasionally one of those things is still sitting in there when a gouge finally arrives to find it.
Nothing about it ruins a panel at this stage. Reach for a larger tool, take the damage out along with the surrounding wood, and treat the whole business as one more reason to leave material for later.
Should you finish one leaf before moving on?
Never on a panel built like this one. Work the whole surface, go round and round, and let every leaf arrive at the same stage together.

Finishing one in isolation guarantees it will not match. The eye judges these things against their neighbours, and a leaf carved to a different standard announces itself the moment the panel is hung.
One last thing about markers. I use them so the camera can read a shape, and I tell students not to copy that, because marker is genuinely hard to get out of ornament once the carving is done.

Fourth of ten workshops. Workshop one draws it and glues the blank down, two roughs to ten millimetres, three maps every rise and fall in two colours, and five turns the piece over to undercut it. The rest runs through six, seven, eight, nine and ten, all of it inside the course. Other centuries treated the same leaf differently in the Greek acanthus, the Roman, the Corinthian and a modern reading, and it wraps a curve in acanthus over moldings. Why a shadow reads the way it does belongs to the design course, the gouges are chosen in the tools course, and no rotation cuts cleanly without sharpening. Never held a gouge? First cuts starts with one knife.
Two tools, a rotation, and no paper anywhere on the bench. Access to the school opens the other nine workshops.
How it's done
- Turn the tool over and shave. Upside down along the surface rather than pushed into it. Pressure is what leaves the marks you would otherwise be trying to remove.
- Make the raised run wide. A narrow one reads as a scratch. Width is what lets the eye follow a leaf from the far side of a room.
- Dig one side to lift the other. The high line survives while the hollow does the work, and nothing raised on this panel is ever carved directly.
- Swing the tool to wipe facets away. Swept right across the face, sometimes straight into the fibres. On a properly stropped edge the timber gives up without tearing anywhere.
- Stab every triangle before opening it. Three millimetres of eleven, dropped in vertically. Go at it sideways instead and the grain takes the point off before you do.
- Leave the separation walls square. Undercutting needs somewhere to begin. A sloped wall offers a tool nothing whatsoever to get beneath.
Frequently asked questions
Can I sand a carving instead?
Abrasive blunts every sharp junction, and a blunted junction casts nothing, so the modelling you spent a morning on stops reading altogether. That same gouge removes its own facets if you swing it sideways over the wood.
Is cutting against the grain ever right?
Here it is, and I do it on camera. A blade travelling sideways at that angle, properly stropped, lifts the fibres clean. Try it on a dull edge and you will produce exactly the tear the rule exists to prevent.
How wide should the raised run be?
Wider than instinct suggests. Something three millimetres across is not a raised run, it is a scratch, and the whole point of one is to give an eye a line it can follow from a distance.