

Alexander Grabovetskiy, woodcarver, School of Woodcarving · Published 2023
How do you carve the center of a flower so the cuts look random, not mechanical?
Quick answer: A natural-looking flower center is a ring of small ridges set at uneven distances, with only some of them a little deeper. On my Gibbons flower in Maine class 15, a 1 mm number 11 made the ridges, and a half millimeter 11 deepened a few.
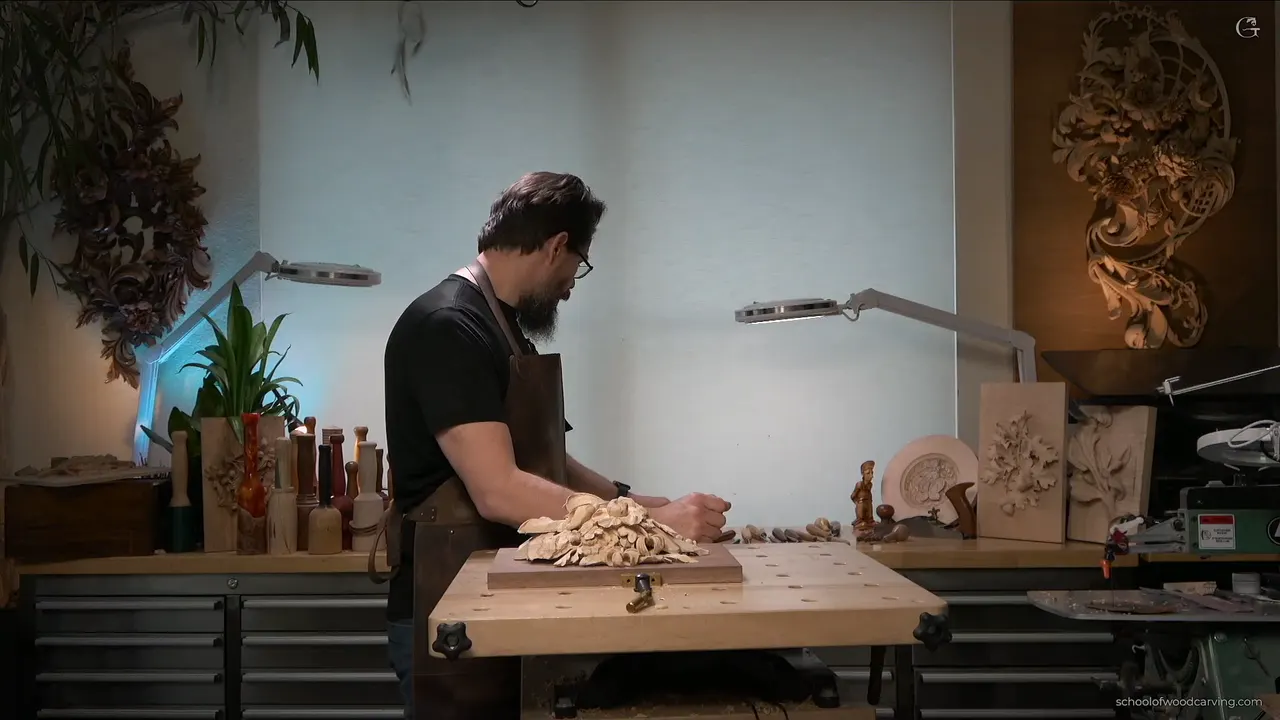
A flower center looks natural when its ridges are uneven. I space them unevenly and take only a few a little deeper. On a Grinling Gibbons panel in my Maine class, a 1 mm number 11 gouge made them. I like the result better than the original. That is my opinion, and I say so on camera.
Ever looked at a flower and seen a center with ridges lined up like fence posts? Does yours come out neat, and a little dead? Then try randomizing the spacing of the ridges in the center.

Uneven center cuts in six lines
- Spacing between the ridges changes from one ridge to the next.
- Ridges come from a number 11 at 1 mm, and I want them exaggerated.
- A still smaller tool goes a little deeper in a few strokes.
- A pancake is what straight down gives you.
- The plug goes in first, with the tool pointing slightly outward.
- My opinion alone: I like this center.
Why did I change this flower at all?
I did not like it. In class 15, I opened with an area of the panel I really did not care for. A flower, and a couple of leaves beside it. For me that flower was just too childish, and I said so on camera.
My point was bigger than one flower. Copy an original and you can still express yourself. Add a few details, maybe even make the piece a little better. By then my panel was about 80 percent authentic to the Gibbons original, I would say, and I called it semi original, because we had already made a part of it wider.
In the new design, the center stays in about the same position, but it looks different. Narrow close to the petals, then it grows up and opens, and some of the areas between the petals open too. That makes a beautiful shadow.

What do I do about the area below the flower?
I said the same about the area below it: I really don't like how it looks. Some flowers stick out right underneath, and we still have the ability to add something there. But I wanted something else. A little more complex stuff, if you wish.
Let's think what we can do with it. I told the class the center would stay about where it was, but it would look a little differently, and so would the petals around it. No rush, I said. Don't rush it.
Which checks come before the center gets any detail?
The thickness of the wood comes first. My wood was about three quarters of an inch, which is about 19 millimeters, and I said that should be fine. After that I excavated around the flower to get the barrel done.
Any tool can start the job, and I said so: a number 11, a number 10 or a number 9, it is up to you. I took a number 11 that is 5 millimeters wide and went around, removing only a little. Going all the way underneath was what I watched for. Careful, I told myself. Don't break it.
The piece was moving while I worked, so I adjusted my push a little differently and went across the grain. A perfect round was not needed at that stage.

After that came a small plug, right in the middle of the flower. For this one I used a micro tool by Dockyard. It has no markings, but I know it is about a 16th of an inch, around 1.6 mm. Most likely a number 8, I said, and a number 9 does the same thing. I buffed it a couple of times first.
Where you set it matters. From the side, the tool should point slightly outward. Straight down, and you get a pancake. Slightly off, and the whole flower ends up a little slanted.

I went in about a quarter inch and wondered if that was enough. Maybe not. A look later, it was about three eighths of an inch, 10 millimeters or so, and that was good.
What shape does the center get before any ridge goes in?
With the same tool, from the outside toward the hole. First I had to establish that center, and I said the sequence matters, just like a combination lock. You know the numbers sometimes, but the sequence is what counts.
I planned the center at about half an inch wide, which is 12, 13 or maybe 14 millimeters, and I went around from all sides.
One more point about the stroke: it cannot go straight in. I want an arching movement, a flowing to the center. When I start, the tool is almost lying parallel to the wood, and when I finish, it is rising up. That is really important, I said.

The facets, the tool marks, serve a purpose there too. Working my way in made the center look more realistic, and I thought I might dig the middle a little deeper to get a shadow. I called it a shadow point.
How do I make the ridges in a flower center look random?
Go smaller and repeat the same strokes. My next tool was a number 11 about one millimeter wide. Same idea as before, only tiny, so the ridges look like the real parts of that center. I hoped the smaller tool would give me that feel, and I said so.

I wanted those strokes really exaggerated. And I did not set them at one distance. If you randomize them, I said, it looks much better. That sentence was about the placement of the cuts, and I said it while I carved.
Next came a smaller tool, half a millimeter, with the same idea and a bit more depth. Not everywhere. Just some of the strokes went deeper, and together they give a natural look.

Look from above and you see an interesting variation. Much better, I said, though that is only my opinion. But I like it better.
Why do I exaggerate small strokes in a center?
Exaggerated was my word for those ridges. I asked for them to be really exaggerated, and then I placed them at uneven distances, so bold strokes and uneven spacing work together as two ideas in one center.
The same word runs through my Venice Room workshops. In workshop 74, I said it was time to exaggerate the convexes and concaves around the eyes. A 5 millimeter number 11, which is 3/16 of an inch, made a concave, and another concave went in the other way.
With a bigger tool I took it almost to the bottom. Beautiful movement, I said, and I could exaggerate even more. The main goal was to exaggerate the future convexes, and I was not afraid to lose the middle.
In another video of that workshop I explained it again. Every division is supposed to have an eye, and the two main convexes are the most exaggerated ones, one coming around the eye and a second beside it. The concave on each side runs right out to that point.
What did the tools and sizes look like on this center?
| Tool | Bottom | Detail |
|---|---|---|
| The first pass | number 11, 5 mm, circles the flower | 3/4 in (19 mm) |
| The middle plug | tiny Dockyard tool, about a 16th in | 1/16 in (1.59 mm) |
| The first ridges | uneven spacing, exaggerated, using a number 11 | 1 mm (0.04 in) |
| The deeper ridges | only some strokes, a half millimeter tool | 0.5 mm (0.02 in) |
| The planned width | half an inch across on this flower | 12 to 14 mm |
Every figure in the table is the one I said on camera, with the other system after it. The last tool for the ridges was half a millimeter wide, and I used it on some strokes only.
What do other lessons of mine say about uneven spacing?
Other courses carry the same habit. Take the Venetian flowers rosette course, where I carved the center part of a flower with a concave. A couple of concaves would work, I said, or a single one. On that flower I could do an extreme one, because I really wanted to see a shadow, and I could exaggerate the concave.

The ridges beside it did not look too good, so I took a smaller gouge to clean the mess. Blending the ridges came next, carefully, with a number 3, 1/8 in (3 mm) wide. Earlier in that lesson I had used a number 7 spoon gouge with a really short bend to make the inside more pronounced. More shadow in that section, I said, and it looks more natural. Next, a small number 8, about 4 millimeters (5/32 in), made a deeper concave.
Next, my Venice Room workshop 114. The middle of a flower sat somewhere right there on the panel, and I said it would not be just a dome. It would be a dome with some extra shadow. For step one I took a number 11 about 7 mm (0.28 in) wide and cut around the flower. That cut was only preliminary, and I said I could make it much deeper, of course.
Where the center sits counts too. In my principles of design course, I talked about the position of the center itself. One small cut inside makes a small spot of shadow, and even the position of that point makes a huge difference to the overall design.

Small details need restraint, too. In Hashemi flowers lesson 47, I made a curl backward and called it a leap, because it looks like one. Curl backward works as a name too, I said. Details like that should be random, I said, and not so often, because it gets to be too much movement. A knife did the work, from the inside out against the grain, carefully, and then I went back inside to smooth it. Gouges would work too, I said, but the knife did the job.
Holes are the clearest case. In lesson 45, I took a small gouge and brought everything to the hole. Holes don't have to go everywhere, I said, because if you do, it will not look as nice. It would not look natural, I said, since some petals sit closer to each other and some farther, and a hole between two far petals creates really big spaces.
Lesson 48 of the same course came back to holes. We did not make them everywhere, just randomly in some spots, and I said I could add more on the go. A second look told me I did not need any. It already looked good.

Size follows the same rule. On the grape onlay, I told students to make the grapes random, some bigger and some smaller. If they are all the same size, it will look all right, but not really nice.
A depth rule sits in that lesson too. When you dig in with the corner of the tool, I said, don't dig too deep. Deeper comes later. Go deep right away and you damage the neighboring grape, and that is really hard to fix. Dig little by little.
Perfect is a trap as well. The second lesson of the Venetian flowers rosette says it doesn't have to be perfect. Matter of fact, if you do it too perfect, it will not look natural. Twice I said that. Then I thought I should lower that side of the petal.

A background works that way as well. The antique style rosette course had me take my biggest punch, a half inch round, and start punching. Any type of mallet works, I said, but I would not use a metal one, and some plastic will do. I placed the punch randomly, and the result was a bubbly background.

One last case. On the chamomile and bow rosette, I did not want to see a perfectly flat top. Random concaves came first, because a flat top will look bad.
Lesson 3 of that course brought it up about an edge. I was really happy my edge was not really straight, since otherwise it does not look right. I could probably exaggerate the movement a little on that side, I said, and it does not have to be straight there either.

Where does the flower go next once the ridges are in?
That center is only part of the flower. I picked up the number 11 again, 5 mm wide, and went around the whole flower to start the shape. Not quite undercutting, I said, since I am making the form, and it goes right underneath.
Care mattered there. I started with three quarters of an inch of wood, but at that spot it was already about 3/8 in, 10 mm, between the two points. Taking too much material would create a problem, I said.

My goal stayed the same as before: a movement to the center that arches, not a straight line. I hunted for the right way to say it, and then I said you got it. A flow to the center.

The swirling center lesson of this course picks the thread up again, and the whole course sits on the Grinling Gibbons course page. Tuition opens it.
How it's done
- Check the wood first. I looked at the thickness before any detail. My wood was about 3/4 in (19 mm) thick, so I went ahead with the excavation around it.
- Excavate the barrel. I circled the flower with a number 11 that measures 5 mm. I removed only a little and watched that I did not go all the way underneath.
- Plug the middle. I set a tiny tool, a 16th of an inch wide (1.6 mm), in the center, pointing slightly outward, and took the plug to a depth of 3/8 in (10 mm).
- Work the center from the sides. From the sides toward the hole, I used an arching stroke, tool nearly parallel at the start and rising at the end, aiming for a center of a half inch or so (12 to 14 mm).
- Repeat the cuts smaller. A number 11 of 1 mm made the same strokes tiny and exaggerated. I spaced them unevenly.
- Deepen only some. The smaller tool went deeper in a few strokes. I left the rest alone.
Frequently asked questions
Why should flower center cuts not be evenly spaced?
I do not set them at the same distance from each other. Randomized ridges look much better, in my words, and I said it while I carved them on my Gibbons flower in Maine.
What size tool do you use for ridges in a flower center?
My ridges came from a number 11 of one millimeter. The same strokes came again with a still smaller tool, deeper in some places only.
How wide is the center of the flower in this lesson?
12, 13 or maybe 14 millimeters, a half inch or so. That was my plan.
Which way should the first center cut point?
What to carve next