
August 6, 2026 · Updated August 11, 2026
By Alexander Grabovetskiy — Master Woodcarver · Founder, School of Wood Carving · 16 min read
Applied carving or carving in the solid: how I choose
Key Takeaways
- Depth settles it. Anything that has to lift more than a quarter inch clear of its background wants to be a separate blank you can turn over in your hands.
- Grain runs the same way on both halves, or the ornament reads as a sticker and pulls against the panel through every change of season.
- Glue only the middle of the back. The outer inch stays dry so your gouge never meets a glue line while there is still undercutting to do.
- Four jobs still belong in the solid: a shaped ground, a small flat motif, continuous figure, and any background you mean to punch.
- Paper between the blank and a plywood board will hold a four foot carving, and it breaks away clean when the work is done.
- Applied ornament stays replaceable for a century. Damage carved straight into the piece has to be patched into the piece.
Applied carving is ornament cut on its own board and then glued onto the finished piece, while carving in the solid means cutting that same ornament down into the wood of the piece itself. I choose applied when the design needs real depth or has to be pierced through, and I carve in the solid when the ornament has to belong to the surface it sits on.
You have the drawing. The panel is clamped to the bench, the gouge is sharp, and you are not carving, because you cannot decide whether to cut into that panel or carve a separate piece and glue it on later.
I know this stops a lot of carvers. It stopped furniture makers for three hundred years too, which is why the trade has two names for the same ornament.
So let me hand you the rule I use at my own bench, and the four questions that get me to it in about a minute. You will also see where the obvious choice is the wrong one, how I hold a loose blank that is attached to nothing, and why the glue is almost never the thing that fails.
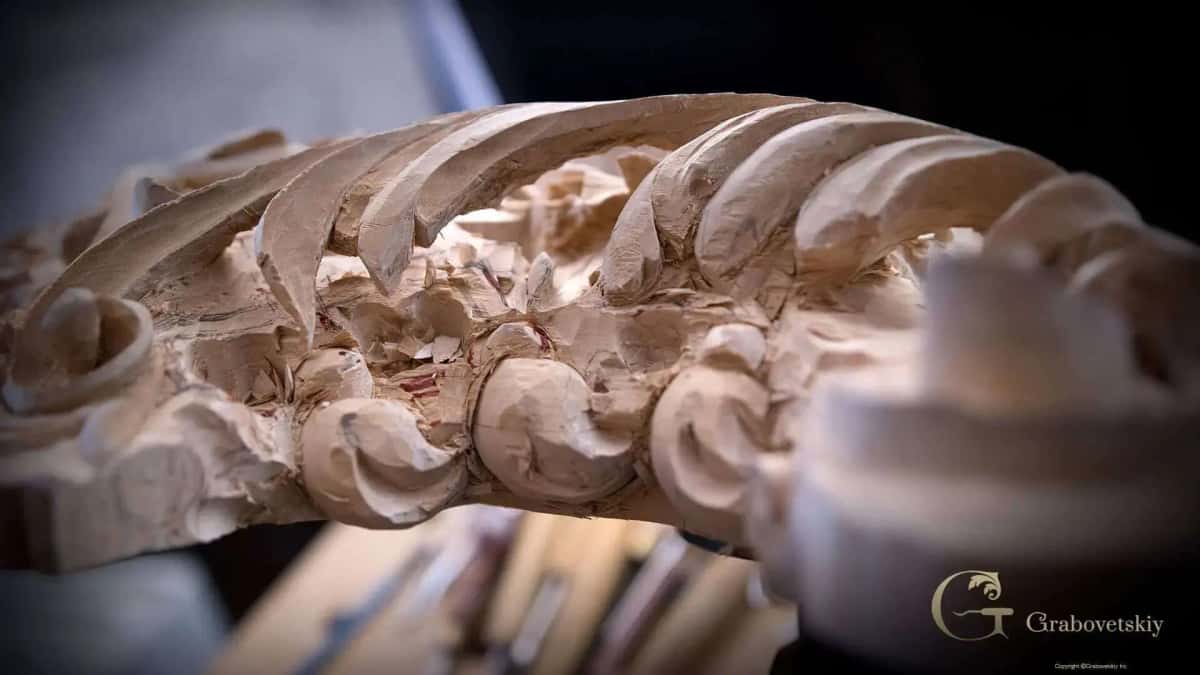
That black under the leaf tips is the whole argument. You cannot cut it from directly above.
What is applied carving, and what does carving in the solid mean?
Applied carving is ornament carved on a separate board and fixed to the piece afterward, and working in the solid is the same ornament cut down into the piece's own wood. Carvers also call the applied version an onlay. Furniture catalogs call it an applique. All one thing.
The words matter less than the day. On the applied route you saw out a blank, carve it flat on the bench, and glue it down once it is finished. The solid route means drawing straight onto the piece, then lowering every square inch of background until the ornament stands up out of it.
Both are old, and both are honest. I tell students this often: both ways are legit, both ways are going to look good, I just have to make my decision what is going to be the best.
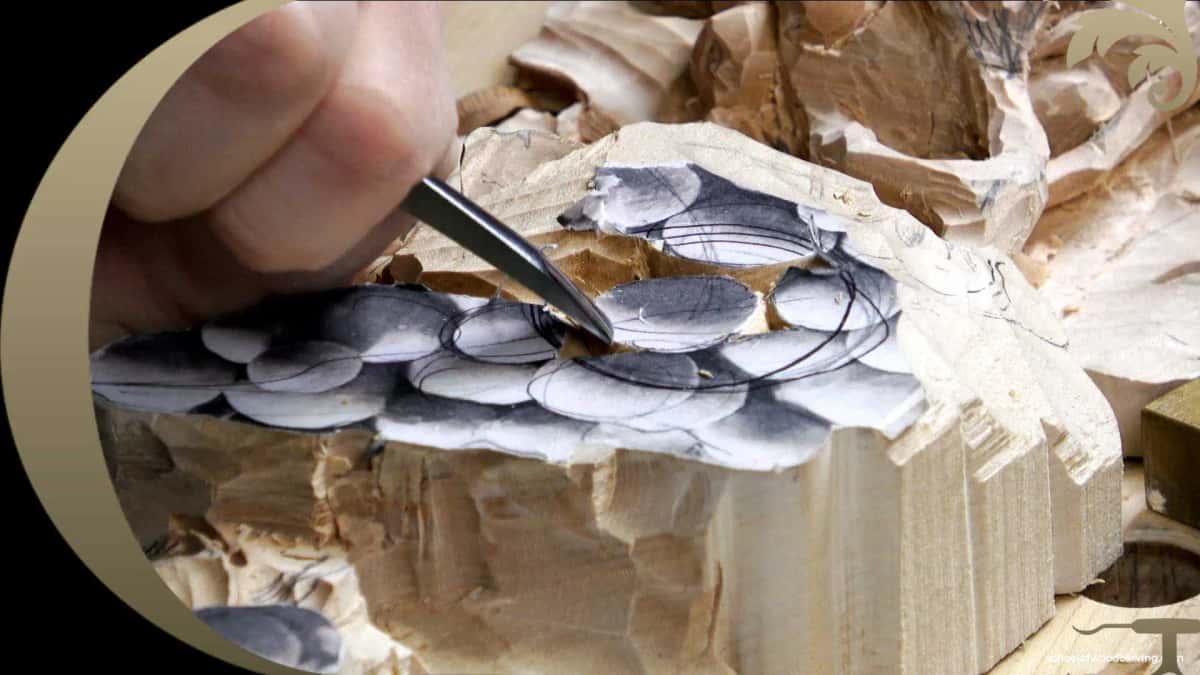
The paper stays on until the berries are round. A map, and I read it while I carve.
A blank costs a few dollars. The furniture behind it does not.
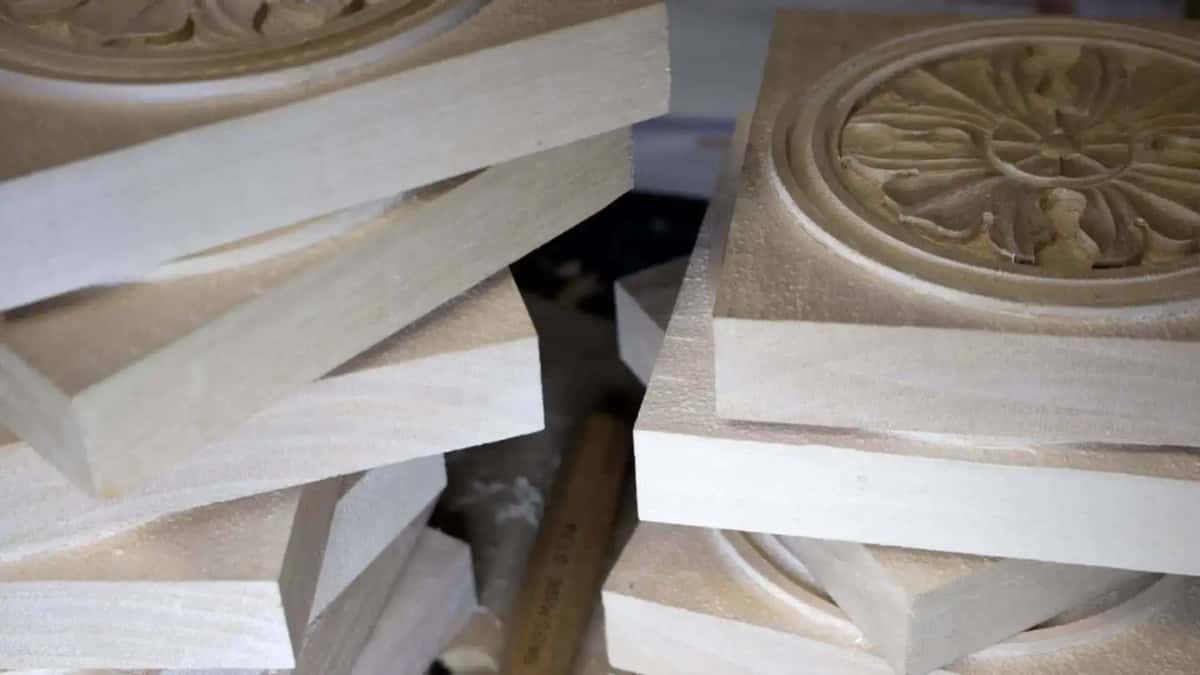
Cut a pile of blanks and you can carve the same ornament ten times without touching the piece.
Is applied carving cheating?
No, and the men who invented this ornament settled that question before we were born. The period shops used screws. Even Grinling Gibbons, the greatest of the greatest carvers, used screws, and he had no problem with that.
Gibbons built his festoons in layers, on separate boards, and fastened them together. He used oak grounds behind his limewood all the time. Nothing about that is a shortcut, and it is the reason his work still reads at forty feet.
The split is older than either of us. As Paul Rabbitts puts it in his book on Gibbons:
After the joiner had prepared and partly set up his wainscoting and other woodwork, the carver would be called in, and the finish that was now demanded eventually separated the two branches of this craft.
The joiner built. The carver came after. Applied ornament is not a modern dodge, it is the shape of the trade.
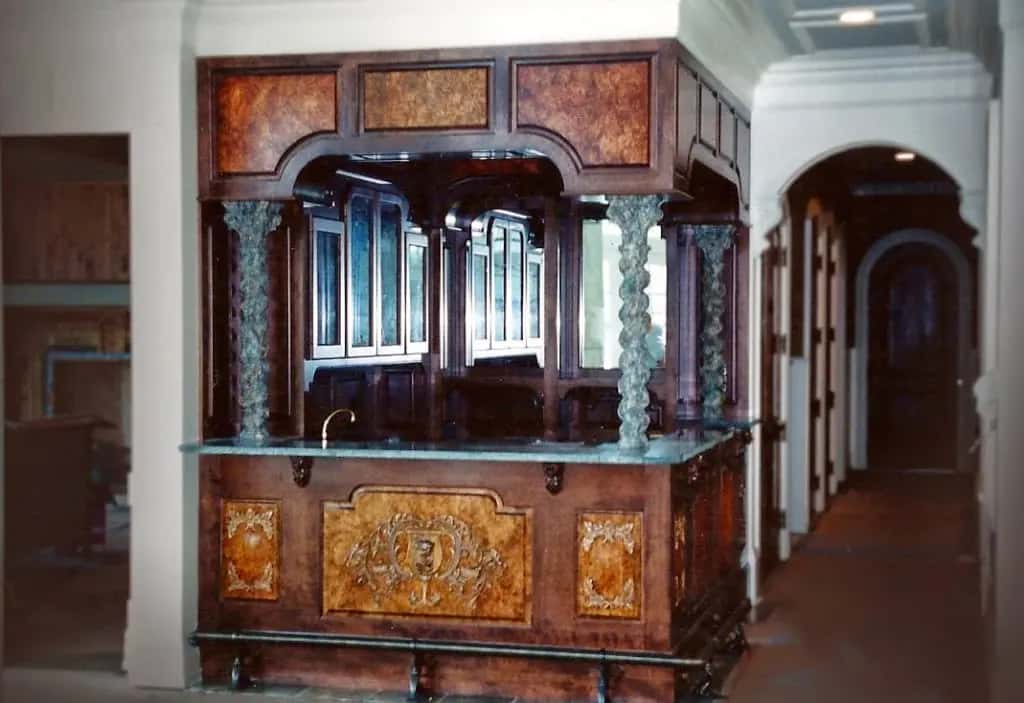
Nobody carves into a burl panel like that. It arrived finished and went on last.
Why not just carve the design into the wood directly?
On the solid route you pay for the ornament twice, once in the carving and once in the background. The ornament is the part you wanted. The background is the part you have to remove to get it, and on a panel that is most of the surface.
Lowering a ground by hand is slow, and getting it flat is slower. Every gouge mark shows, so it wants a router plane or a lot of patience. Then you finish, and the piece is one object: if the last cut goes wrong, you did not lose a scrap of basswood, you lost the furniture.
David Esterly, who spent a year replacing a burned Gibbons carving at Hampton Court, put the cost of that plainly. He wrote that nobody learns the price of getting the order wrong more painfully than people who work by taking material away. You cannot glue a chip back.
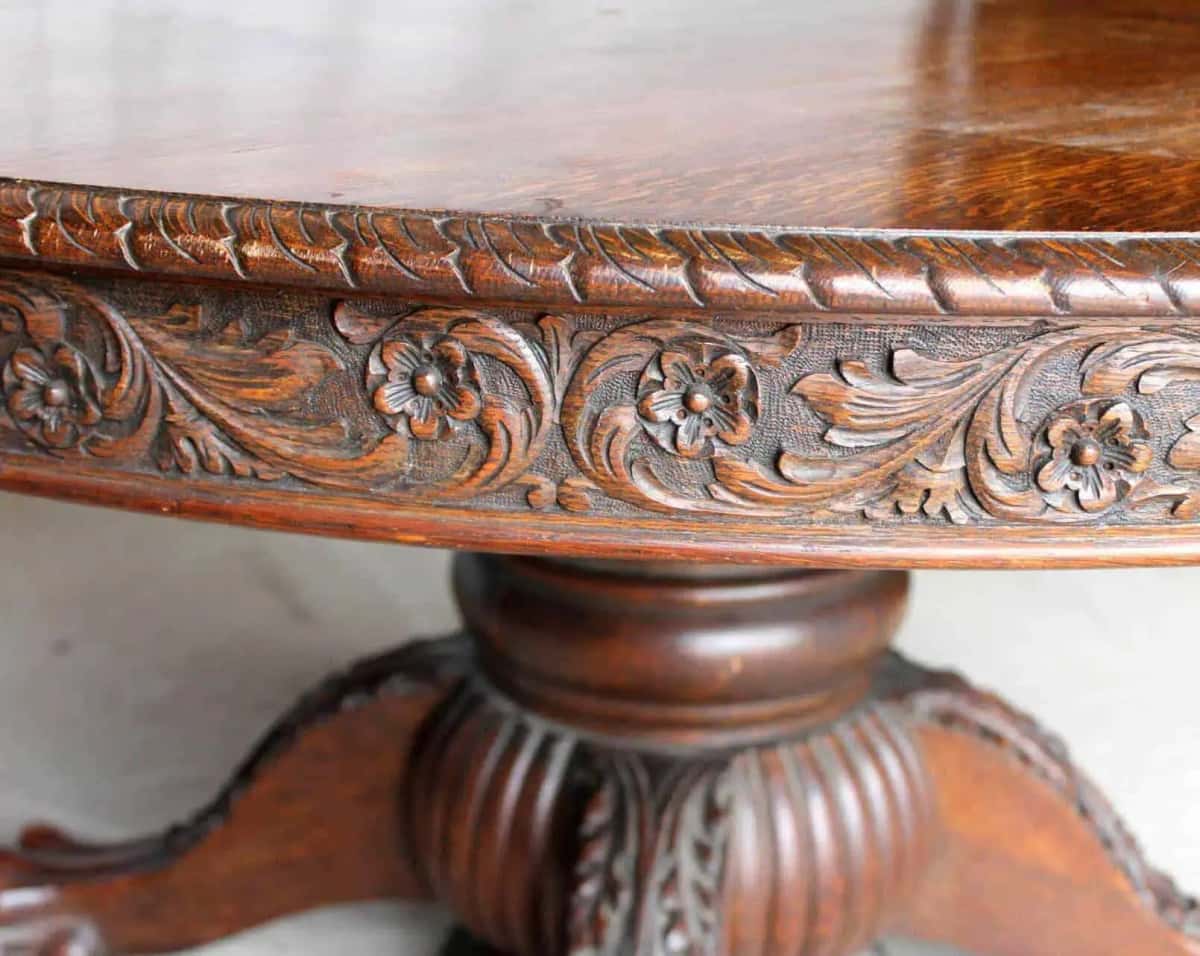
Cut into the apron, not glued to it. Follow that curve with your eye and you will know which of the two you are looking at.
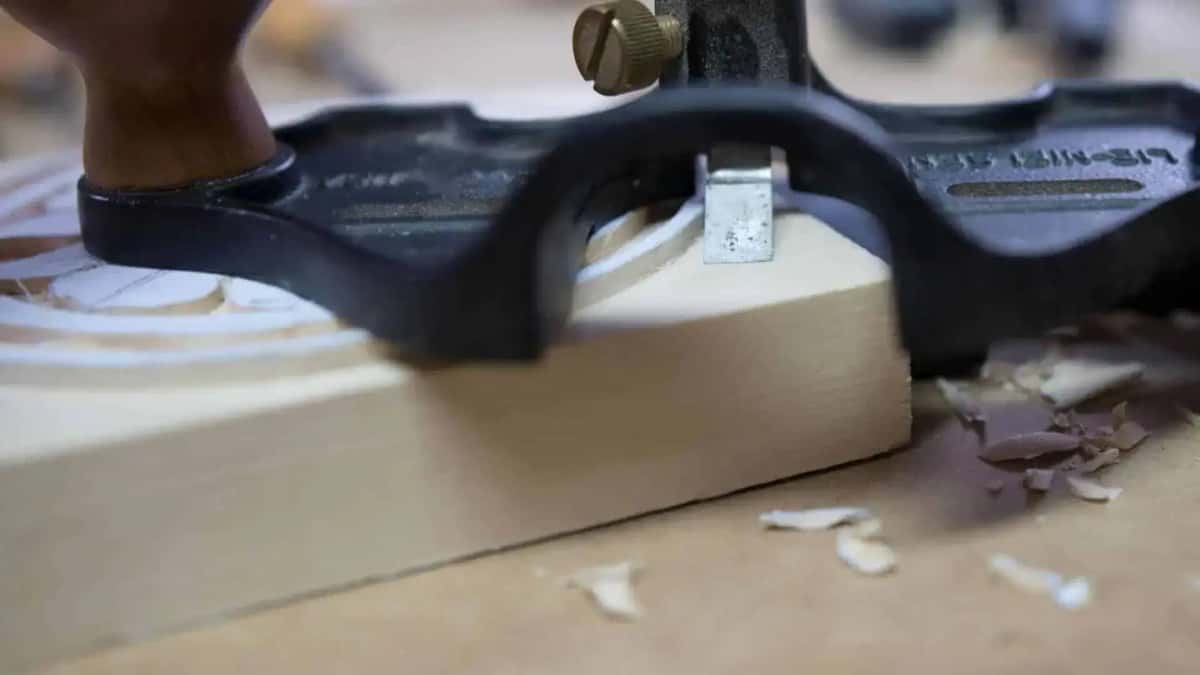
Carve in place and here is the tax. Every square inch of background comes down by hand.
How deep can the ornament go before the solid route stops working?
Depth is the first question I ask, and it decides most jobs on its own. A leaf that lifts an eighth of an inch off its ground is comfortable in the solid. A grape cluster that has to come loose from the leaf sitting behind it is another matter entirely, and no amount of skill changes that.
The reason is geometry, not skill. When the carving is part of the piece, your tool can only arrive from above. When it is a loose blank, you tip it, turn it over, stand it on edge, and cut from underneath. Esterly describes exactly this dodge:
I left tabs on the sawn-out boards, temporary extensions of the wood that you could clamp onto while carving and then cut away when finished.
The applied side has its own limit, and it pays to know it before you start. I have to undercut, and I have to undercut on the opposite side as well, but I still need some connecting point underneath. If I undercut all the way through, there is no way I can glue that on the panel.
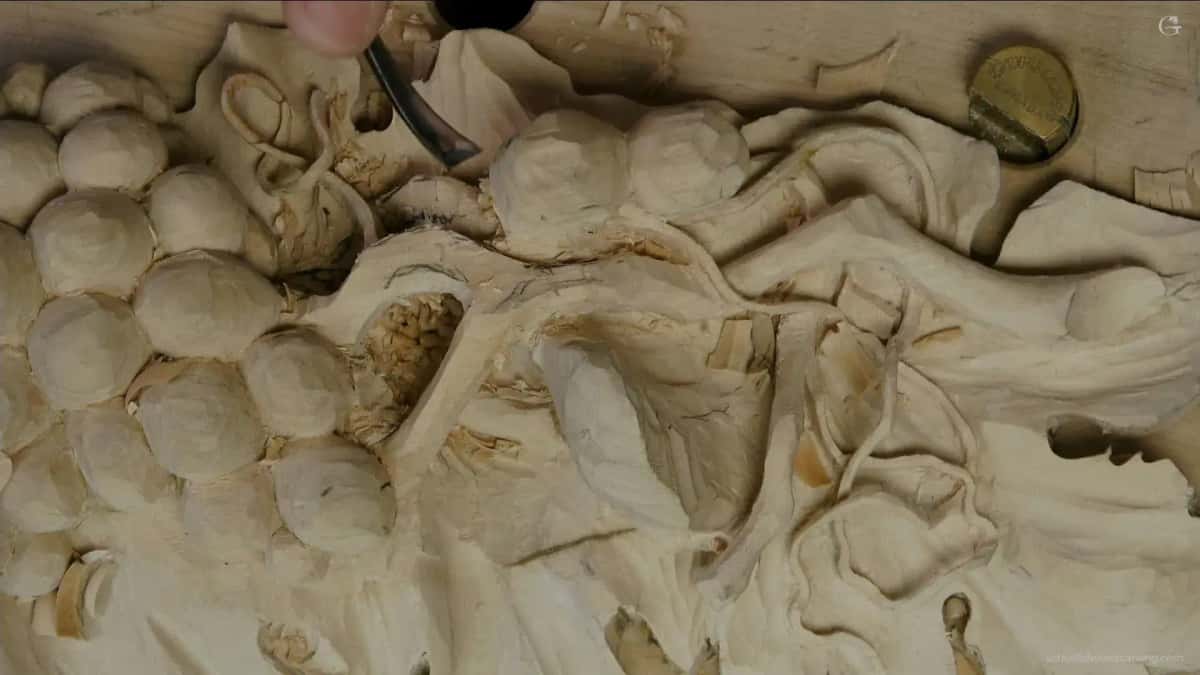
The berries have to come loose from what sits behind them. A bent gouge reaches where a straight one cannot.
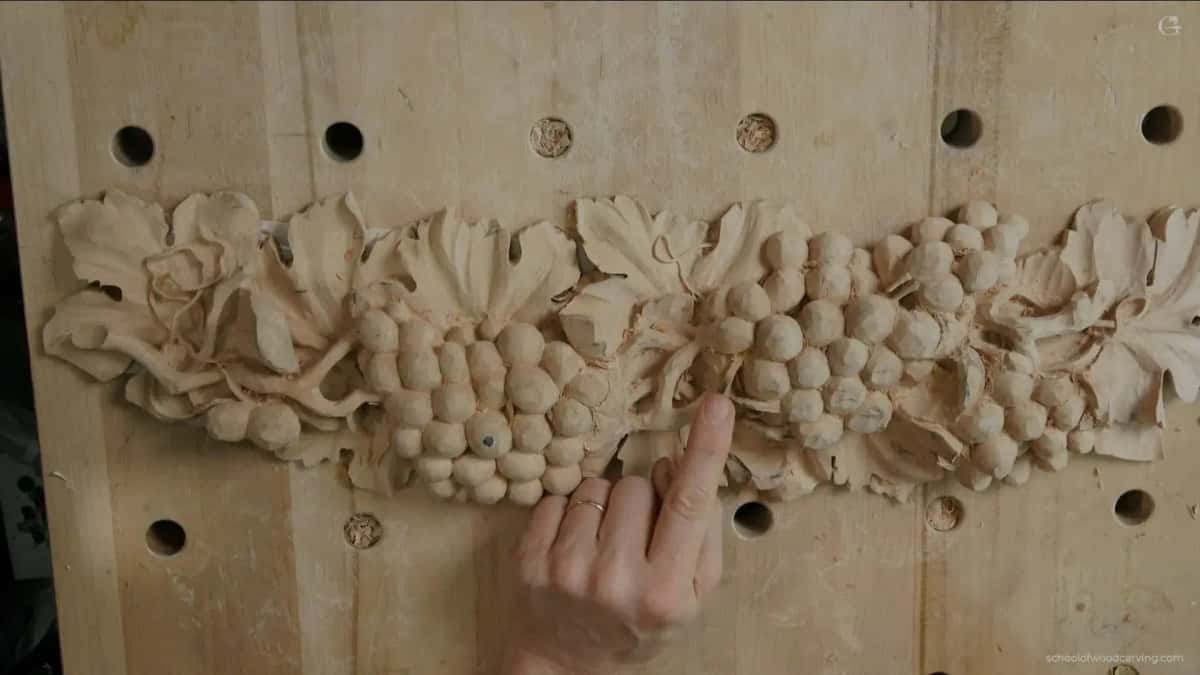
My bench shows right through it. Carve in place and every one of those holes is a hole in the furniture.
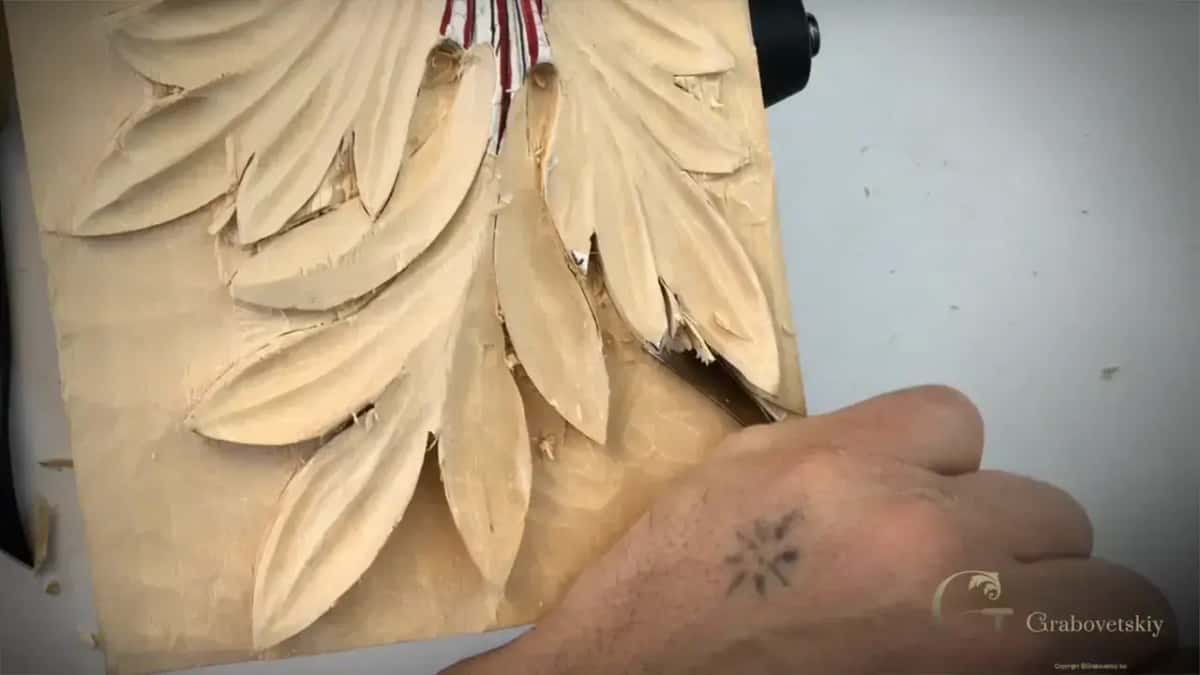
Black means the tool got behind the leaf. Grey means it did not.
Which way should the grain of the applied piece run?
The same way as the ground it goes onto, every time. Two reasons for that, and only one of them has anything to do with looks.
The look is the easy one. On an onlay the grain is almost invisible once the surface is modeled, and you can blend it nicely with no problem, as long as the grain goes the same direction. Cross it and the ornament reads as a sticker even before anybody touches it.
The second reason is that wood moves, and it does not move evenly. Basswood shrinks about 6.6 percent radially and 9.3 percent tangentially, so it changes roughly one and a half times as much across the grain as through it. Glue a long onlay across the grain of a wide panel and the two are pulling different amounts every season. The USDA Wood Handbook has the measured numbers for every species you are likely to hold.
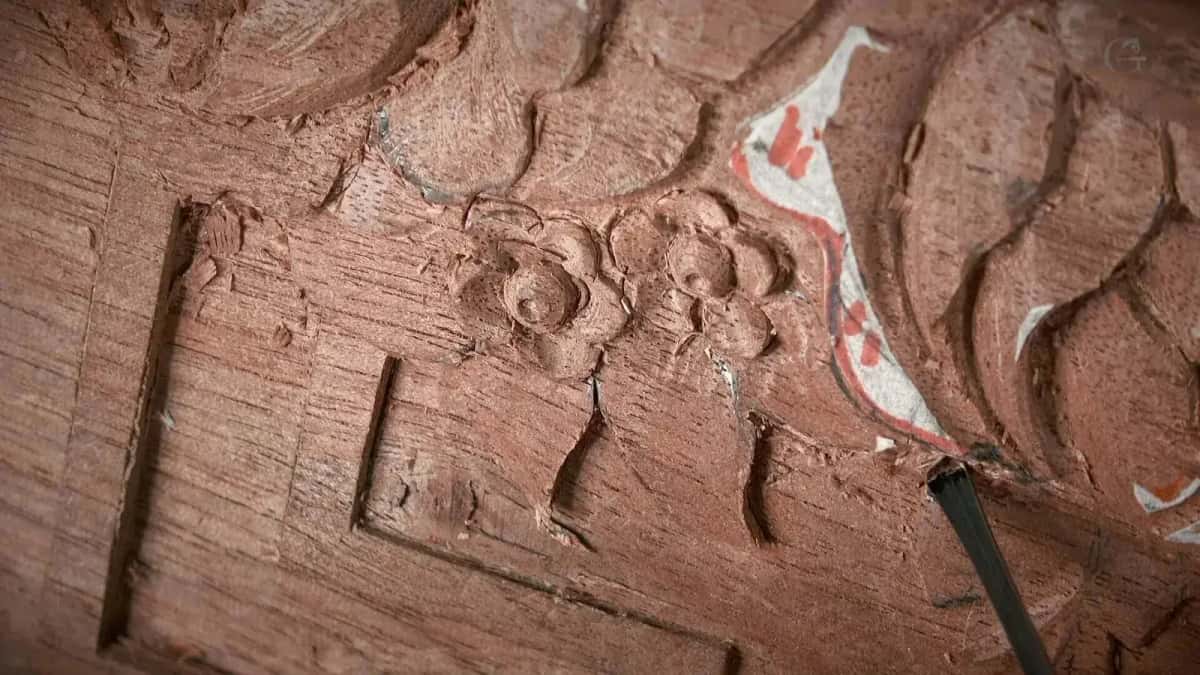
This wood fought back. Small flowers in coarse grain crumble instead of slicing.
Will a glued onlay fall off?
Mine have not, and I stopped worrying about it years ago. Am I afraid of movement on a piece like this? Not at all. Even if it moves a little bit, it is okay, and I have not had any problem in years with movement.
That is not luck, it is undercutting. When you excavate deeply you are breaking those long fibers, and a board full of hollows is not a solid board anymore, so it has far less to give. I advocate more undercutting rather than less, because there is less chance of seeing a crack later, and the piece ends up so light you are not afraid to glue it onto anything.
On some panels I glued six inches of width together. It looks like a solid block, and it is not. Look closer and there are glue lines, and it is staying right there with no movement whatsoever, because I altered the direction of the grain.
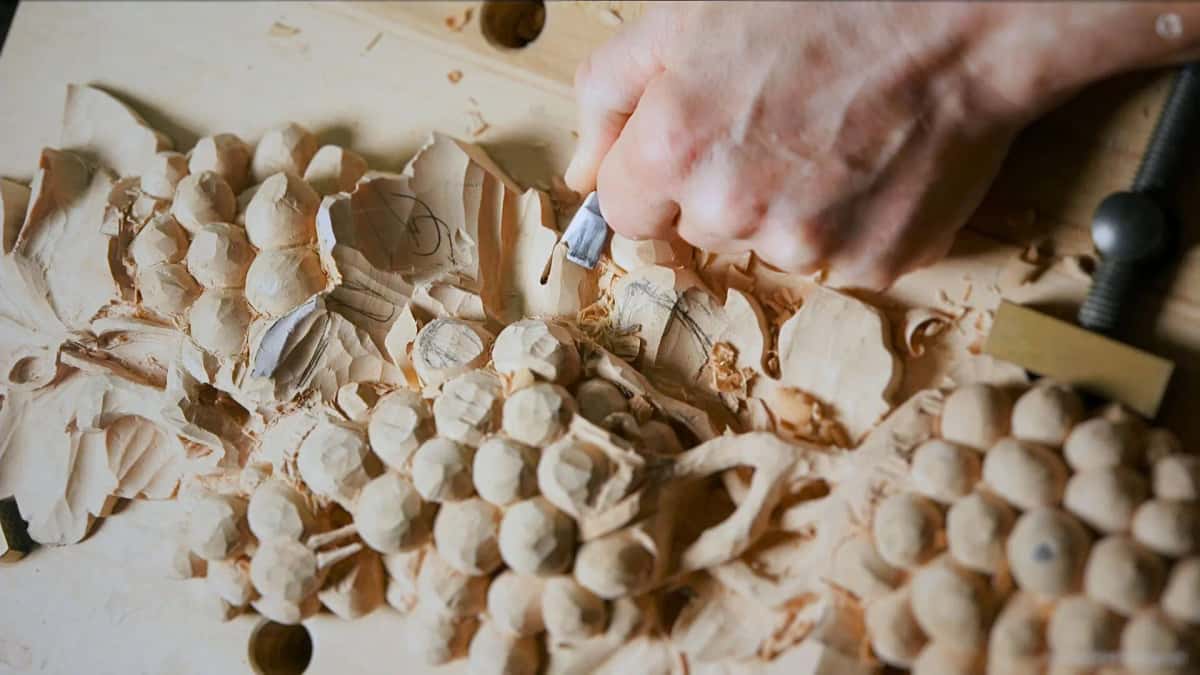
The ornament runs off the edge of the blank. A panel has no edge.
How do I hold an onlay while I carve it?
Paper and glue, and it is stronger than anybody believes until they try it. Holding a loose blank is the objection I hear most, and it is the easiest one to answer.
Step 1. Take a backboard
Half inch plywood is what I use. If you have a bench with dog holes and hardware you can hold small work directly, but I do not think it is really practical, because the clamps are always in the way of the tool.
Step 2. Lay paper between the blank and the board
Printer paper. Glue the paper to the plywood, then the blank to the paper. When it is time to pop the carving out, the paper splits and the back cleans up easily. Do not over spray it, or it gets harder to take out. Leave no gaps between sheets and do not overlap them, or the blank sits loose.
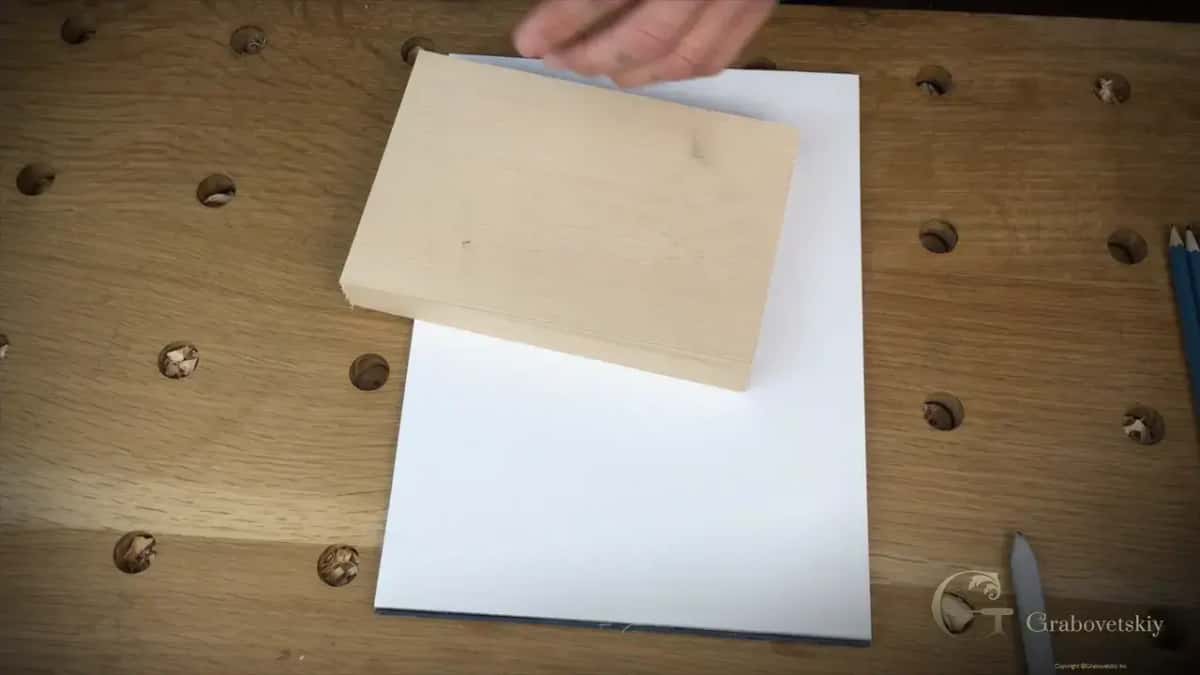
One sheet of paper. The whole fixture, and it will hold four feet of carving.
Step 3. Carve, and move the board instead of the work
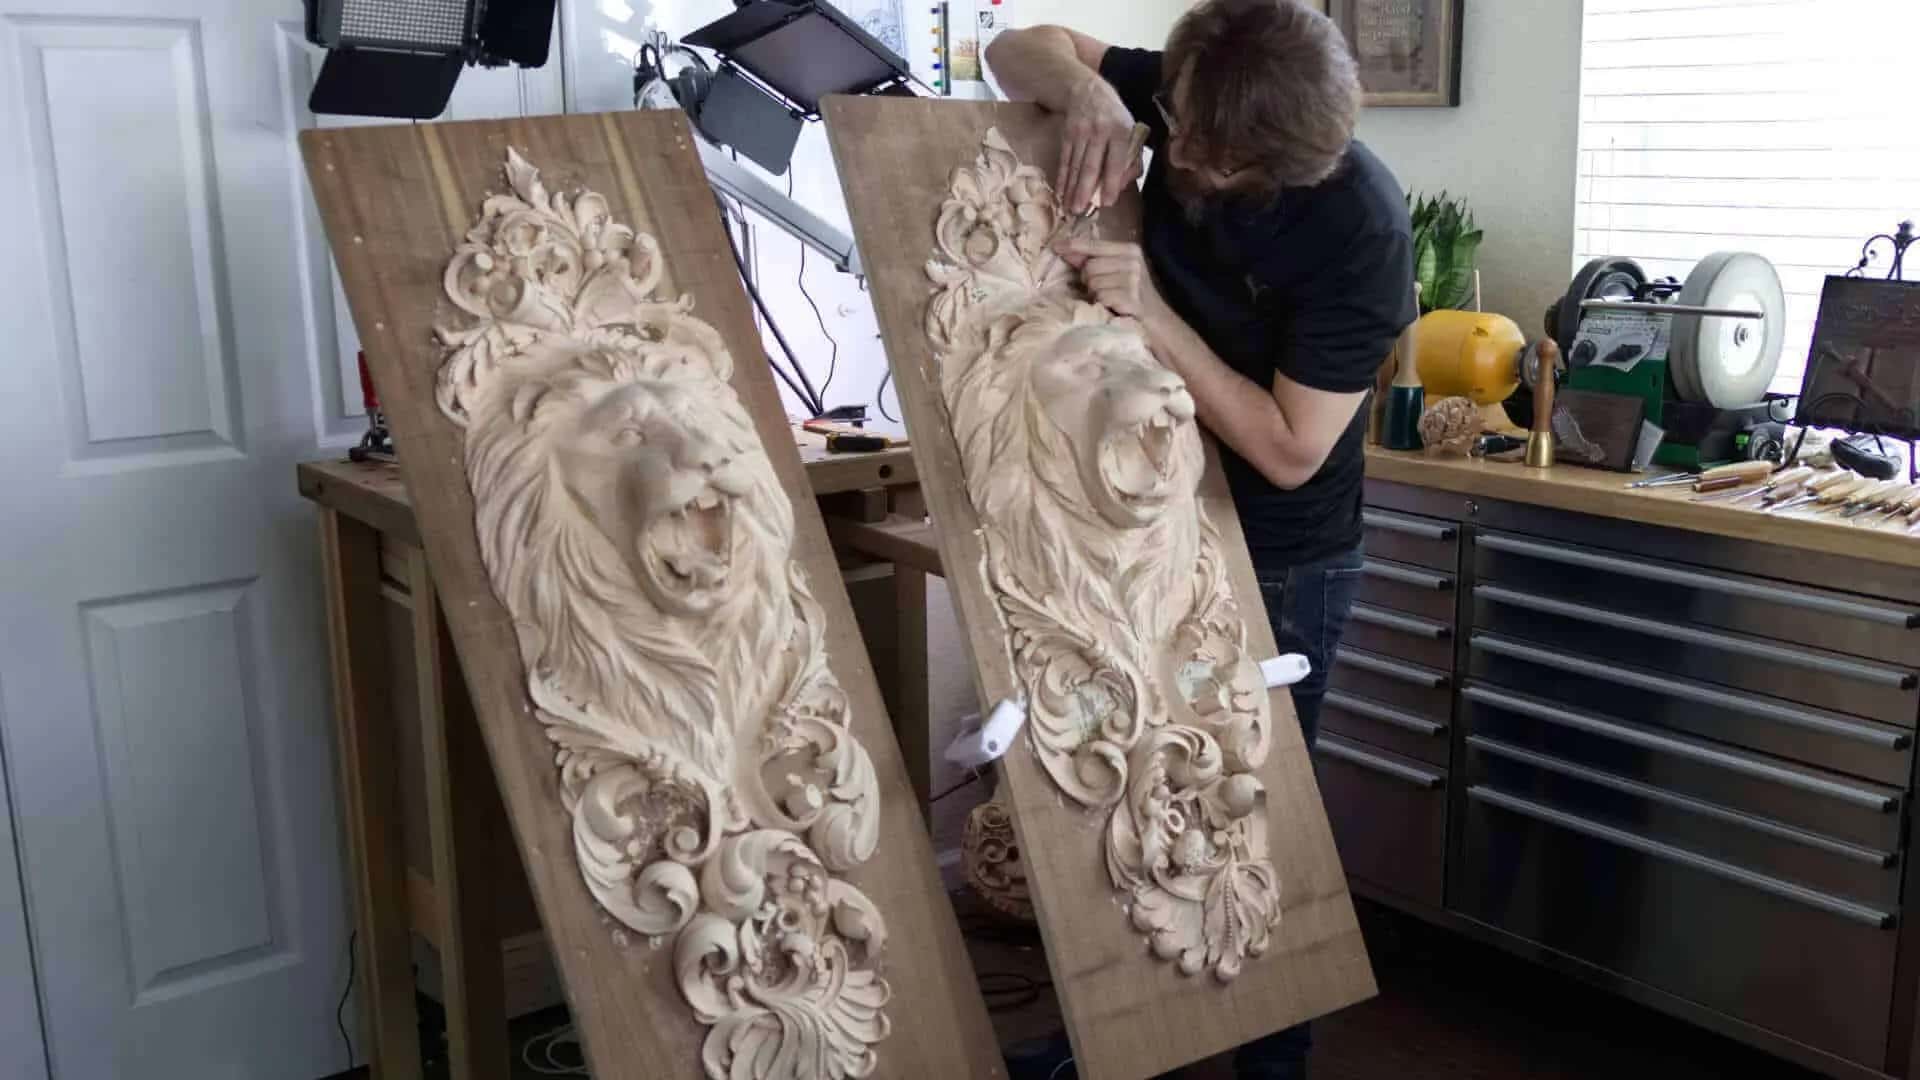
I use the sandwich method all the time, on big projects even. I just did lions, lion head onlays for one of my clients, and they are huge. They are 48 inch boards, and they were held by a piece of paper. If you want to see that job from the beginning, the whole lion head onlay carving is written up start to finish.
Step 4. Check everything before you break it free
Check the whole carving before you take it off the paper. In one case I had missed an undercut underneath a flower. It took a couple of seconds while it was still attached to the background, and it would have been much harder after.
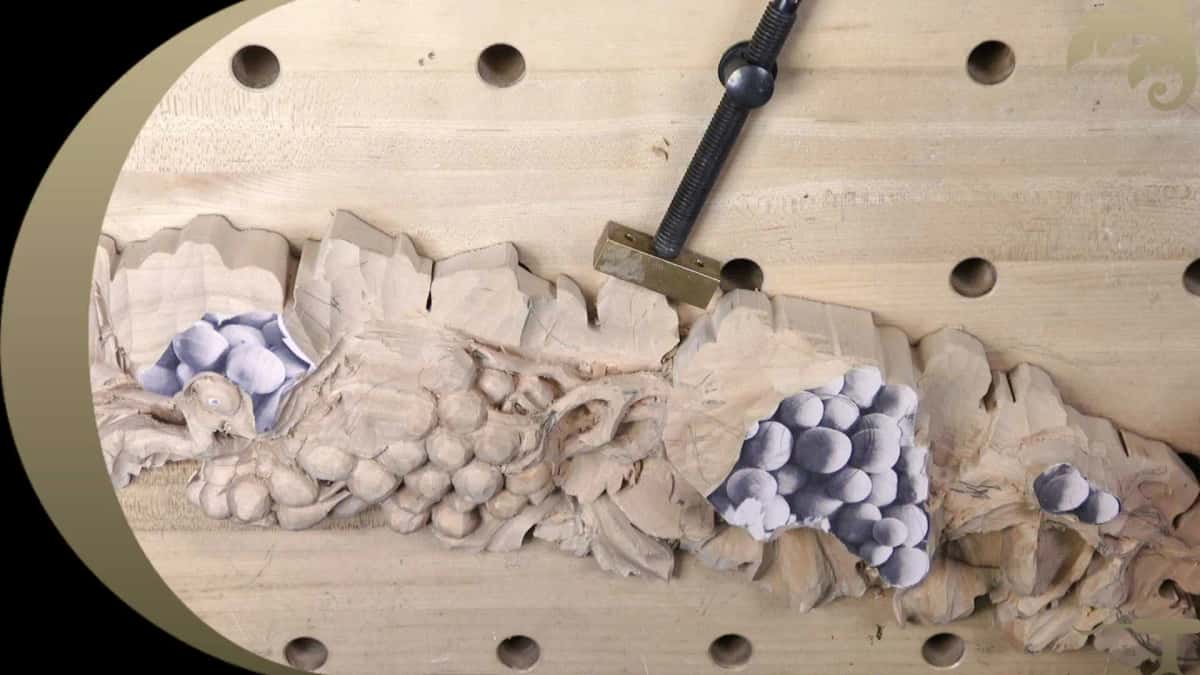
One brass bar, one hole, and the blank stops moving. Move the bar, reach the other side.
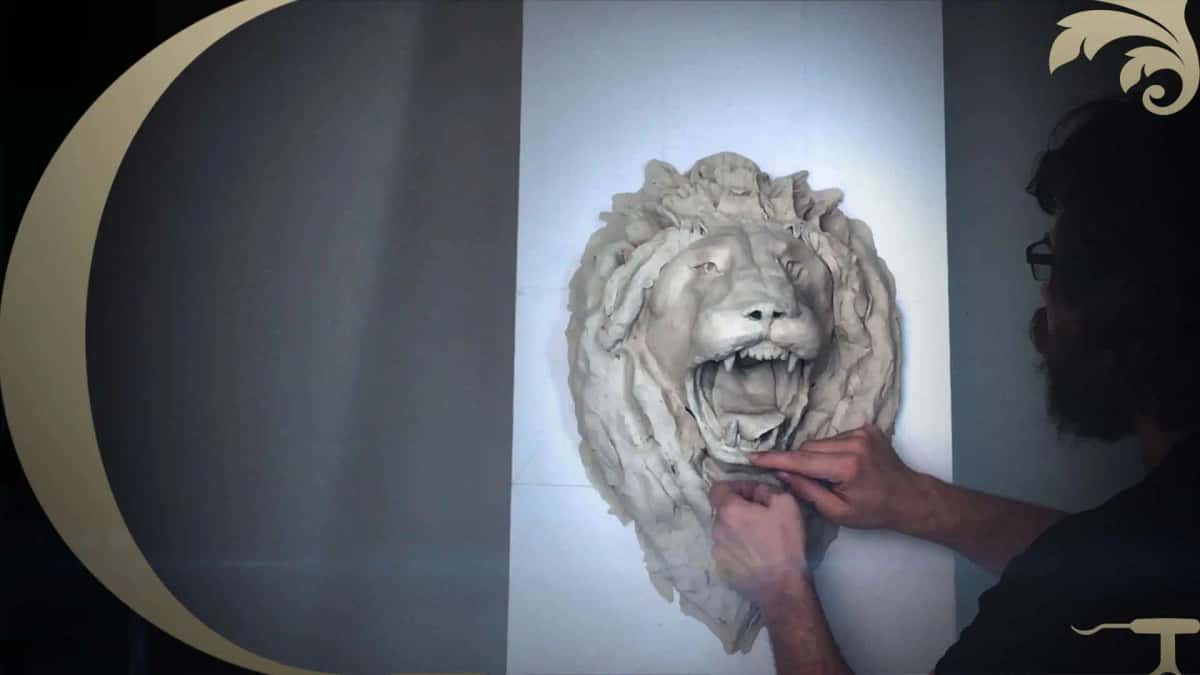
Clay first, wood second. Clay lets you put a mistake back.
How do I glue the onlay on without ruining the piece?
Glue the middle only, and leave the edges dry. This is the part almost nobody is told, and getting it wrong makes the last hour of the job miserable.
Step 1. Mark the glue patch and keep it flat
I step in about an inch from the outline. That middle part is the only spot I do not touch with a tool, so it stays flat, and that is where the glue goes. The rest of the back gets a texture.
Step 2. Keep the adhesive off the outline
A word of caution. I apply my glue just in the middle sections and nowhere else. First, I do not want to see any squeeze out. Second, I am going to undercut parts of it afterward, and I do not want to meet a glue line with my gouge, because it is much harder to work.
Step 3. Pick a glue you can clean off
Any wood glue works. Titebond does the job and I have used it on plenty of projects, but it is hard to clean. Lately I use more spray glue, because it comes off the back easily once the work is done.
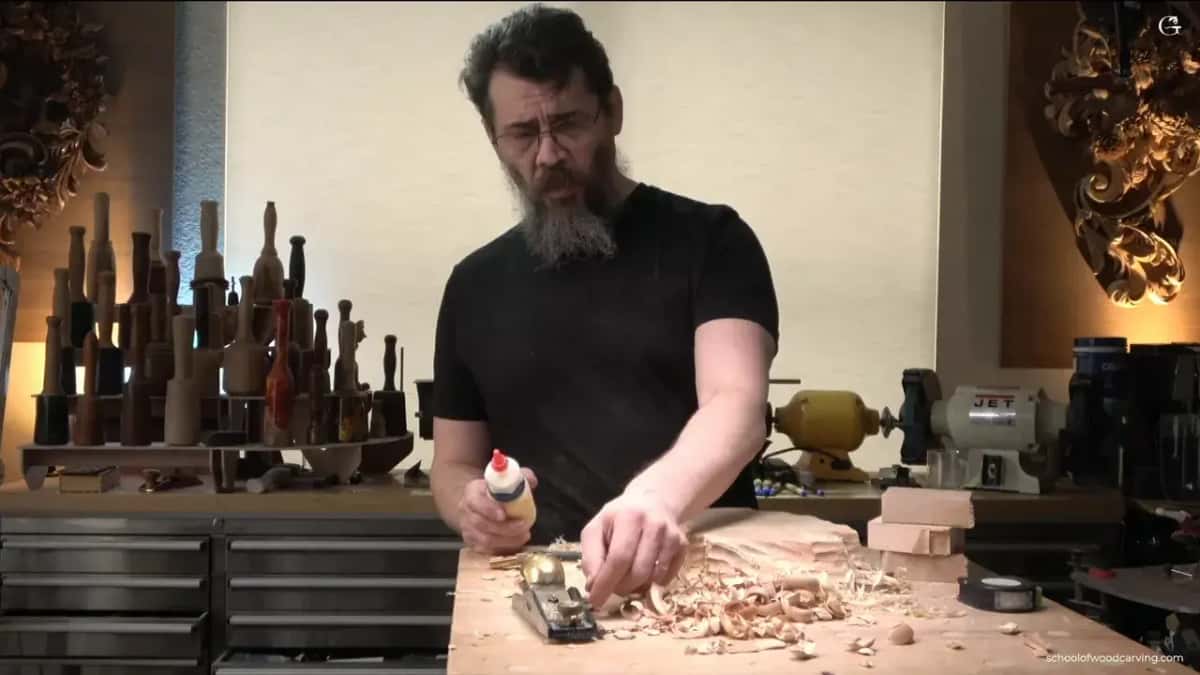
The bottle matters less than where you put what is inside it.
Step 4. Add a peg if the piece will be handled
You can use a screw, or a dowel, just a plain dowel like they used in the eighteenth and nineteenth centuries. In Byzantine work they made the top layer replaceable on purpose, so if somebody knocked it or broke it, that piece could come off and be carved again. A few pegs and the ornament is repairable instead of permanent.
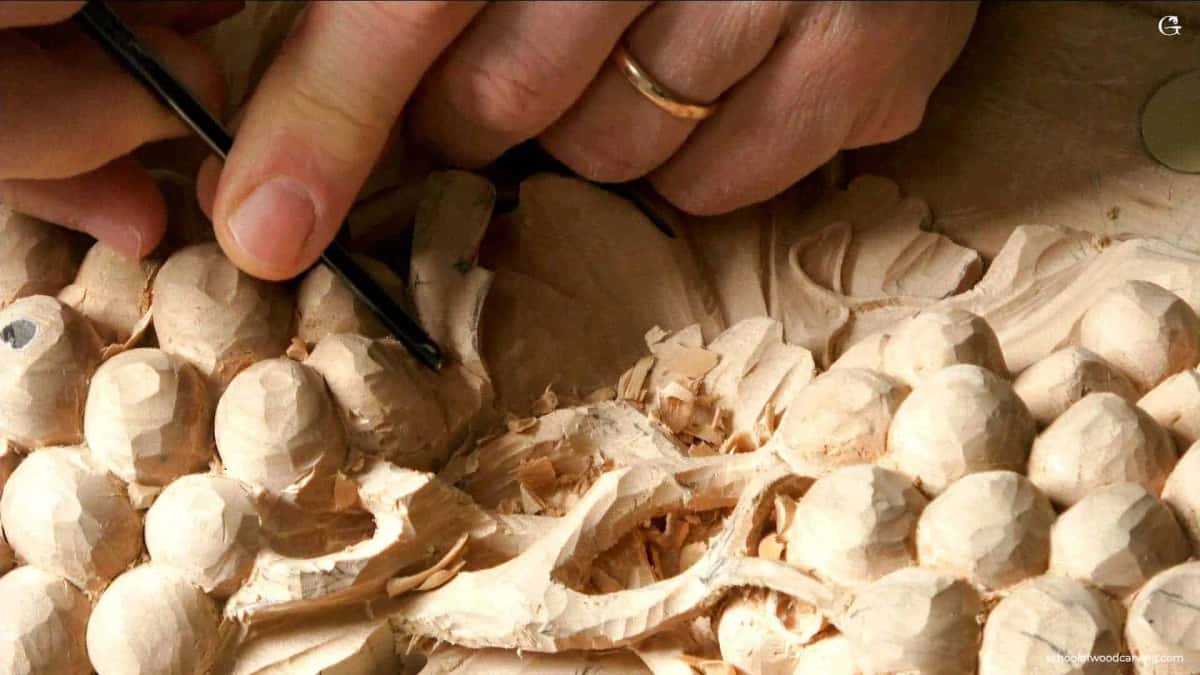
Tendrils are where an onlay earns its keep. Thin and free.
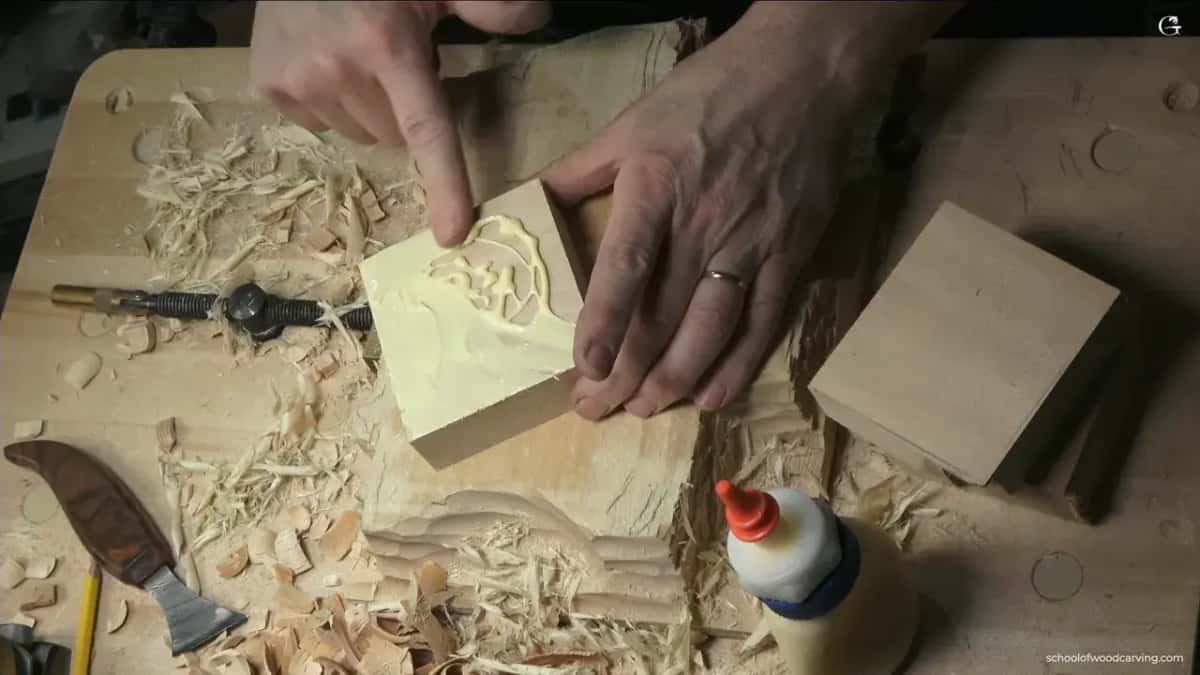
Wiggle it down until it grabs. Too much glue here and you meet it later with a gouge.
What do most carvers get backwards about this?
They think the onlay is the shortcut, when the harder flex is cutting it from the solid and making it look applied. This is the trick I actually enjoy.
Working a molding, I undercut beneath each leaf until it feels like it is glued on, which of course it is not. It can be a sixteenth of an inch deep and still look full three dimensional. Go further and you can attack from both sides, connect the two cuts, and create the illusion completely. Nobody is going to see it, but you will know.
On one grape panel I got about half an inch in underneath, which is more than enough for people to think it is glued together. Tell them to take a look inside, because it is a solid piece.
Students do their own version of this. One of my students carved a tiny fly and set it deep inside an acanthus leaf, purely so people would ask how in the world he got that in there. He never told them.
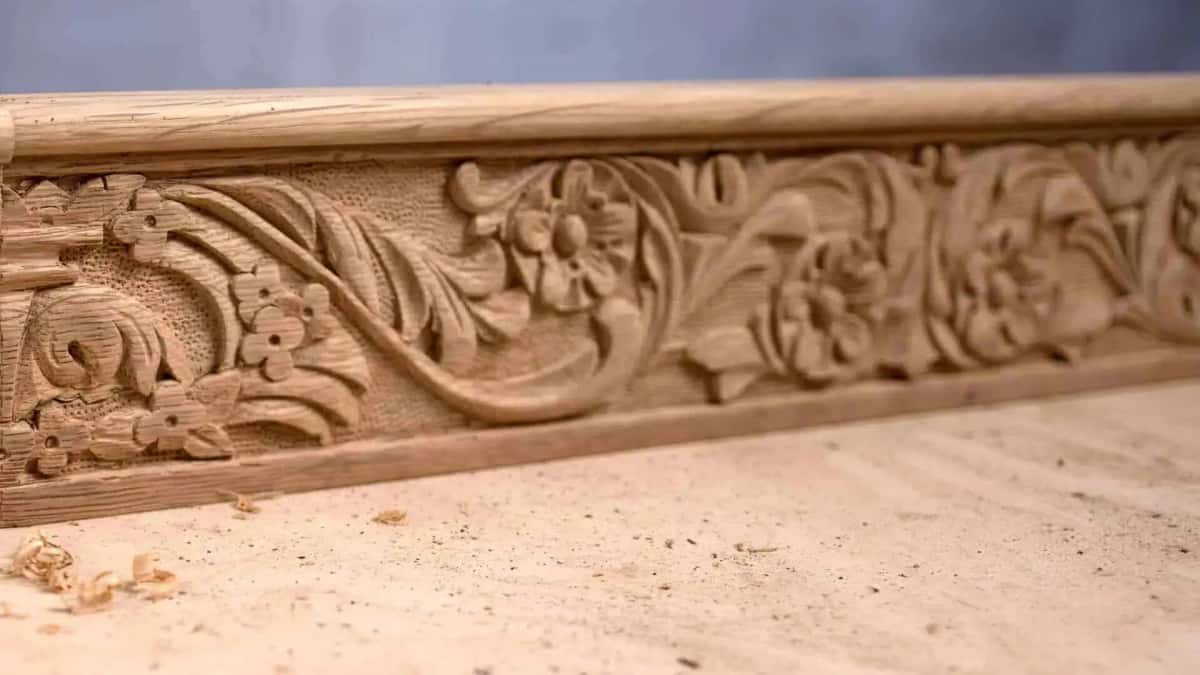
A punched ground is a decision you can only make when the ground belongs to the piece.
When does working in the solid actually win?
Whenever the ornament has to sit on a shape, or the grain has to run through it. Four cases, and they come up constantly in furniture.
A shaped ground is the big one. A cabriole knee, a crest rail, a bombe front, a turned column: an applied blank would have to be hollowed to bed onto that curve, and the seam will find you. Cut it in the solid and there is no seam to find.
Small flat ornament is the second case. A rosette an inch and a half across gains nothing from being applied, and the glue line costs more than the depth is worth. Continuous grain is the third, where one figure has to run through ornament and ground so the eye reads a single object. Last comes the punched ground. It only ties ornament and surface together when the two started life as the same board.
I made this call on a Venetian rosette recently. I could have scrolled the flowers out and applied them to a plywood or MDF ground, and I thought about it. I went solid instead, so you would see exactly what is going on.
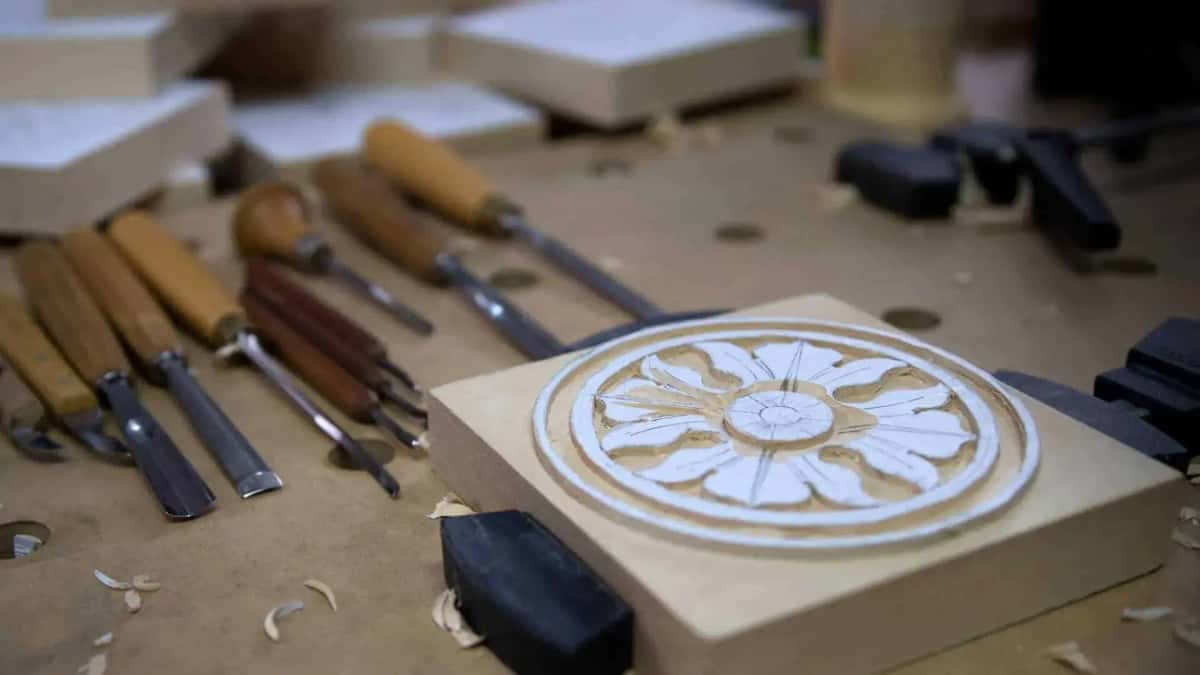
A rosette this size I cut in place every time. Layout is the hard part here, not depth, and that surprises people.
So which one should I choose for my piece?
Answer four questions and the job decides itself. How deep does the ornament have to stand off its ground? Will the piece's own wood hold that detail? Is the ground flat? And could you bear to recarve the piece if the last cut went wrong?
Here is the same thing as a table. Find the row that describes your job and read across.
What the job needs | Applied onlay, carved apart and glued on | Cut in the solid |
|---|---|---|
Deep relief work | The blank turns over for the tool | Only from above |
Piercing right through | Cut clean through the board and keep going as far as needed | Holes the piece |
A veneered ground | The only route that exists for figure | Never an option |
Wood that tears | Carve the ornament in basswood and then glue it onto the coarse oak | Stuck with it |
A ruined final cut | You threw out a cut-off worth pennies | Furniture gone |
Small shallow ornament | Overkill, and the seam will show itself sooner or later | Right every time |
A shaped ground | The blank must be hollowed to bed | No bedding needed |
A punched ground | The texture stops dead at the glue line and betrays it | Reads as one |
Repair in fifty years | Pop the old one off and carve a fresh replacement to suit it | Patch the piece |
Weight on a hung panel | Light, because the whole back is hollowed out underneath | Board carries all |
Which choice will still be repairable in fifty years?
The applied one, and that is the argument nobody makes. Furniture gets moved, knocked, and left in dry heat, and ornament is always what breaks first.
An onlay that comes off is a carving job. A carving cut into a table apron that gets damaged is a patch in the apron, and now you are letting new wood into an old piece and hoping it disappears. When I am asked to match new carving to an antique, the applied pieces are always the ones I can put right honestly.
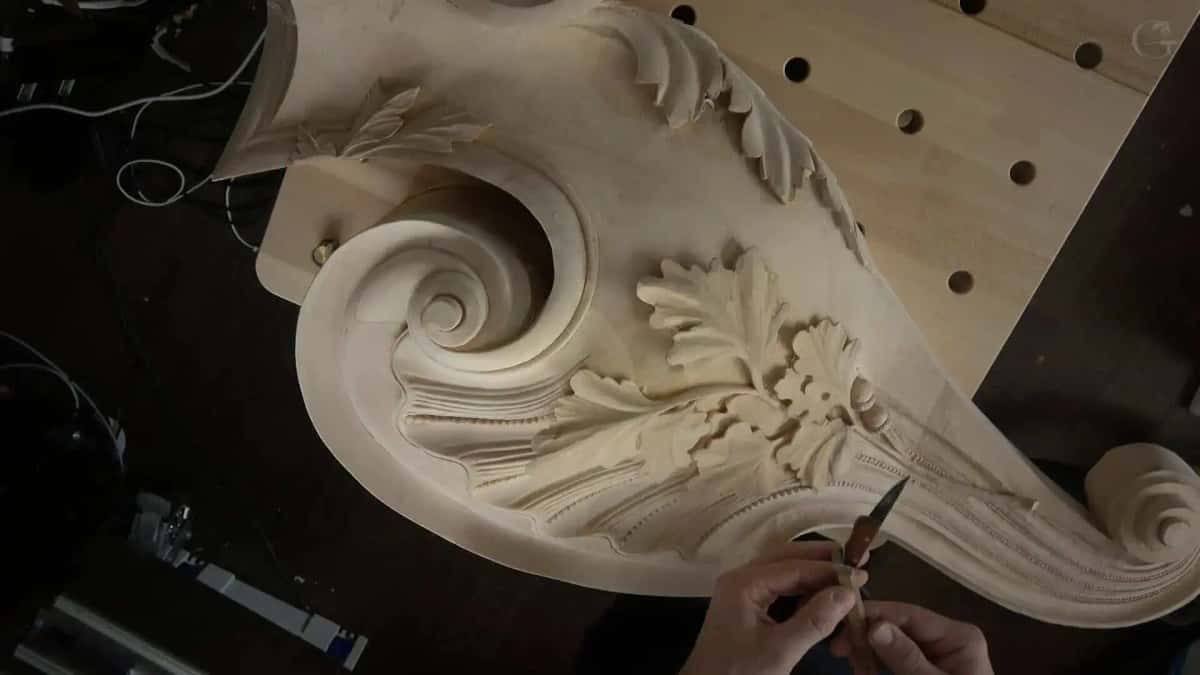
A console this size is built and carved on the bench, then lifted into the room.
Can I just buy a carved onlay instead?
You can, and for some jobs you should, as long as you know what arrives. A bought onlay is machine cut, so it is shallow, softly detailed, and identical to ten thousand others.
It will look bought under raking light, because the undercut is not there. On paint grade work in a hidden spot, that is a fair trade. On a stained piece where the eye lands, you will spend so long deepening and undercutting it that carving your own blank would have been faster.
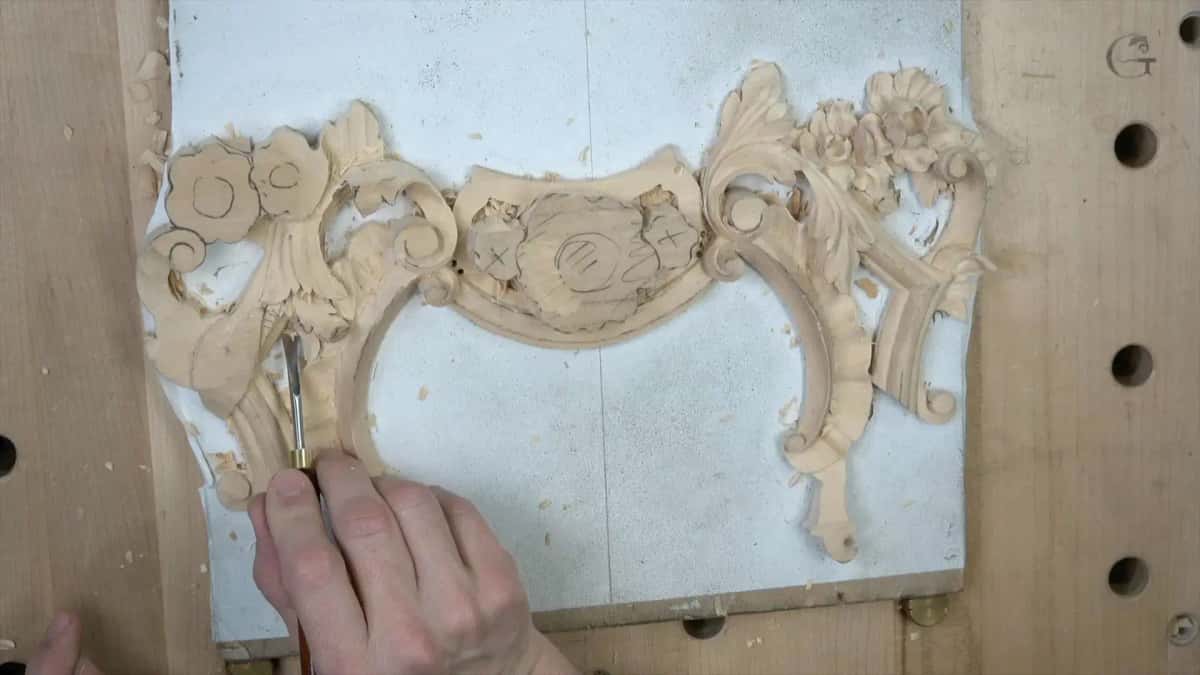
Paint hides a glue line and forgives a species. It does not forgive a shallow undercut.
I am not precious about machines either, and never have been. On a production job I glue up the board, cut the outline with a jigsaw, and get on with it. They would have used a bow saw to be authentic, but this is production work and I have to be smart. It is still all carved by hand where it counts.
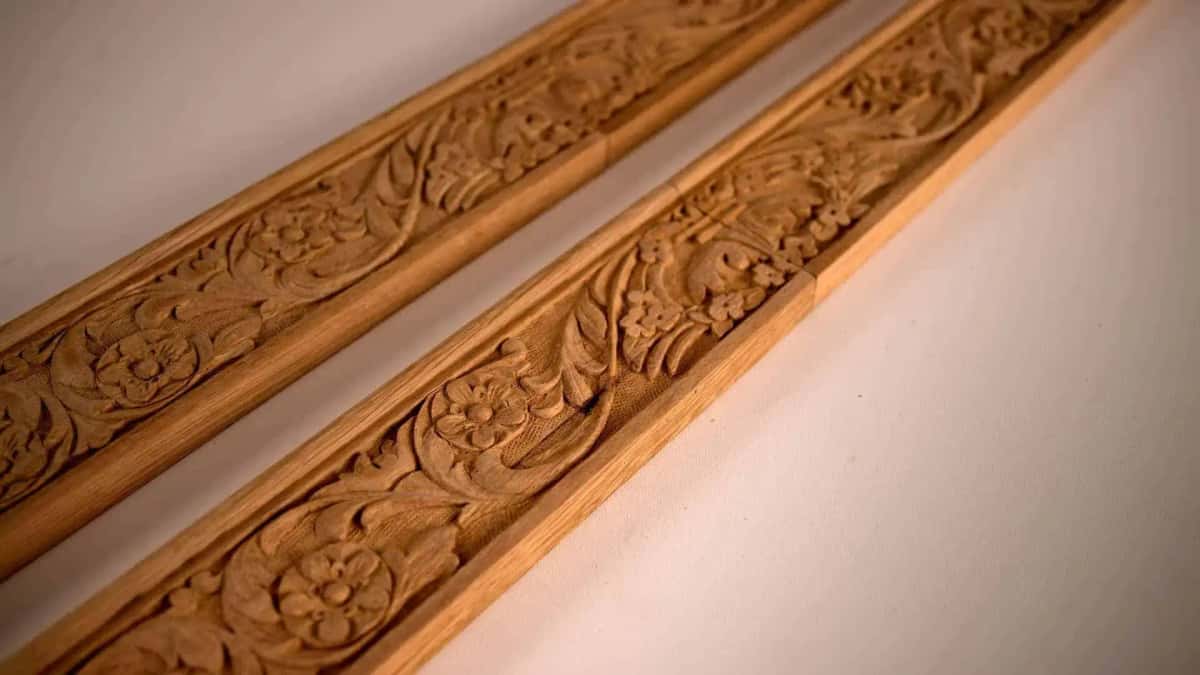
Two lengths that have to agree. Carve them side by side on the bench, never one on the piece.
Those grape onlay lessons follow one garland from the pattern to the glue, and the dining table apron shows the other route on a real piece of furniture. Between them you will have carved both answers, and the ornament in the pattern books of Thomas Chippendale in 1754 never once specifies which route to take. That decision has always belonged to the carver at the bench.
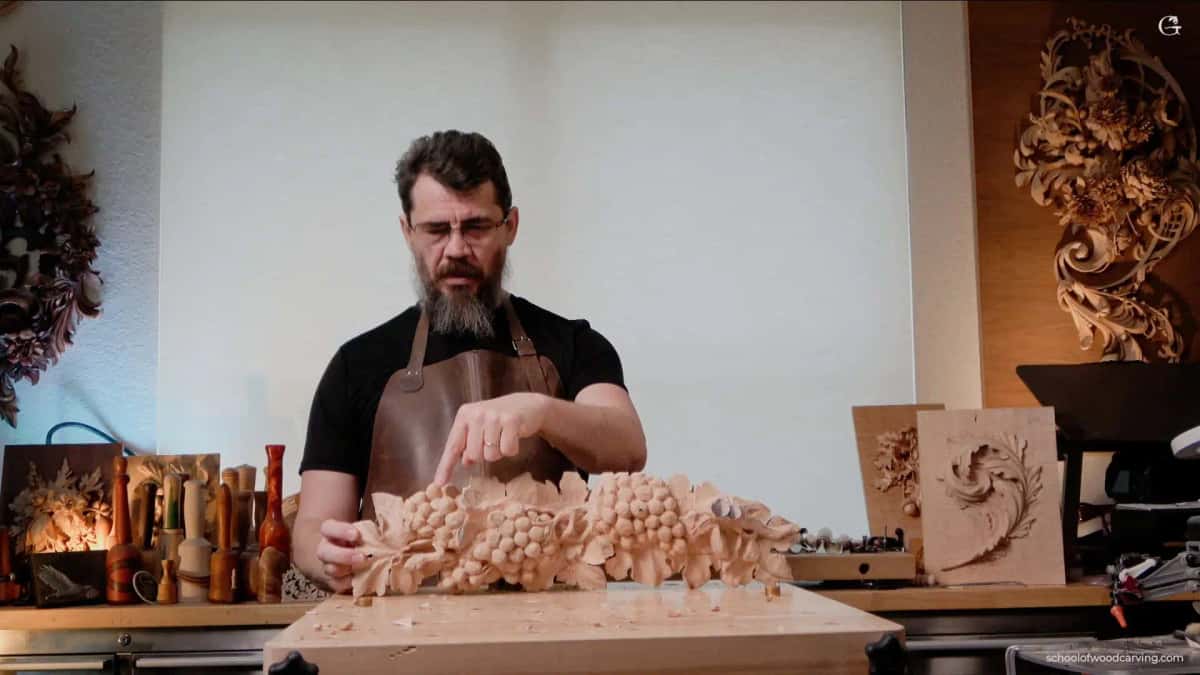
Off the bench and in my hands. It weighs almost nothing and it goes anywhere.
I used to have long hair, and when I was carving those lions I had really long hair, because I had to match the theme. I had to be a lion. Lion carves lion.
Have you ever stood over a panel and not known which way to start? Would you like to hold a finished garland in your hand before it ever touches the furniture? Then stop guessing and go carve one.