

Alexander Grabovetskiy, woodcarver, School of Woodcarving · Published 2020
How do you carve a ceiling panel that people see from below?
Quick answer: A ceiling carving is work planned for the person standing under it. Hollows that face that person stay shallow, so they never pull the eye off the leaf. Pockets nobody can see into go just deep enough to hold a shadow, and a piece that means nothing from down there comes off.
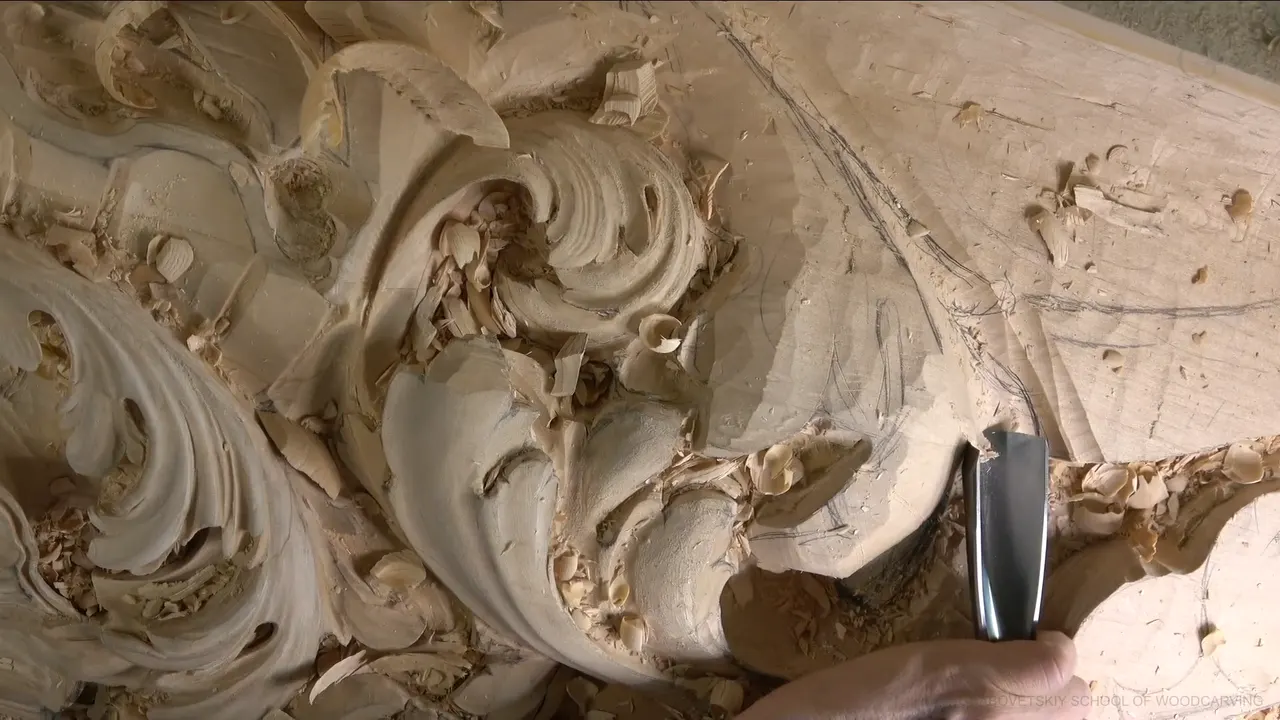
Carving a panel for a ceiling is a job you plan from the floor up. Faces that meet the eye stay shallow. A pocket nobody can look into only needs to go deep enough for a dark line of shadow, and a part that makes no sense from down there comes off the board for good. Carved ceiling panels get judged from one spot, underneath, and in workshop 29 I made those calls out loud, one pass at a time, on a Venetian acanthus leaf.
Have you ever tipped your head back to look at a ceiling? Did the lights and the corners up there look flatter than they do at eye level? A carving that lives up there gets that same flattened look, so the passes on this board get planned for someone below with their head tipped back.
You already know that view. It decided six things for me in this workshop, and each one comes with the gouge I used and the part of the lesson where you can watch it happen.

Six things the floor decided on this board
Hollows that face the floor stay shallow, and more than once a #7 was all I used.
Depth goes where nobody sees the bottom.
A whole section came off in part 4, since the floor could read nothing in it.
Keep a ridge high wherever a lower one would lose the movement.
Blend a slip into the next pass while there is still wood for it.
A good movement reads from the far side of the room as well as from right under it.
What makes carved ceiling panels different to carve?
People will stand on the floor and look up at it, and that one view decides most of what follows. I said as much back in workshop 9, where you stay on the floor and look up. The board itself is what I call the ceiling board, about two inches thick, 51 mm, and part of it runs up onto the ceiling itself, so on that part I end up working upside down. It is architectural carving, a relief made for a room, and nobody will ever hold it at arm's length.

My camera can't sit where the leaf reads best. For a moment in part 7 I moved it to show the leaf from the side where it reads, and from there it looks absolutely different, the same element going down, down, down and then up. But the camera would have to stay just above my head, and my head would cover the view. So most of the lesson you watch from where a camera fits, and I tell you what the floor will see.
How I judge a detail by standing where the owner stands and moving the light is a separate habit, and my workshop 12 page covers it.

How shallow should a hollow be when people look up?
Shallow enough that it never pulls the eye off the leaf. I carried a concave down the side of a pipe in part 3, a #7 all the way along, and then stopped. That is good enough, I said, and I didn't want to do more than that. A deeper hollow there would be visible from below and would distract the eye, which is the whole reason.

Cleaning up after a back bent gouge, I dropped to a smaller #7, even a #8, and still said I didn't want to see a deep concave. The other side of that pipe got almost no concave at the beginning, more pronounced only as it came closer to the pipe, and a #11 started it.

The plainest version comes in part 6. That concave was never meant to be big and deep, only a #7, and it still gave the eye a really nice movement.
I'm going to be honest with you, I argued with myself about it once. At the end of part 5 I said maybe I could get by with a little deeper concave, and part 6 opens with a #11 spoon at 10 mm, about 3/8 in, going in against the grain, which was not in my favor.

How deep a concave can go before the leaf itself stops it is a different limit, and my workshop 22 page covers that one. The eye of the person below is the other limit, and a hollow on a ceiling answers to both.
Where does the depth go on a ceiling panel?
Into the pockets nobody can look into. A big eye gets opened in part 11 with a quarter-inch #9, about 6 mm. That is not a big tool, but it is a big eye, and I went all around it until the plug came out completely.

Then I said why depth hardly mattered there. It doesn't really matter how deep I go, because it's not going to be visible anyway. All I need is a shadow line.
Next went a #11 at 4 mm, about 5/32 in, carefully into the hole the plug left. Straight after it I switched to 2 mm, roughly 5/64 in, and went much deeper. The wall came down with a #5, though I said a #3, with its lesser sweep, would have been smarter. Last, a 1.5 mm #11, about 1/16 in, took the bottom a little deeper.

I could have kept going. I didn't have to, and I said so, just deep enough. That eye sits really high above, and more depth there would not make a huge difference to the look.
Deep enough for a shadow line is where I stop. A thin tool pushed deep into a pocket can break, and my workshop 19 page on where the eye goes warns about exactly that. The same reason comes back in part 12, in fewer words. I don't have to go really deep, since it sits high above.
That same part starts on another eye, a smaller #11 veiner and then a 3 mm, about 1/8 in, to get even deeper. I held back there on purpose, since I still had to develop it. An early eye turns up in part 3 as well, going underneath, and I said I could go even more there if I needed to, though I didn't have to.

What comes off because nobody below will see it?
A whole section, once in this lesson. I looked hard at one piece of that leaf in part 4, and seen from below, it didn't make any sense, not from that side. I don't really need it, I said, and then stopped to think. Well, no, actually, nothing to think about. Just take it out. Without it the leaf makes a beautiful movement overall, and I liked that, so I knocked it out right away.

A smaller move can clear the view too. Back in part 3 I couldn't see one spot from below, so I knocked a little more down until I could. I still want to see this movement from down below, I said, and some version of that line turns up in most parts of this lesson.
Busy background behind the ornament counts as well. Too much going on distracts the eyes, so in part 1 I cleaned one area with a #7, and in part 5 I got the junk out with a #6 spoon gouge. Any spoon gouge will work for that. Pencil marks pile up the same way, and by part 5 there were so many I couldn't even see what I was doing.

The opposite trouble is an empty hole. Once that section came out in part 4, there was a space inside to fill, and I didn't want a big hole there. Left empty, it's just distracting, a big hole, a black hole, so something has to go in. At least I have to do something, I said, and turned to the next side.
Why keep a ridge high when you carve for the floor?
Losing a movement from below is the worry, and I say so in parts 2, 7 and 11. I carved around an eye in part 7 using a #11 at 4 mm (5/32 in) and kept one ridge high on purpose, leaning the tool on the side of the future pipe so I wouldn't lose that eye.

The harder version came in part 2. A part could flip either way, and one of the two would have lost it from below. I'm going to lose it, and I don't want to lose it, I said, so I moved the eye over and made that part bigger.
That thought opens part 10 too. That ridge has to be higher, I said, because it's flipping that way. When a leaf flips all the way over, so the person below looks up into it, that is its own job, and my workshop 16 page is about it.
What happens when you slip on a ceiling carving?
Every slip I point out here had a fix waiting in the next pass, because the wood for that pass was still there. The clearest one is in part 10. I made a couple of relief cuts with a #11, and what happened next was not good. Not good, but okay.
I still wanted to see a concave there, so I blended the damage into it, and that concave still reads from below. It's not the end of the world. But still, it shouldn't have happened.

I chipped a little too much in part 12 and told myself not to do that too quick. It's okay, I'll fix it, because I still have to create the pipe right there. One more turned up in part 11, a #11 on its side already chopping off more than it should, and I said I'd fix that later on.
Dull steel came up more than once. One tool in part 2 was absolutely dull, for some reason, and in part 10 it felt like my tool needed to be sharpened a little better. I even stop in part 1 to sharpen for a nicer concave.
Once the wood for a second try is gone, the fix is gone with it, and my workshop 25 page is about finding that point.
Does a leaf carved for a ceiling still read from across the room?
I got one that does in part 8. I saw a chance for a really beautiful twist and opened it so it would be detectable from below when you look in from the side. Then I gave it roundness, a shape rather than a hole.

Well, I shouldn't say I think, I told you, because I know it's going to give me beautiful movement. It doesn't matter where you look from. From underneath you still see that movement going downhill, and from a farther point of the room you can still pick out the whole detail.
Earlier in that part I brought some eyes a little farther to make the leaf more airy. That creates lightness, and the leaf looks light. Two eyes and three parts, one unified form, was what I was after there.

How far away people stand also decides how much detail a small flower needs, and my lily box lesson gets into that.
Eight calls from workshop 29, and why each one
Every call on this page sits in one place here, with the lesson part where it happens.
| Call | Reason | Where |
|---|---|---|
| Concave kept shallow | A deep one would pull the eye. | Three, carried along by a #7 |
| Big eye opened | Nobody sees the bottom, only its shadow. | Eleven, quarter-inch #9, then smaller veiners |
| Whole section removed | Seen from below, it made no sense. | Four, with a hole left over |
| Ridge kept high | An eye there must not get lost. | Seven, leaning on the future pipe |
| Part made bigger | One flip would have lost it below. | Two, after moving the eye over |
| Background cleared out | Too much going on distracts the eyes. | One and five, #7 then spoon |
| Slip blended in | The concave it needed still reads below. | Ten, right after some relief cuts |
| Twist opened up | You see it downhill from any spot. | Eight, opened first, then given roundness |
How does workshop 29 end, and where does the board go next?
The last part opens on an eye of the acanthus I can see, then adds one extra subdivision, an extra eye, because the leaf didn't feel light enough yet. It closes with a pipe separated out, almost flat on one side and more pronounced on the other. I had to move my pipe a little for it, and that is absolutely okay.

Sometimes I have to go by whatever feels better. Not just by the design. If it doesn't feel right for me, somebody else will probably feel the same thing.
Workshops 27 and 28 lead into this one, workshop 30 comes after it, and the course page holds all twelve workshops. The room keeps going in workshops 38 through 49.
All twelve parts of this lesson open with tuition, and you can watch every one of these calls happen at the bench. A last thing from part 12. I apologized there for the pauses while I think, and one of them was only me looking for my pencil.
How it's done
- Find where the viewer stands. Before the first pass, settle where your viewers will be. For this board that means the floor, looking up at the ceiling board.
- Keep visible hollows shallow. Run a concave beside a pipe with a #7 and quit once it reads.
- Bury the depth where eyes can't follow. Lift a plug with a quarter-inch #9 (6 mm), follow with small veiners, and stop the moment the shadow reads crisp.
- Take off what the floor can't read. Remove a section that means nothing from underneath, then plan a design for the gap it leaves.
- Hold a ridge up. Keep the ridge high beside an eye you want to save, leaning the tool against the future pipe.
- Fold a slip into the next pass. Blend the damage into a concave you meant to carve there anyway, while the wood allows it.
Frequently asked questions
Should a carving that hangs high be carved deeper?
Only where nobody can see into it. Anything a viewer's eye lands on stays shallow, because a deep hollow there drags attention away from the leaf. Hidden pockets go down until a dark line of shadow shows, and past that point more depth changes almost nothing.
How deep should the eye of an acanthus leaf go on a ceiling?
Deep enough to throw a clear shadow, then stop. In workshop 29 a #9 a quarter inch wide (6 mm) lifted the plug, and veiners of 4, 2 and 1.5 mm (5/32, 5/64 and 1/16 in) followed it down. Thin steel buried in a pocket can snap.
What should come off a carving that people only see from below?
Any part that reads as nothing to a person looking up. On this leaf a whole section went in part 4, since from the floor it made no sense. Busy background comes out too, because clutter behind a leaf only distracts, though a big empty hole distracts just as badly.
What to carve next