

Alexander Grabovetskiy, woodcarver, School of Woodcarving · Published 2020
Where can you find good acanthus leaf references for carving?
Quick answer: The best reference for an acanthus leaf is an old European book about ornament or architecture. Most of those books are not in English, and some are printed in French. Each one shows the acanthus of the period that made it, so one book gives you one period's leaf.
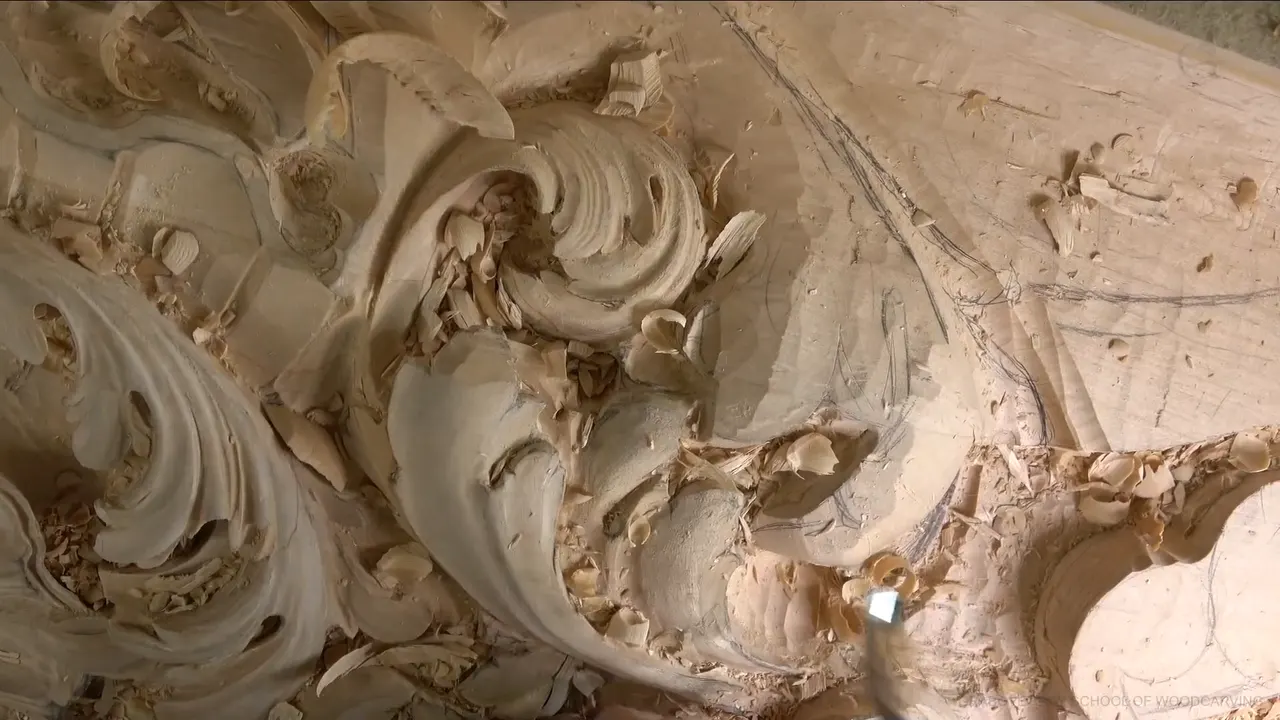
The best acanthus leaf reference is an old European book about ornament or architecture, and very often that book has nothing to do with carving. I said so on camera in workshop 28, in the middle of undercutting a leaf on the Venice room ceiling board. Carving books are not the best material you can find. Most answers you get online still send you to carving manuals, and mine runs the other way.
Have you seen a carved leaf on an old chair or a column and wanted to carve one like it? Do you want yours to sit on the board the way the old ones do? Then put the carving manual aside for now, and open an old book of ornament.
I'm going to be honest with you. Good reference for this leaf is rare, and I have researched acanthus a lot. By the end of this page you will know which shelf I skip, where I look instead, and what I check on an old leaf once I find one.

Where I look, and what I skip
Few books are written about acanthus at all, and even a good one can leave out part of the idea.
An old book shows only the acanthus of the years it was written in.
Old books from Europe about ornament and buildings teach me the most.
On the old work behind this Venetian room, the little triangles where lobes meet are usually rounded off.
Your eye learns the tiny concaves by carving leaf after leaf, in more than one style.
A video misses depth, so turn your own carving and look along it.
Why is a good acanthus leaf reference so hard to find?
Few people today understand how an acanthus leaf is built, and not many books cover it. When I say acanthus, a lot of people don't even know what that is. Furniture makers and carvers usually know the word. Even among carvers, it is really hard to find people who honestly understand the structure of the leaf, its anatomy.
The ornament is named for a real plant, Acanthus mollis, and our page on drawing the acanthus leaf asks whether the carved leaf is the same plant you see in a garden.
Let me tell you a story. I had a #5 gouge in my hand, a quarter inch (6 mm) wide, and I was deciding whether one separation should be crisp or round. That question sent me to old work, and old work sent me to books. I talked about it for a couple of minutes.
The ceiling part sat close to that leaf, so many of my cuts went in with a spoon gouge or a back bent.
I studied these leaves a lot. Not studied, I should say researched. I own some of the books about acanthus, and there are only a handful to own. Even in those books, you sometimes just don't get the completely right idea.

Why does every old book show a different acanthus?
Each old book shows the acanthus of its own years, and just that one type. Even in the old ones, you still see a certain type of leaf, and it belongs to the time when that book was written.
A Rococo leaf is a long way from a Renaissance one, and a Baroque leaf sits somewhere else again. So a book printed in one period mostly teaches you that period. Our page on telling Greek and Roman acanthus apart shows how far two styles can drift.
The oldest Greek leaves even carry a V cut inside each lobe, and the Greek acanthus lesson explains where that came from. The old work behind this Venetian room went the other way, with smooth turns inside.

Where do you find acanthus ornament worth studying?
Look in old European books about ornament, and in old books on architecture. Most of them are not even in English. Some are only in French, some in other languages, and I still say they are the best material you will find.
Those books were not written about wood carving, and they were not written about acanthus either. They are about ornament. The architecture books add one more thing, because you look at them and get an idea of what they built back then.
Maybe some books are good. I shouldn't say that about all of them. Still, I would not start with whatever is sold on Amazon, or anywhere else like it.

On this site we keep a free page on one old book of ornament, Ralph Wornum's Analysis of Ornament. Wornum wrote in English, which makes him the exception on that shelf. We also keep a page on Louis Quatorze ornament for carvers and one on ornamental carving design rules from 1847.
Which parts of the leaf should a reference make clear?
A good plate shows where the pipes run, where the eyes sit, and how the concaves tie together. Most people miss those parts. On this relief ceiling board I checked all three.
My pipe beautifully flows downhill, I said in part 3. A concave beside a pipe should go all the way to the point. I added one more concave in part 4, because those concaves are supposed to be connected all together, and then I stopped so I would not distract the main movement. One spot there was already too tiny, so I did not go deeper.

Eyes need the same care. During part 5 I went in beside the eye, because from that side you can press on a back wall with no problem. A 1 mm (about 1/25 in) #11 hooked out the rest. Part 9 had me talking about a half millimeter (about 1/50 in) #11 for another eye, and in part 2 a small micro tool, a Dockyard #8, cleaned out the inside of one more.
The center line matters too. I moved it over in part 7, then set a shallow concave right beside it with a #5, and I kept it shallow, because going too deep there would have been a big mistake. A lesson on the acanthus cross section covers the concave, convex, concave shape. In the same part I stopped for a second and said it plainly. I see the shape, and that matters.

What should you look for on an old leaf?
Four small places tell me the most on an old leaf, and I go through them in this order.
Start with the little triangles between the lobes. Like I said on camera, most of the time on old work I don't see those triangles crisp. They usually just round them off, and they probably used something like a gouge, or even a saw, to get that roundness.
My teacher in Russia, a fine-art master I apprenticed with at 16, taught me to think like a tool. I still do it with an old leaf. I look at a rounded triangle and ask which tool made it.
I can carve a crisp separation, and on this board I did in a few spots. That's okay too. The old work just leans the soft way.

Next, look inside the turns. I really like how they did that originally, with no sharp transition on the inside. Leaving it sharp is not wrong. I shaped one part of this leaf with a #2 at 12 mm (about 1/2 in), then said the inside still needed a #11 to clean it.
On a Byzantine acanthus you don't see those sharp turns, and where a leaf gets gold leaf, the smooth turn holds the gold much better. I carve that style in its own Byzantine acanthus course.

Then there is the small concave cut inward, just slightly. That is an extra detail they used to do, and in part 10 I gave one leaf exactly that.
Last comes the fine line work, the micro concaves along a center line. It's not on all acanthus leaves, by the way. And for some reason I don't like it when carvers go too deep with those lines.
Old Venetian leaves also carry extra separations inside a lobe, and workshop 14 explains why. Back in part 2 I carved small notches into one division here, because I really wanted to see some curliness.
Leaving a spot alone counts too. One spot in part 6 almost asked me for a slight concave, and I left it alone for now, because otherwise the leaf would get too stripy.
Here is what the old work shows, and what I did on mine.
| Detail | Old | Where | Mine |
|---|---|---|---|
| Triangles between lobes | Rounded off, probably by gouge or saw | Eighth part | Crisp in a few spots only |
| Turns inside lobes | Smooth, with no sharp transition left inside | Third part | A small #11 cleans the inside |
| Small inward concave | An extra cut the old carvers used | Tenth part | Added to one leaf, very slightly |
| Fine center lines | Found on some acanthus leaves, not all | Tenth again | Kept those lines shallow on purpose |
| Tiny shallow concaves | Almost nothing, yet the eye still reads | Fifth part | Left one tiny ridge, still readable |

Why can't a beginner see those details yet?
Those concaves and convexes are almost nothing in the wood, and at the beginning you don't notice them. That is normal, especially if you have never carved acanthus in different styles. The more of these leaves you carve, the more of them you see, and the more of those movements you see.
A #5 back bent, 10 mm (3/8 in) wide, carved one of those small convexes in part 4, and I said on camera that it is almost none. I know it's a small detail. It still counts.

One concave in part 5 is so shallow it is almost nothing. It still leaves a small, tiny ridge, and that ridge is readable by the eye. I did the same beside a separation in part 8, for one extra shadow that is almost invisible.
What you read there is shadow. I kept one undercut in part 1 shallow, but I still wanted to see that shadow. The last cut in part 12 came out beautiful and deep, and I said it will be really visible from the bottom, because this board goes up on a ceiling.
Movement is my word for how those small hollows carry the eye along the leaf, and workshop 26 shows what happens when the movements disagree.

How do you read a leaf in three dimensions?
Look at it from the side, and from a few angles. When I say a leaf is flowing, I'm talking about curvature, and it has to flow together in three dimensions. In part 1 a side view showed me one movement was not flowing nicely, and I took a #7 to fix it.
My own video misses things too. Part 1 opens with an excavation underneath that I called really deep. I knew you couldn't see it. My hands covered the view in part 4, because the ceiling part sat so close that there was no other way in. In part 5 I checked from different points of view and different angles and caught a couple of spots that stuck out too much, and the camera could not catch that. Can you see it? I asked that in part 11, and I hoped you could.

There was a hump in part 10 that you probably don't see on the video. I could feel it. I knocked it down with a concave and kept that concave slight, because a deep one would mean too many concaves.
When I'm not sure a spot looks good, I walk away and come back in a day or so. A lesson from the first part of this room covers that habit, and judging a flow line by turning the work is the same idea in another course.
My mallet fell in part 9, right in the middle of all this.

What should you carve while your eye learns?
Carve one small leaf from an old plate, then carve another in a different style. My Greek acanthus course is a fair place to begin, and the first Corinthian leaf lesson shows the leaf that sits on a Corinthian capital.
Go slowly where too much is going on. Twice in part 3 I said it out loud, I have to be careful.

Leave yourself extra wood while you copy. I kept material on one side in part 7, because I didn't know yet what I was going to develop, and it's easy to lose the material and then regret it.

When you want a whole ceiling, workshops 26 to 37 carry this board, with workshop 27 and workshop 29 on either side of this one. Tuition opens every workshop in the room.

Do you want your next leaf to look like it came off an old building? Find one old plate, study those four small places, and carve it slowly.
How it's done
- Pick the old shelf. Look for European books on ornament and on architecture before any carving manual. Many were printed in French or another language.
- Note the book's period. Each old book records one period's leaf, so a single book teaches you a single period.
- Trace pipes and eyes first. Follow every pipe to its tip, find every eye, and see how the hollows connect before a gouge touches wood.
- Study the small corners. Check whether the little corners where lobes meet are rounded or crisp, and whether the turn inside a lobe stays smooth.
- Carve two leaves, two styles. Each new leaf in a new style shows you hollows you missed on the last one.
- Check the curve by eye and hand. Look along your carving from the side and from a few angles, and feel for any hump a camera can hide.
Frequently asked questions
Are there good books about carving acanthus leaves?
A handful exist, though not many, and even a strong one may leave part of the leaf unexplained. I send carvers toward old European books on ornament and on architecture instead. Many were printed in languages other than English, and some only in French.
Why do old ornament books show such different acanthus leaves?
Every book froze the leaf of the period that printed it and nothing more, so one Rococo volume teaches Rococo leaves.
Which details matter most on an old acanthus carving?
Check the small triangles between lobes first, since old carvers mostly rounded them. Then check the turn inside each lobe, which should stay smooth. Fine line work shows up on some leaves and not on others, and I keep mine shallow.
What to carve next