

Alexander Grabovetskiy, woodcarver, School of Woodcarving · Published 2020
What does it mean when a wood carver says a part has to be higher?
Quick answer: Keeping a part higher is choosing which piece of a carving stays up while the rest around it comes down. In Venice Room 40.2 I made that call out loud: that spot needed a far deeper dig, so bringing the part lower made no sense, and it had to stay up.
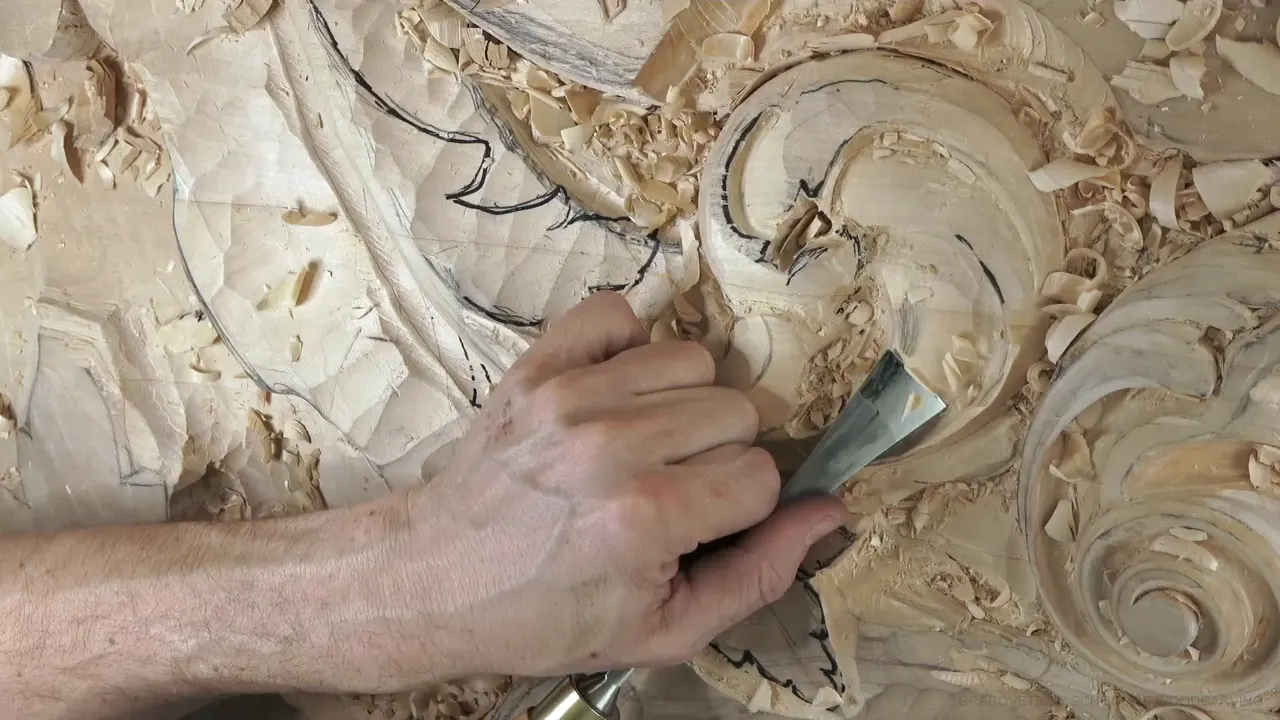

Higher is my word for the part of a carving that stays up while the wood around it comes down. In part 2 of Venice Room workshop 40 I said, "So that has to be higher," and the reason came first: "I have to excavate much deeper right here." In low and high relief carving, that call sets which shape sits on top.
Does your carving have one shape lying over another? Would it help to know which one stays up before the gouge goes in next to it? Then read how I made that call on this panel and on other pieces, with the reasons I gave out loud.
Most of wood carving is taking wood away. Here you'll get the moments I named a higher part on camera: in this part of workshop 40, on a furniture panel, the Hashemi flowers, a tray, a lily box and a few other Venice Room workshops. You'll see what stayed up, what came down beside it, and the one spot where higher turned out wrong.
Six short notes on higher
- Part 2 of workshop 40 kept one part up, since the wood right there was going much deeper, and a low version would not work.
- On several pieces I stopped and chose out loud which side would sit higher and which would go underneath.
- A leaf was to sit above a flower on the furniture panel, and the moldings were to go lower, under a leaf.
- Keeping a ridge high takes care, and the tool goes around it.
- To let a part sit up, I take the wood next to it down, sometimes a whole section.
- Once I thought a spot might look good kept higher, and it would not.

What did higher mean in workshop 40, part 2?
It meant one part stayed up, because the spot right there needed a far deeper dig. Getting there took a few turns, and I said each one out loud.
The part opens on a ridge I liked. I said I kind of liked it, then took the "kind of" back. Then I saw a hump that was a little too big, so I went at it with a number three gouge upside down, from one direction and then from that direction too.

Next came the middle line. I went back to my original idea to see where it was supposed to go, found the point, and said a division would go right there, with an eye. I could go really deep there, I told you, and I really didn't have to. The overall boundary came first in my plan.

Two things were coming for this spot, an eye and a much deeper excavation right there. A letter S shape was possible too, I said, and there would be another division.
Inside, I still had to make some divisions. But I saw no space left for that kind of division. Maybe I'd have to raise it much higher. And then, twice, I said I really didn't have to do it. Then I said I'd use a number 11 of 5 mm (about 3/16 in) to pre-establish that eye.

Why couldn't that part come down below the line?
The deep excavation right there ruled it out. I changed my mind out loud in this spot, so you can hear the whole thing.
I asked myself what I could do. I could bring this part down below the line, and that would give me a chance for an extra subdivision. So I thought that was what I should do. But no, I said, I'm not. I can't.
That spot still needed a much deeper excavation. With that, the way I had just told you would not make sense, and I said so twice. So that part had to stay up. Right after, I apologized in case I had confused you a little, and said I shouldn't have, since I hadn't done too much yet.

Outline it, I told myself. And this way too, I added, before the next word on the recording, which is wonderful. Starting to excavate deeper right there was possible as well, I said, and that is where the words stop for a stretch.
Do you raise a part to make room for more detail?
I didn't in 40.2. Even with no space left for a division, raising that spot much higher stayed only a maybe, and I let it go. Near the end of the part I was still not too happy that we got only one division there, but it was okay.

In Venice Room workshop 62 I went the other way. First I said I'd use a number 11 veiner of 18 mm (about 0.7 in), then maybe bigger, 30 mm (about 1.2 in), because I really wanted to exaggerate everything. What I wanted next was to raise one spot there, for the same idea: concave, convex, concave. I had plenty of material, and I was able to use it to my advantage.

How do you decide which side of a carving is higher?
I stop and choose before the tool goes in again, and I say why: on one piece it was logic, on another the look.
On the furniture panel, lesson 21 I was about to make a separation cut and wanted the right direction. I need to make the decision which side is going to be higher, I said, and logically this side had to sit higher than that side. One spot would stay somewhat flat. I wasn't going to take down either side there, only add more rounding, one side rounding one way and the other the opposite way. The separation cut would go on one side so the other could grow from underneath. I know it could be a little confusing at the beginning, I told you, and then I said I'd start with the eye.

In workshop 62, part 1, I had left approximately five millimeters, 3/16 of an inch, at a ridge, and we were going to need it. Then came the same choice. I believed it would look much better with this side higher and the main part going underneath, even though that tool was maybe a little too big. Okay, though. The plan was to outline it.
Back in workshop 3 I put it as this one supposed to be higher than that one. I wanted a full movement there, a full head of the acanthus, so a number nine was going to make one section a little lower, slightly lower, while still keeping my shell.
There were a couple of ways to go in lesson 22 of the furniture panel. One could lie on top, or the other. But logically this one was supposed to be higher, so the other could go underneath that line.
Which goes higher, the leaf or the flower?
On my furniture panel, it was the leaf. In that same lesson 22 I said I first needed to figure out which one goes higher and which one goes lower, and in this case the leaf would sit above that flower.
I sorted the rest out loud the same way. That flower higher than this one, the main flower higher too, one part on a secondary level and another on a lower level. My number 12 knife came next, one of my favorite knives, leaned a little inward to give some undercut right away instead of going straight down at 90 degrees.

In lesson 17 of that panel the moldings were going to go somewhat lower, because they run underneath a leaf, and I really needed to keep that leaf the high spot. The volute had to be a little higher, and another part a little lower. Step one would be just a knife cut.
Flowers and berries came up too. On the Hashemi flowers, lesson 19 I took one area lower because it gives more of a three-dimensional look, and the berries there are not on the same level. One goes lower, another higher. In lesson 29 of that course I first made a flower look like a donut, semi, not a real one, because some spots would be higher and some lower, and it was still preliminary. I used a number five, one inch (25 mm).
The lily box, lesson 4, had one section I still had to keep an eye on, since it would stay higher and another would go lower, and I said a separation cut would come first. We were not working the real details yet. Just roughing out.
Here they are side by side, with the reason or the next move I named.
| Piece | Higher | Next |
|---|---|---|
| Venice Room 40.2 | The part I thought of bringing down lower there | A much deeper dig there |
| Furniture panel 21 | This side up, logically, and that side lower | One side grows from underneath |
| Ridge in 62.11 | A ridge I did not want to lose | Go around it, more careful |
| Hashemi flowers 18 | This part, sitting higher than another one there | A separation cut, V tool |
| Volutes, workshop 157 | The volutes, which really needed more height there | Take that section down |
| Floral panel 10 | A ridge to stay higher than its opposite side | That opposite side goes down |
| Spot in 87.5 | A spot I hoped would look good kept up | All of it gone |

How do you keep a ridge higher while you carve beside it?
Carefully, with the tool going around it. In workshop 62, part 11, I had a number seven of 14 mm (about 9/16 in), the one I called half an inch, and I told myself to be more careful now.
I didn't want to lose that ridge. I wanted to keep it higher, keep it high, or else I'd lose the transition upward. With the same tool I went around to exaggerate it more and more. And I owned up, I have to be really careful how I'm doing it, and I wasn't. With the corner of my tool I could start the uphill cut, I said, and the side we were exposing will be visible from the bottom, a really important part, so I'd finish it later.


For the tray, lesson 3, I asked you to remember the 60 and 40 of the golden ratio, seen from above even where it might not look logical from the side. The ridge was to be a high spot, with the pipe wrapping around it. I was catching the grain there, kind of a danger zone if I attacked from that side, and I still did it, since I didn't want to block the view. Every concave gives me a shadow line. See that shadow cast? That's what makes it beautiful.
Over on the floral and molding panel, lesson 10, I was about to carve downhill, because that ridge stays higher than the opposite side and the opposite side goes down. But first, I said, let me fix the overall movement. And maybe I could go ahead and lower that petal of the future flower. It goes on top, I know, but the middle of it will still be higher.

Lesson 18 of the Hashemi flowers had one part staying higher than another, so I needed a separation cut with the V tool, my number 16. I went kind of deep, keeping an eye that I didn't go all the way down, and left about half an inch (13 mm) between my back and that V cut. Then I'd try to bring it downhill with a number seven, one inch (25 mm).

What do you take down so a part reads higher?
The wood around it, and sometimes a whole section. Workshop 157 had a whole section I needed to take kind of down, because the volutes really needed to sit higher. Those guys, I called them.
My plan was my number two again, upside down, to blend it into a beautiful convex, a fillet, then take that ridge out and shave it. A little later I said it looks really good. A number six came next in my plan, before a five.

Early in the room, in workshop 2, a claw was going to stay higher anyway, which meant I could go ahead and chop that side. That side goes from underneath the claw, and I could go really low if I needed to. A little after that I said you'd probably know by now why I left so much material right in the middle.

Carving the modern acanthus, lesson 7, I was still slicing even while I scooped an undercut out, and I said, "Obviously this piece needs to be higher. It goes deeper inside." Keeping some thickness mattered, because we don't want to create a really fragile piece.
And on furniture panel 34 I had to lower the sides of a petal so this part could be the convex it should be, which means it sits higher, with concaves to do that. The number seven I picked up there is not really a seven. It's more like seven and a half, a fishtail, and I kind of like it.
Can you keep a part too high?
It can happen, and in workshop 87 it did. A big gouge was ready to remove lots of waste, then I stopped to measure the opposite side first, and it matched.
All that wood had to go. I knew from the beginning it was not the final height. I thought maybe it would look good if I kept it higher. But no. It was not going to look good.
This part of workshop 40 opens on the same kind of fix, the hump that got a number three upside down. Near its end I said I'd probably take one more part down below like this, with an eye there and the movement going a little in. Workshop 47 gave me one more, where one division would be the higher one, so there is an eye.
Where will your high spot sit?
Does a shape on your board lie over its neighbor? Should that one read on top? Then make that call first, and say why, the way I did on that furniture panel.
Watch me talk it through in workshop 40, part 2, and in the other parts of that workshop. The Venice Room course for workshops 38 to 49 holds the whole run, and if you want every lesson in one place, start here.
How it's done
- Pick which side stays up. Before my separation cut on the furniture panel I made the call: this side up, that side lower.
- Outline the shape. After choosing in workshop 62, I said I'd just outline it. Back on 40.2 I told myself to outline it, this way too.
- Go around the ridge. A number seven of 14 mm (about 9/16 in) went around the ridge I wanted higher, and I had to be really careful.
- Take the section down. For workshop 157, a whole section had to come down, my plan being a number two upside down, so the volutes could sit higher.
- Leave wood at the back. Hashemi flowers, lesson 18, is where I left roughly 1/2 inch (13 mm) between my back and the V cut.
- Check the height. Before the big gouge in workshop 87, I measured the opposite side, and that height was not final.
Frequently asked questions
Why did a part in workshop 40 stay higher?
The spot right there needed to go much deeper. Bringing that part down lower would have given me a chance for one more subdivision, and for a moment I thought that was what I should do. With that deep dig it would not make sense, so I said that part had to sit higher.
Should you choose which side is higher before you carve?
On my furniture panel I did, right before a separation cut, because I wanted it going the right direction. One side would sit higher than the other, so I planned the separation cut on one side and let the other grow from underneath. Part 1 of workshop 62 brought the same choice, and I said I'd just outline it.
Which part stayed higher on the furniture panel?
My leaf was to sit above the flower, and that flower above another one, with the main flower higher too. One part was for a secondary level and another for a lower one. Lesson 17 kept a leaf as the high spot, with the moldings planned lower to run underneath it.
What to carve next