

Alexander Grabovetskiy, woodcarver, School of Woodcarving · Published 2020
What does a wood carver mean by "extend"?
Quick answer: In Venice Room 68, part 10, I said one piece probably needed extending a little bit, because it felt like I had to make this side and this side equal. Other lessons use the word for a movement, for a leaf, for a line and for a part left on.
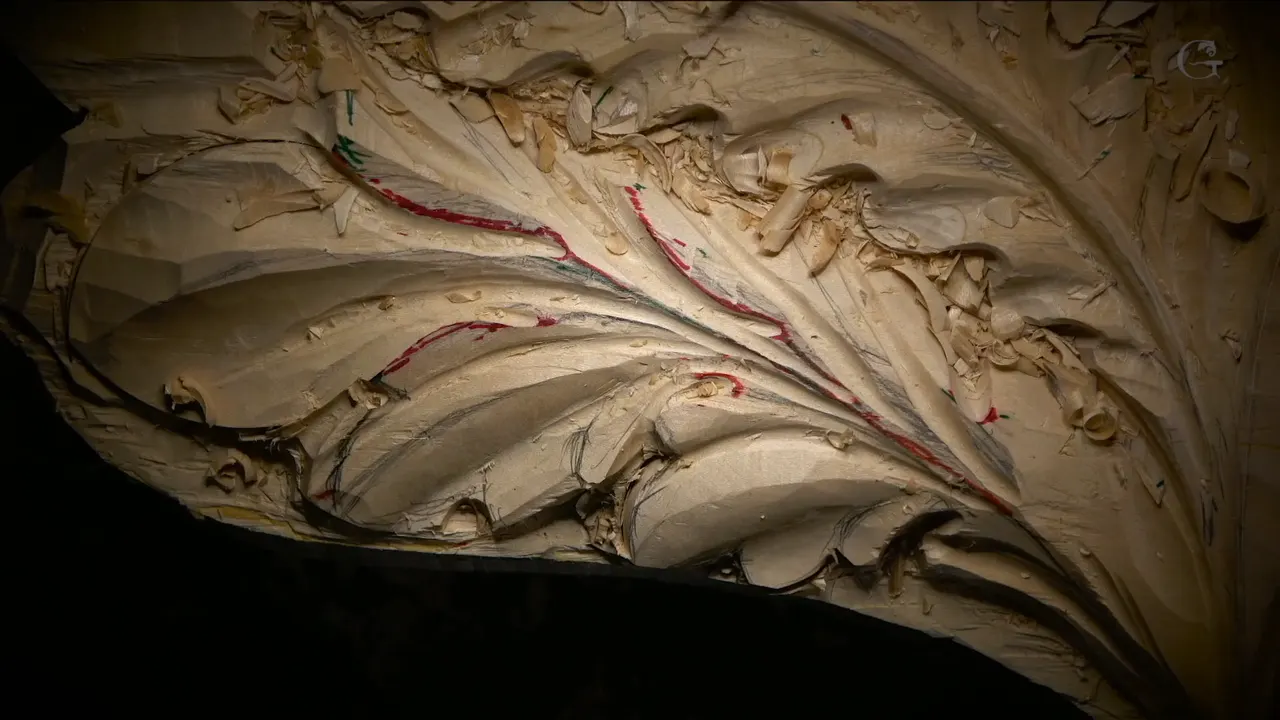

When I say extend, I mean carrying a piece farther. In the tenth part of Venice Room workshop 68, I said one piece probably needed to be extended so that its two sides would be equal. Other lessons of mine use the word for a movement and for a leaf, and once for a part of the wood I left on.
Ever stood over a wood carving and asked yourself how far a shape should run? That video is a short run of work. My answer is in it, and from there this page follows the word through other lessons of mine, one by one.
What did I say about extend in the part?
My first words were "Okay, number five." Next, "And 1 inch, approximately about 25 millimeters, something like that, okay? Doesn't have to be exact." One inch is 25.4 mm, so my figure and the conversion agree.
Before the word came up I was explaining the bottom of the carving. I left approximately an eighth of an inch (about 3 mm) there, because later I planned to clean it up. Going too deep, I said, would leave some tool marks on a layer. "I don't want to see tool marks."
Here is the line this page is named for. "So I need to extend probably this piece a little bit this way. So just feels like I have to make it more this side and this side equal. So that's what I'm going to do and extend that side right there."

Every verb there is a plan. I added that I think it will make more sense. Then came "And go around," and after that a single word, "Beautiful."
What did I say after that side was extended?
"See, it's nothing complicated at all." I kept going: "It's just the same all the time. At least in this style of acanthus." I looked ahead as well: "It's beautiful acanthus. But there's even more beautiful. Wait until we're going to do a French one. Someday."
Blending came next: "Here you go. So now I need to blend a little bit that movement." Later in the part: "Right. That's good. So at least it just looks equal, like I said." Then "Okay, let me start developing that side."

Divisions came up next, and so did a pencil that had gone missing. "And maybe I could already develop divisions on the main end of acanthus, if I'll be able to find my pencil, because my pencil disappeared on me." I found it. One more division would run on the opposite side, and then, I told you, it would look more like acanthus.
Tools followed. Number six or number five would work, I said, but I think number six will work better, like 5/8 of an inch, which is about 16 mm. I did not want to go too deep, "because I really hate to do those tool marks, and I've done them too many times."
Then "Okay, let me get number five." Number five, I thought, would be better in this case, and I said "number five that way and number five this way." About the fit, I said "See that? It just fits perfectly." and "Absolutely perfect fit."

The part closes on a size and a switch. A small number five, approximately 5/8 of an inch or even half an inch, would work, but I would just use the 5/8 to chop this side. Half an inch is about 13 mm. Soon after: "But number five, it's not the best tool for it." I should take number seven and 1 inch, about 25 mm, I said, and go gradually up. My last question was "Can you see acanthus is born, almost?"
How far should a movement run?
Venice Room 60.1 puts it as a question: "But how far I should extend that?" My answer was "It should be probably somewhere right here." It would look much better, I said, and it would become part of this main movement.

Two spots were on the table. Higher up, I could get the movement there, and excavating and creating its details would be a lot easier for me. The other stopped short, and that would give me a really good shadow. The piece will be visible, I said, and how you look at it is also really important.
Workshop 56, part 12, ties the question to the overall design. "But I also have to be logical how far this is going to extend." The movement had to fit the whole design. My way to find the end was to pick a middle spot and draw an arc from this point, and I said "And right there, it falls right here."

Over in lesson 41, part 1, it is an offer without a fixed answer. "Well, actually, no. I can actually extend that all the way if I need to." That would be really nice, I said, and I could also carry one piece out to the next one, low and gorgeous.

Next came a plan with a first step: "this part going to go underneath." An outline could come from "just a number 11". Going deeper there was possible, I said, because a twist was coming.
How to show one part was the topic in workshop 13, part 10. "I think I should probably extend just like that and make this as a part of that one, this moment, and maybe move this one a little bit inside." I added that it doesn't make probably too much sense right there, but you'll see how I will develop it.

Lesson 20, part 4, calls the same need a little problem. "I need to extend that little farther. It's not a problem, but something I need to address pretty much right away." Next I said "I can create the eyes", and that this one would be a little smaller eye, with maybe number 11 and 3 millimeters (about 1/8 in).

What does extend mean when a piece goes on the ceiling?
A part that goes on the ceiling, pretty much, comes up in workshop 55, part 3, where I said "So that part continues and I have to extend actually even higher, glue above just another board". Another line from that part: "I know it doesn't make sense as of now, but it will."

Lesson 52, part 10, says it in the middle of a talk about undercutting. The piece would be installed close to the ceiling, I said, and I still had more to extend. It would go even higher, okay, reaching the ceiling itself.

A livestream has it too. On the April 2020 livestream, I called one section "about 10 feet long" (about 3 m), and said corbels would come on the sides, big ones. Then "Also, I have to extend up." The next line was "It's going to go to the ceiling."
Who would touch it came next. "Only people who clean, cleaning crew are going to clean it." And I still had to watch "how fragile I make" it. A vacuum cleaner or a duster, I said, was probably how they would clean it.
Do I extend first, or undercut first?
Extend and undercut sit close together in workshop 67, part 8. It was "actually a good point for me to actually get some of the leaves on inside right away and then extend", I said, and that is probably what I will do. Then "But before that, I need to still undercut." My tool for that undercut was "Quarter-inch number nine, that's what I'm using." A quarter inch is about 6 mm.
The word shows up beside a concave in workshop 70, part 9. "I'll be able to actually extend". And then a big concave right there, and an undercut underneath of this line, both stated as plans.

The Hashemi flowers course, lesson 31, part 1, offers it with a concave cut. "But what I could do, I could actually extend this small section underneath of this one and make a concave cut first." I'll take a number nine, I said, for "A small concave cut, like a blending." Then came a plan for an undercut with the V tool.

The Furniture Panel course, lesson 20, part 7, has me saying "Although, I actually can extend that reach" and that it would make even more sense. Then "Let me outline", with the work going underneath. My tool for the outlining was number 11 and 1 millimeter, "one of the most useful tools for furniture carving." One millimeter is about 0.04 in.

The Roman acanthus course, lesson 7, part 2, makes it a plan for later. "Later on, once I'm going to undercut, we're going to extend this leaf underneath, and then it's going to make sense. Right now, it doesn't make too much sense." You can see that leaf, I said, from the side.

When do I say no?
Part 1 of workshop 74 is a no. I was really happy with that movement, and my question was how I want to see the opposite side. Then a firm line: "I really don't want to extend any movement this way." I ended on "Really don't."
Lily Box 11, part 5, answers a question. "Oh, by the way, I need to answer your question, probably, why do I have that part extended, and why I didn't cut around and just keep this." The answer was about holding. "If I would just cut or scroll that part and without that part, it would be hard for me to hold it. But this extension will serve me as a holding device, okay?"

The extension lets me clamp it, rotate it and "work from different positions just because of that." I also called something there "really thick", and extending a lot above was not needed: "Really don't need it."
Can I extend a line, and what is it for?
Workshop 155, part 1, is about a line and a 45. I said you have to hold it perpendicular "just to make sure you got the right distance". The line needed carrying out to a point, with the other line taken up. Another 45 is needed, I said, just to replicate whatever the miter are supposed to be.
A jigsaw comes into lesson 154, part 3. "I want to extend it, and the best way to do that, of course, I use just a jigsaw, and that's not always accurate." My next idea was to put the line in with the pencil, "So that way I know my distance." It helps me to measure, I said.
Carving Floral and Molding for the Panel 1 uses it for a rod. Some stuff was in my way, and I had to change the position of how I measure, and my words were "So I can extend my rod". I would first try whether it works. Then "That would be probably the best position to extend that rod."
On the Hazelnuts course, lesson 5, part 1, I was giving measurements, and I said "This is also about an inch and a quarter to this point" (about 32 mm). Then "Maybe I can actually extend this one guy also." And the end of my husk was to be approximately 16 millimeters, about five-eighths of an inch or so. Five-eighths of an inch is 15.9 mm.

Can extending save a chunk that was a little too big?
The Lily Box 6 lesson, part 1, uses it on a chunk, which I called "a little too big. Originally, it doesn't go all the way." A little change, I said, and with that material in hand it would look good. Then I said I'll use a small number five for the outlining.

In Lily Box 13, part 1, I said of one piece: "this one, I extend it with the leg."
A table of the extend lines
| Lesson | What I said about extending | Near it |
|---|---|---|
| Venice Room 68.10 | One piece, so that both sides come out equal | equal |
| Workshop 41.1 | That piece carried out to the next piece, low and gorgeous, if I need to | gorgeous |
| Part 3 of workshop 55 | Even higher, with another board glued above it | ceiling |
| Lesson 52, part 10 | More, even higher, for a piece that goes up near the ceiling | fragile |
| Workshop 60.1 | The length of a movement, and what stopping it gives me | shadow |
| Workshop 56, part 12 | The run of a movement, kept in line with the overall design | logical |
| Workshop 20, part 4 | That little farther, a small problem I need to address pretty much right away | eyes |
| Workshop 67.8 | The leaves inside, extending after, and the undercut I still need | quarter-inch |
| Hashemi 31.1 | Underneath, a small section, with a concave cut first | V tool |
| Furniture Panel 20.7 | That reach, followed by an outline that goes under | underneath |
| Workshop 155.1 | A line, held perpendicular for the right distance, and then a 45 | miter |
| Lily Box 11.5 | A part I had left extended, which gives me something to hold | clamp |
Where can I watch it happen?
Part 10 of workshop 68, in the Venice Room Part 6 course, has the plain version: one piece, and both sides equal. Come and watch the acanthus come along in Venice-style wood carving.
How it's done
- Leave a layer at the bottom and watch the tool marks. At the bottom I left approximately an eighth of an inch (about 3 mm), and later I planned to clean it up.
- Extend one piece. The plan was one piece, a little bit this way, and then that side right there.
- Match the sides. One side and the other were to be equal, and later in the part I said it just looks equal.
- Ask how far. In another lesson I asked how far to carry a movement, and I gave a probable spot.
- Check the design. Another time I said the end had to be logical, and in step with the overall design.
- Plan the undercut. The extending came after the leaves went in, and the undercut was still to come first.
- Say no to extending one way. In one lesson my line is against extending a movement one way.
Frequently asked questions
Which piece did I extend in workshop 68?
A piece, probably, and only a bit. Both sides had to match, so I planned to carry one side farther. Later I said it looked equal, like I said.
Where does a movement end?
I asked that in workshop 60, part 1, and gave a probable spot. Carrying it higher would be easier to excavate, I said. Stopping it would leave a really good shadow, and I weighed the two.
Can a piece reach the ceiling?
Workshop 55 has me saying a piece must go even higher, with another board glued above. A piece in workshop 52 was meant for a spot near the ceiling, and I said to be careful how fragile I make it.
What to carve next