

Alexander Grabovetskiy, woodcarver, School of Woodcarving · Published 2020
What does a wood carver mean by "divide more"?
Quick answer: In Venice Room 68, part 12, I said "divide even more" near the close. Other lessons use that word over acanthus leaves in several courses, Greek, Roman and Maine among them. Two of them say I could divide, but I don't have to.
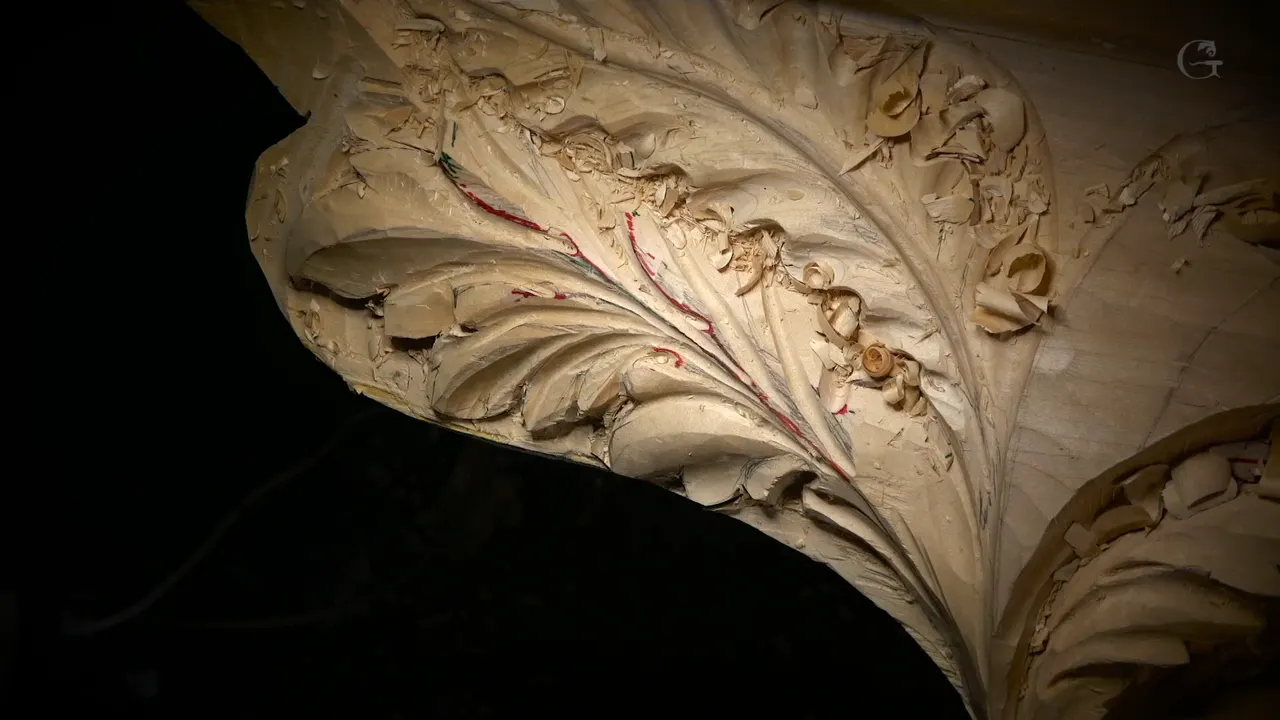

In the twelfth part of Venice Room workshop 68, I talk about dividing a leaf right up to the close. My other lessons use that same word over acanthus leaves, and in a few of them I wonder out loud whether to add another division.
Ever looked at a carved shape and wondered how many more cuts it can take? This page starts with one video of mine, line by line. After it, I follow the word through other acanthus lessons, from several of my courses.
Which lines came before the divide line in part 12?
It opens on one side of the leaf. I think I should do something else there, because I kind of like to bring another concave all the way this way, and make the side "a little lower maybe." Next came "Maybe yes, maybe no," then a plan to blend a little and make the decision after.

Then came "let me think what tool I should use," with "probably number three" as my pick. The movement I wanted was one "curling downhill." A part close by needs to be excavated also, I said, and I might curl it a little bit more.
For cleaning "that mess," my plan was number 11 at 7 millimeters, close to 0.28 in, "again." Dropping it even lower on this side of the movement was another maybe.

One ridge left me not too happy yet. I had not developed this side yet, so maybe it was a little too early to worry. A little of it I planned to chop. "We don't need that," I said. As for the tool, my plan said probably a back bent.
What was my point with the concave and the convex?
My point, I said, is to make concave and convex: a concave on one side, a convex, and then another concave. A slight concave, convex, concave, I called it, but "it's going to catch the light."
Next I planned number 11, 7 millimeters. Then came "Okay, good," and "That is actually good, except one of the parts I'm not happy yet." Of it: "I still going to divide that in multiple divisions."

Running that concave to its full length was undecided, "but maybe not." For now I would leave it, and we'll see. A bigger tool was the next idea, number 11 with 15 millimeters, roughly 0.6 inch, for a cleaner cut.
Then I said it looks much better. Still, "that is probably a little too small," and I need to use 20 millimeters (about 0.8 in) to clean this movement.

The end of the part has the lines this page is about. "And now I going to divide even more." After that: "So it's pretty much all those concaves and convex." Next came a line about the limit: "whatever to the extreme you want to take." And once more: "It's all about divisions."
Three spots follow in a row, named one by one: right here, right there, right here. All of it will be divided, I said. The closing line is a plan for one more spot, "somewhere right here."
Did workshop 68 point the same way in parts 9, 10 and 11?
Part 9 gives a hint. The leaf will still get more divisions, but it's already showing up, I said. At least I am able to see what is going to happen.

Part 10 starts that side with "let me start developing that side," and a maybe: I could already develop divisions on the main end of the acanthus, if I find my pencil. It had disappeared on me. "And yes, I found it."
After the pencil came "that is going to be the point," and a plan for another division going like this, and one more on the opposite side. Then it will look "more like acanthus."
Part 11 has its own plan: other micro divisions, which will help me a lot. Another division right here is also important, I said, but before it I still have to attack and clean it.
The same part names a deeper excavation inside, on both sides, with the smaller one: "maybe just 3 millimeters," close to 0.12 in, like an eighth of an inch.
Where else is "divide" over a leaf in my lessons?
Venice Room 49, part 7, puts it as a rule of the leaf. Later I will divide that further, I said, and "it's going to be divided in three, all of them." That way I can develop any movement.
I called it the principle of what you see everywhere else on the piece: the main divisions, then the subdivisions, "and even smaller divisions."

In lesson 4 of the Grinling Gibbons class in Maine, part 1, I ask "See those three lines?" and call them the main subdivisions. Inside each of those three I plan to subdivide more.
Part 2 of that Maine lesson says how far it can go: "if you want to be really crazy about it," you can subdivide even more, inside of those subdivisions you already did. For "a more like a parsley look," I said, we have to just do a cut like this.

The Greek acanthus course, lesson 1, part 2, has me on a big leaf, with a plan to follow the flow line and subdivide right here. I also said I have to divide again, and make my flow line following this way. "Those are my main flow lines," I said. Its beauty, I said, is "all about pipes and eyes."

Part 3 of that Greek lesson has "let's divide it again in five," followed by the words "Another eye." The Roman acanthus course, lesson 1, part 2, has "Even more pipes," and in the same part, "let's subdivide even more."
I know it looks probably complicated at the beginning, I said, but it is not as complicated. It is "just about the symmetry," how symmetrical it will look, right side to the left side. And let's add another line, I said, about one eighth of an inch (about 3 mm) away from the base.

The Tray of Blessing course, lesson 3, part 3, says not to put too many marks with the pencil, "because you know, see how that becomes dirty." Indicate where the point goes, I said. Right there we are going to subdivide further, and probably this one also.

Part 1 of lesson 12 in the Floral and Molding course has me saying "let me see what I've got, how many divisions." I had multiple divisions, "not just the main ones." There will be three main ones. I will subdivide those.
Another round of subdividing is needed, one more time, I said. Within that part, I do not have to make that subdivision, and "I think that is plenty."

When did I say more divisions would make it clearer?
Workshop 63, part 11, is where I said "maybe I can clean this section right here." More divisions right now, I said, and a lot more sense after. My words: "Let me get my number 11 and 5 millimeters" (5 mm is about 0.2 in). Then: "Cut down. Relief those parts."

The shape was "already looking different," and I said I like how it looks. Later in that part: "I could actually divide even this, but I'm not sure if I should or not."
For that cut I said number 11 in this case, and three millimeters, one-eighth of an inch, "that's what I'm using." Three millimeters is nearly 0.12 in.
Take workshop 53, part 3: "that is a good development. But three divisions is not enough," and "I really need to make more divisions." Next: "let me think how I can do that."

Workshop 52, part 3, has "I am ready actually to create more divisions" at the top of my acanthus. For you to see better, I said, I could use just a marker because of the light. After placing them: "it has to be uniformed to the overall design. So for me, it is important."

There will be more on this edge, I said, "but for now it's okay." Part 9 of workshop 52 has me saying the leaf is not supposed to look finished yet, but I can see that I'm able to create even more.
Workshop 74, part 9, has "now I have to just create more divisions," one of them this one. I was using a number 11, 5 millimeters, "3/16 of an inch," and said "I'm going to just excavate." Five millimeters is about a fifth of an inch.

Did I plan a division for later, in other lessons?
Workshop 26, part 1, has a doubt: more divisions right there, or not? If yes, I said, the pipe has to come the full length that way, and the subdivisions go like that. But originally, I want to make it a long movement.
Workshop 34, part 8, has an eye with another division beside it. "I could actually give more divisions later on," I said, and "That is actually really nice." And: "I probably have to do couple times and give more curliness to this movement."
Over in workshop 32, part 10, the inside part is going to go below, "but I still want to see a lot more divisions." Much nicer, I think, if we put multiple.
Workshop 48, part 12, says it with a limit: "Even if I'm going to create some more divisions, I still want to make sure everything is just gradual."
Part 11 of workshop 49 is a plan again: a lot more divisions, then an excavation underneath, then a smooth transition, and a finish. Next time, I said, you will probably see it finished.
Workshop 52, part 2, says a subdivision comes later, with the part above it. Further divisions are planned a little later, right there too.
In part 7 of workshop 53 I create the eyes of the acanthus and "some more divisions," at least on this part. Part 3 of workshop 53 adds that probably another division goes like that, to the eye you don't see. Workshop 59, part 1, has "I need to get two more divisions," with a look at the space first, and a plan for a little smaller space than the one between that point and this point. Part 5 of workshop 59 has some more on a small piece.
Do more divisions bring more curl?
Workshop 13, part 10, names a technique, and subdividing a little more would "make even more curliness." The same thought, with micro movements that will give me even more of it, is in workshop 56, part 1. Ahead of it comes a plan: a division going in from the eye.

Workshop 64, part 11, has "micro division to give extra curliness." Before that comes a plan for another division downhill, and one more right here.
In that stretch, too: "I could actually go to extreme and divide even right here. But I'll see if it's necessary or not."

Workshop 47, part 1: "I'm still going to have divisions," I said, "more divisions, I should say." A pronounced S shape was planned right there, with a later divide of that too.
The Furniture Panel design course, lesson 14, part 5, has me planning a little more of them, maybe a little more curliness and more movements. It is only the indication of the movement. Once we carve it, I said, it will show exactly how it should look.

Do I always add another division?
No, and workshop 49, part 12, has both kinds of line. It opens with "Let me just do more divisions, nicer movements a little bit." Further on, I said I'm not sure if I should make more, and "I could divide, but I don't have to." Here I also said I have to create the idea because "it cannot have a long part like this without any subdivisions."
A table of my lines on dividing
| Lesson and part | What I said about dividing | Word nearby |
|---|---|---|
| Venice 68.12 | Several spots to divide, one by one | concaves |
| Venice 68.11 | Micro divisions, a big help | excavation |
| Venice 63.11 | Divisions now, so it makes sense | relief |
| Venice 64.11 | I could divide even right here | necessary |
| Venice 49.7 | All of them divided in three | principle |
| Venice 53.3 | Three divisions is not enough | enough |
| Venice 52.3 | More at the top of the acanthus | marker |
| Venice 74.9 | More, with a number 11, 5 mm (about 0.2 in) | pipes |
| Maine 4 | Inside of those three, subdivide more | parsley |
| Greek 1.3 | Let's divide it again in five | eye |
| Roman 1.2 | Even more, just about the symmetry | symmetry |
| Floral panel 12.1 | Subdivide one more time, then I think that is plenty | plenty |
Where can I watch it happen?
Part 12 of workshop 68, in the Venice Room Part 6 course, has the plain version: a concave and a convex first, divisions after. Come and watch the gouge work on the leaf in Venice-style wood carving.
How it's done
- Plan the concave and the convex. In part 12 my point was a concave on one side, a convex, then a second concave.
- Check the cleaning tool. Part 12 calls for 20 millimeters (about 0.8 in), following the remark about a tool probably a little too small.
- Mark the spots. I named three places in a row, and then a fourth.
- Pick a small tool inside. Part 11 plans an excavation on both sides, with a smaller tool.
- Ask if it is needed. Workshop 64 asks if it is needed, and workshop 49 leaves room to skip it.
- Look at the shape again. Workshop 63 has the leaf changing after the cuts.
Frequently asked questions
What does workshop 68, part 12, say about dividing?
Part 12 closes with three spots named one after another, and a last one "somewhere right here." Before them came the plan for a concave and a convex.
What led up to the divide line in part 12?
My point, I said, was to make concave and convex, with another concave after. I added that it will catch the light, and that a bigger tool is needed to clean one movement.
Did I plan the divisions earlier in workshop 68?
Part 10 has a maybe, that I could already develop divisions on the main end. Part 11 says micro divisions will help me a lot.
What to carve next