
Alexander Grabovetskiy, woodcarver, School of Woodcarving · Published 2025
How do you carve a tray with a grape leaf?
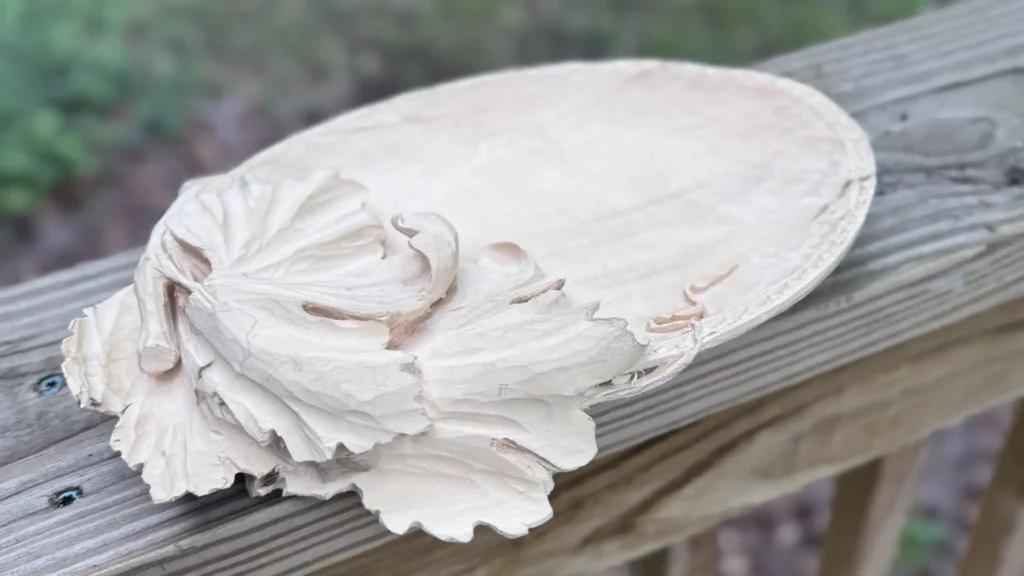
Quick answer: A carved tray starts as one block of 8/4 basswood, 51 mm thick or 2 inches, and it finishes near 11 inches long, 280 mm. You dig the bowl down an inch, 25 mm, leave a border for the rim, then carve the grape leaf and its vine out of the waste you left standing.
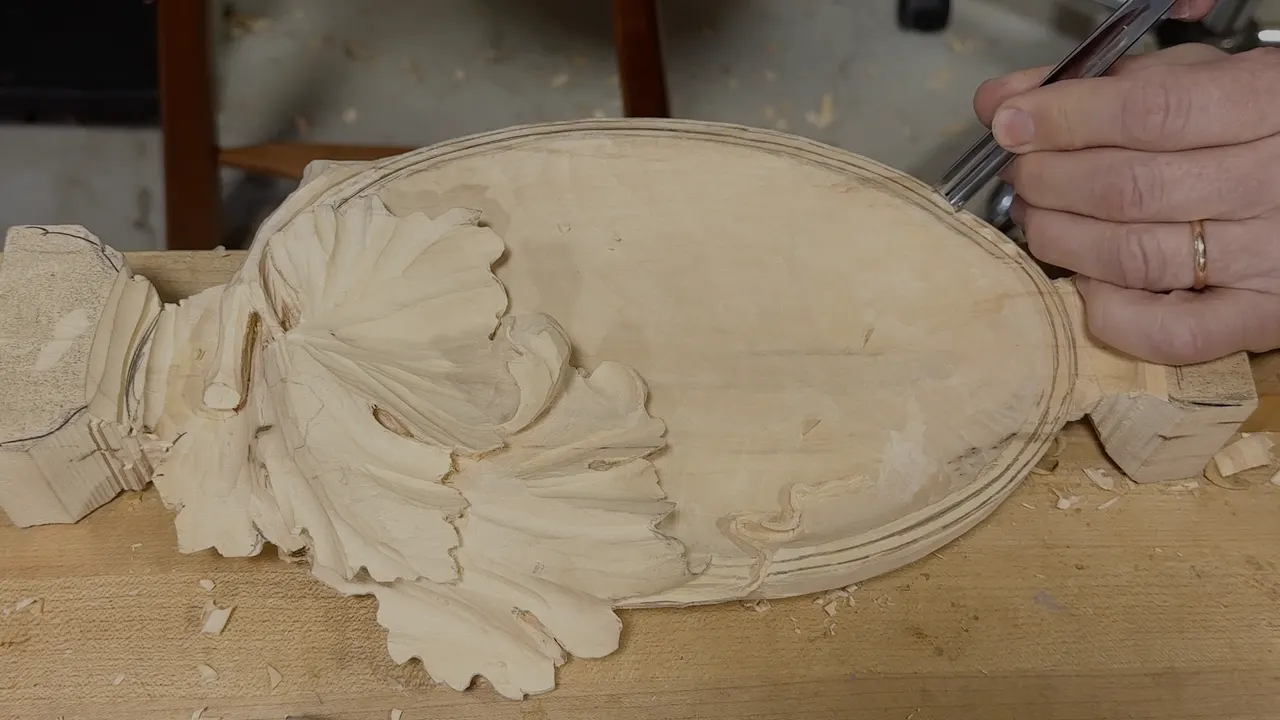
Ever tried hollowing a bowl from a solid block, and wondered how far down you can go before you come out the other side? Want a leaf on the rim that throws a real shadow across your dining table? We carved this tray over eight workshops in a class in Michigan, and I am going to give you the real numbers.

What wood do you use for a carved tray?
Eight quarter basswood, 51 mm thick, which is 2 inches. The tray comes out at 280 mm long, near enough 11 inches, and it is carved full size off the drawing, one to one.
American basswood, lindenwood, limewood. One tree, three names. Soft enough that a sharp gouge slices it instead of fighting you, and soft enough to soak with resin if a spot turns fragile.
In the last workshop the grain on mine came up looking like maple.

Why is a grape leaf carved on a tray?
This tray is about abundance, and grapes have stood for abundance for a long time. The shape comes off a Cabernet Sauvignon leaf. Five lobes on it, the kind that grows over a real vine.
In class I called it a donation tray, a catchall, even a cookie jar.
Old grapes are on my mind while I carve one. Georgia and Armenia have their own really ancient forms of the grape, and some of the best wine I have had was from Georgia.

Can you hollow a bowl out of one solid block?
Work from the outside in, crossing the grain, and keep a border of about 10 mm, three eighths of an inch, untouched the whole way around. The border becomes your rim, so no tool touches it on day one.
Go down in two steps. The first takes you to an inch and a quarter, 32 mm, then on to near an inch and a half, 38 mm, until the edge is in your way. Keep digging past that and you only create a problem.
Step two starts with a pencil line 18 mm down from the top, a shade under three quarters of an inch. Then all the wood above that line comes out.

Don't raise the handle at the start of a pass. Lift it and you dig in too deep at the beginning, or you build a wall at the edge, and either one is really hard to clean up. Keep your bench dogs low too, or sooner or later you hit one.

What does bosting mean in wood carving?
Bosting is the first stage, where you take the mass out and set the whole shape with no detail in it at all. English carvers say bosting. I say roughing out, or hogging out.
Reach for the biggest gouge you own. Mine is a number 9, 20 mm wide, a shade over 3/4 inch. A 9 is a clean half circle, and I call it the pure American smile. Turn it over, pure Russian smile. The 7 is a German smile, shallower, and a 2 is the Chinese smile with almost no curve left. Both stamped numbers mean something, the sweep first and then the width in millimeters.
Treat your tools like soldiers and yourself like the general. You give the order, the tool takes the ground.
Carving makes no dust. All day long you make a pile of expensive chips.

What is a slicing cut in wood carving?
A slicing cut is one where the gouge rotates as it travels, so the edge starts near one corner and escapes at the other. Start on the left of the tool and finish on the right, or the other way round. Both are right.
People set the flute up and push instead. Think about what the tool has become. A wedge. You push the whole wedge into the fibers, and that is not good.
I let the tool do the work, because tired and frustrated both come out of pushing. My hands carry no blisters and no calluses, and I do not need them.
One more move is worth learning early. Carve, step back, carve, step back, half an inch at a time, 13 mm. I call that the back stepping cut, and a molding plane runs the same way. You never start at the beginning. You start at the end.

Should you carve with the grain or across it?
Across the grain, almost the whole way, and especially while you are learning. Run with the grain and your edge picks up a fiber, follows it into a micro crack you never saw, and pops the whole thing out.
Keep the grain direction in mind before your first cut. That first cut is really important.
I break this rule myself, and you watch me do it. Here and there I carve against the grain, but my tool is sharp and I am okay with that. When the wood starts fighting, stop digging. Flip the piece and come at it from the other side, as many times as you wish. Nobody is timing you.

Why do carvers leave little legs on a carving?
Little legs sawn into the blank hold the tray to its board for seven of the eight workshops, and they come off in the last one.
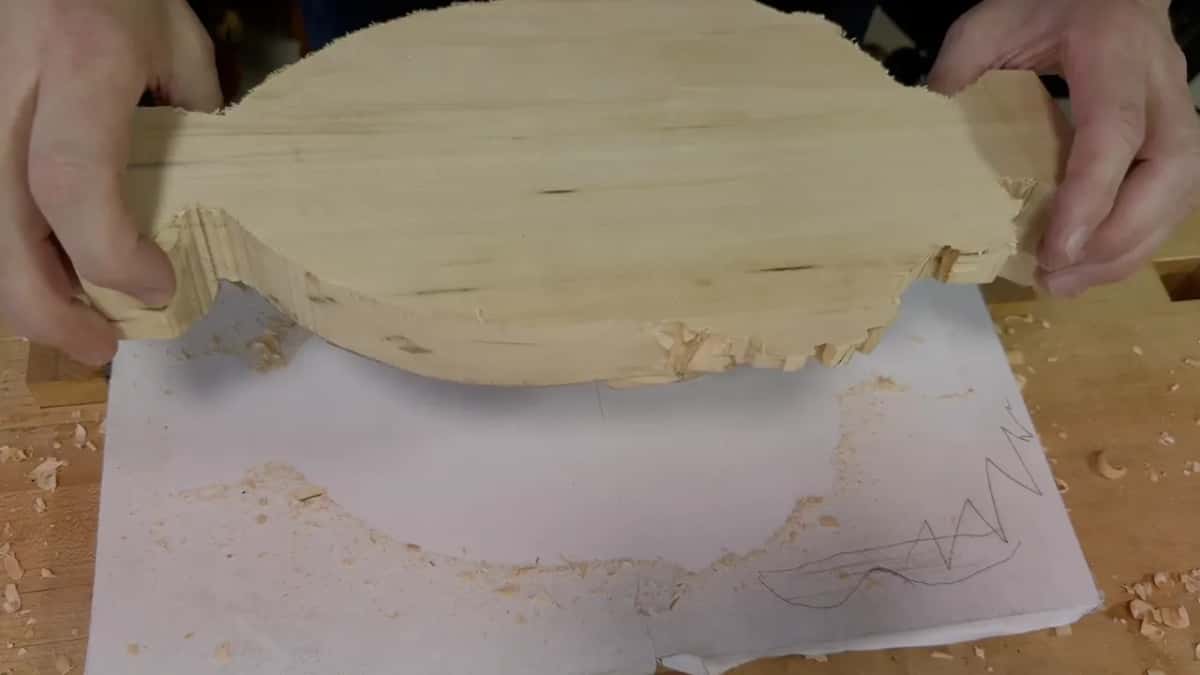
Legs earn their keep twice. While the bowl is coming out they hold everything still. Later, when the piece flips over, you clamp on the legs and the carved face never touches the bench.
On day one I said it twice in a row. Those legs stay. Those legs stay. In the last workshop one of mine stood in my way, so I chopped a little off it, and even then the leg survived.

How deep can you carve a tray without going through the bottom?
About an inch, 25 mm, measured off the edges, and that leaves near three eighths of an inch of wood under the bowl, 10 mm. On two inch stock that is my semi final depth.
You cannot really tell how deep you are, so leave at least a millimeter behind.
Stay back from your design line as well. Five millimeters, three sixteenths of an inch, while you rough. The grape leaf has to come out of that wood later, so you leave it alone for now.
Never get excited while you are carving like this. I check thickness constantly, and in workshop six I still almost made a mistake on my own leaf.

Where does the golden ratio go in a wood carving?
Sixty to forty. That split has a name, and the name is the golden ratio. Pick a ten inch line across your design. The main point does not sit at five inches. Move it to six. That is a simplification, but that is your golden ratio.
Fibonacci sets how many grapes go in a bunch. A lot of people have no idea about Fibonacci, and you do not have to either. The right count is just more pleasing to the brain. Mine had room for three.
Repetition is the law sitting beside it. Whatever detail you carve once, repeat somewhere else at a smaller scale. One lobe here rolls backward, so I added a second, much smaller curl in another area.
My clients never ask about any of this. Most do not know it exists, and I never explain it to them. But I remember why I did what I did for the rest of my life. All ten rules live in Principles of Design in Wood Carving.

Why does my carved leaf look flat?
Shadow is missing. You are painting with shadow and light, and every concave you carve hands you one dark line. Concave, then convex, then concave again.
A panel that hangs on a wall has it much easier. Light comes from above, so a shallow cut still drops a shadow down the wall. Lay a tray flat and the light crosses it from a window, so you dig much deeper for the same effect.

Which is why I flipped one lobe up off the surface, about 20 mm of it, 3/4 of an inch. That flip gives me a really good shadow, and I like it much better than a plain leaf lying flat on the tray.
Copying a finished piece will not teach your brain to think. You learn to see in three dimensions when we carve together, so come and stand at a bench and watch it happen on your own wood.

What are the eye and the pipe on a carved leaf?
The eye is the opening where two lobes part, and the pipe is the raised ridge that runs out of it. Carve the eye in the shape of a water drop, wide at one end and closing to a point at the other.
Hollow both sides of where the pipe belongs, and the ridge standing in the middle becomes your pipe. Ride a number 2 along the top of your own ridges to blend it. I use that tool upside down too.
Every pipe runs home to one point. Find the center first and connect everything to it, and never put a straight line on the leaf. That is one of the mistakes I see when people carve leaves.
Exaggerate the pipe. Look at a real grape leaf and you find no ridges like these anywhere. Wood carving is not a copy of nature. Carving exaggerates nature, and the classical rules tell you which way to push.

How many lobes does a Cabernet Sauvignon grape leaf have?
Five main lobes, with the eyes between them. Then you subdivide inside each lobe into three smaller ones, and inside those go a few small notches.
Do the separations only once the overall movement makes you happy and you are not going to change anything on the edge.
Start each separation with a relief cut. Number 11 at 3 mm, flute up, and straight down into the wood. Only then bring in a flatter tool. Skip it and attack a point from each side with that flatter tool, and you are going to break it.
Big separations do not need to be sharp. I leave mine soft, because a leaf with saw teeth on it stops looking like a leaf.

Why exaggerate the veins on a carved leaf?
You exaggerate a vein so you can see its shadow, the same reason you exaggerate a pipe. Every separation on this leaf is a micro pipe, the same eye and pipe rule, only smaller.
Put a number 9 down and slice toward the center line. Deep where you start, shallow where you finish. Not everywhere. A few spots, and the whole leaf wakes up.
Sometimes I drop that concave slightly downhill, and it brings even more life.
Look close at the facets your gouge leaves behind. They already run like veins, which is why I do not sand this piece. Sanding takes off the one thing that came for free.
Should a carved vine pass over or under a leaf?
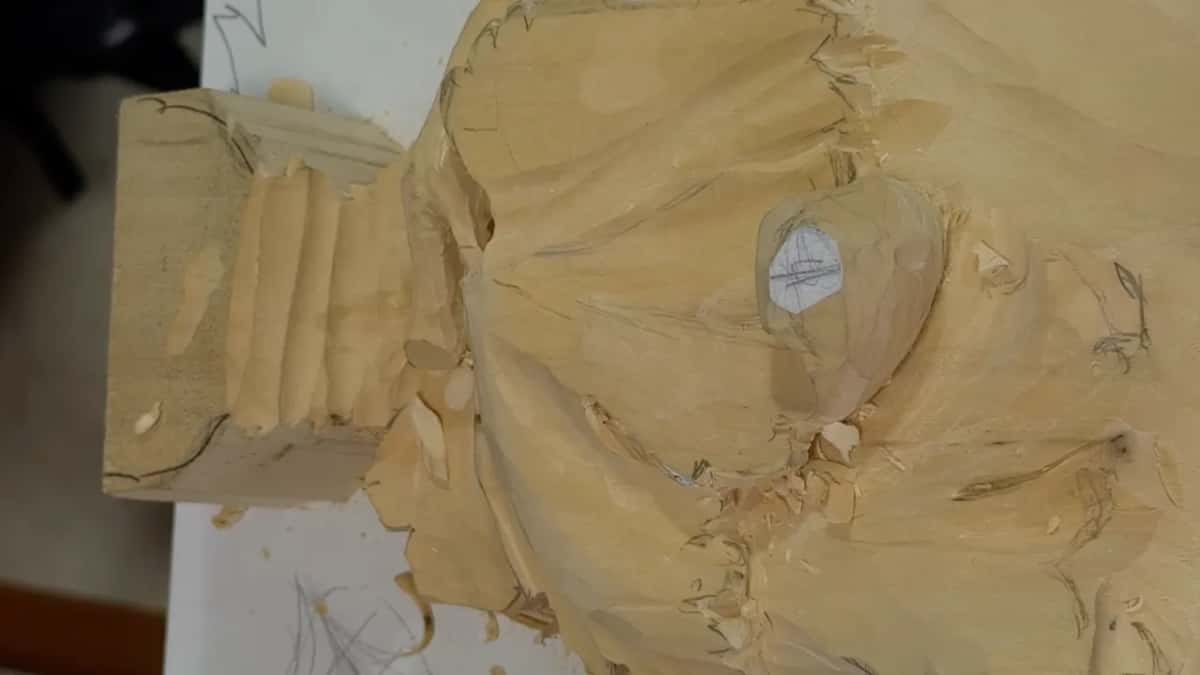
Decide which one goes over and which one goes under, then slope the end of the vine with a flatter tool, so it feels like it was cut.
Think in depth as well as width. Ten millimeters of width, 3/8 of an inch, means you go about 10 mm deep as well.
On this tray the stem comes off the vine, runs above the leaf, and dies under one lobe. Part of the leaf sits over the stem and part under it. More work, and worth it.
Keep every vine crooked. A vine should never run like a straight line.
I redesigned this piece on the fly while the class watched. And when you make a mistake, you redesign, and you make something even more beautiful than before.

Can you carve a hole right through a leaf?
Airborne means you have carved right through, so daylight travels under the piece and comes out the other side. One small hole under a stem, and the whole thing just pops.
Work from both sides, and don't try to get the hole from one side. On the tendril I took a half millimeter number 11 with the flute at about eleven o'clock, then came back from the other side with the flute at three o'clock.
Every time you plan an airborne spot, put it in long grain. Short grain will break.
Then look from the side, the way people at a dining table will, and you see that hint of light.

What keeps a thin wood carving from breaking?
Leave more wood than you think you need, then carve the last of it away so the edge only looks thin. The handle end of this tray keeps a full 10 mm of meat, 3/8 inch, and still reads as paper thin from above.
Ten millimeters back from the edge, ease down toward a knife edge. It looks really fragile, but it is not, because the thickness is still there. Pick it up and you feel solid wood. Look at it and you see a leaf.
For work that really is fragile I brush on penetrating epoxy. TotalBoat, because most brands go yellow with age and that one does not. Satin lacquer over the top, or it looks like plastic. Wood hardener does nothing. Superglue holds five years and lets go.
Trays live on tables, and a panel on a wall is a different animal. On a wall I would undercut this leaf until it floated. Set it on a table, though, and I stop early, because you have children, and cast iron gets broken too.

What changes when you carve the back of a tray?
Take it off the board with a flat number 1 gouge, working in along the grain, then clamp it face down and hollow behind every lobe. Don't take it off from the side.
Clamp it upside down so the work points away from your face, and leave the flat bottom of the bowl alone. That untouched spot is what lets a tray sit still.
Everything else goes. Keep a rim of 10 to 11 mm, three eighths, and undercut under the lobes and leave about 3 mm, an eighth of an inch. On the front you carve from the outside in. Back here you go from the center outward.
A lot of the waste came off this side with a chopper, to save time. I could even use an axe, and I have. If it is sharp, it is a tool. Chainsaws scare me, the cheap ones with no automatic stop, held close to a man's face.
Only a nosy person who flips the tray over will ever see this side. Tilman Riemenschneider carved the backs of his altars in the fifteenth century anyway, and once they went up nobody saw that work again. Asked why he bothered, he said people will not see it, but God will. I met his last living descendant, a woodworker in South Carolina, and the line ends with him.
Did wood carvers ever make real money?
Grinling Gibbons did. He got a royal title for wood carving, he was paid well, and he ran a big shop. Riemenschneider grew rich from carving too. Chippendale never could pay his men properly, because the rich men who hired him did not pay enough.
One story about Gibbons is worth knowing. Look closely at his work and you find pea pods. A closed pod meant he had not been paid for that piece. Once the money came he went back, opened the pod, and carved the peas inside. He kept many pieces going for one room, so the pods were his ledger.
I think that is kind of cool. A man kept his books inside the carving, and you can still read them.
How do you carve a bunch of grapes in wood?
Aim for a triangle where the grapes meet, never a square. Put four together so their corners form a quad and cleaning that point gets really difficult.
Draw them big. Start each grape about an inch across, 25 mm, and it finishes near three quarters of an inch, 19 mm, once cleaned. Small grapes stop looking like grapes.
Use only the corner of the tool. A number 7 at 14 mm, pointed at your drawn line, all the way around the bunch before you deepen anything. Careful how you outline. Furniture makers usually outline the wrong way first, and then they don't know what to do with the damage.

Really good carvers, even ones who teach, still struggle with grapes.
The middle of a grape gets finished with a toothpick. Press the side of one into the center and it leaves a clean dot, and the same toothpick burnishes the rim of it. I broke mine on purpose, because a broken one takes a mallet and drives the dot deeper. People will ask how in the world you made that dot.

Which cuts make a carved border on a rim?
Two pencil lines and two cuts. The first goes about 5 mm in from the edge, three sixteenths of an inch. The second sits a millimeter and a half in from that same edge, about a sixteenth. Keep the gap even and check it twice.
Take the corner of a number 2 and angle it out toward the edge, following the line like a knife. Only the corner, and not deep, especially on end grain. Then set a number 9 at 10 mm on the outer line and slice down to meet it. The chip lifts out. If it does not, leave it, go back with the number 2, and open the first cut again.
Your tool has to be sharp for this. I stropped mine in front of everybody first, for a reason.
While we drew the rim lines, I asked Graham if he was all right. He told me this is me happy, those exact words. I told him I saw him happier yesterday.
Scott said the border running around the rim looked like chip carving. Nothing is cheap about carving, I told him. Chip carving is mostly geometric and came along later. What runs around this rim is older, organic, and follows a curve.

What is a tendril, and how is it carved?
A tendril is the thin curl a vine throws out to grab hold of something, and on this tray it finishes about a sixteenth of an inch thick, 1.5 mm. A few spots go thinner than that.
Outline it with an 11 at 3 mm, a sixteenth deep, and leave an eighth of an inch of space to work in. Blend with a number 7 at 14 mm, presented at 45 degrees, in tiny cuts. Slow motion. The whole thing looks simple until you start one.
Rest the tool on your middle finger and use it as a fulcrum. Half a millimeter of steel and one finger, and the tool goes exactly where you send it. Work like this and you are training your character to be patient.
Every tendril has to be connected to something. One student ended up with a snake and another got a worm, and I told them both so.

Can a beginner carve this tray?
It takes a while to get the slicing cut, and I really like that on this project you can practice it. Three things get asked of you. A sharp edge. A slicing cut. The patience to block in the whole shape before any detail.
Never held a gouge? Put your hands on First Cuts for Beginners. This tray needs sharp tools, so Carving Tool Sharpening comes next, and All About Tools tells you what to buy before you waste money on wrong steel. Grapes return in Carving Grape Onlay and on the vase with grape leaves. The lessons map lays the road out in order.
People want to know who is teaching before they ask what it costs, which is fair, so here I am.
So there is basswood on your bench, two inches thick, and a drawing of a Cabernet leaf on top of it. Where does the first hollow go? Come and find out at the bench. Shall we carve?
The whole course is The Tray of Blessing. Eight workshops, twenty five videos, filmed at the bench with the class asking questions.
| The job | Reach for | Size |
|---|---|---|
| Hollowing the bowl | The wide number 9 | 20 mm, 3/4 in |
| Working closer to the line | The narrow number 9 | 10 mm, 3/8 in |
| Rolling a lobe and blending | One number 7 | 14 mm |
| Cleaning and smoothing | A flat number 2 | 10 to 12 mm |
| Escaping where a straight tool jams | Spoon gouge | 10 mm, 3/8 in |
| Relief cuts and separations | An eleven veiner | 3 mm, 1/8 in |
| Undercutting and the tendril | The small eleven | 1 mm |
| Airborne holes and micro cleaning | The finest eleven | 0.5 mm |
| Lifting the tray off its board | Flat number 1 | any width |
| Fast surfaces, if you can find one | Skew chisel | 25 mm, 1 in |
| Chopping bulk waste off the back | A chopper, or an axe | sharp |
How it's done
- Draw the leaf and saw the blank. Lay your full size drawing on 8/4 basswood, a full two inches, 51 mm, and saw the outline. Mark the holding legs before you cut, because they anchor the tray to the board for the next seven workshops.
- Hollow the bowl in two passes. Keep a border of 10 mm, 3/8 inch, untouched. Take the middle past 32 mm, one and a quarter inches, to about 38 mm, one and a half. Then set a line 18 mm down from the top and take out the wood above it.
- Block in the leaf and its movement. Drop one side of the leaf and raise the other, then put in the first curl about 20 mm across, 3/4 inch. Shape only, no detail, and never within 5 mm of your design line.
- Cut the eyes and raise the pipes. Carve each eye as a water drop where two lobes part. Hollow both sides of every pipe with a number 9 and let the ridge stand, then soften it with a 2 riding on its own ridges.
- Subdivide the five lobes. Relief cut first, a 3 mm number 11 straight down, then bring in a number 7. Three smaller lobes inside each of the five, with a few small notches inside those.
- Carve the vine, the stem and the tendril. Give a 10 mm vine roughly 10 mm in depth. Run the stem over the leaf and let it die under one lobe. Bring the tendril down to a sixteenth of an inch, 1.5 mm, working from both sides.
- Free it and hollow the back. Lift the tray with a flat number 1 gouge along the grain, clamp it face down, and thin behind the lobes. Hold the rim at 10 to 11 mm, 3/8 of an inch, and leave the flat bottom untouched.
- Dress the rim and carve the grapes. Two pencil lines, both measured off the outer edge, one at 5 mm and one at about a millimeter and a half, then the corner of a number 2 followed by a number 9 at 10 mm. Set the grapes so they meet in triangles, an inch across to start and three quarters finished.
Key takeaways
- Basswood at eight quarter, 2 inches thick or 51 mm, is the minimum for this tray, and the finished piece runs 280 mm, 11 inches, end to end.
- Slice, never push. The gouge rotates as it travels, entering on one corner of the edge and leaving by the far corner.
- Carve across the grain almost the whole way, and flip the piece whenever the wood starts fighting you.
- The bowl goes an inch down, 25 mm, and what is left under it comes to near three eighths, 10 mm.
- Every eye on the leaf needs a pipe, and a pipe is made by hollowing both sides and leaving the ridge standing.
- Grapes have to meet in triangles. Four grapes forming a square make a corner that is a real struggle to clean.
- Leave a full 10 mm in the handle and carve the last of it to a knife edge, so the tray only looks thin.
Frequently asked questions
What size basswood do you need for a carved tray?
Eight quarter basswood, about 2 inches thick or 51 mm, gives you enough depth for a bowl an inch deep and a leaf that still lifts off the rim. Eleven inches long is where the finished tray lands, 280 mm on the rule.
Can a beginner hollow a tray from a solid block?
It takes a while to get the slicing cut idea, and this project gives you plenty of practice at it. You need sharp tools, and the patience to rough out the full shape before you start on details.
How long does it take to carve a wood tray by hand?
Bench time runs to eight workshops. The class in Michigan carved for five days. How fast or how slow you go is up to you, and nothing is wrong with either, because it is more about the technique.
What to carve next
More on this: Grinling Gibbons, the carver who got a royal title, Tilman Riemenschneider, altar carver of the 15th century, Thomas Chippendale and his workshop, Cabernet Sauvignon, the grape behind the leaf, Tilia, the tree called basswood, linden and lime, Basswood, its working properties and density, Chip carving, the geometric tradition, The golden ratio and its sixty to forty split