

Alexander Grabovetskiy, woodcarver, School of Woodcarving · Published 2018
What is air carving in wood carving?
Quick answer: Air carving is the grip a carver switches to once a panel gets too thin to lean on. Both hands come off the surface, the blade is pinched close to its edge, and the tool is steered rather than pushed. Cuts get very small. Pressure, not skill, is what breaks fragile work.
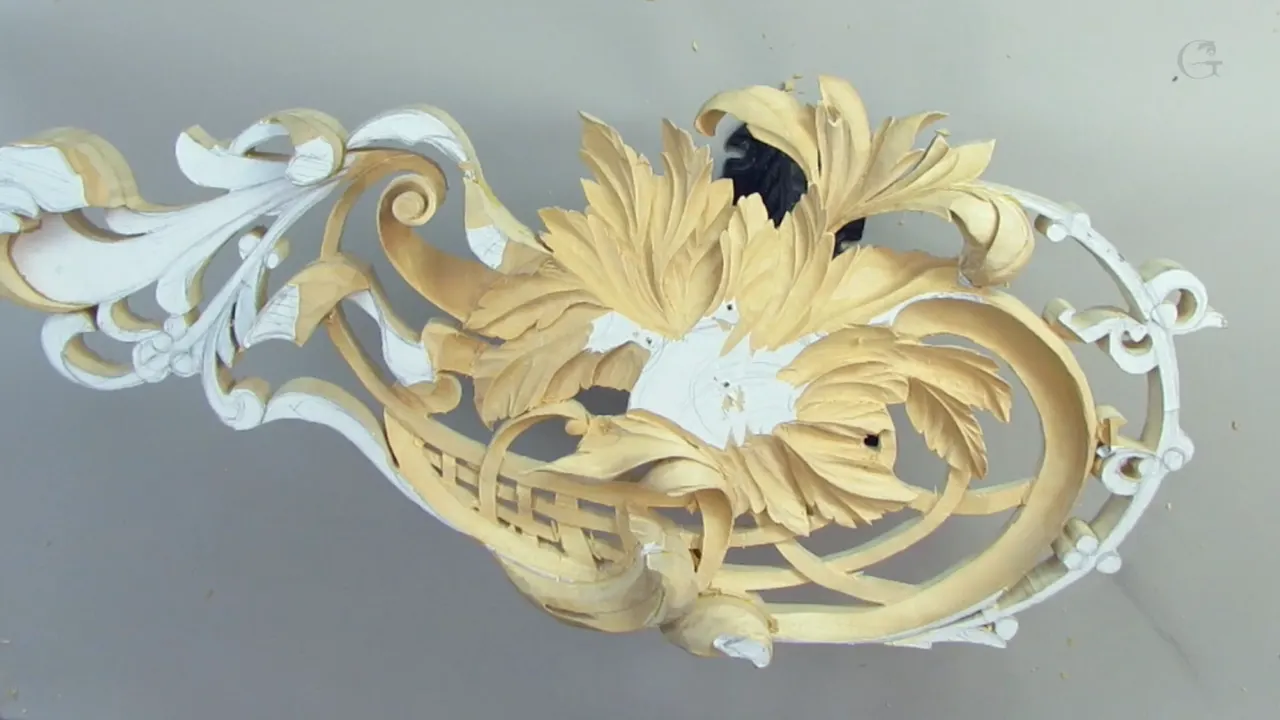
Air carving is holding the gouge with nothing of yours resting on the work. A pierced panel thins to about a sixteenth of an inch in places, and a palm laid on it will crack it. So the hands brace against each other instead, only the edge touches wood, and the cuts shrink.
Somewhere in every pierced panel the bench quits helping you. Mine quit at workshop 12.
Until then I had leaned, pressed and rotated a one inch gouge through everything the design asked for. Then the openwork opened. The wood under my hand went thin enough to flex, the whole piece started to shake when I touched it, and the old grip became the fastest way to lose four days of work.
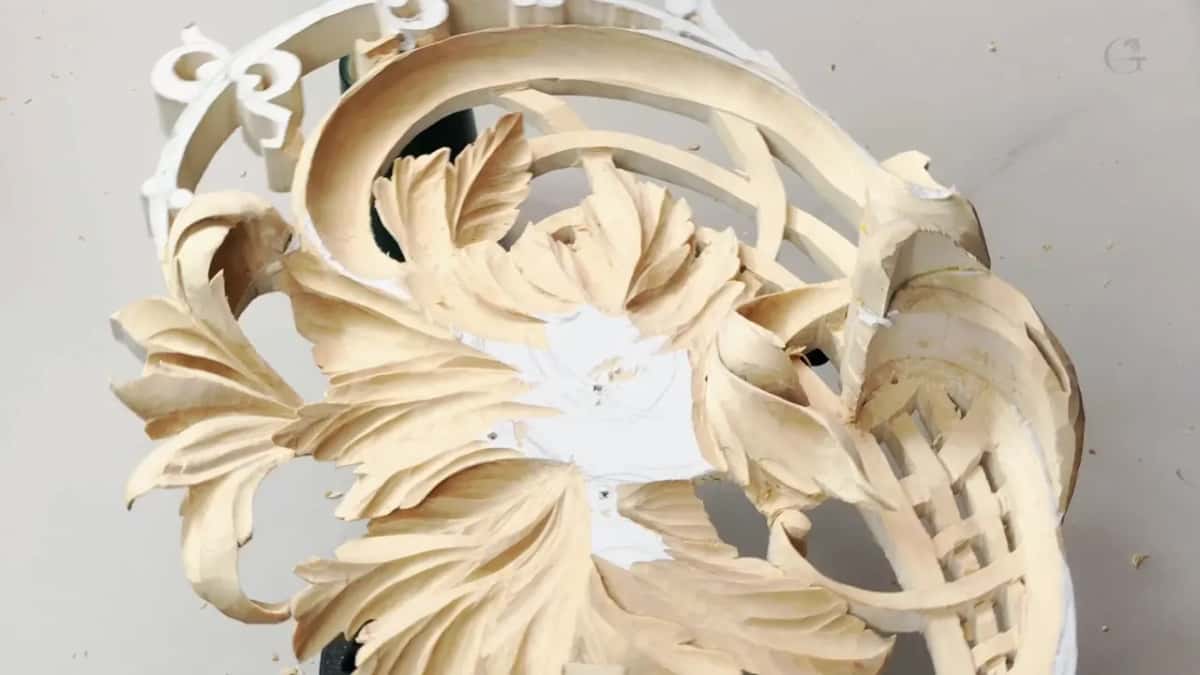
What changes once the panel goes fragile
- Your hands come off the carving.
- Pressure drops to almost none and the cuts get small.
- The V tool starts doing work the gouge used to do.
- You attack from whichever side the wood allows.
- Big gouges still win, but they arrive gently.
Where the name came from
An airbrush gave me the word. You hold an airbrush a little above the surface, steady in the air, and the paint arrives without the tool ever landing. My hands are doing the identical thing by the time a pierced panel reaches this point, so air carving became my name for it, and every student I have said it to understood immediately.
Watch my hands in workshop 12 and you will see almost no contact anywhere. Two fingertips, sometimes, on the thickest part I can find. Everything else is floating above the work.
What is a sweeping cut?
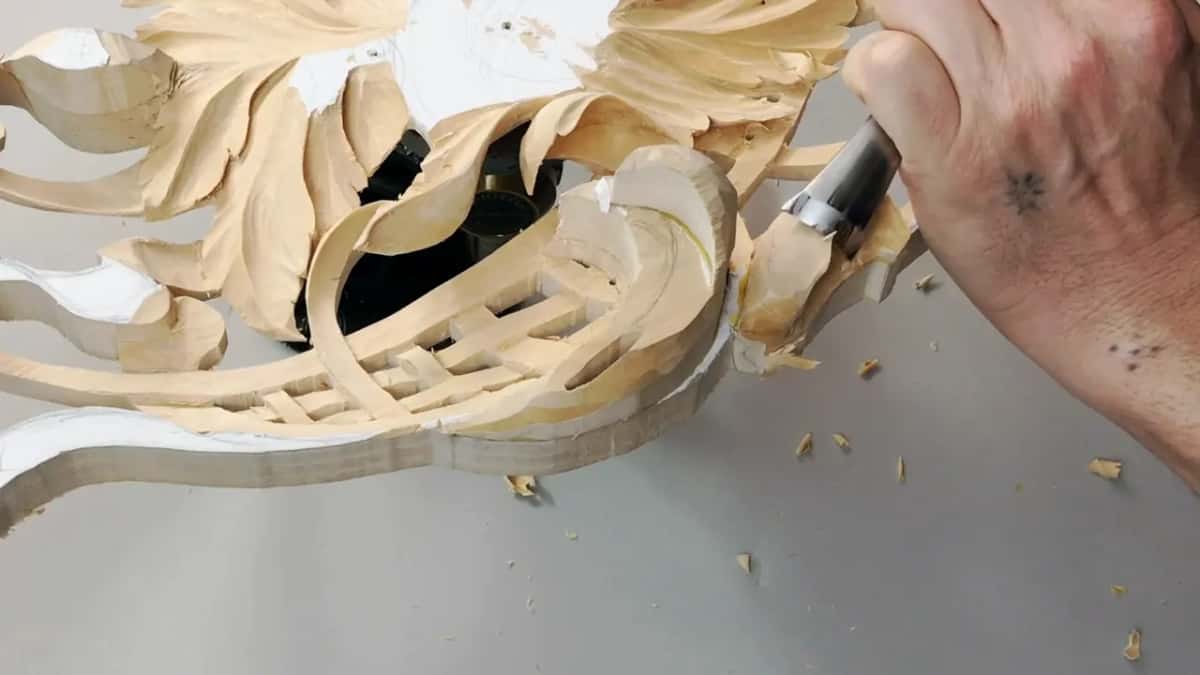
A sweep is a rotation, nothing more complicated than that. Instead of pushing the gouge forward in a straight line I roll it as it travels, so the corner of the edge enters first and the curve of the blade unwinds through the wood behind it. The chip comes off in a ribbon rather than a wedge, and the surface behind it is already close to finished.
That rotation is the whole trick on a fragile panel. A straight push drives everything into the wood; a roll drives most of it sideways along the fibre, where the panel barely notices.
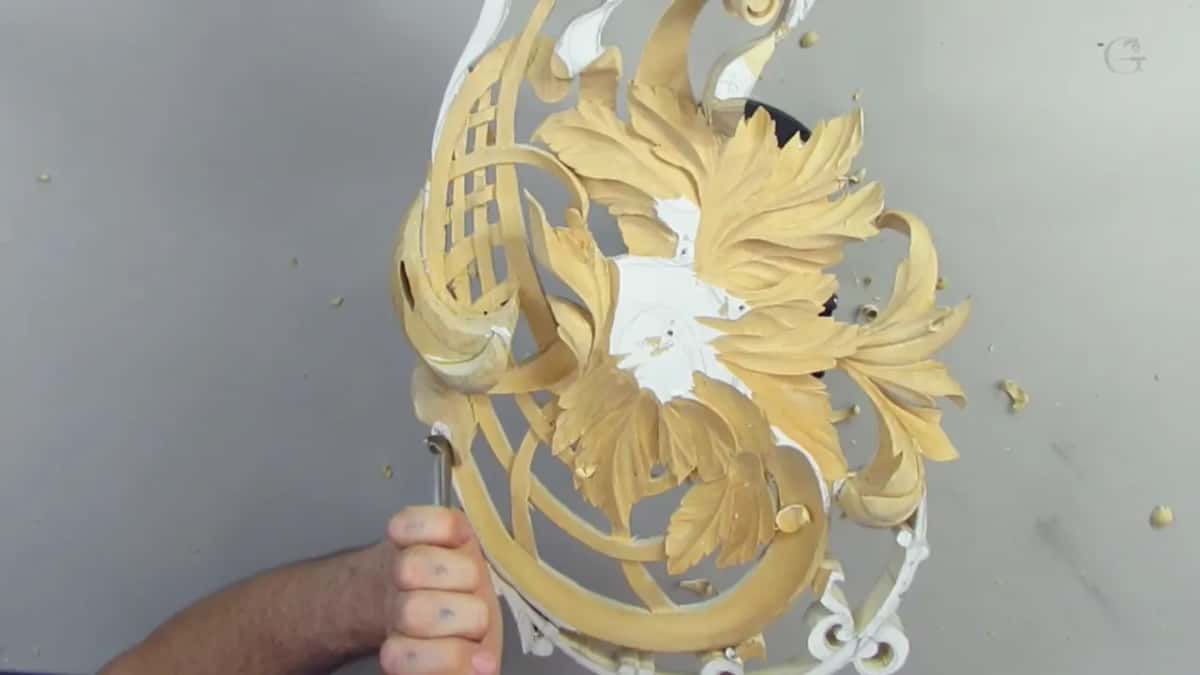
I also use a word I invented, and I will own that. I call the second move a rounding cut, or roundy, and every time I say it I know exactly what I mean even though it is not in any book. It is the cut that takes a flat facet and makes it read as a cylinder. The the slicing cut is its cousin, and between them they cover most of what I do all day.
When do you accept a level you never planned?
About twice a session, honestly. Partway through workshop 12 I was carving with the grain on a curl, the fibre ran out under the edge, and a strip lifted that I had wanted to keep. There was no clever repair. The only route forward was to lower that whole area until the damage was gone, which cost me height I had been saving for that curl.

I said on camera that I did not like it, and I did not. The design still works. It simply goes downhill and grows back up now, instead of doing what the drawing said, and nobody except me will ever know there was a drawing. A different problem from a slip that became a detail, with a different answer: this one you accept, the other one you adopt.
Being willing to lose a planned level is what lets you keep carving a panel that has gone fragile. A carver who refuses will force the cut, and forcing is how the piece ends up in two parts. I would rather lose three millimetres than lose the a blank glued up for height I built the whole panel out of.
How do you hold a tool with nothing underneath your hands?
Pinch the blade close to the edge. That single change buys back most of the control you gave up when you took your palm off the wood, because a hand gripping two inches from the edge can steer a cut that a hand on the handle can only shove. As close to the edge as the shape lets me get.
The other hand does the pushing, and it pushes very little.

Bringing the two hands into contact with one another turns them into a single unit with a fixed span, and that habit comes out of holding a gouge for detail. The only change on a pierced panel is that the unit now floats.
Find the one place on the panel that still has thickness under it and let two fingers rest there. Anywhere the panel has turned into openwork that spot moves every ten minutes, so hunt for it again each time you shift position. Everything I said about reading a flow line applies here too, except that now you are judging the line with almost no hand on the work.

Why does the V tool take over at this stage?
A gouge needs somewhere for the waste to go. Push one into a wall of wood and the chip has to lift, which means the tool is levering, which means the panel is taking the load. On solid stock that is fine. On a panel this thin the load is the thing that breaks it.
My answer is a relief cut, and I use that word literally. I take a 6 mm V tool, run a groove alongside where I want to carve, and the groove gives the gouge chip somewhere free to fall. After that the gouge slices instead of levering. I go back to the V tool twenty or thirty times in a session like this, and each trip saves a piece of basswood I cannot replace.

Which gouge do you pick when you cannot press?
| The tool | What it does once the panel has gone thin | Force needed | The way it lets you down |
|---|---|---|---|
| No 7, one inch | Carries a whole curve through in one unbroken sweep | Very light | Digs in when pushed flat |
| No 9 at 20 mm | Hollows fast | More than a thin panel owns | Snaps an edge |
| V tool, 6 mm | Clears the wall beside your line so the gouge can stop levering | Almost nothing at all | Floor comes out choppy and needs a second pass |
| No 5, one inch | Holds a ridge without rolling off it | Light | Too flat for a deep hollow, and slow |
| Spoon gouge | Reaches beneath an overhang nothing straight can enter | Very light | Harder to aim, so it wants patience |
Read the middle column twice. Pressure is the only thing I am genuinely choosing between here, and the sweep number comes second.
Does bigger still beat smaller on a thin panel?
Bigger wins, and that surprises people. The larger the tool, the cleaner the cut, and the less there is to clean up afterwards. A one inch No 7 crosses a curve in a single sweep where a quarter inch gouge leaves a row of little facets that all have to be taken out again later.
What changes is how the big tool arrives. Rotated, sliced, never shoved. On thick stock I would put a mallet behind that same gouge without thinking twice, and here I would not go near one.

Late in the workshop I did reach for a mallet, thought about it, and put it straight back down. Too fragile, I said. That was the panel deciding, not me, and I have learned to let it.
What happens when you pry?
The panel cracks, usually somewhere you were not even looking. Prying loads the wood sideways, and sideways is the one direction a wall that thin has no strength in. I have written about hoiking before, and on a solid panel it costs you a tool; on this panel it costs you the carving.
So the rule for the whole session is multiple small cuts, slowly, instead of one cut that tries to finish the job. Slower results beat rushed mistakes every time, and I say that as a man who has rushed plenty.

How deep can you go before the panel gives up?
Depth is shadow. The deeper I excavate, the darker the shadow under the curl, and shadow is what makes relief read from across a room. The whole argument for digging sits right there.
The counter argument is that the deeper you go, the more fragile the thing becomes, and those two facts pull against each other on every single cut. In workshop 12 I stopped with a sixteenth of an inch left underneath, said out loud that I could not take any more, and then spent ten minutes making the curl above it more pronounced instead. There is a separate answer for how thin a leaf can go, and it is not far off the same number.
Why carve against the grain on purpose?

The good direction is blocked, and that settles it. On an openwork panel a finished detail sits exactly where you would want to stand your gouge, so you carve from the side you can actually reach, and you accept the rougher surface. I say this on camera three or four times in workshop 12, because students hear the cranky sound and assume I have made an error.
A sharp tool makes this survivable. A dull one tears. Everything about grain that you learned on a flat board still applies, but the panel has taken away half your choices, and half your choices is what you have left.

Then I come back later, from the opposite side, and clean it properly. That second pass is the plan, not an apology.
Should you carve both sides of a curl before finishing either?
Always, on work this thin. I attack a curl from one side, rotate the whole panel in the vise, attack it from the other, and keep alternating until the shape agrees with itself. Carving one side to completion leaves an unsupported wall standing while you work behind it, and that wall is the part that snaps.

Alternating also keeps you honest about the flow line, because a curve looks correct from the angle you carved it and wrong from everywhere else. Rotating is free. A crack is not. I made the same argument about moving around a design earlier in this course, and on a pierced panel it stops being a preference and turns into the only method that survives.
What do the numbers on a V tool mean?
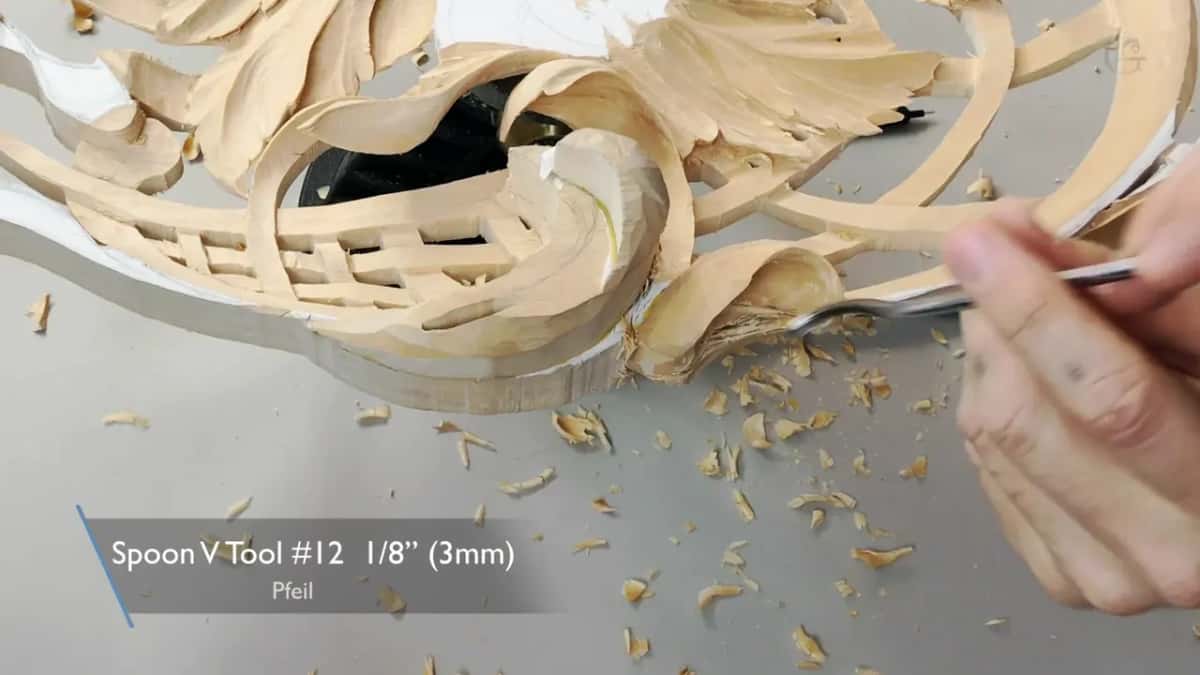
Angle, not size. The numbering runs 12, 14, 15 and 16, and the higher the number goes the narrower the V gets: roughly 90 degrees, then 60, then 45, then about 35. My 16 at 6 mm is a Pfeil, and it is the one I keep grabbing on this panel.
Narrow is what I want here, because a narrow V removes less wood per pass and puts less strain into a panel that cannot take strain. On a thick oak frieze I would happily run a 12 and let it bite.

How slow is slow enough?
Slow enough that you keep changing tools. I picked up more than ten different tools in that one workshop, not because ten were needed, but because I was hunting for whichever one fitted the space without forcing anything. A number 3 at 12 mm, a number 8 at half an inch, a short bent V at 3 mm, a knife for the final edge.
Trying tools is not indecision. It is the cheapest form of testing there is, and it costs a few seconds against a repair that costs an afternoon. Number 9 is a true half round; number 8 sits slightly shallower. Written down that sounds like nothing, and it decides everything once the space is 5 mm wide. My number 8 is an Ashley Iles. The film names it on screen twice.
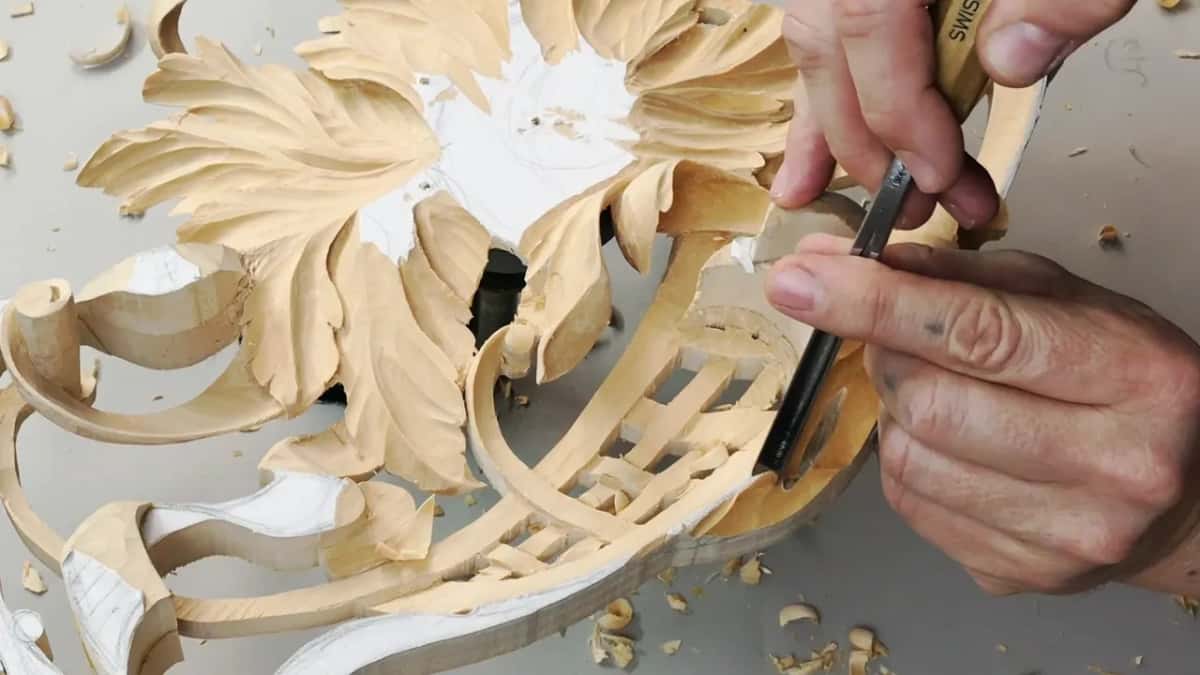
The one that finally worked in the tightest spot was a spoon gouge gouge, number 8, half an inch. A straight gouge could not even enter.
Does any of this show in the finished panel?
A viewer sees none of it, and that is the honest and slightly painful answer. What they see is a curl that goes underneath and comes back out, a shadow with real depth, acanthus edges crisp rather than crushed. Three things. All three arrive in the last fifth of the work, the part done with your hands off the wood.
Go and look at the Grinling Gibbons carvings, at anything in the V and A sculpture collection with piercing in it, or at the panels in the Getty rooms. Those men had no better wood than we do, and their Henry Taylor equivalents were worse. What they had was patience at exactly this stage, plus nobody standing over them asking when it would be finished.

What to try on your own bench
Take whatever you are carving now and deliberately carve one small area with no hand touching the work. Two fingertips on the thickest spot, the blade pinched near the edge, tiny cuts. It will feel terrible for about four minutes.
Then it starts to feel like control, and you have the grip you will need for every pierced panel you ever carve. All 49 workshops of Carving Hashemi Flowers sit inside the school, and this is workshop 12 of them.

One last thing about the vise. Partway through the session the panel began wiggling and I stopped to snug the screws underneath, apologising to the camera for the movement. Tightening helps a little. What I say straight afterwards is the real point: the more fragile the piece becomes, the more shake you will see, because the loose thing is now the carving itself.
Which is the moment the holding problem stops being about clamps and starts being about hands, and about how lightly you are willing to work. Workshop 15 is where the panel leaves the vise.
How it's done
- Find the thick spot. Search the panel for whatever area still has full depth below it, and make that your only resting place.
- Pinch the blade. Grip the steel about a thumb width behind the corner instead of holding the handle.
- Brace hand to hand. Bring your wrists together so the pair works as one unit with a fixed span between them.
- Clear the wall first. Run a groove beside your line with a narrow V tool, so the gouge chip has somewhere free to fall.
- Shrink every cut. Take one shaving and look, rather than finishing a whole shape in a single confident pass.
- Roll, never shove. Rotate the gouge as it travels so the edge shears sideways and the load stays out of the panel.
- Alternate sides. Turn the work and carve the same curl from the far direction before either face is finished.
- Stop before it flexes. Leave roughly one and a half millimetres of material, then put the drama into the curl above instead of digging deeper.
Frequently asked questions
Is air carving a real technique or your own name for it?
My own name, borrowed from an airbrush, though carvers everywhere do the thing without calling it anything. Watch an experienced hand on openwork and you will see the palms lift away from the surface.
Can you use a mallet on a pierced panel?
Rarely, and only over the thickest part left. One light tap in this workshop told me to put the mallet down, because a blow travels through the whole piece and finds the weakest bridge.
Does air carving make you slower?
Much slower, and that is the trade being made. Working this way costs you an afternoon; a crack costs the panel plus every hour already inside it.
What to carve next