
October 2, 2024 · Updated August 16, 2026
By Alexander Grabovetskiy — Master Woodcarver · Founder, School of Wood Carving · 12 min read
Do I need to be good at drawing if I want to wood carve and sculpt?
Drawing for sculpture is a seeing skill more than a hand skill. You do not need to be good at drawing to carve a form in the round, because a flat sheet cannot show what a shape does when it turns away from you. A clay model can. So model it first.
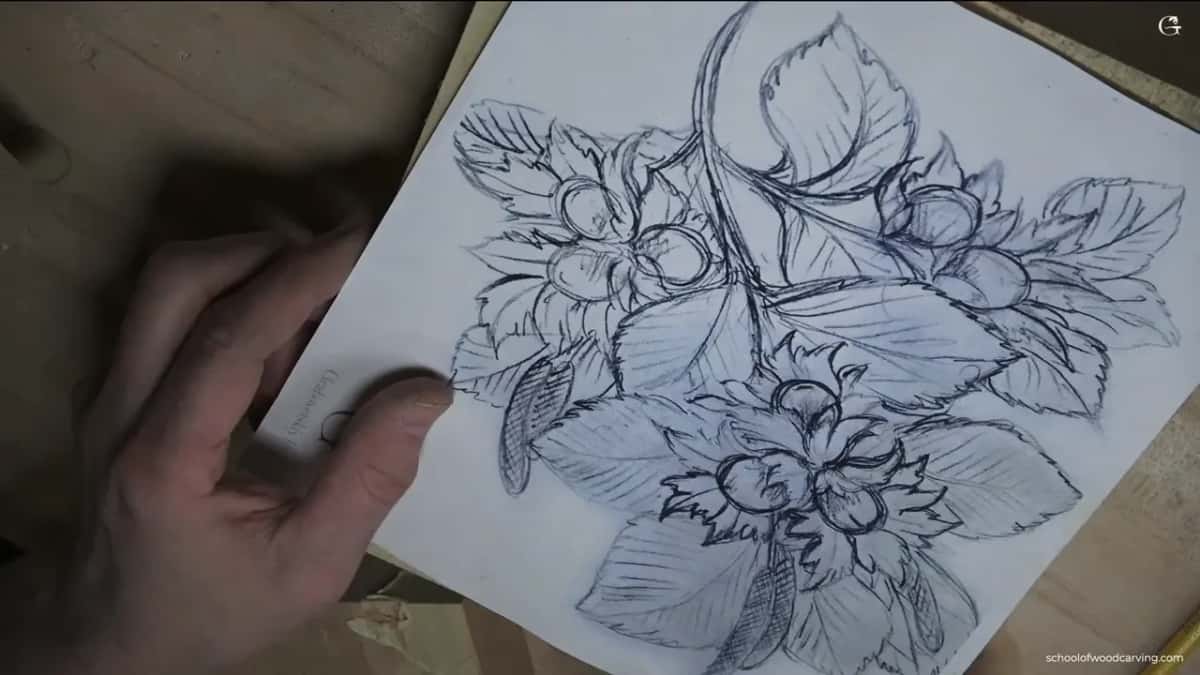
Ink on paper, and every nut on it has to end up as a ball you can walk around.
People ask me this after they have already carved a few flat panels. Tracing a pattern is easy by then. Hollowing a leaf is easy. Then they try to carve something that stands up off the board and turns over at the top, the shape goes soft and muddy, and they decide the problem is their pencil.
If your real question is whether you can begin at all without drawing, that is a different question and it has its own page. Go and read what drawing skills you need to start wood carving, then come back. This page is about form.
I have carved for over forty years, and I started at six years old. I can draw. As a young boy I could put beautiful designs on paper and I knew the movements and the rhythm and every rule of the armature. It still was not enough. The problem was drawing. It limits you to two dimensional world.
- A drawing gives you proportion, layout and rhythm, and then it runs out.
- The side view is where a form is won.
- Clay solves the whole shape for you at a stage where nothing is at risk yet.
- Wood gives nothing back.
- Light and shade is what you are really learning to read, and it is the last thing to arrive.
What can a drawing tell you about a form you have to carve?
A drawing carries proportion, layout and rhythm, and after that it has nothing left to give you. Small it is not, and I would never tell you to skip it. Beginners just expect far more from a sheet of paper than paper can hold.
One minute of drawing, so you can count the lines.
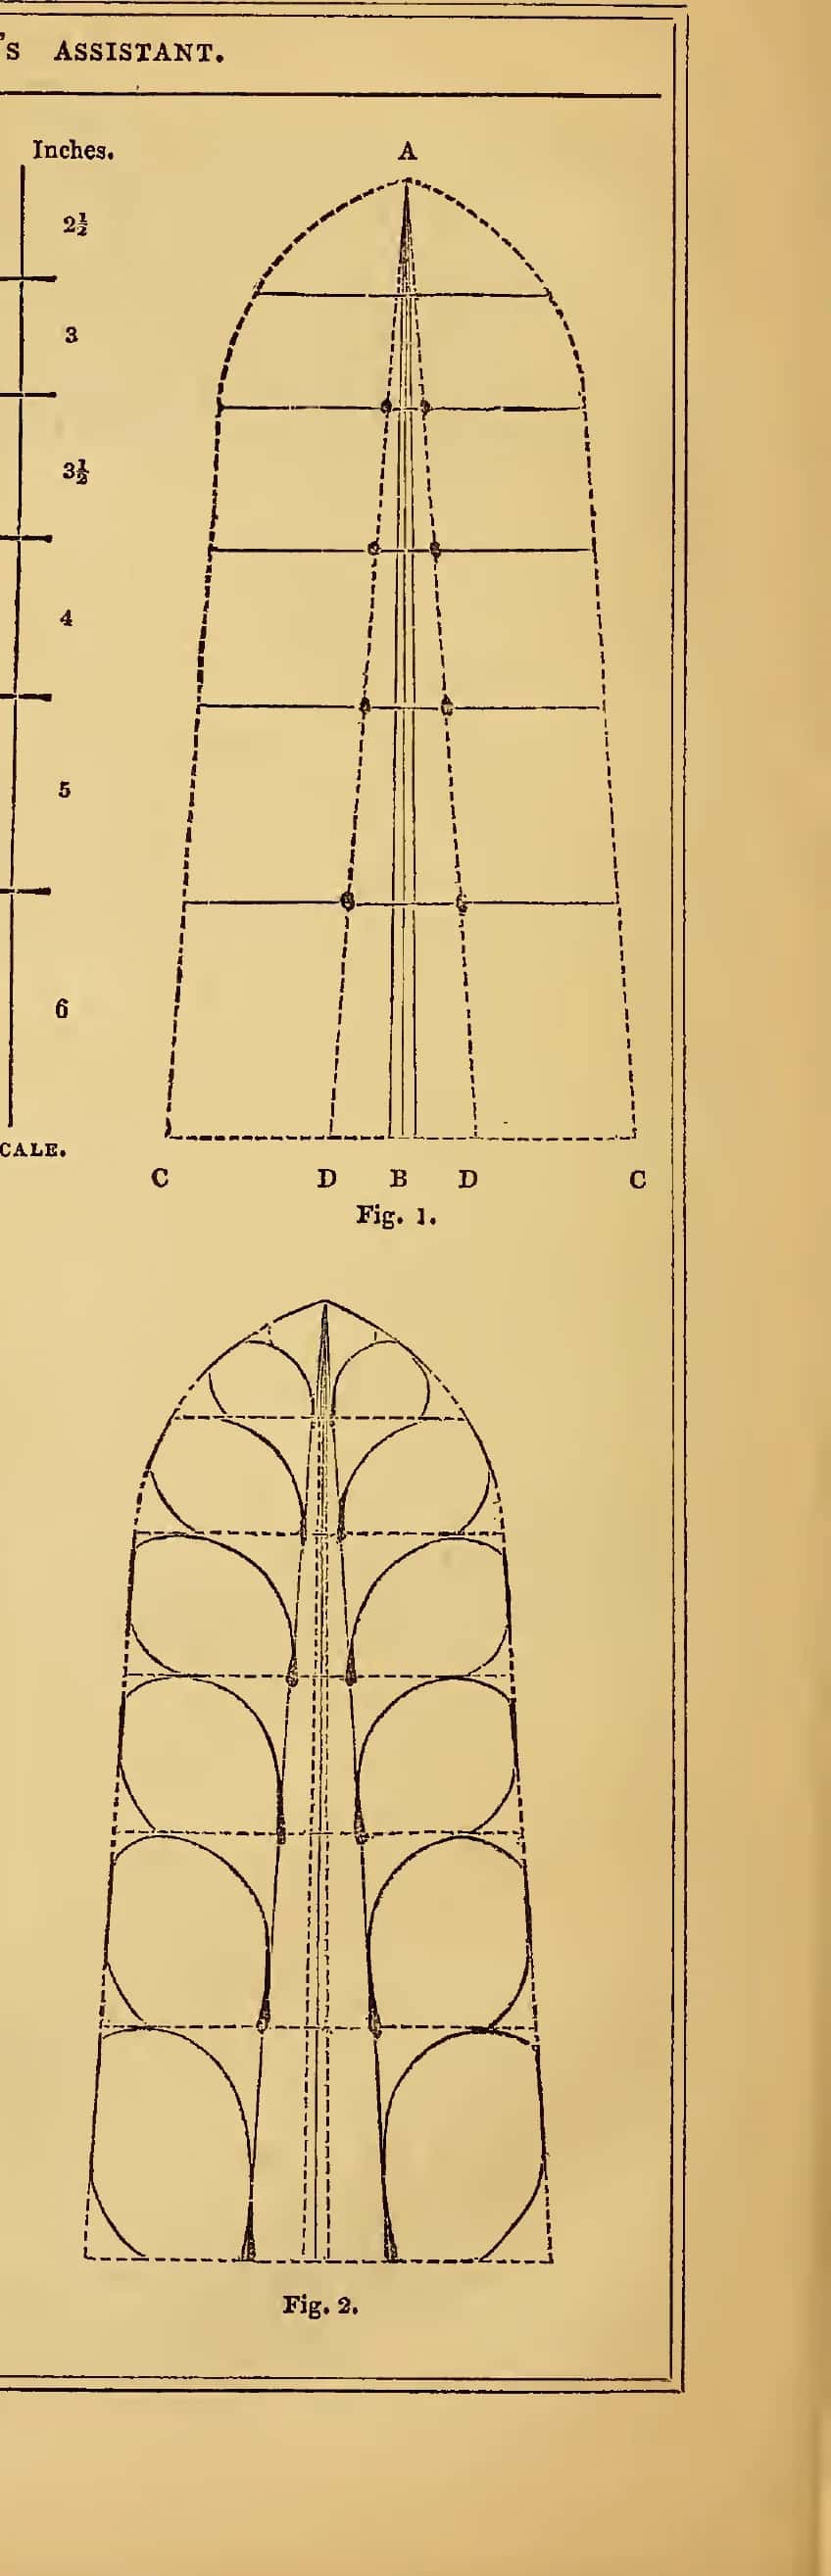
Fig. 1 is the cage. Fig. 2 is the same cage with lobes hung on it, and both were printed before 1850.
Open the old drawing books and the method never changes. A height line down the middle, a base split into equal parts, an inch scale down the left edge from two and a half to six. Proportion, yes. Where the leaf sits in space, nothing.
Even less than that goes onto the wood. In my furniture panel design course I say it plainly while drawing the flower onto the blank. I do not put any details on the inside when I am drawing it. On paper I work an original right through. Onto the board goes an outline.
The line on the board is a fence, not a picture. For the paper stage I wrote up the whole method in planning and sketching a carving design, and I drew one leaf step by step in how to draw the acanthus leaf.
What does a flat drawing leave out?
Every single thing that happens when the shape turns away from you. That gap is why good draughtsmen still carve mud.
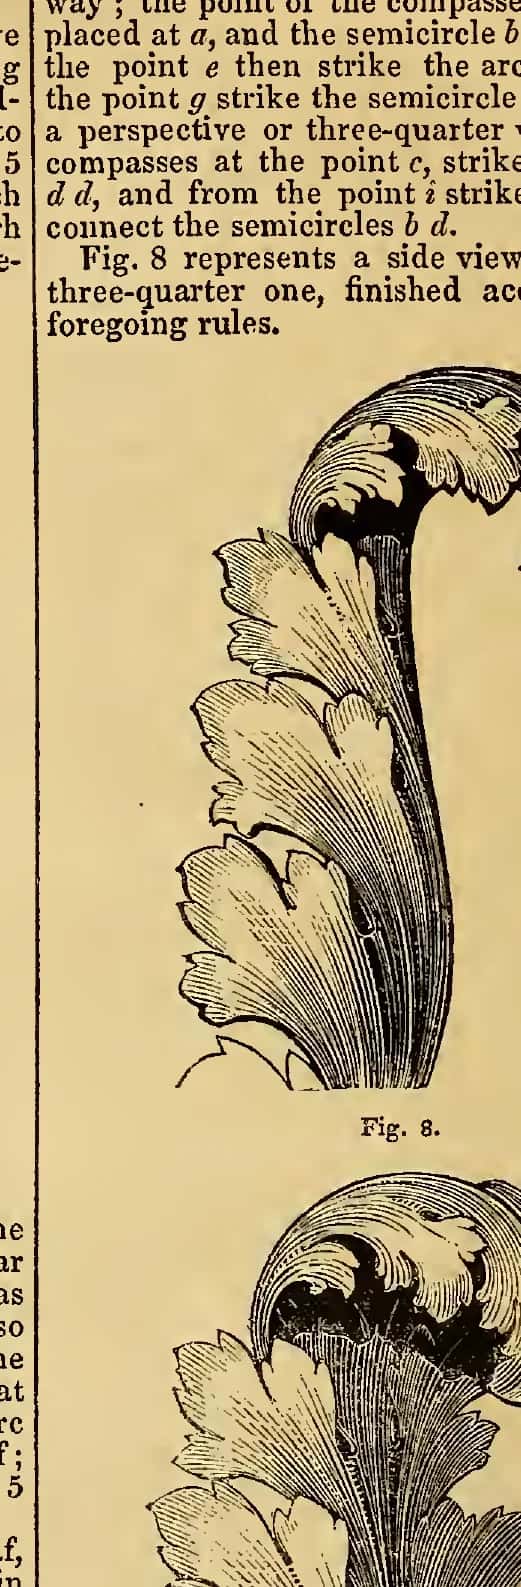
Fig. 8 is the side. Under it sits the three quarter, and the black hollow beneath the head is the part nobody draws.
Go looking for acanthus drawings online and you will find thousands. Almost all are taken from above, so you are just looking straight down at the leaf. And it is a problem. How is it looking on the side? Hardly anybody shows you, because a leaf seen from above is quick and a leaf seen edge on is work.
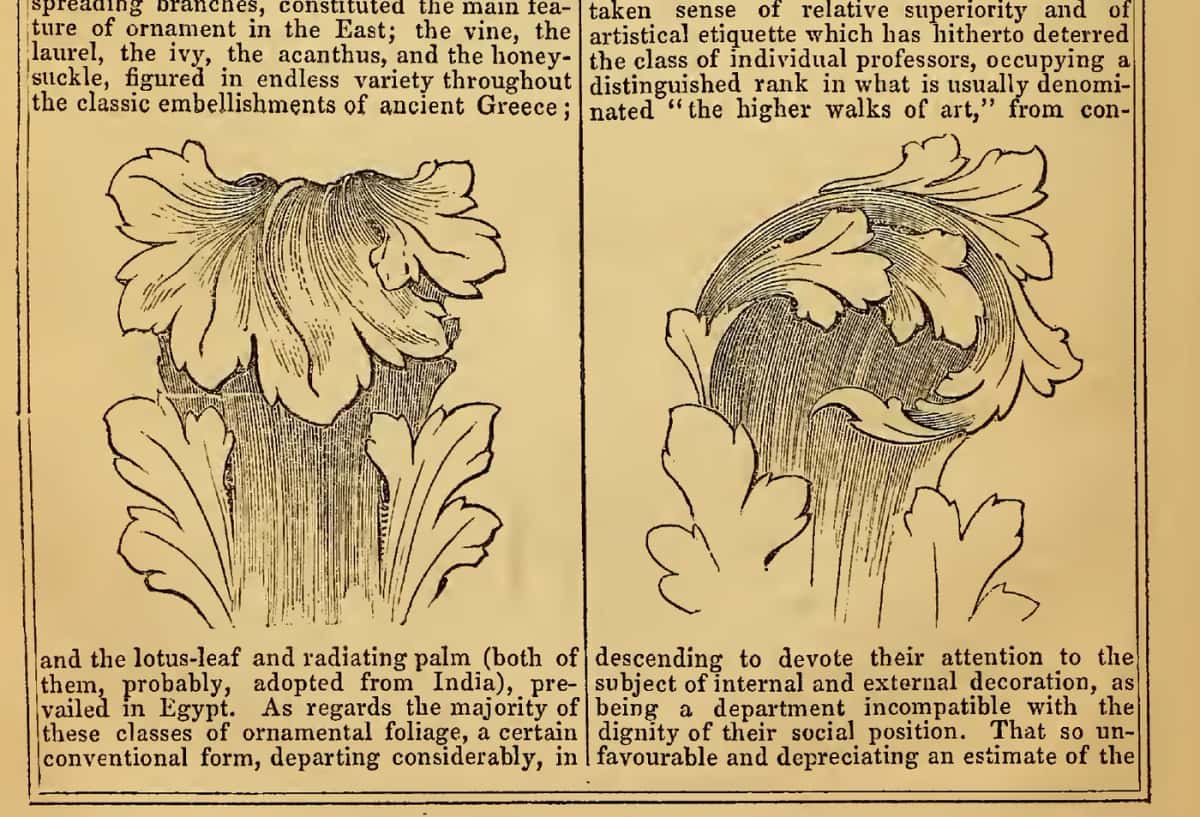
Old ornament books printed both, which is why I still buy them. One study square on, one turning over, side by side so your eye does the translation. A carved acanthus lives or dies on that turnover, and it gets worse when the leaf has to roll over a moulding, which is the whole of my acanthus over moldings course. Greek and Roman part company right there, which I unpacked in the difference between Greek and Roman acanthus.
Why do I model in clay before I carve, even one leaf?
Clay lets me make the mistake somewhere it costs me nothing at all. I did not always work this way. For years I used no clay, because I was young and I was ignorant.
The problem with wood carving is the art of deduction. You are only ever taking out. Bang a little harder on your gouge with the mallet and you took a little too much, and then you screwed up. Really, you screwed up. Forty years has not changed that.
So now I say it in class the same way every time. It is better to use clay first, even if it is a simple detail, even acanthus leaf. With oil based modelling clay you add on, you take out, you add on again. Made a mistake? Nobody cares, and nothing is lost.
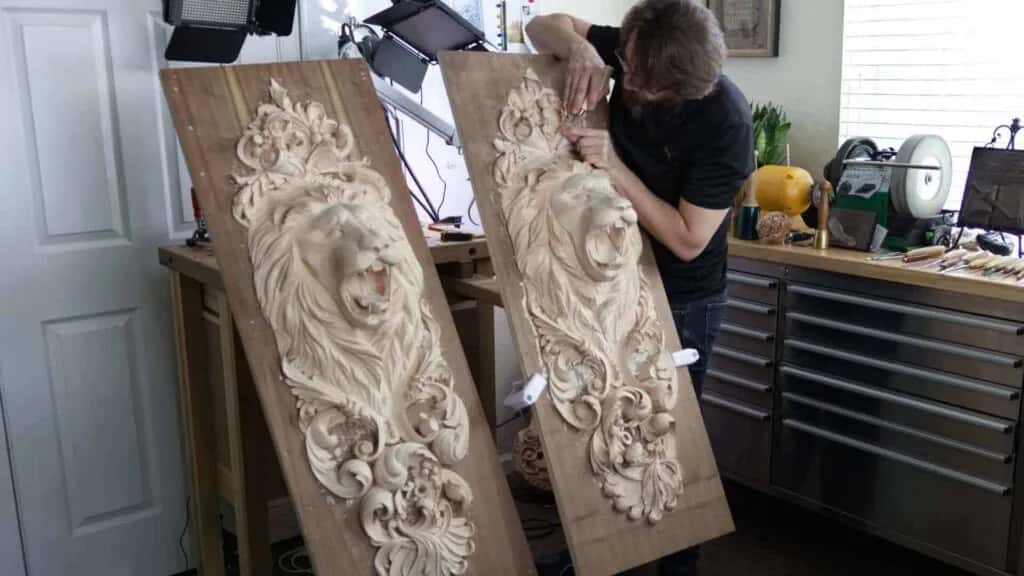
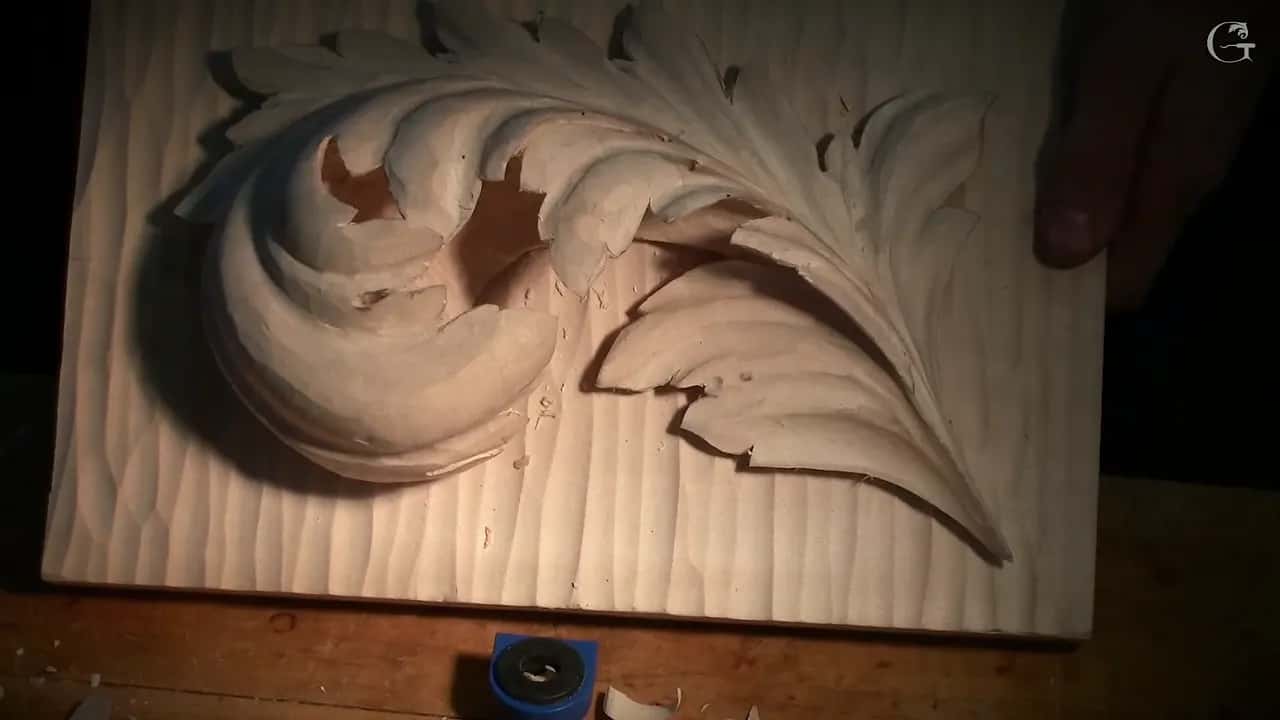
One finished, one still under the gouge. Before either of these panels existed there was a lump of clay on a turntable.
Before I touched a gouge on those lion panels I built the lion at full size in clay, about 50 pounds of it. Roughly 22 kilograms. Then I photographed it head on and from both sides, printed those, and carved from my own pattern. Michelangelo modelled too, whatever the story about a figure waiting inside the stone says.
Sculptors have transferred points off a model for centuries with a pointing machine, and I use one. Modelling warms the brain the way lifting warms a muscle. In a gym, the people who get hurt are the ones who grab a heavy bar cold and push it anyway.
Drawing, clay, or the wood, which one answers which question?
Each of the three answers something different, and asking the wrong one is how people lose weeks. Here is how they split at my bench.
| What is needed | What a flat drawing on paper gives | Clay model | What the wood itself finally decides |
|---|---|---|---|
| The overall leaf proportion | Exact, and you can measure it right there | Roughly about right | Locked the moment your ground goes down |
| Side view | Nothing, and this hurts beginners badly | Everything, and very clearly | Only once the roughing stage has finished |
| The way a lobe turns | Just a guess, because paper holds one fixed angle | Solved, and completely | Far too late to change anything |
| Depth of relief | A number you scribbled beside the finished drawing | Real depth | Whatever thickness your board happens to allow |
| The light and shade | Faked with pencil shading, and so never really true | Close enough already | The one place where any of it happens |
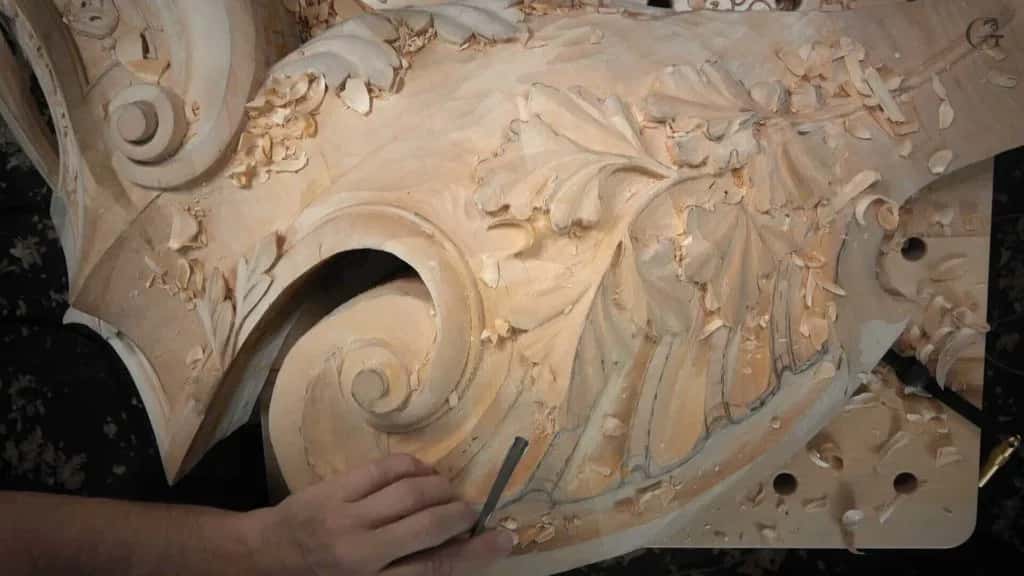
Same board, same hour. The right side is still a plan and the left side has become a thing.
Read the middle two columns against each other. Paper holds numbers you can trust, clay holds shapes you can trust, and a carver needs both before the mallet comes out.
How do you check that a carving reads in three dimensions?
Pick the piece up, turn it, and spend most of your looking on the side. Work flat and the form goes soft. In my hazelnut carving course you hear me say it out loud in the middle of roughing.
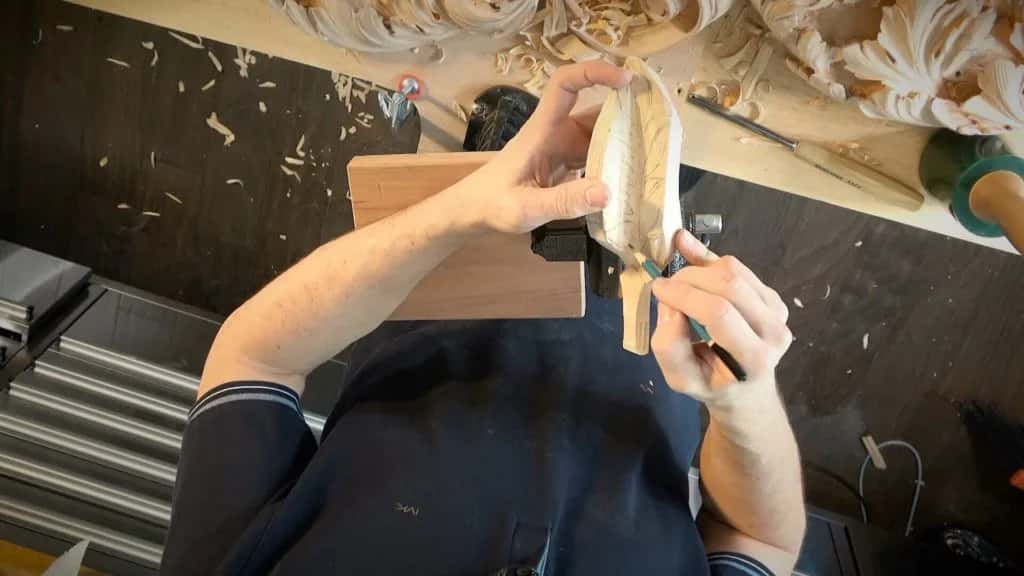
I do have to look from the side a lot. The reason is material. I have to be sure enough of it is still there, because once it is gone you cannot put it back.
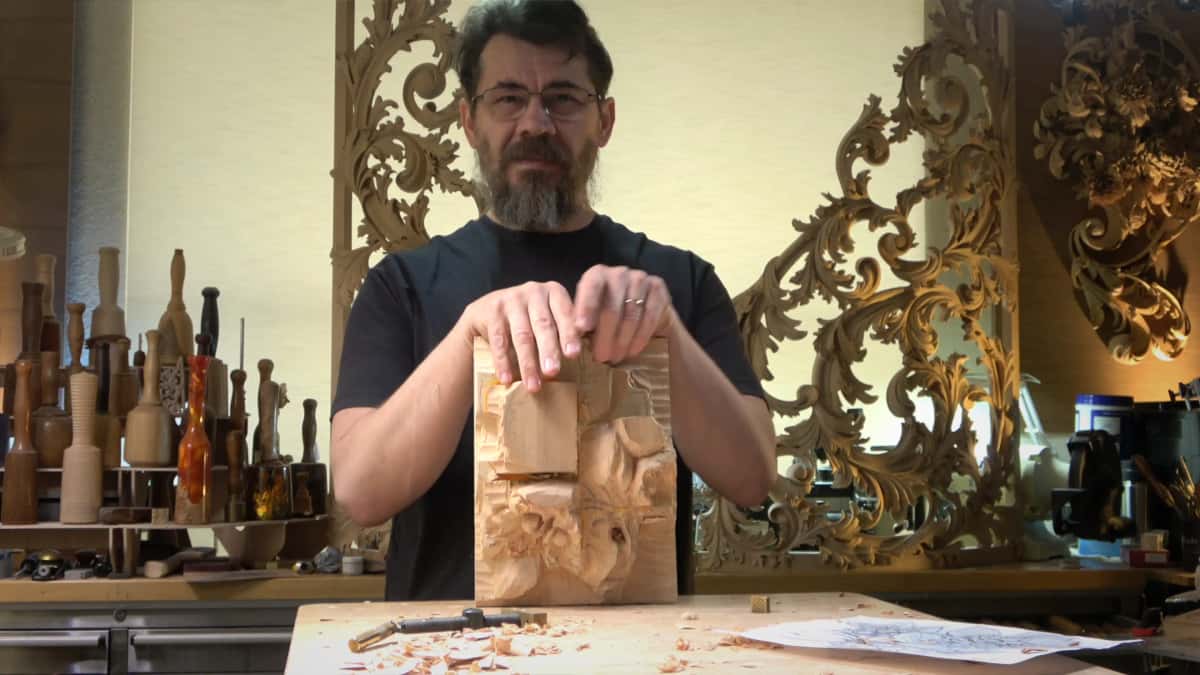
Stood upright on the bench, not lying flat. From here the husk either wraps the nut or it does not.
On the lily box I say the same thing while bringing a second layer down. Keep an eye on how it looks in profile, because I really do not want to create something I am going to regret later on. I want to make sure it looks really good in three dimensions.
That is the whole habit. Flat, side, three quarter, flat again. A shape that only works from one seat in the room is not a form yet. The second layer of a Byzantine acanthus panel punishes this harder than anything else I teach.
Is reading light and shadow the real sculptor's skill?
Light is the only thing anyone ever sees, so shade is what you are actually carving. Wood has no colour to help you. It has one tone and a lot of hollows.
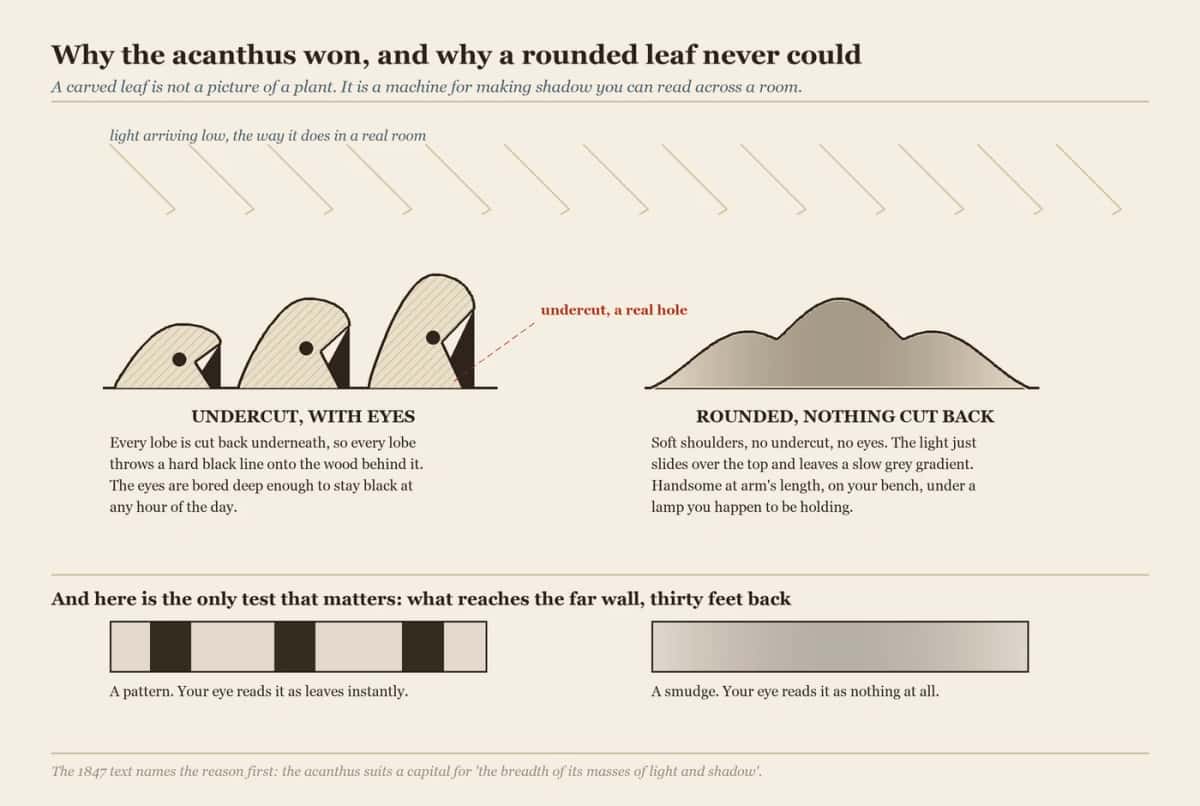
Left eats the light. Right gives it back. From thirty feet away only one of them is still a leaf.
All of it is about the shadows. A shadow under a leaf edge separates that leaf from the rest of the picture, and without the separation your panel is a rubbing. Painters call the trade chiaroscuro and fake it with pigment. Ours has to be dug.
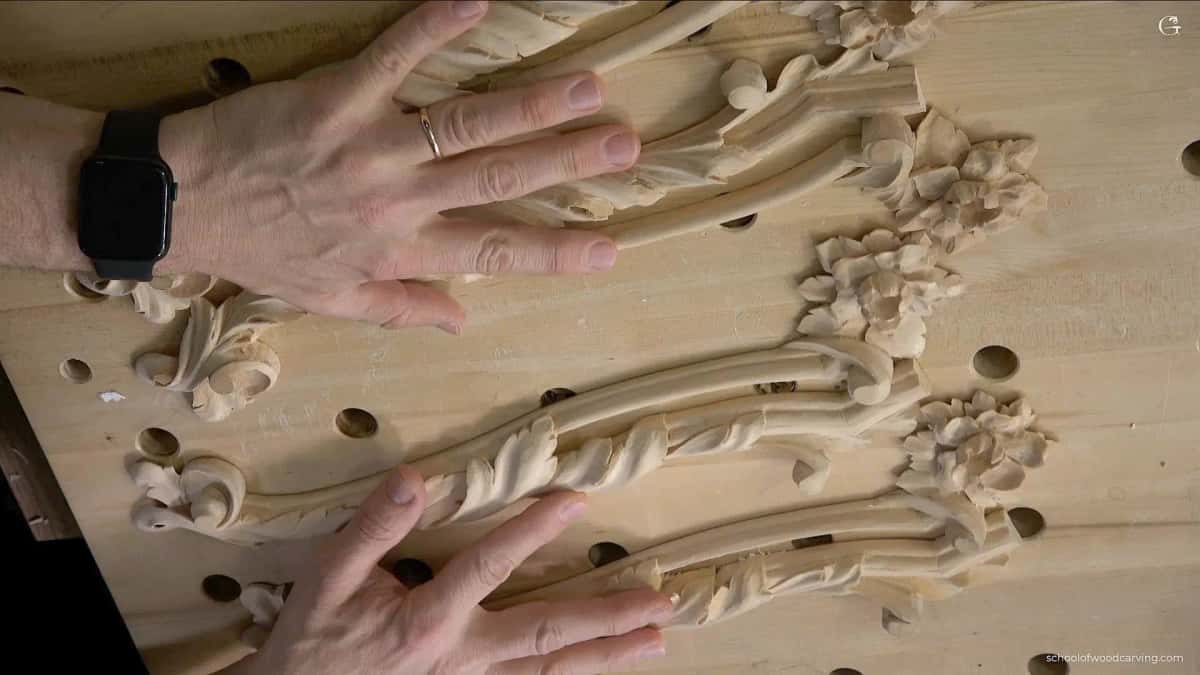
The old books knew it. In the modern acanthus course I read the line out to the class, that the concave gives you the best shadow, which is why the old furniture shops filled everything with concaves. How deep you go under a petal, how much dark you create, that part is up to you.
Grinling Gibbons undercut everything deeply, it took him forever, and you can still pick his work out from across a room. Study the Gibbons carvings held by the V&A, then the tradesmen beside him, who chopped down at maybe 15 or 20 degrees and went home. Same wage. Not the same carving.
How deep does a relief carving need to be?
Deep enough that the shadow still reads from where the piece will actually hang. Distance decides it, not the design and not your ambition.

One eighth of an inch of ground, and that is already enough to make the disc float.
An eighth is plenty for a small rosette held in the hand. A panel over a doorway needs three times as much before anyone on the floor sees a shape. Board thickness sets the ceiling, and basswood in one and a half inch stock carries more relief than most people use.
The USDA Wood Handbook will tell you what fibres do at that depth, and the numbers are honest. None of it decides the shape for you. Back issues of Woodcarving Illustrated are worth your time, and they will not decide it either. Only turning the model and looking does that.
How do you model a form when you cannot draw one?
Build the mass first, keep turning it, and let a real gouge test every hollow. No talent is required for any of the five steps.
Step 1, get a lump of clay and one honest reference
Any oil based clay works. Set a real leaf, a real nut, or a photograph beside it, and never start from a drawing that was made looking straight down.
Step 2, build the whole mass before you build any detail
Get the big shape sitting right first. Detail hung on a mass that is wrong is completely wasted work, every hour of it. Every class, day two, without fail.
Step 3, turn it and fix whatever the side view shows
Rotate a quarter turn and look again, then another quarter. Most corrections come from the profile and from behind, almost none from where you started.
Step 4, hold your own gouge inside the hollow you just made
Take a gouge and get inside the cavity you modelled. That way the tools you actually own tell you whether the shape can be carved at all.
Step 5, photograph the model head on and from both sides
Print those at full size and you have a pattern nobody sells. A phone scanning app is fine, so long as it does not distort the picture.
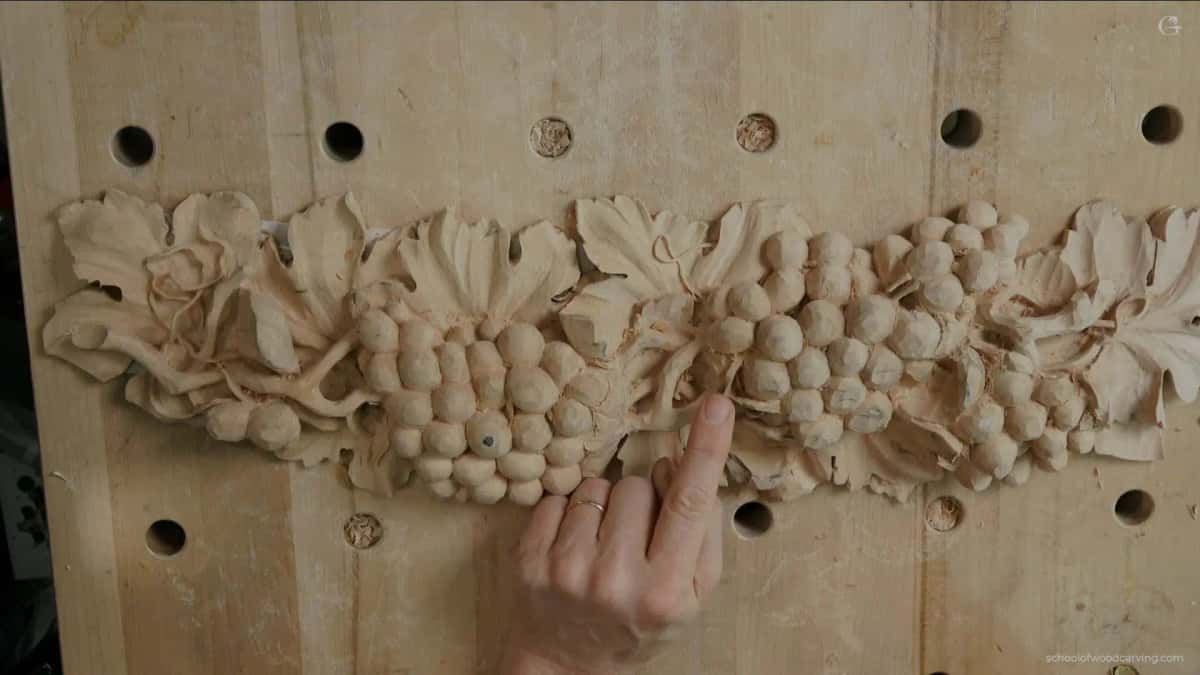
Every grape here had to be a ball before it was allowed to be a grape.
Do that once and something shifts in your head. Carving develops your ability to think and to see in 3D, and modelling in clay is not working around a weakness, it is developing even more ability. British carvers call it carving in round, and the Greek acanthus lessons are the gentlest place to try it.
Two courses lean on this hardest. Principles of design in wood carving is where the flat armature gets built, and the Corinthian acanthus course is where that armature has to survive being turned over.
You are not short of drawing talent. What you lack is information about the back of the shape, and clay hands you that in an afternoon.
Frequently asked questions
Can I carve a sculpture in the round without drawing it first?
You can, and plenty of carvers work straight from a clay model with no paper at all. What cannot be skipped is a three dimensional reference. Something has to hold the back and the sides of that shape, and if paper is not doing it, clay has to.
What kind of clay is best for modelling before carving?
An oil based clay that never hardens suits this job, because you keep reworking it for days. Water clay dries and cracks while you are still thinking. Buy more than you expect to need, since a full size head can swallow twenty kilos.
Is drawing still worth learning for a wood carver?
Very much so, though for layout rather than for form. Paper is the fastest place to fix proportion, spacing and rhythm across a whole panel. Once those are settled, paper has given all it has and the shape moves into clay.
When is a relief deep enough?
Stand the panel up and walk back to the distance it will be viewed from. Blurred into one grey field means your hollows are still far too shallow for that room. Deepen the shade under the edges before touching anything on the top surface.
Does modelling in clay slow the whole project down?
It looks that way for two days and then it pays back hard. On the lion panels the model saved me weeks, because every point was settled before a gouge went near basswood. Fixing a wrong form in wood is not possible.
Why does my carving look flat even though the drawing looked good?
Almost always because nothing was undercut. Every surface sits at the same height, so a flat drawing turns straight into a flat carving and the light has nowhere to catch. Push the hollows deeper and let one edge overlap another. Shadow does the rest.
Filed under
- beginner wood carving tips
- easy wood carving projects
- simple wood carving techniques
- wood carving basics
- Wood Carving Basics
- wood carving classes
- woodcarving courses
- wood carving for beginners
- wood carving for kids
- wood carving guide
- wood carving how to
- wood carving ideas
- wood carving instructions
- wood carving lessons
- wood carving patterns
- wood carving projects for beginners
- wood carving step by step
- wood carving techniques
- wood carving tips
- Wood carving tools for beginners
- woodcarving tutorials