
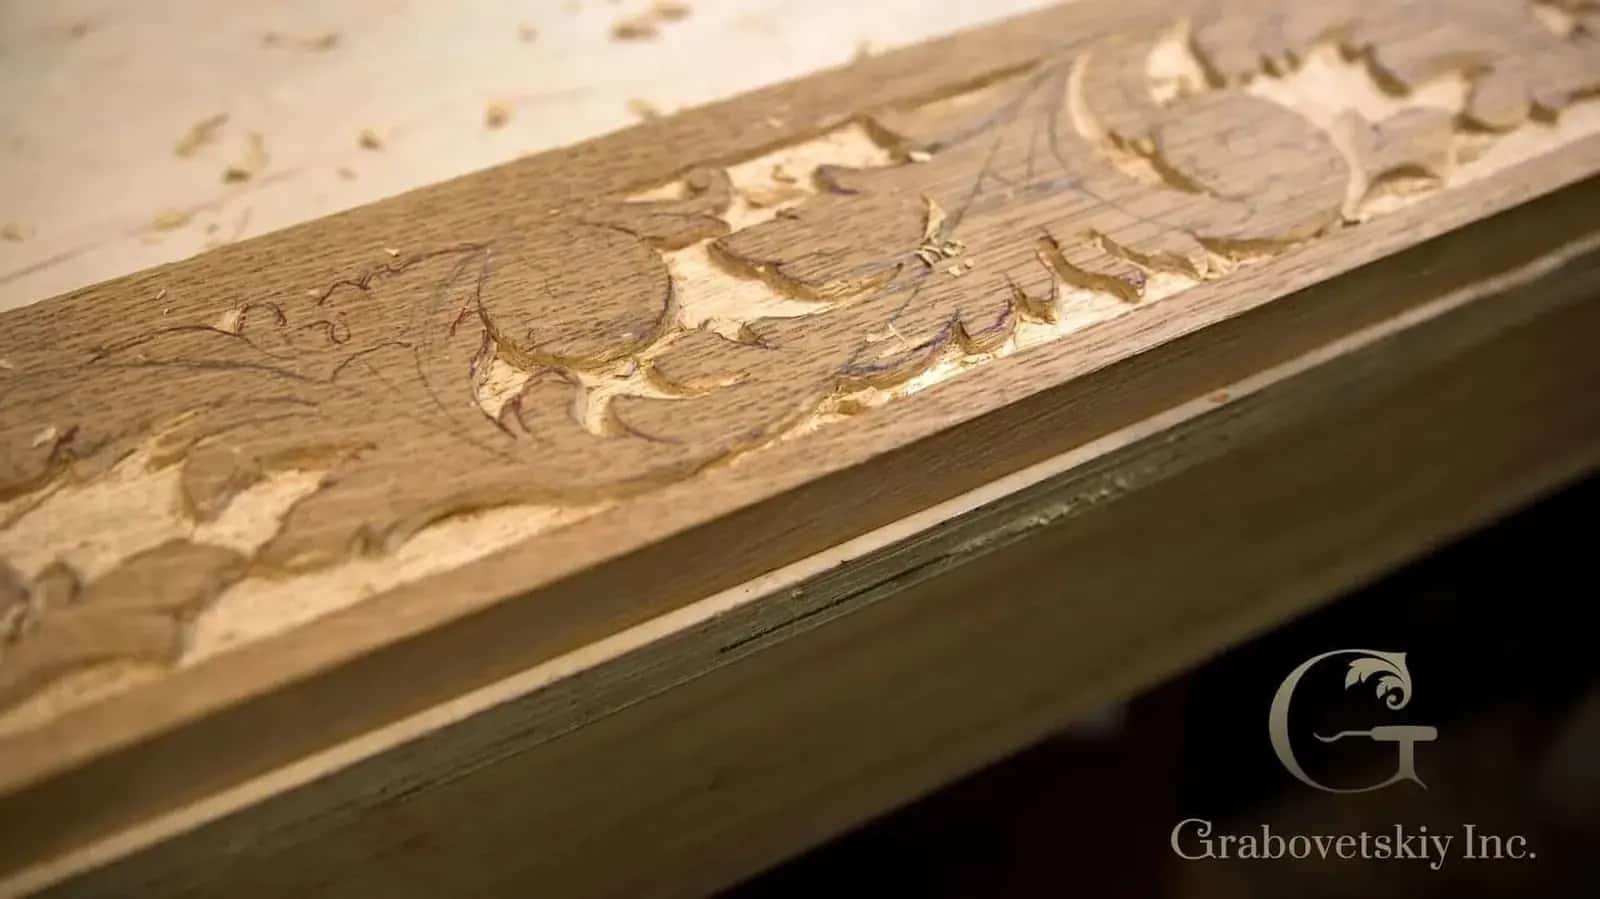
August 10, 2026
By Alexander Grabovetskiy — Master Woodcarver · Founder, School of Wood Carving · 14 min read
How to carve an acanthus over a molding
Quick answer: A running acanthus over a molding is a repeating carved leaf that follows a molded profile instead of sitting on a flat panel. The leaf is carved to look applied, laid on top, while the molding appears to run underneath it and come out the other side. That illusion, not the leaf itself, is the hard part.
You already carve a decent acanthus on a flat panel. Then you lay the same leaf on a molding and something goes wrong that you cannot name. The lobes look right on their own, the run looks stiff, and right at the crossing there is a small vertical wall the eye keeps snagging on.
That wall is the whole problem. It tells the viewer the leaf and the molding were sawn from one block, which is true and must never look true.
My master took me on at sixteen, and the thing he drilled into me was not how to draw. It was that design is the law of space and rhythm and repetition, and that you have to think like the tool. Ornament over a molding is where that stops being philosophy. Below is the order I work in, the sweeps I reach for, and the one carving at the end that makes the leaf sit on top.
What is a running acanthus, and how is it different from one carved leaf?
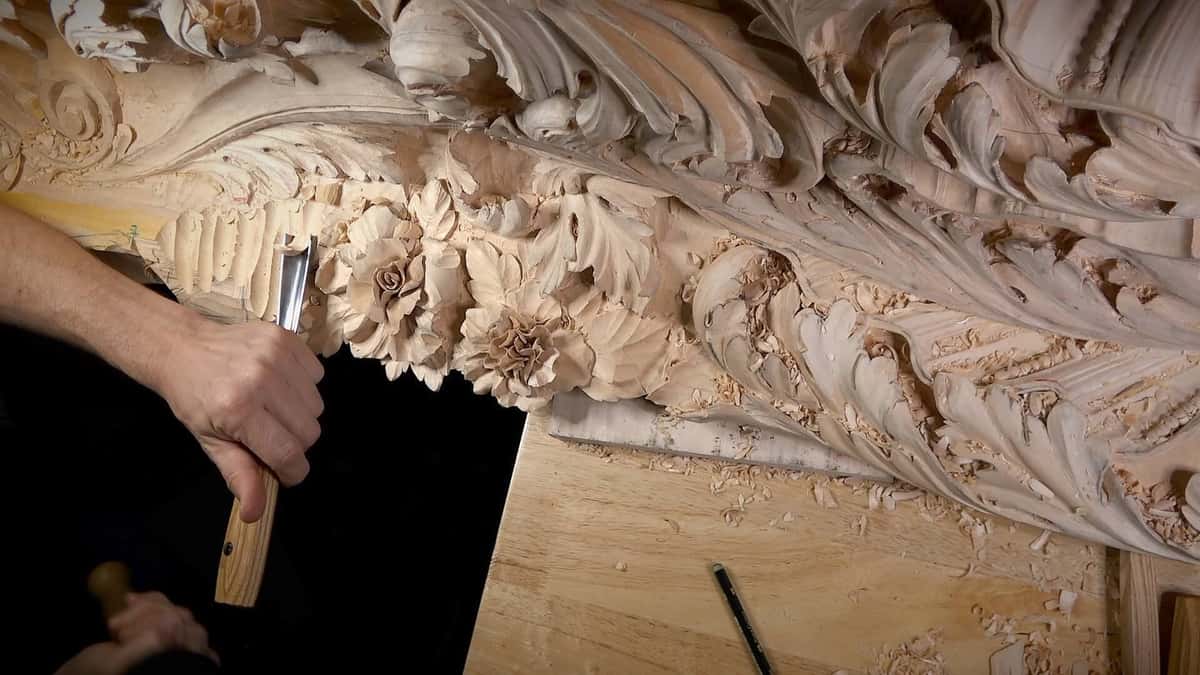
A running acanthus is enrichment, one motif repeated along a length of molding and sized to the profile it rides on. One carved leaf is a specimen. A run has to keep going, hold the same height for its whole length, and still look like it grew there.
None of this was decoration by taste. The old builders paired a motif to a profile and then kept the pairing for centuries. The 1911 Encyclopaedia Britannica entry on mouldings records the rule plainly: the ogee was always carved with the Lesbian leaf, the ovolo took the egg and dart, the astragal took the bead and reel. Greek moldings were painted with these motifs before anyone carved them.
So when a furniture maker asks which ornament belongs on his cornice, there is an answer older than his shop.
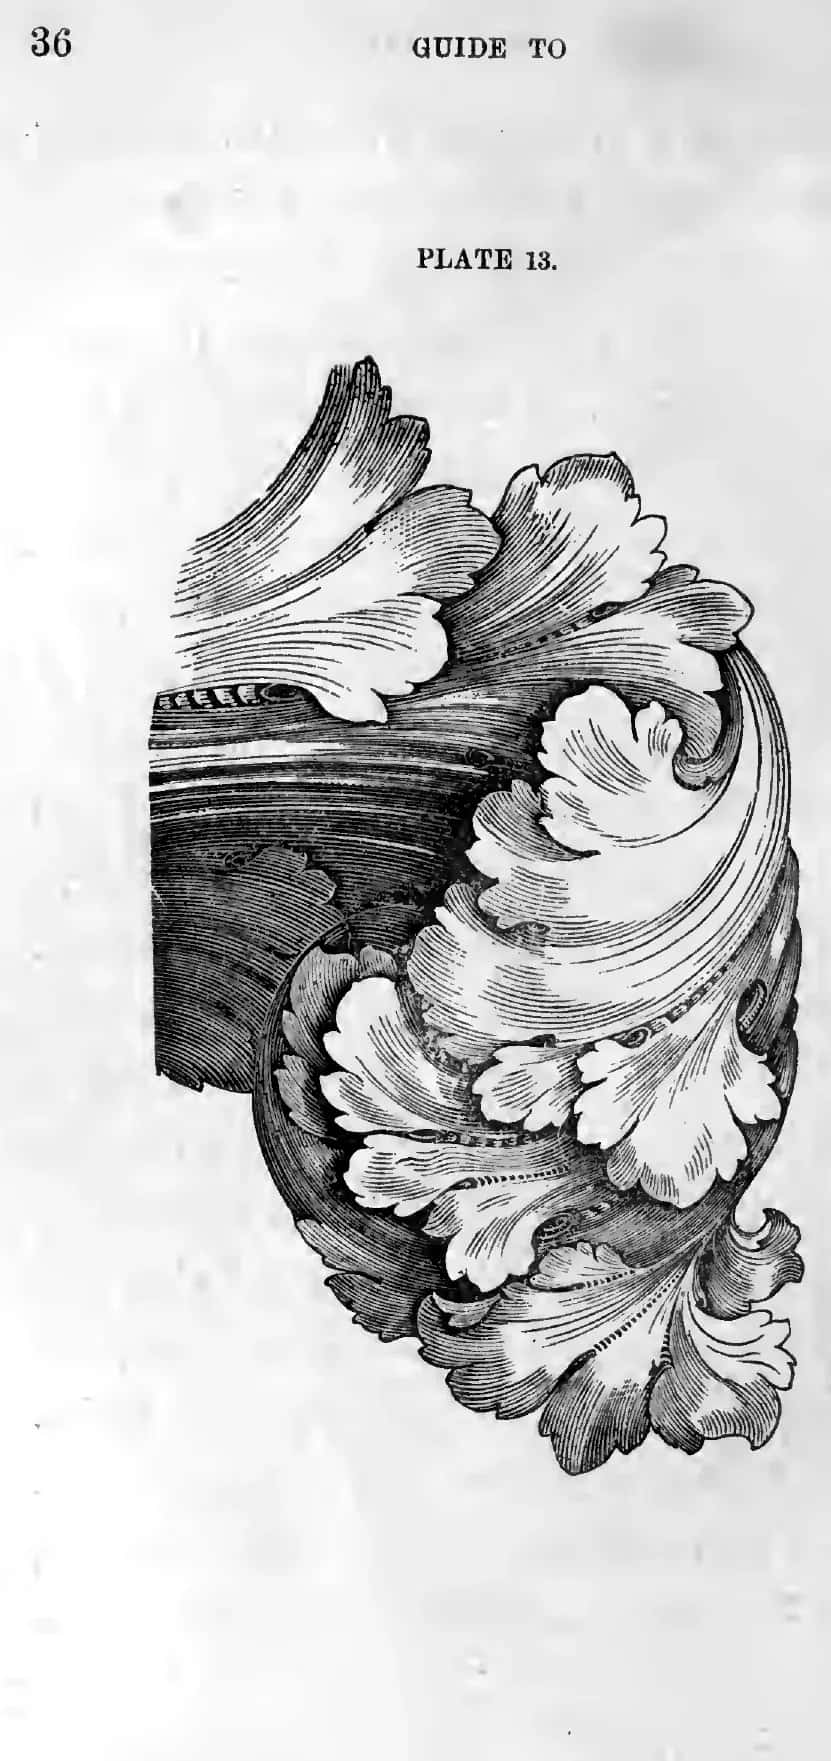
James Page drew the leaf breaking over the molding, not resting on it. That difference is the whole job.
Which molding profile takes an acanthus?
A profile with a convex belly takes foliage; a hollow does not. You want a surface that catches light along a ridge and then rolls away into shadow, because that roll is what gives a carved leaf somewhere to go.
Molding | The shape you are carving on | Its motif | What that profile hands you before you start |
|---|---|---|---|
Cyma recta | Hollow on top, round below | Anthemion | It is read from below, so the motif has to run big and open |
Cyma reversa | Round on top, hollow below | Lesbian leaf, and the running acanthus | A lit ridge sitting above a dark hollow, before you carve anything |
Ovolo | A quarter round, standing proud | Egg and dart | Round forms on a round ground, so nothing fights |
Astragal | A small half round bead | Bead and reel | Too small to hold a leaf, so it gets rhythm instead |
The cyma is not a freehand curve. Two arcs of one sixth of a circle build it, each drawn on its own chord, meeting where the curve reverses. Change the chord and the whole molding scales with it, which is why old moldings in one room agree with each other.
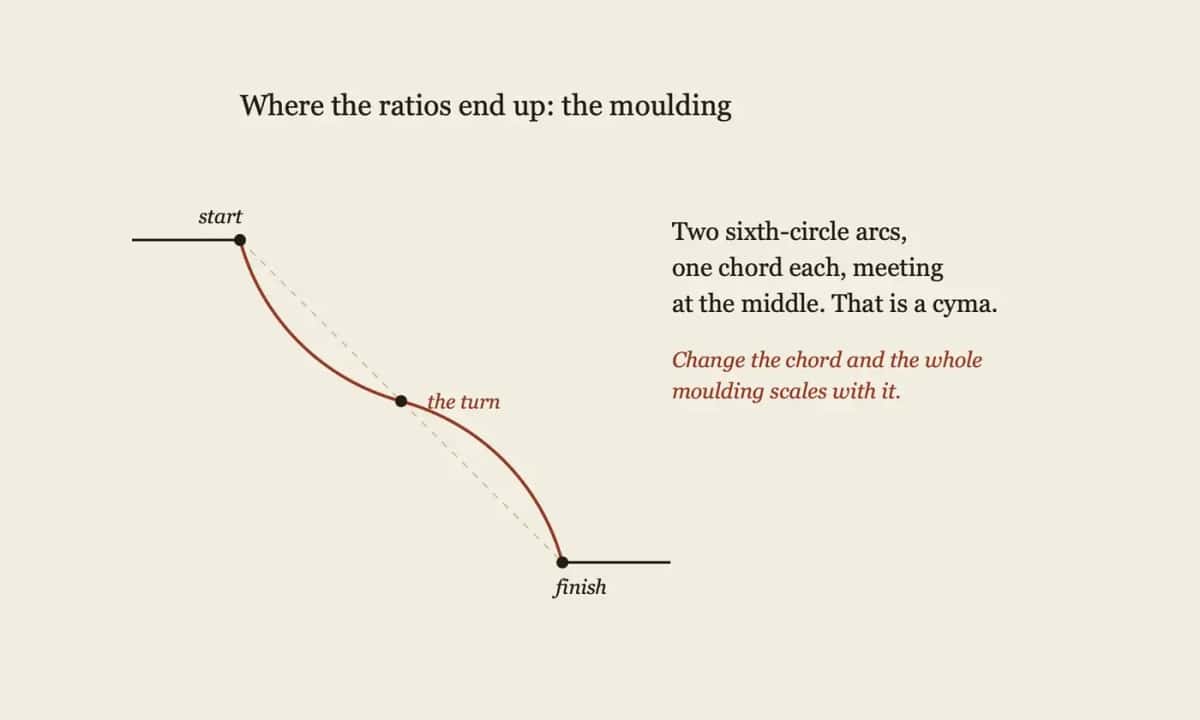
Two arcs of one sixth of a circle, each on its own chord. Change the chord and the whole molding changes with it.
Why the leaf has to look like somebody laid it on top
Carve the run so it reads as two separate things: a molding underneath, and foliage applied over it. This is the sentence I repeat most when I teach this project. Make it feel like the molding is one piece and the leaf was set down onto it, even though you sawed both out of the same board.
Everything below serves that one illusion.
The failure has a shape and you should learn to spot it early. Right where the two meet, a beginner carves straight down and leaves a vertical line. The eye then cannot follow the molding under the leaf, so the molding stops dead and starts again, and the piece looks sawn instead of built. On paint grade you might get away with it. Stain grade will show you every time.
Before I shape any leaf, I run a #17 along the outline of the future molding and hold one side of the tool at ninety degrees, no undercut at all. That frees the molding from the body of the ornament. Released early, shaped last.
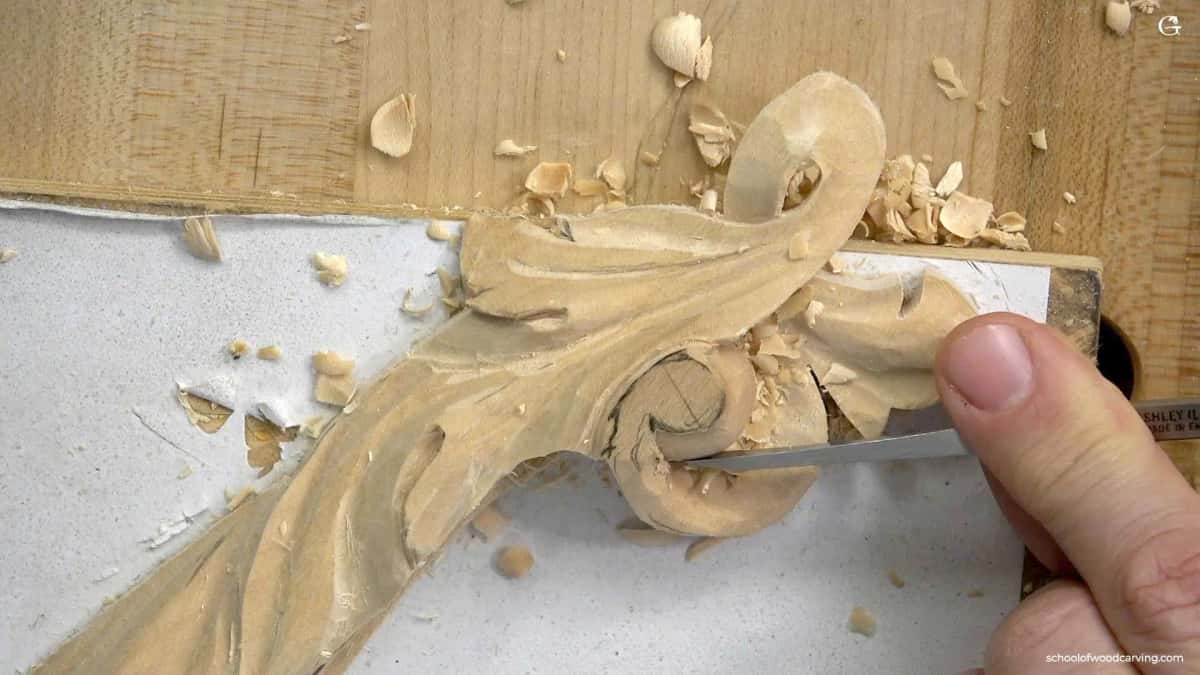
This is the carving a flat panel never teaches you. The leaf keeps its shape while the ground falls away under it.
How do you stop the run drifting?
Keep the heights mechanical and let the shapes vary. That sounds backwards to most woodworkers, who expect the opposite, and it is the single most useful thing I can tell you about a long run.
Heights get no judgment at all. Before anything is carved I score a line with a marking gauge on both edges of the blank, and that line is the high point of the molding. Nothing goes below it, ever. Then a router plane brings the ground to one depth, and I keep the piece I finished yesterday sitting on the bench beside the one I am carving so I can lay them together and look.
Shapes get the opposite treatment. Nobody measures the leaves here, and I do not want them identical. Equal divisions look dead. So the eyes and the lobes vary while the heights do not, and the run reads alive without wandering.
For setting out the repeat itself, step the length off with dividers rather than a tape. I wrote that method up separately in how to lay out a carving with dividers, because it applies to any ornament, not just this one.
Honest note: on the piece in these photos my two moldings still came out about half a millimeter different in height. I cannot tell you why. It bugs me.
How I carve it, in order
Step 1: run the profile and saw the blank out
Work the molding as a molding first, because if the profile does not look right plain, no amount of leaf laid over it will save the thing. Keep your bandsaw offcuts. They make a second bearing surface for the router plane later.
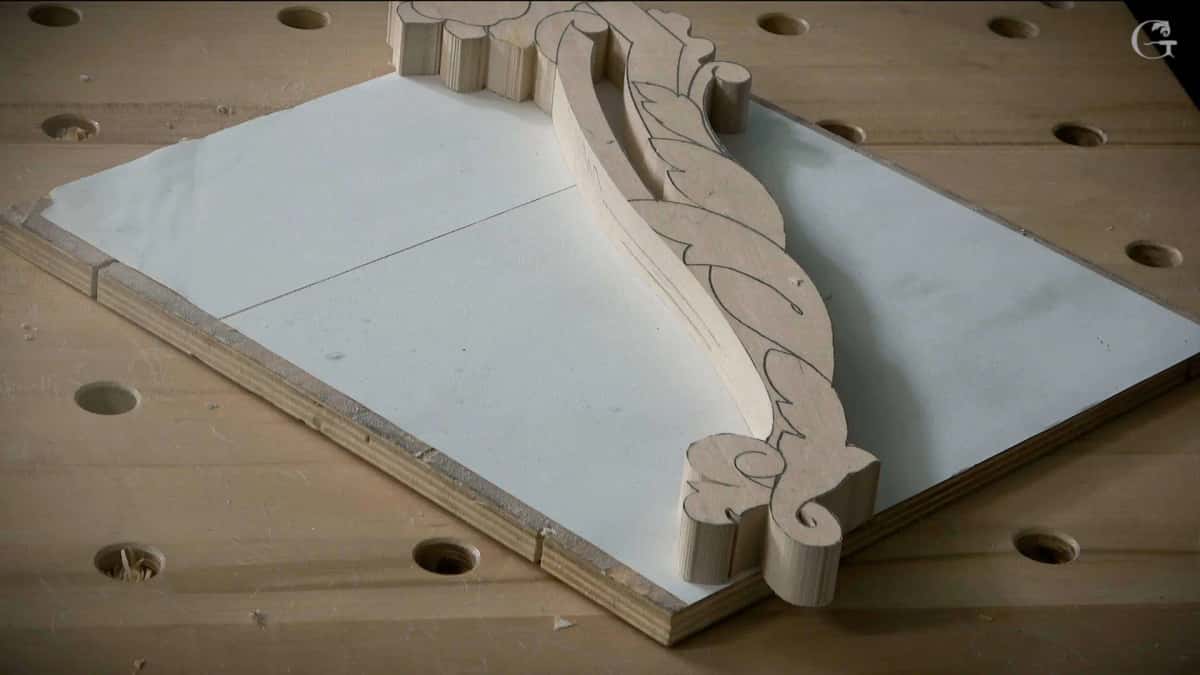
Profile first. The molding has to work as a molding before it is worth drawing a leaf on it.
Step 2: draw the ornament on the wood
Draw it on the blank, not on a print you trace. The line has to answer to the curve underneath it, and you only see that curve on the wood. I cut my molding profiles out of printer paper, cover them with green tape so they hold their edge, and keep them on the bench for reference.
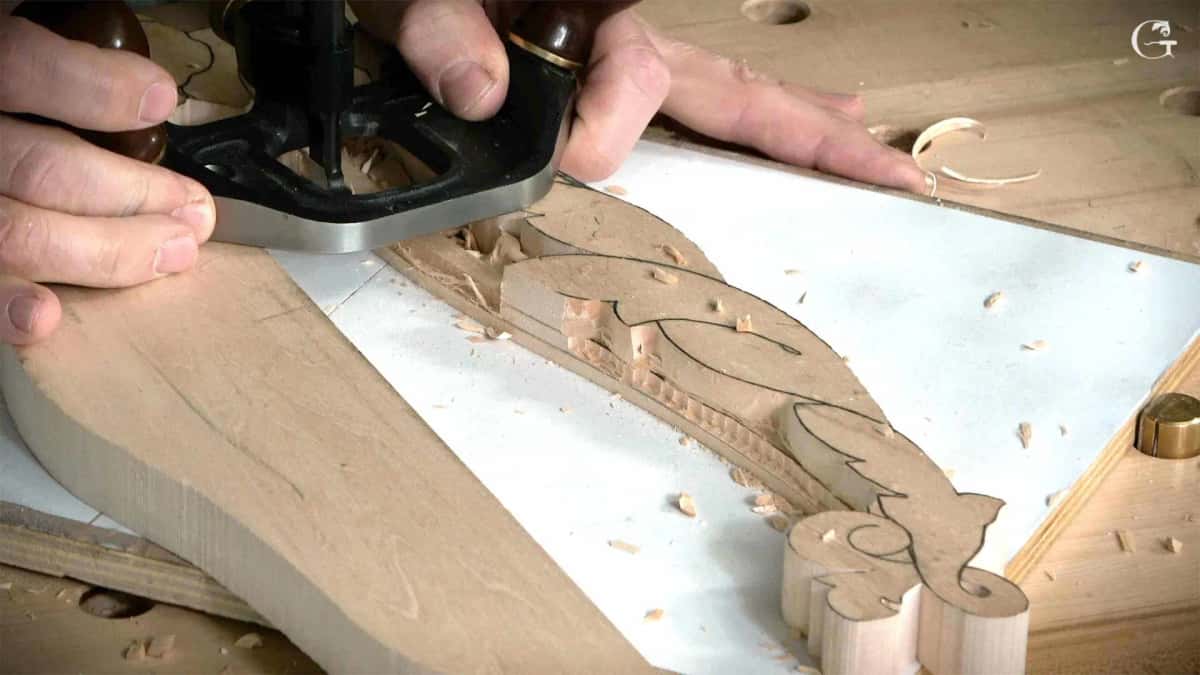
Drawn straight on the wood. The line has to answer to the curve underneath it.
Step 3: set in, in two moves
Ninety degrees straight into the line, then a horizontal carving across to meet that first one. Leave about a millimeter of wood between your line and your tool on the first pass. Twelve ounce mallet. Land each blow in the middle of the one before it and the tool does the work instead of your shoulder.
Do not undercut here. Not next to a molding, not anywhere, not yet.
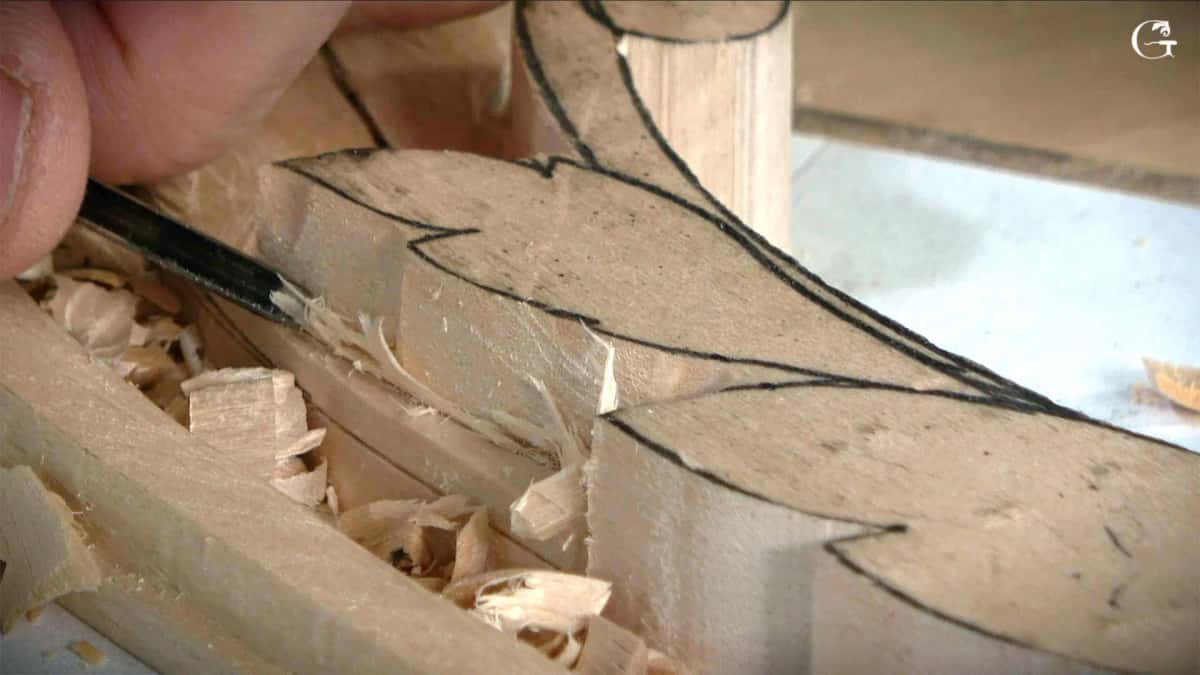
Down on the line first, then in from the waste side. Never the other way around.
Step 4: take the ground down
A #9 at three quarters of an inch, slicing on every stroke, hand planted on the work. Stop short of the line on purpose, because a different tool gives you the final surface. Then the router plane for height.
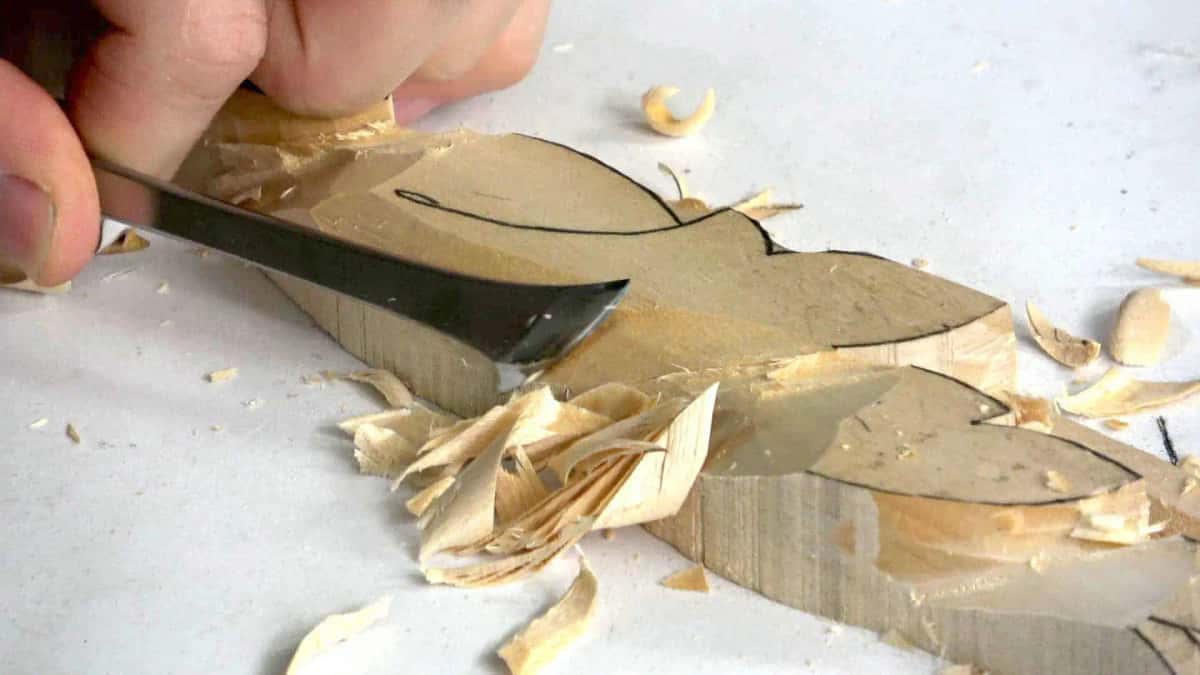
Big tool, big chips, no detail yet. Depth comes before decoration.
Step 5: find the movement and skip the detail
Big tools. A #7 up to an inch and a quarter, a #9, a #11. You are looking for the raised spine down the middle of each lobe and the eyes. The middle of an acanthus leaf is always convex, and to get a convex you have to carve two concaves beside it. Nothing is finished at this stage and nothing should be.
Then walk away for a couple of days. When you come back you see the mistakes you were blind to, and you fix them in ten minutes.
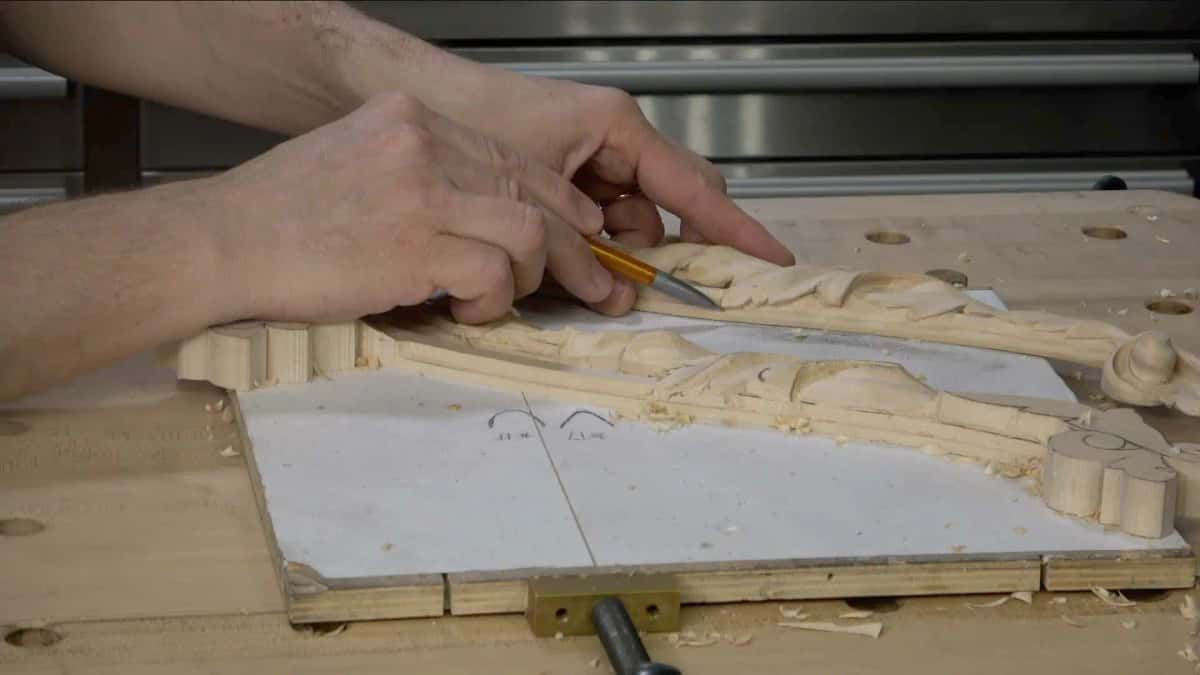
Your drawing comes back three or four times. You carve part of it away, you put it back, and it is closer each time.
Step 6: model each layer
Set in every layer separately. Where the leaf rides over the profile, keep its underside within a millimeter of that surface and keep the edge low. A deep pocket there is a trap. You still have to get a tool in afterward to work that profile, and you cannot clean what you cannot reach.
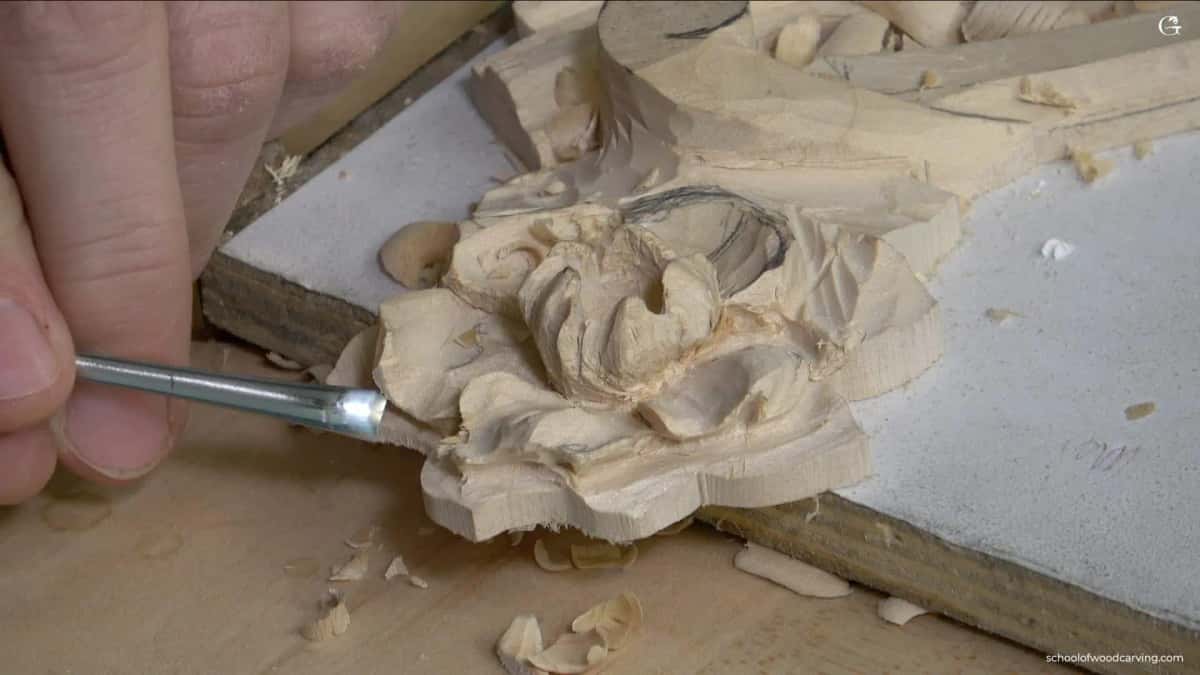
The flower stops the run, and every repeating ornament needs somewhere to stop.
Step 7: shape the molding, and then undercut the leaf
The moldings are the last thing I carve. Pencil a center line down each one, then take multiple chamfers until the round appears. A round is just enough chamfers.
Then the carving that pays for the whole job. Undercut the leaf where it crosses, bring the carving right to the edge, then lay a knife upside down and blend the undercut into that edge so there is no wall. Now the molding runs under the leaf and out the other side, and the shadow does the rest.
Deeper undercut, more fragile. On a panel that people will touch, keep it shallow.
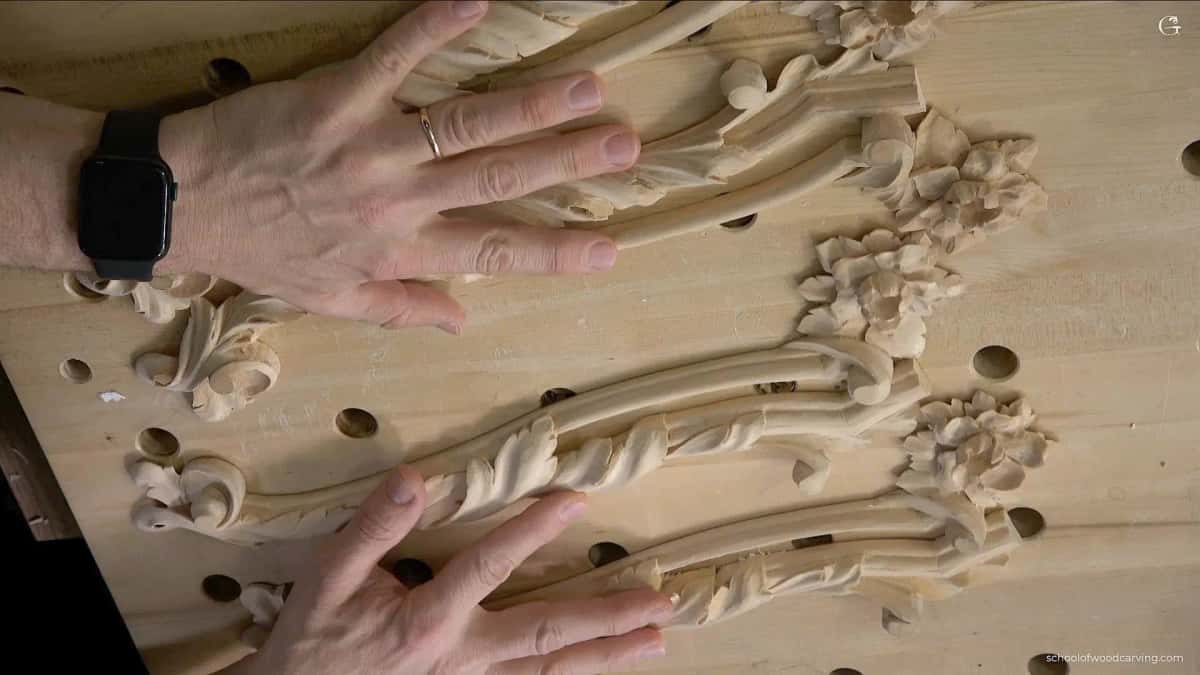
Nobody sees your depth. They see the dark you made with it.
The stage | Tool and size | What it is doing at that point |
|---|---|---|
Grounding the waste | A #9 gouge at three quarters of an inch | Clears the waste in a hurry |
Levelling the ground | Router plane, blade from 2mm to a quarter inch | Brings every piece level |
Setting in | A #3 or #2, sometimes a #1, from 3mm to 16mm | Ninety degrees into the drawn line |
Releasing the molding | A #17 gouge, 3mm and 6mm | Frees the profile from the body of the leaf |
Bosting the shapes | A #7, up to an inch and a quarter | Big movement across the whole run |
Modelling the flower | A #11 veiner, from half a millimeter up to 20mm | Cuts the raised spines and the eyes |
The last undercut | A #9 spoon, 1mm, with a tiny hook | Makes the leaf look applied |
Sharp beats clever. You cannot always carve with the grain on a run this long, and the answer is not a better tool, it is a sharper one. My strop is a scrap of leather with a little paste on it. Leather shops give the offcuts away.
What happens where the molding turns?
On the piece here the turn is carved, not joined. The molding runs into the corner, changes direction, and passes under the ornament, all in one board, so it looks mitred without being mitred.
A real mitre is a different question and I am not going to pretend this project answers it. Agrell, who does this commercially, resolves corners by placing a carved motif at the mitre so the profile never has to meet itself cleanly. Which is a design answer, and a good one.
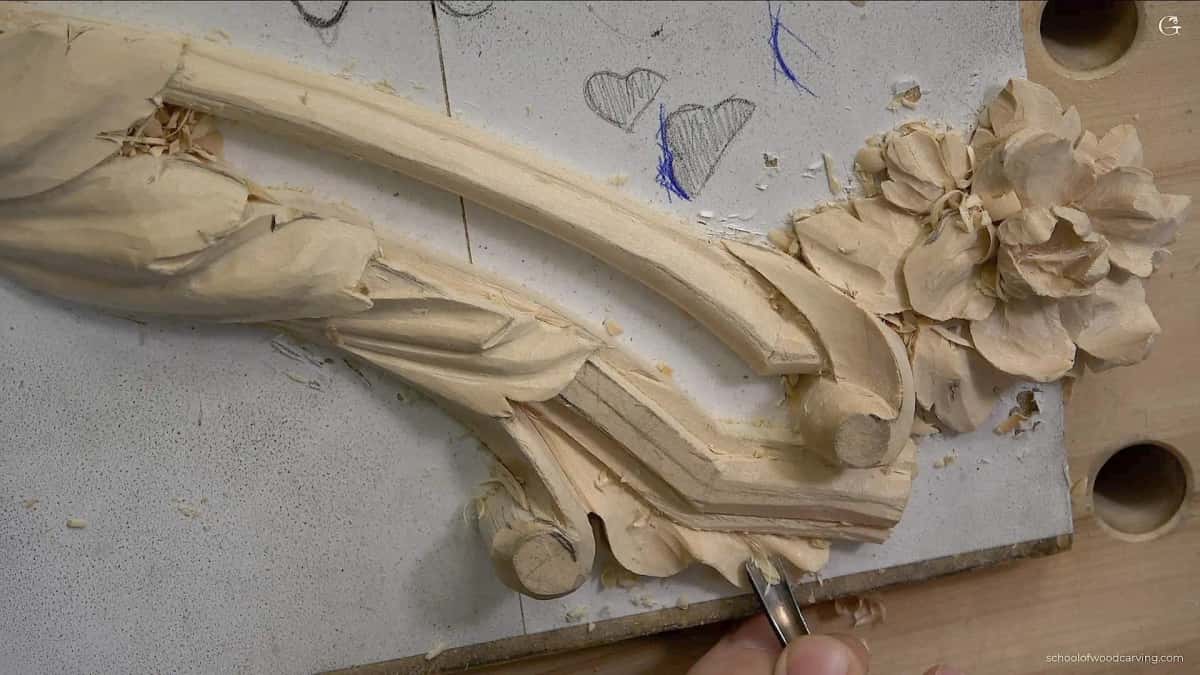
Follow it end to end with your eye, because wherever it stutters is the place where you hurried.
Is it worth carving by hand?
By any hourly arithmetic, no, and it has been that way since about 1800. Composition ornament, the pressed putty substitute, existed precisely because carved ornament cost too much. The National Park Service brief on composition ornament traces the trade.
One carver documented 64 acanthus leaves at about three hours each. That is 208 hours for eight columns. His figure, not mine.
So carve by hand for the reason that survives the arithmetic. A cast leaf has one depth of shadow because it came out of one mold. Hand work does not, and at six feet away that is the only difference anybody actually sees. Wood carving is all about the light and the shadows.
Where the motif came from in the first place
The story comes from Vitruvius, Book IV, and every carver should know it. A young woman died at Corinth, her nurse set a basket of her things on the grave with a tile over it, and the basket happened to sit on the root of an acanthus. Come spring the plant grew up around it, and the leaves that reached the corners of the tile curled back into volutes. Callimachus walked past, liked what he saw, and built the Corinthian capital out of it.
Whether that is history or a good story, the shape has been in service for about 2,300 years. James Page, whose 1880s drawing guide is in our free library, wrote that no other foliage is ever mentioned by any writer, ancient or modern, and that no substitute has been found with the same freedom.
Five things that decide whether it works
The gauge line on the edge is the molding's high point, and nothing gets carved below it.
Free the molding from the leaf early, and give it its final shape last.
Heights are mechanical. Shapes are eyeballed, and unequal on purpose.
A vertical wall where leaf meets molding kills the illusion on stain grade.
The undercut and the blend at the end are what make it read as applied.
Questions carvers actually ask
Do I need a mallet, or can I push the gouge? Both, and the choice is the job. Setting in wants a mallet, twelve ounces is plenty, because you need a controlled blow straight down. Modelling wants your hands. I use a rubber headed mallet most days for the noise.
Cyma recta or cyma reversa for a running leaf? Cyma reversa. Its convex is on top where the light lands and its hollow is underneath, so the profile is already doing half the shading before you carve anything. That confusion is common enough that it comes up in classical architecture groups regularly.
Should I sand a carved molding or leave the tool marks? Leave them, mostly. Facets are the brush marks of the piece and a sanded run goes soft and dead. I changed my mind partway on this after students kept asking, so now I will use mesh abrasive when the piece calls for it, but never below 180 grit. If you want to polish, burnish with a piece of wood. Never metal.
What wood should I use? Basswood or European lime to learn on. For furniture that has to match a case, walnut, cherry, or white oak all carve well enough. Skip poplar. Not that you cannot carve it, but the stuff feels wrong under the tool and it gives nothing back.
Do I carve the molding before or after the ornament? The profile gets run first, the ornament is drawn and carved next, and the molding gets its final shape last. Sounds inefficient. That is still the only order that works, because the molding has to be shaped to whatever depth the finished leaf leaves it.
How deep should the relief be? Less than you think. On the shell in this piece the lowest point sits 3mm down and the highest 5mm, so two millimeters of variation carries the entire movement. Depth is not what reads at a distance. Shadow is.
Who is telling you this
I am Alexander Grabovetskiy, a master carver and International Woodcarver of the Year. The piece in these photographs is one of four identical sections for a Venetian panel, carved in the style of the late fifteenth and early sixteenth century. I deliberately kept certain modern tools out of it, because those carvers in Venice had no V tools, and a tool mark that could not have existed then does not belong on a replication.
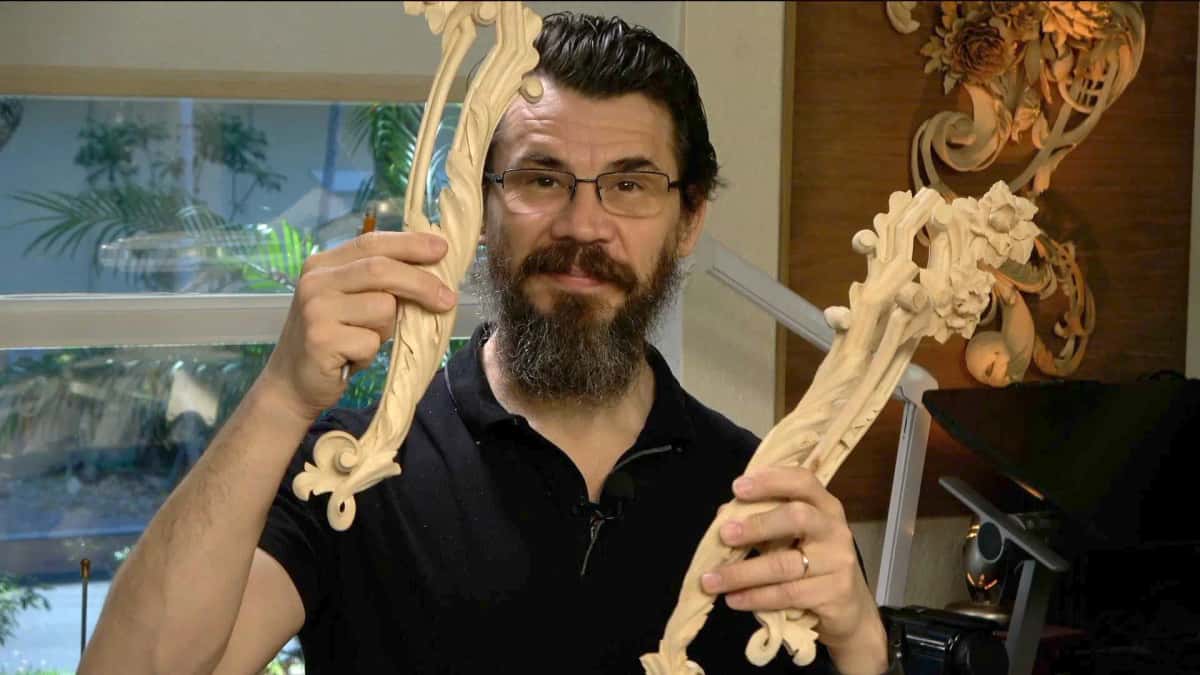
One piece of wood, one leaf that had to keep going and still land on its feet.
The whole thing runs as ten lessons inside Acanthus over Moldings, where you watch every carving happen instead of reading about it. Want the leaf on its own first? Start with how to draw the acanthus leaf. And if furniture carving is new to you altogether, begin at wood carving for furniture makers.
Tim Yoder turned me a cherry mallet years ago, when I was teaching at Marc Adams, and it has sat on my bench ever since. Never used it once. Do not want to mark it up.
Get your gouges sharp, put a scrap of molding in the vise, and carve six inches of it before you touch the real piece. Shall we carve?