

Alexander Grabovetskiy, woodcarver, School of Woodcarving · Published 2020
What does roundy mean in wood carving?
Quick answer: The second video of workshop 39 has me saying that I want the look to be roundy. Next came a ridge I planned to chop. In Hashemi flowers 12 I said I made the word up myself, and it works every time. On one livestream I said I use it all the time.
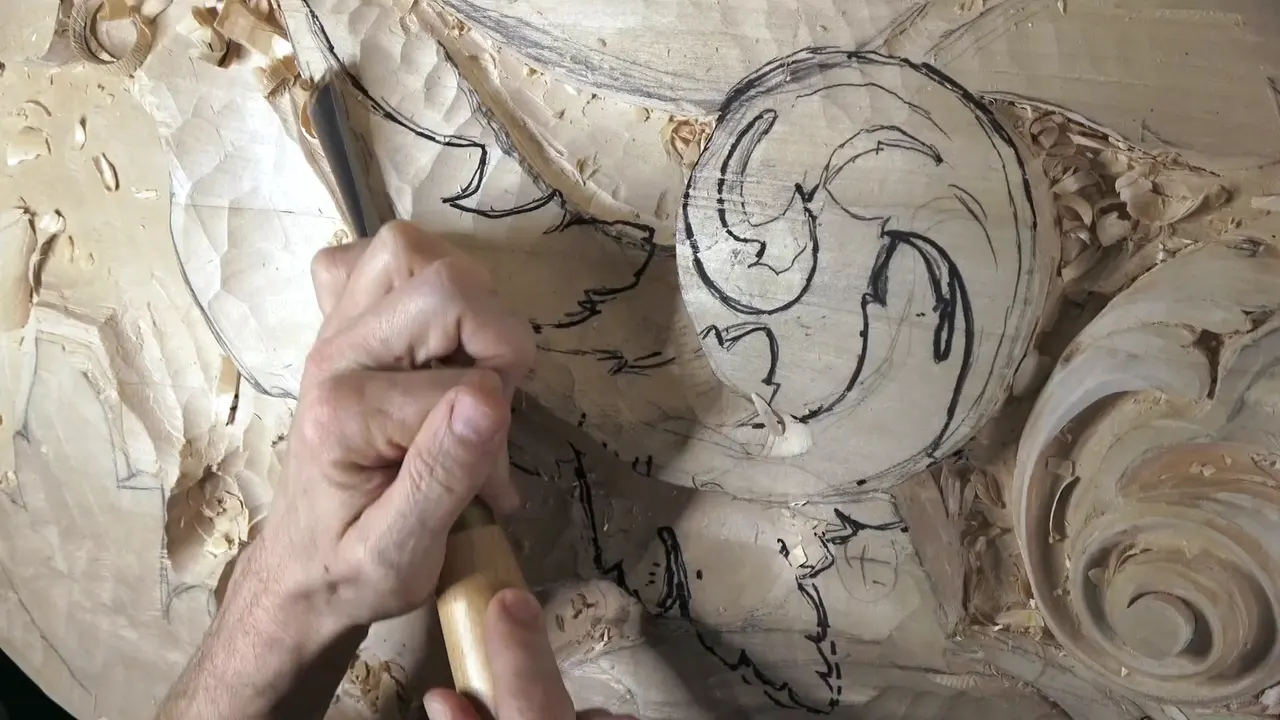

Roundy is my own word for a part I want to look rounded, and I use it when I plan the rounding and again while I do it. Part 2 of Venice Room workshop 39 has me saying, on the other hand, I want to give a roundy look. Other lessons catch me wondering if it is a word at all.
Have you ever stood over a ridge, tool in hand, and wondered how round it should go? Did the next pass look like it would help, or just take more wood? Then the places where I said roundy may give you something to measure against.
This page gathers them. It covers the Hashemi flowers, Roman acanthus, Greek acanthus, a lily box and a chamomile rosette. So are a hazelnut lesson, a grape onlay, nine more Venice Room workshops and a question and answer livestream. Most use a gouge. One mentions a knife, and a hazelnut shows a prolonged shape.
What the word roundy covers on my boards
- In 39.2 I wanted a roundy look, and I planned to chop a little of a ridge.
- On the Hashemi flowers my rounding cut took a number 7 at one inch (2.54 cm), and it made the part roundy.
- A part can be not roundy enough, and a number 5 was my tool for it.
- A ridge can wait to be rolled later, and a deeper concave beside it gives extra shadow.
- A part can be too roundy, and then it doesn't look natural.
- Some shapes, like a hazelnut with a prolonged form, are not roundy at all.

What did roundy mean in Venice Room 39.2?
A look I wanted. Something there needed to be chopped out because it was too high. But I want to give a roundy look, I said, on the other hand.
My plan came next. Let me chop a little bit of this ridge, and let me see if I should add some more details on the inside or not. We'll see, I said, and then said it once more before I turned to the tool.
Probably just a number 5, I said. Or actually, you know what, a number 3 could do in this case, and I could start developing. One inch, I added, is kind of big.

Earlier in this part I had laid out the area. One line would sit higher than the overall development underneath it, and from above that doesn't look right, design-wise. You have to understand it's going to rise up, and this part will match that part.
Separations came up too. There's going to be separation, I said three times in a row, and I like this.
Is roundy really a word?
I'm not sure, and the camera has caught me saying so. My rounding cut, as I call it, was the job on the Hashemi flowers, where the part had to be roundy. Then came the confession. I just made this word up myself, but it works every time. When I use it, I know exactly what I'm talking about.

A livestream in April 2020 caught me again. I was developing a shape that wasn't finished. That is approximate yet, I said, but it needs to look logically roundy. Whether the word is in the vocabulary at all, I can't say, but I use it all the time. The April 2020 livestream has it on video.

There is more in Venice Room 53. I was using a number 11 and a 4 mm (0.16 in) veiner, and I planned to outline a little deeper and start my filleting and my roundness. Almost every project, I'm saying it. If there is no word, now there is a word, because it is roundy. If you can say curly based on a curl, I said, you can say roundy based on a round.

How do you make a part roundy?
With a rounding pass, and the tool depends on the part. Number 7 in one inch, 25.4 mm, did the job on the Hashemi flowers. Exactly the same on the other side with the same tool was my next plan. My goal was a curl underneath, flowing nicely like a flow line, attacked from all the directions until I was happy.
For a Roman acanthus leaf the plan was a number 5, a quarter inch (6.4 mm), to kind of make it roundy. Three ridges were on my list. Next came a number 9 on the right side, and the plan was exactly the same on the opposite side.

A flatter gouge came out in workshop 83, a number 3 at about 10 mm (0.39 in), three-eighths of an inch. So now I need to fillet that pipe, I said. Or make it roundy, make it more convex.
Another try, this one with the pipes, came in Venice Room 13. A long pipe was going to be there because I wanted to see really good movement, with a plan for another concave right on the side of it. The idea is the same, I said. I want to make this part more roundy. I said I'd try the number 7 upside down, because it should give me really good roundness. It looks like it works just fine, though it's not the final form.
Later in that part the pipes needed to be more roundy, and I said I'll use an upside down number 5. One side, another side. I really want to pop them out, I said. I want to see them.
Venice Room 22 had me getting rid of a ridge, just a tool mark. I planned to get the right movement later. Round this a little bit, I said, because right now it's not too roundy. Number 5, at 8 mm (0.31 in), was in hand, just a little bigger than a quarter inch.
On the chamomile rosette, one part had to go all the way down, just like dropping down. Right now it's too big. A flatter tool was needed, like a number 3, in my case about 10 mm (0.39 in). I don't want to rush it, I said. Somewhat roundy, if you wish, was the look I was after, and I have to go from all the sides. Later I called it really, really rounding it off, with just the one tool pretty much.

What does a roundy look begin with?
A first shape. Workshop 69 asked for a really nice, roundy look. What I mean by that, I said, is that I need to chop and create the first shape, how it's supposed to look.
Maybe a number 9 at 20 mm (0.79 in), or something like that, like 3/4 of an inch (19 mm), for a small chop. Not much, because I didn't want to rush it. In 39.2 the words roundy and chop sit in the same breath as well.

In workshop 58 the word was feel. All I need is just to create that roundy feel, I said. This has to round a little bit, just not overall. This part rounds down. The right side also rounds down. A side that would be visible more counted for more, so I worked to get that side as clean as possible.

Can you plan a roundy shape and carve it later?
I can, and workshop 57 did. A ridge was needed there because I was going to roll it a little later. Roundy was the plan there. A veiner at 7 mm (0.28 in), a number 11, made a little deeper concave on the sides first. That would give me extra shadow, if you wish.

Something close happened in Hashemi flowers 20. A small volute start came first, which is how I call the start of a leaf. I said I'd make it a little roundy. Cleaning, cleaning, and cleaning followed, and a big number 7, one inch, could make one beautiful cut.
A separated part needs care so it doesn't break, and the Hashemi curl showed it. Roundy again, with the same tool, carefully, was the job. Just because I separated it, there's not much support, so I have to be really careful how I approach it.
| Where | What I said about it | Tool |
|---|---|---|
| This part | A roundy look, with a little chop of this ridge | Maybe a number 3 |
| Hashemi flowers 12 | So it has to be roundy | Number 7, one inch (2.54 cm) |
| Roman acanthus 9 | Kind of roundy, and out with that ridge | Quarter inch (6.4 mm), number 5 |
| Room 22 | Right now it is not too roundy | 8 mm (0.31 in), number 5 |
| Room 57 | I need that ridge, to roll it a little later | Veiner, 7 mm (0.28 in) |
| Grape onlay 7 | Not too much, only a little | Back bend, number 7, on an edge |
| Hazelnuts 5 | Not truly roundy, a prolonged shape somewhat | None, just its shape |
When does a part become too roundy?
When it won't look natural. A back bend, number 7, was my pick for rounding an edge on the grape onlay. Too roundy wasn't the goal, but a little bit is right. Part 3 of that lesson, with a back bend again, made the point once more. Not completely roundy, because it's not going to look natural.
Too flat is the other risk, and the Grinling Gibbons class in Maine says so. For the back of a tulip I planned to start my rolling motion with a number 2 and create multiple chamfer cuts, chamfer by chamfer, and round that thing. I really want to make sure it looks roundy. That is the spot you can't mess up. You can make it too flat, and it will look really bad, like a pancake. Really make sure you understand the roundness, I said, and it's supposed to go all around.
Some shapes aren't roundy at all. Hazelnuts lesson 5 had me keep an eye on the shape of the hazelnut itself. It is not truly roundy. It has a prolonged shape somewhat, I said. Aiming matters too, because the nut grows from the inside outward.

The lily box had a tiny fillet to make a part more roundy, and I didn't want to overdo it. Leaving it was probably better. A chamfer is just a 45 degree cut, I told you in Lily Box 3. Filleting is like a rounding. A knife was an option there, and I thought that was a good idea.

How does roundy work on the points of an acanthus leaf?
The end of a leaf can be roundy. A sharp point is normal on a later acanthus, I told you on a Roman leaf, or on a Greek one. Here the end is more roundy, with still a little point, but not much. For rounding one, I planned on a number 6 at 14 mm (0.55 in), because right then it didn't look too appealing to me.

Old Italian work comes into it too. The first Venice Room course, in workshop 8, has me pointing at it. Those acanthus points never had sharp points, I said. They had more like a roundy. For staying really close to the original design, that detail needs your attention. Not every acanthus design has a sharp point.

Can a tool be roundy?
It can. Workshop 29 used a number 11 at 20 mm (0.79 in) from a different maker, with a profile that doesn't have a pronounced U. It's still a U shape, but not as other brands. Just a little more roundy, which in this case works really perfectly, I said.
I knew I was wiggling, and I said the roundness of that tool helps me a lot. The Greek acanthus course makes a related point. A gouge goes up to a number 9, the exact half of a round, and after that they're already veiners. If it's still roundy but it's a veiner, you can place it, and its wing is higher than a half round, so it's more like a U shape.

What else happened in 39.2 beside the roundy look?
A plan, then big tools. A big acanthus head wasn't what I wanted there. For me there was no reason, because a big part and a big detail were right there. All the attention going to this acanthus end was not something I wanted.
That end would be probably plinthy, I said, still kind of big because it's going to go all the way.
Flowers would partially hide this. It would still be visible if you look from the side, so it was still somewhat detectable, okay, I should say. That's why I was doing this leaf right there.
Maybe sometimes it's a good idea to just use a skew, I said. With a skew, I can give actually any shape I want to. See? It's just gradually moving like that, which is beautiful.

Next I planned to excavate around this detail, because this part would be much lower than that movement. Number 11, I said, or 9. Like a big number 9, three-quarter of an inch (19 mm). Preliminary, just remove some of that material I don't need.
Well, actually, no. I could just take overall right away pretty much downhill and then redevelop it, which maybe I should. An even bigger tool could do it, a much bigger tool. That's going to save me some time. Chopping right away around looked possible, and this has to go down also.

The next part has a related line. Instead of 20 minutes, I can spend a couple of minutes with much bigger tools.
Where will your next roundy shape start?
Is there a ridge on your carving that is too high right now? Can you see which side will show more? Then chop the first shape before you round it, the way workshop 69 says.
The ridge sits in part 2 of workshop 39, and the Venice Room course for workshops 38 to 49 holds the whole board. For every course of the school in one place, start here. Wood carving is taking wood away, in relief or in the round.
How it's done
- Chop the first shape. A first shape began the roundy look in workshop 69.
- Pick the tool for the part. One inch, number 7, was the rounding tool on the Hashemi flowers. A number 5 was my tool for the ridges on a Roman leaf.
- Round it a little. Round it a little bit, as I planned in workshop 22.
- Work from every side. The chamomile rosette part needed work from all around, with a flatter tool and no rush.
- Stop before it looks unnatural. The grape onlay had me wanting a little bit and no more, because it wouldn't look natural.
Frequently asked questions
Is roundy a real word?
I made it up myself, I told you on the Hashemi flowers. I know exactly what I mean by it. Workshop 53 added that if there is no word, now there is a word, because it is roundy.
Which tool did I use for a rounding cut?
A number 7 in one inch, 25.4 mm, did it on the Hashemi flowers. The chamomile rosette part wanted something flatter, a number 3. In Venice Room 57 a number 11 veiner went in first, and the roll was planned for later.
Can a part be too roundy?
A tiny fillet was the choice on the lily box, with no overdoing it. The grape onlay put it another way: a little is right, and completely roundy wouldn't look natural.
What to carve next