

Alexander Grabovetskiy, woodcarver, School of Woodcarving · Published 2020
What does a wood carver mean by "bead molding"?
Quick answer: A bead molding is a string of small beads that sits beside a convex on my Venice Room panel. In workshop 71, part 12, I said I needed to leave room for it. In part 11 the first job was the main shapes.
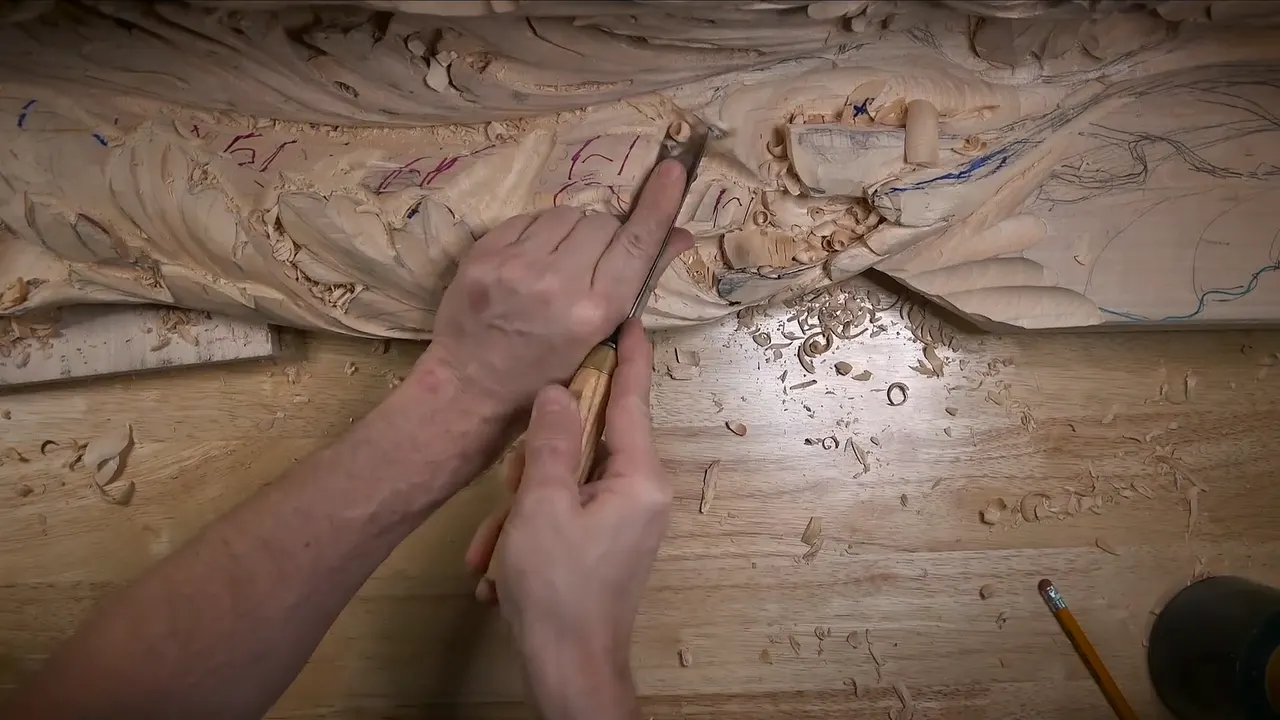

In part 12 of Venice Room workshop 71, I said, "So I have to leave a space for the bead moldings, or bead molding, I should say." On my panel a bead molding is a line of small beads beside a convex, and its room is planned before any bead is carved.
Ever carved a curved shape and then wondered where the beads would fit? Did you take the wood down too far, with none left for the next step? Come through this part with me.
What did I say about the bead molding in part 12?
The part opens with a doubt. "I really don't have to do those beads in this area, but I think it's going to look nicer, I should say, with the bead moldings." A shape followed. "So it's going to be concave, going to the convex, and again, concave. Hope you see that."
A while on came "Got to stop somewhere," and then "Again, I still have to create some space." Next came a plan for "about 45 degrees bevel all around," and I closed that stretch with "So just have to keep that in mind."
Minutes later came the line at the top of this page, with my own correction of the word to the singular.

A tool change came up next. "You know what? I should use the number seven right here, because I can damage my main movement." Then, "So it's better to switch to a different tool and work a little safer."
After a pause came a plan to start establishing my convexes. For those my pick was "skew for the beginning," because it would be much quicker for me.
How did part 12 end?
Toward the close of that part I spotted a mark. "Oh, that's really penetrated deep. I've got a mark I want to get rid of, but it's penetrated really deep."

I looked at the whole shape next. "I know it's looking really big right now, convex and concave, but that's okay. We're going to establish extra movements." My need was "just the main shape at this point."
Where did the beads come up in part 11?
Right before, in part 11, they had a line of their own. "There's going to be a bead moldings. I need to determine which side am I going to do." I was not sure yet, and I said so. "Maybe right there on that side and right here it makes sense." One more side got beads too.
The order was plain, though. "But anyway, first what I have to do, establish my main convexes and concaves."

Why do the beads wait for the main shapes?
Other workshops tell it the same way. Take 57.5. One step could not be overdone, and my reason was "I'm still going to need some material to create the beads a little later." My own word got a fix right after. "Or bead movements, I should say."
The twelfth video of workshop 99 uses a plan of its own. I held back from going too deep, since some bead molding would sit on the inside. Later, still in that part, came "I don't want to overcomplicate because I'm going to have a bead molding."

The other way shows up in 141.1, where "a super clean cut" was not a worry, since most of it would be gone once I carved those beads.
How big are the beads?
Workshop 6, part 5, has me saying "I need to make the decision" on how big the beads would be. My limit was "a quarter-inch, six millimeters bead" (a quarter inch is 6.35 mm).

By 6.9 the size changes along the shape, "six millimeters at the top and five millimeters on the bottom" (0.24 in and 0.2 in). My conclusion was "So which means my beads, they supposed to become smaller and smaller." I marked them by eye, and I said "Again, I am just eyeballing. I don't really have to measure."
The Roman acanthus lesson uses the same size. In Carving Roman Acanthus Leaf, lesson 16, I said the distance I left was "approximately quarter inch. About six millimeters." I planned "maybe three beads, just like that." More lines were planned at "about eighth of an inch on both sides" (3 mm, or 0.12 in).

Another small size turns up in workshop 92, part 2. "I could do a bead on inside," I said, though I was undecided. The beading I described would be "about eighth of an inch probably" (about 3 mm).
What comes before the first bead?
Marks come first. At 6.1 I said "what I want to see before I do my bead mouldings, I want to create a step down." I planned to "draw approximately 3 millimeters away from this detail, a line" (about 1/8 in).
Back in 6.5, I said a number 11 could give me an outline. "I can create probably a 3-millimeter cut with the number 11, 3-millimeter concave on the side of those lines." Bigger was possible, I said, but 3 millimeters would give me "a really nice outline." The work got called "just preparing canvas" in that part.

The room itself shows in workshop 57. "This cut has to be really accurate," I said in 57.7, and I was "establishing right now the space" beside the bead moldings. Later I said "just preparing space for my beads."
Two millimeters was my size there. Three was fine too, with "nothing wrong with 3 millimeters too." I held back over "how much space I have for a big concave spot" (about 0.08 in for 2 mm and 0.12 in for 3 mm).
The beads themselves start in part 10 of that workshop. "Now I have to work on my beads." The pipe I made with a back bend was "about quarter inch" wide, and I said "we could use the same tool, actually" to mark those bits. I meant to stay back from the edge by "maybe about one-eighth of an inch, three millimeters," and "everywhere else, about three millimeters away."
The size question comes back in workshop 140, part 3. I wanted enough material for the beads, so "maybe 4 millimeters is a little too big." In the same part I said "I think 2 millimeters would be a more appropriate tool for this" (about 0.16 in against 0.08 in).
What goes wrong when I go too deep beside the beads?
I showed it in 57.7. Next came a smaller tool, the one and a half, and I watched. "It's exactly what I was afraid of." Then, "It crumples because I've got too deep of a cut, so that's not good."

"I pushed too much," I said, and a little more care was needed. Smaller was the plan. "I could go with the 1 millimeter, and I think I should" (1.5 mm, 0.06 in, down to 1 mm, 0.04 in).
A warning came in 6.11. "If I'm not careful, I can make a too deep of a cut, and then one of those beads can pop out. And yeah, you can glue that back, but if you can eliminate that pop out, just eliminate that from the beginning."
The tool matters in part 5 of workshop 100. "Be careful, your skew chisel must be super sharp because grain direction here does weird stuff."
How do I mark the beads before carving them?
Two ways came up in 57.7. "A couple ways I could establish my beads." Next, "I showed you one way, but there is also another way." To explain a tool name, I held up a gouge. "Number eight would be a sweep, and number six after forward slash would be how wide it is."

At 57.8 I marked the boundary of the beads, and I named the limit of that way. "The limitation is it doesn't taper." I like to narrow them later by "hitting the sides." What it gave me was a "really good-looking line and the beads movement."
Dots came in 57.12. "See those black dots? Those are connection points between those beads." A dot at every single spot was not what I planned. "I usually don't do that at all. I just eyeball it." My tool went in the middle, and the plan was to push like this. A later plan was to undercut the underneath of those beads, so the left-hand line would disappear.
How did the beads go in workshop 100?
In 100.5 the bead molding sat "on the right-hand side of each of those convexes," and I planned another line "about quarter-inch away" (6.35 mm). For the first pass I planned "5 millimeters, number 11" (0.2 in). Then, "let me try to use number seven" for the part between that line and the opposite side. "And yes, it does," I said, and that would be "the main concave."
My words then were "now I'm ready to do my bead molding," twice. A plan followed. The first step was "I'm going to just create squares first." The rest was set for off camera, "for just the time-saving sake." My choice of tool was "just a skew," a chisel "to create my initial cuts."

Notches open part 6. "With the same skew, I can start creating some notches, just like that." Soon after, "I've got already initial beads and they're just flowing with the same line, and I'm happy with that."

At the end I counted my tools, and I said "Pretty much three tools is what I used." The list was "Small skew, chisel, and number nine, and number seven." Then, "That's it." I added that there are multiple ways to do the same operation, and I picked "this way" for that day.
Do the beads need a special tool?
Not in 57.11. "You will be confident that you can do same operation with the tools you have. And I could do that, all the beads, with just a knife pretty much. I've done it multiple times."
The beads of workshop 7, part 2, got a description of their own, and I said "it's just not perfect round," then "it's actually like a diamond."

That thought closes in 6.12, near the end of the part. "Hopefully, you already see those beads coming alive. Maybe there is other ways to do them, and maybe some of you can do them much quicker, but I've always done that operation that way, and it works every time for me."
How much room do I keep for the beads?
The reason for the room shows in workshop 35. Some space had to stay for the beads later, so "I can't take too much material," and the beads "are going to give me a really beautiful detail."
The plan in workshop 24, part 11, is similar. I needed some space for my beads, and beads would sit on the inside, done the same way as before.
What height does the bead molding need?
A tool for the height shows in part 3 of workshop 159. "Get the right height, at least the midsection of my bead molding. So it has to be the right height." Right after, "Okay, wonderful people, I am ready to create the first bead."

Some beads I did not show. Workshop 67 had a shell that would repeat the beads, and I said I would do those "just off camera." My reason is in workshop 69. "Because of the position and I did not want to stick my head in a camera view."
What do beads add to a carving?
Late in 6.12 I said "I've done a lot of beading." It is "a really, really, really nice element to add to the picture frames, to any pretty much architectural designs."

Styles differ. "There is different styles of bead moldings. So there is a skip one, like you've got one bead, then you skip a couple of them, you create an oval area, like double." Small details like those "add more interest, let's say, to the carving."
Back in the Roman lesson I said "I incorporate those beads in lots of different designs," and my goal for a bead there was "true bead or true round sphere."

How do those lessons line up against my words?
This table sets each lesson beside what I did at the bench, and the words I used for it.
| Lesson | Moment | Words |
|---|---|---|
| My workshop 71.12 | A space left, then a number seven | Bead moldings |
| Venice Room 6.5, the first course | Eleven, three millimeters | Just preparing canvas for the bead molding |
| Venice 57.7 | Space made with the number eleven | Pushed too much |
| In the ninth course, Venice Room 100.5 | Skew chisel | Squares first, skew must be sharp |
| Venice Room 57.8 | Boundary of the beads set in advance | Doesn't taper |
| Carving Roman Acanthus Leaf, lesson 16 | Planned three beads | What I left was approximately quarter inch |
| Venice 99.12 | Not too deep, bead molding coming | A bead molding |
| In Venice Room workshop 159, part 3 | Right height | Ready to create the first bead |
Where can you watch the full videos?
Every lesson above sits inside one of my courses, and a workshop number means the Venice Room, a relief panel, while the Roman lesson carries its own course name. This workshop 71 holds all twelve parts, and workshops 62 to 73 are in Venice Room Part 6. For all of them, start here.
How it's done
- Hold some wood back for the beads. Bead moldings need room, so in workshop 71 I said I had to leave some, with a 45 degree bevel to keep in mind. In 35.5 I said I could not take too much material.
- Switch tools beside the main movement. Close to the main movement I said I should take a number seven, because the other tool could damage it. A different tool was a little safer.
- Carve the main shapes first. The first job in part 11 was the main shapes. By the end of part 12 the shape still looked really big, and only the main shape was needed.
- Pick the bead size. The limit I set in workshop 6 was a quarter inch, six millimeters, and I planned to mark them by eye.
- Sharpen the skew. A skew chisel must be super sharp, I said in workshop 100, because the grain direction there does weird stuff.
Frequently asked questions
Which tool did I want near the main movement?
A number seven. I said I should use it because the other tool could damage my main movement, and it was better to switch and work a little safer. A skew came up for the convexes, since it would be much quicker.
Which came first in part 11, the beads or the main shapes?
The main shapes. I was unsure which side would take the beads and guessed one, and then I said the first job was to establish my main convexes and concaves. The bead moldings had to wait.
How big were my workshop 6 beads?
My limit for the beads was a quarter inch, six millimeters. At another spot the top was six millimeters and the bottom five, so the beads shrink as the shape does.
What to carve next