

Alexander Grabovetskiy, woodcarver, School of Woodcarving · Published 2021
What is a fillet in wood carving?
Quick answer: A fillet in wood carving is a rounded edge or corner, taken off with gouges so that part of the ornament looks like it rolls over. In lesson 103 of the Venice Room one began at an old undercut under the cloth drop, and a back bent carried it along the side.
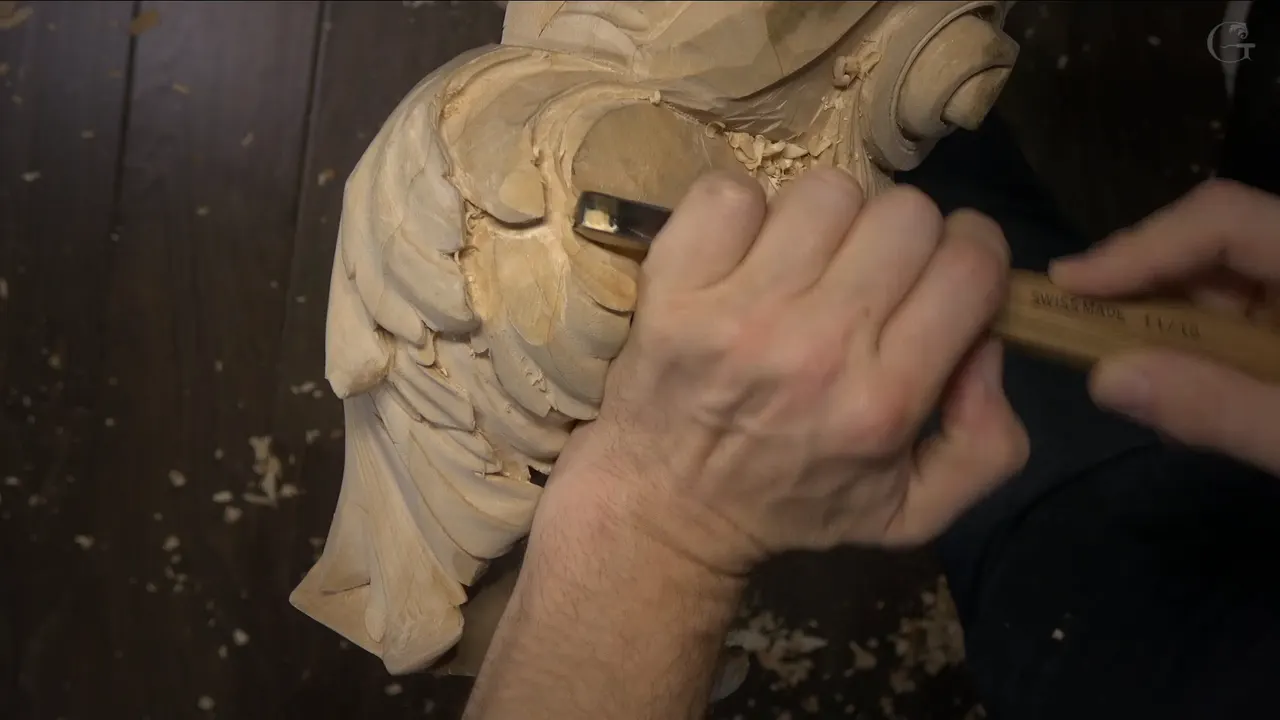
A carved fillet is a rounded edge, taken off with a gouge so one part seems to roll over, or flip. That is how I use the word at my bench. A plane and sandpaper are the usual answer to how to round wood edges by hand, and in this lesson I used neither. My fillet in lesson 103 of the Venice Room came off a back bent and a small veiner, under the cloth drop on the corbel's side.
Run your thumb along the edge of an old table. Is it round? Does the light slide over it, with no sharp line to stop it? Carve that roundness into one part of a carving, and the part seems to flip over.
I'm going to be honest with you. This lesson is short, and its fillet takes only a few minutes of the video. So this page starts with that lesson and then goes to other workshops where I used the same word and said what I meant by it. Each one is named and linked, and you can open any of them.
Six things about a carved fillet
Rounding a corner or an edge is what I mean by a fillet.
Mine in lesson 103 sits low on a corbel, beneath a cloth drop.
My tool there was a back bent. In workshop 58 I called a back bend the best tool for a fillet, at least for me.
A spot can sometimes take a fillet or a chamfer, and in workshop 88 I stopped to decide which.
The round does not need a true radius.
What the rounding gives you is a part that reads as flipping, even when the detail is small.

Where did lesson 103 need a fillet?
The side of the corbel, below the drop, is where lesson 103 needed one. By then the piece was nearly finished. Earlier in the lesson I raised one edge with a 10 mm (3/8 in) tool and said I could even exaggerate that movement, so the middle came up as a convex. Some of the ridges came off after that with a #5 back bend, and I had to be careful with it.

I was not too happy about one little detail. A 3 mm or even 4 mm veiner, about 1/8 or 5/32 in, would make an eye in that spot, I said. Then a 2 mm (about 1/16 in) #11 took it a little deeper, and a 1 mm deeper still, before a 3 mm #8 by Dockyard and the 1 mm again removed the plug. My goal was a really deep shadow spot. There's no limit, I said. You can get it as detailed as you wish. Lots of detail on this piece will be covered with white paint, and I said so on camera, but the shadow spot still went in.
Then a #1 back bend blended it. I didn't really need a back bend there, I said. Pretty much like a knife, in place of a carving knife, is how I was using it. All the fuss around it was loose pieces, I said, and they would be gone once I blew on it.

Two workshops before, in lesson 101, I had already gone underneath that drop with a 10 mm #11, the flute at about nine o'clock, almost on its side, to undercut it. I also left one section of that side high on purpose, because I didn't know yet what I wanted to do there. The part would come from the opposite side, I said then, continue that movement and roll onto this side.
Then came the section that did not work. I looked at it and said it plainly: it has to make sense, and now it doesn't. My big idea was that the side had to continue underneath the drop and go on from there. I had a detail on one side and wanted to recreate it on the other side, and I thought I would add something else too. But I needed to figure out what was going to look good.

Before all that, I said I could give the surface a cleaning job with my rasp. A minute later I was happy with it and left it like that.
How does an undercut become the start of a fillet?
The fillet in lesson 103 started at an undercut that was already there. Beneath the drop there was a spot going like an undercut, and I said that spot would be the beginning of our movement. What I wanted was a movement that blends, more than a new line in the wood.

It would be like a fillet, and that fillet would go all the way along this side. Let me double check, I said then. Don't want to create a problem. Right inside it a concave would follow, and on the opposite side I planned exactly the same thing, with the fillet going the opposite direction.

That spot was a weird area. It had to transition smoothly, and it had to do it right there. Nothing prevented me from making a second fillet on the right-hand side, and a back bent could do it. I needed the right position to attack it, though.

Next came a #11. The 2 mm was probably a little small, so I took the 5 mm, 3/16 in, and let it ride along that way. Then the back bent again. That pass was not as clean as I would love to see it, but I was getting close, really close. You should be able to catch the idea of what I'm after, I said.
Which tools carved the fillet in workshop 103?
A back bent, a 5 mm #11 and a #8 long bent did the work there. Next, the same #11 made a cleaning pass. After it I said I'd take maybe a #8 long bent for the concave. It had to go that direction, even though that direction was against the grain.
| Lesson | Tool | Result |
|---|---|---|
| Venice Room 103 | A back bent on the right-hand side, under the drop | The old undercut blends in |
| Furniture Panel 22 | Number 3 at 6 mm (1/4 in), the size I named | One side reads as flipping |
| Lily Box 6 | Number 7, 14 mm (9/16 in), needed again to round | Rounded so it really flips |
| Lily Box 4 | A #5 at 5/8 in (16 mm), tried first on a big radius | Convex part, just a rounding |
| Rosette 5 | A molding on the rosette, rounded this way and that | Fillet on both sides |

The cleaning I could do off camera, I said, just a flatter gouge. For a preliminary form I said I'd take probably a back bent, and probably the same back bent for the next section, so it continued the slope with a nice transition.
From this side I was happy with what I saw. The corbel's side still had to blend. Let me think, I said. I wanted to try a concave that would continue this side. I was not quite sure I wanted it. Probably the only way, I said, and I took it all the way to the groove my veiner had made before, so I could hide what was left underneath and blend the two together.

That gave me exactly what I see on the other side of my drop. It still didn't make too much sense, I admitted. As of that moment, though, I was really happy, and the cleaning could wait.
How to round wood edges by hand with a gouge
Rounding a wood edge by hand on a carving is gouge work, and the gouge changes with the part. On the furniture panel, lesson 22, I wanted one side to look like it was flipping. A number 3, about a quarter inch or 6 mm, could do it, I said. Then I went at it little by little. That lesson has its own page on why furniture carving leaves no sharp edge, built chamfer by chamfer, so I will leave that method there.

The lily box asked for other sizes. Lesson 6 of the box needed the #7 at 14 mm again to round one side, and I wanted it rounded like a fillet so it shows that it really flips. A little undercutting went with it, and a half millimeter (about 1/50 in) tool cleaned off the glue where I had glued a piece.
With a #9 I made a concave in lesson 4 of the same box to separate two parts, then turned the next part into a rounding. If you would call it a fillet, I said, it's a big radius fillet. I tried a #5 first, 5/8 in, 16 mm. Later in that lesson a #2 at 12 mm, about 1/2 in, made a fillet with a bigger radius. Number three will work also, I said, and number four will work. What I would not do was touch my edge, since I didn't want to lose it.

Is a fillet just a chamfer?
A chamfer is flat and a fillet is round. My own definition is on the furniture panel, lesson 19, where I said fillet is like rounding corners, and the edges as well. Engineers use the word for a rounded corner too. I took a micro tool there, because it gives me a lot more control, and the tools must be really sharp, or the work gets all smooshy. Where there was almost nothing, I undercut right away.
I know it takes time, I said in that lesson, and that's exactly what they did. They took time, and only then does it become really nice.

In workshop 88 of the Venice Room I started to say I wanted a fillet, and stopped halfway. I'm not sure if it's going to be a fillet or maybe a chamfer, I said. Then came a line of about half an inch, 13 mm. If it was a chamfer, it had to look good on that side too. That part would turn into a concave running downhill, I said.
It's a good idea to always attack from the right position, I said in that same lesson. My right-hand fillet in 103 needed exactly that.

Why does a round edge look like it flips?
Rounding the edge is what makes the part seem to flip, and that is the reason I gave on the furniture panel and again on the lily box. The ends of the design on the lily box, lesson 2, needed only a little rounding. You can call it fillet. Filleting, I said, but it's still rounding.
The detail was small, I knew that, and I still wanted a three-dimensional effect from it, so I went all around it, a little toward the stem too, and then lowered the stem itself a little.
Back on the furniture panel I said I would need the magnifier lamp at that point. I didn't want to mess up, and I thought I already had, somewhere, but it was okay. I would fix it. A minute later I saw a little hump I did not like. I called it no bueno and said I would fix it on the inside, which was not a big deal at all.

How round should a fillet be?
A fillet needs only some of a radius, not a true one. A molding on the Venetian flowers rosette, lesson 5, got rounded this way and that way, a fillet on both sides, and I said it is not supposed to have the true radius, but somewhat. Then I chopped down those sections only about two-thirds of the way and left the undercut for later, for extra shadow underneath.
On that same rosette a router had helped me earlier with the depth of the molding, as I didn't have enough depth, and I cleaned it really nicely after. The rounding came later, as its own step.

The next rosette lesson, number 6, had a shortcut in it. You could just create a fillet, just knock down that ridge, I said, and the line would be a lot easier to draw. I passed on it that day. Spending too much time there was not the plan.
The word stayed the same on the rosette and on the corbel. Lesson 100 has a fillet of its own, and its page tells how that one went.
What comes after the fillet?
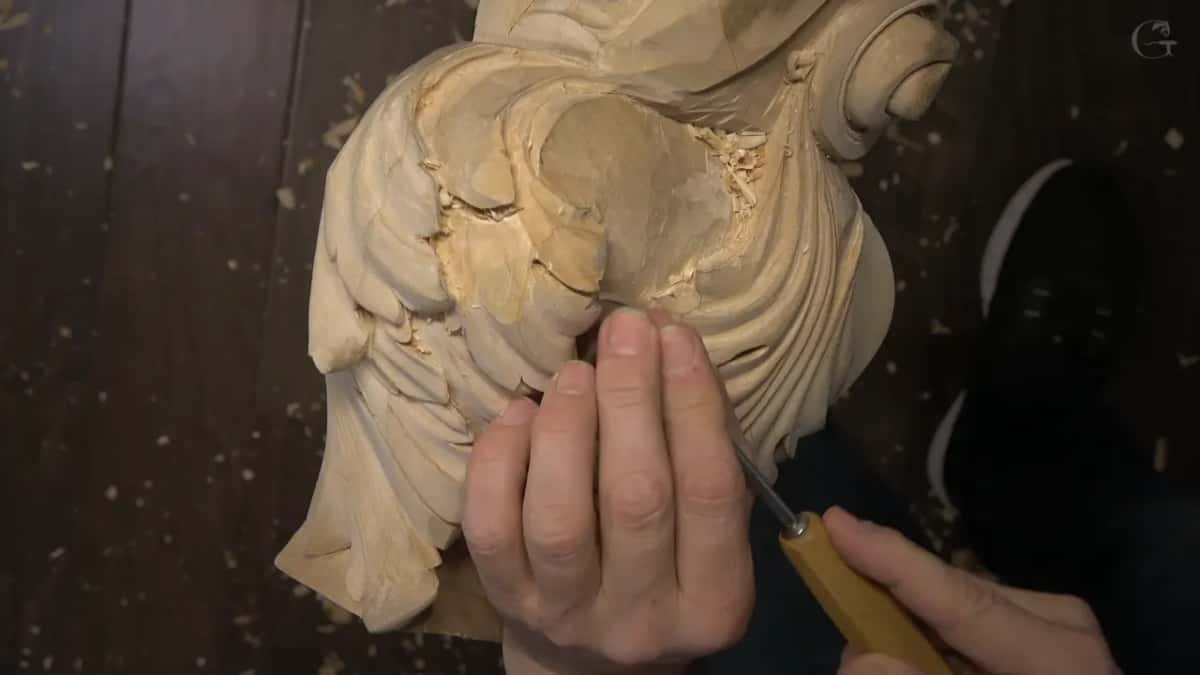
The acorn caps come after the fillet, and since some of you asked me for their pattern, the course page for Part 9 of the Venice Room tells that story. By then the corbel was 99% done. It was still waiting for a cleaning before the paint, and before it came lesson 102, which carved the convex in the middle, while lesson 104 comes right after.
The piece has a cloth drop, something like oak, and acanthus that is not normal acanthus but Venetian-style, and I'll repeat it, that is the Italian Venetian style. If you would love to create something like that, you're going to make me proud.
Would you like to watch that fillet go in under the drop, one pass after another? Or see it blend into the corbel's side? Every workshop of the Venice Room is open with full access, and the first steps are laid out on one page.
How it's done
- Look at both sides first. Find the detail you already have on one side. I wanted to recreate mine across the drop.
- Begin at the undercut. Let the undercut that is already there be the beginning of the movement, so the new part blends in nicely.
- Double check before going on. Stop and look once the fillet runs along the first side. I double checked mine before going any further.
- Round it with a back bent. Mine on the right-hand side took a back bent.
- Let a #11 ride along. Run the #11 veiner, 5 mm, along the line. A 2 mm was a little small for this spot.
- Mirror it on the opposite side. Take the concave right inside the fillet, then do the same on the opposite side with the fillet going the other way.
Frequently asked questions
What is the difference between a fillet and a chamfer?
A chamfer takes a flat bevel off an edge, while a fillet rounds it over. Back in workshop 88 of the Venice Room I stopped halfway through a sentence because one spot could have gone either way, and I had to be sure the chamfer would look good from that side.
What hand tool rounds a wood edge?
A gouge, on a carving. I named a quarter inch number 3 for a furniture panel edge, took a 14 mm #7 and a 16 mm #5 on a lily box, and used a back bent beneath the drop of this Venice Room corbel.
Does a carved fillet need a true radius?
Only somewhat, and I said so while rounding a molding on a Venetian rosette. On the lily box I called one a big radius fillet and was careful not to touch the edge beside it, because I did not want to lose that edge.
What to carve next