

Alexander Grabovetskiy, woodcarver, School of Woodcarving · Published 2020
Do you need the same gouges your carving teacher uses?
Quick answer: Using gouges that differ from your teacher's is fine for many cuts. On one Venetian acanthus I noted that several sweeps could clean out the same shadow. A few cuts refuse a swap. A straight gouge blocked on both sides needs a spoon, and a very small separation needs a micro tool.
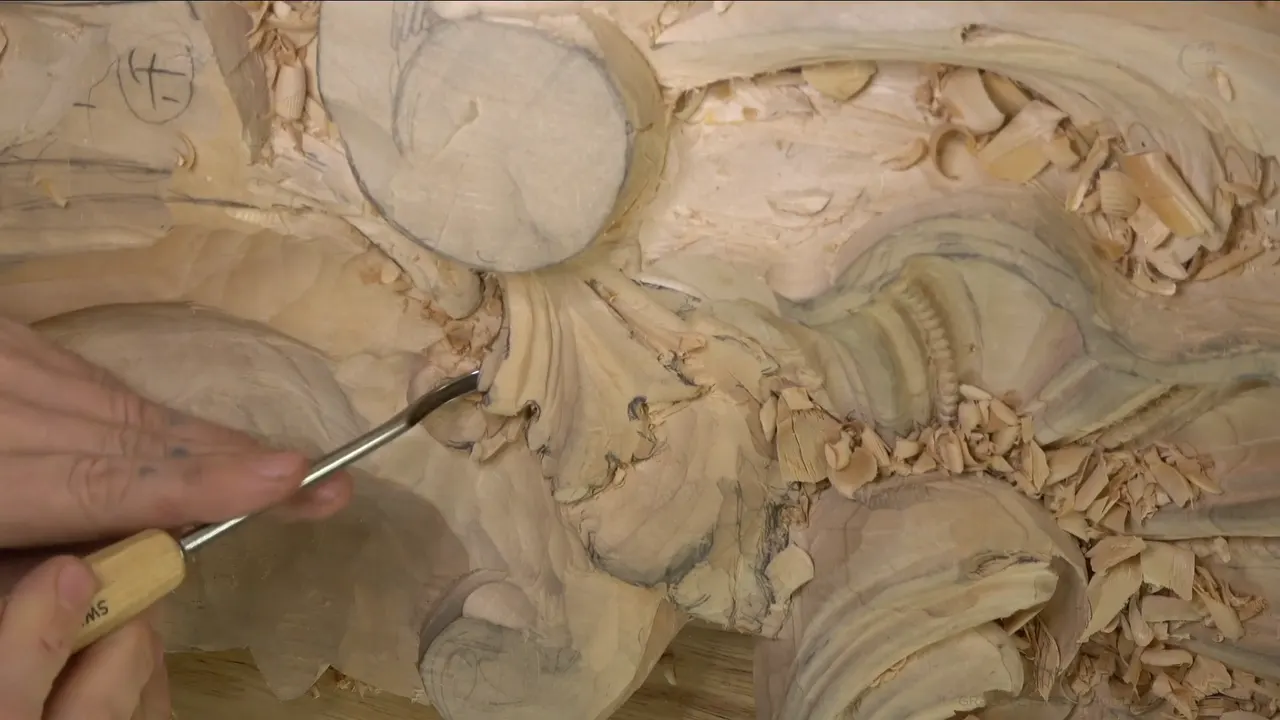
Following a carving lesson with different wood carving gouges is fine for many cuts, and I said as much while I carved this Venetian acanthus in workshop 21. Several tools can do exactly the same operation. One shallow shadow could be cleaned with a small #11, a #9 or a #8, and any of them would work. A few cuts will not take a stand-in, though, and those are the ones worth knowing before you buy anything.
Would you like to follow a carving lesson with the tools you already have? Would it help to know the few cuts where only one shape of tool will do? Workshop 21 of the Venice Room shows both. I try to name each tool out loud as I pick it up, and by the end you will know which of your own gouges can stand in for mine.

What workshop 21 says about swapping gouges
A viewer asked me to write down every tool for this room, and I said no, for reasons I give on camera.
A plain gouge lowers an area about as well as a skew.
Boxed in on both sides by the carving, a straight gouge has to give way to a spoon.
A micro tool went into one tiny separation, after I had talked myself out of a knife.
A full run of #11s, with discounts, is about half a thousand dollars.
I love V tools, yet for these separations a #11 leaves a smoother transition inside.
Why is there no written tool list?
There is a list, only it is spoken. A viewer asked for a written tool list for this project, and I said I was not planning to make one. I try to name every tool I pick up. So if you follow along and watch everything, you hear the whole list, sweep and size, as I go.
Second, the room is huge. I do not expect anybody to carve a project this big, and it takes maybe hundreds of different hand tools. A hobbyist will not buy all of those for one job, so you do not really need them for this. What the room is good for is seeing the details up close, then carrying one of them, a curl or a single separation, into a project of your own.
The biggest reason, and the last one, is time. I film many hours a day on this commission, and going back through every minute to write down each gouge would take far too long. Please forgive me for that.

I added one more reason later in the same workshop. When I do write a list for a lesson, I keep it to the fewest tools I can, because I know not every one of you owns a lot of them. Choosing tools that suit people at school takes me time to think through. On this room I just open the tool chest and grab whatever looks right for the cut, without thinking twice.

Can a different gouge make the same cut?
Often it can. I lowered one high spot with a big skew chisel, shaving it down into what I call a clean canvas to work on, and then admitted you do not have to own one. A gouge would do that job and give you about the same result. I even corrected myself on camera. Not the same result, about the same result.
One sweep can even fill in for another, since a bigger #11 laid on one side works like a #3 or a #5. That is one reason I like them so much.

Sometimes a gouge takes the place of a different kind of tool altogether. Late in workshop 21 I cleaned the surface of a convex with a #3, and it came out almost perfect, so I did not need sandpaper or a rasp on that spot at all.
You will hear me change my mind about a tool right before the cut. For the eyes on one leaf I first said 3 mm (1/8 in), then took a 1/4 inch (6 mm) #9 instead and rotated it to set two big eyes. Near the end of the workshop I said a #11 or a #8 would do on the side of a pipe, and picked up the #8. And a #7 at 14 mm (9/16 in) felt a little too big in one spot, so a #8 at 10 mm (3/8 in) cleaned up the mess I had made there earlier.
Some swaps come down to fit. I had sliced a little too deep in one place, so I slowed down, picked up a mallet for more control, and cleaned the spot with a #11 spoon gouge. A long bent would have worked. I went with a short bent because it suited that spot better, and if the two bends are new to you, start with how a long bend and a short bend differ.

Size is its own question. I was cleaning a messy hollow with a 2 mm (5/64 in) #11, said out loud that a bigger one would be quicker, and switched to one twice as wide, which let me swoop out a lot more right away. Or scoop. Whatever you call it. How far that idea goes is the subject of whether a bigger gouge does the same job faster, and choosing the width for each cut is workshop 18.

Which cuts will not take a stand-in?
Four of them came up in workshop 21, and each one sent me back for a different tool. The first was a hollow I was cleaning with a straight #8 at 4 mm (5/32 in). One part of the carving sat in my way on one side and another part on the other, so the straight tool could not reach the right position. I switched to a spoon gouge and told the camera it was the only way to fix it.

The second was a very small separation. I first said a small #3, a #1 or even a small knife would get in there, looked again, and changed my mind. A micro tool went in about 1/16 inch (1.5 mm), because I wanted that separation more exaggerated and easier to see, closer to the edge.
The third was a curl. I had blended some ridges with a small skew, and when I wanted to curl one edge I said the skew was not going to cut it, so I picked up a #3. That curl mattered to me because it will be seen from below.

The fourth was a separation I began to blend with a more developed kind of skew chisel, one with an extra corner for reaching deeper underneath. After blending a little, I stopped and said it was not the best tool for that job. Some kind of spoon, a #5 at 8 mm (5/16 in), would be wiser, and carving in the right direction would help too.
It works the other way as well. My big skew does one thing better than a gouge, because I can put only its point into a tiny corner underneath and get a cut so clean inside that I hardly have to touch it again.
Sometimes the tool is fine and the shape in front of it is wrong. Working with just the side of one tool, I hit a hump too big for it, said I needed something else, probably a #5, and fixed that movement a little at a time so I would not lose the detail.
One tiny separation got both answers from me. I told the camera the tool in my hand was not the right one for it, then added that this did not make the cut impossible. A little later a 1 mm (1/32 in) #11 went back in and made that separation deeper and easier to tell apart.

What would a full run of #11 wood carving gouges cost?
About half a thousand dollars, and that buys one sweep. If I listed every tool I use on this room, you would be looking at many sizes of the same sweep, a #11 at half a millimeter (1/50 in), another at 30 mm (1 3/16 in), and every size between. Just those #11s, with all the discounts, come to about that much by the count I gave on camera.

I said on camera I did not think anyone would do that. Then I took it back a little. I know one student who will. He is doing really well, he follows every lesson, and he does all the work.
I use a lot of #11s on this room. A lot.
What to buy first is a different question, and I answer it in which carving tools to buy first and in how I choose tools for carving. If the sweep numbers stamped on the handles still puzzle you, what the numbers on a gouge mean covers them.

Why a #11 instead of a V tool for these separations?
On this acanthus a #11 gives me a nicer, smoother transition inside the cut, and that is what decides it. I love V tools, by the way. I really love parting tools, and nothing would be wrong with using one on this project. I just think the #11 gives an even better result here.
Right after saying that, I took a 3 mm (1/8 in) #11 under one eye. From straight above it looks like I am making a plain straight cut, but I am digging out wood underneath, and from below it is really an undercut.

The same sweep did a lot of the separating in workshop 21. A 10 mm (3/8 in) #11 cut the concave that set two small elements apart from the main movement. And when I rushed to take wood out before a cut was all the way in, which I have a tendency to do, a 1 mm (1/32 in) #11 spoon gouge hooked the mess out.
If you open a groove with a V tool before shaping, that habit has its own good reason, and I explain it in why carvers cut with a V tool first. Anyone buying or sharpening one should read what angle a V tool should be first. What I do on this acanthus is one choice for one kind of separation.

Seven cuts in this workshop and their stand-ins
This is how the swaps and the refusals lined up in one workshop.
| Job | Tried | Instead | Verdict |
|---|---|---|---|
| Lowering the canvas | a big skew chisel shaved it down | Plain gouge | close result, though not the same |
| Cleaning a shadow | small #11 after the #5 made it | #9, #8 | several sweeps would clean it out |
| A blocked hollow | a straight #8, 4 mm (5/32 in) | Spoon gouge | the only way to fix it |
| A tiny separation | a #3, a #1 or a knife | Micro tool | about 1/16 inch (1.5 mm) in |
| Curling an edge | a small skew had blended the ridges | #3 gouge | skew not going to cut it |
| Blending one separation | a more developed skew with a corner | Spoon #5 | not the best tool for that |
| Many separations here | a V tool would have been fine | #11 gouge | a nicer, smoother transition on inside |
How do you follow along with the gouges you own?
Listen for each tool as I name it, take the closest one you have, and try another when the one in your hand is not working. Even I try more than one. Late in workshop 21 I switched between several tools just to see which one would work better. Early in the same workshop, cutting into the grain the way it ran there, I stopped and said maybe I should use a different tool for this.
I even plan the retreat. Carving a movement upward with a straight #11 about 15 mm (5/8 in) wide, I said that if the straight one stopped working I would switch to a spoon. So far it looked fine, I said, and then added that an even bigger one, maybe 3/4 inch (19 mm), would give a cleaner look and was probably what I should use.

The deep spots in this lesson did not come from a special tool. I got really deep under one part with a #11 and some Dockyard micro tools, and I said that is how I get some of my work so deep. Take your time. That's it.
The edge is the one thing that never swaps. When my big skew went through the wood, I asked you to listen, because that is the sound of a really, really sharp tool. Carving Tool Sharpening is where I teach the edge itself.

And when your version comes out a little rough, keep going. My work is never perfect. I spend a few days at the end of a job just cleaning, and even Grinling Gibbons, one of the best wood carvers ever, left spots I could point to that do not look too clean, in my opinion.

Which of your gouges would stand in for mine? Lay them out beside you, pick one leaf, and listen for the next number I say. The tuition opens this whole room, with workshop 20 before this one and workshop 22 after it, and the room itself begins in workshops 1 through 12.
How it's done
- Listen for the number. When a gouge comes up, I try to say its sweep and its size. Jot both down, or pause the lesson and write them.
- Reach for your closest match. Grab the nearest sweep you own and try it.
- Change tools when one fails. If a tool will not reach the spot, stop and try another one.
- Keep one bent and one tiny gouge handy. A bent gouge gets into a boxed-in hollow, and a micro tool handles the very smallest separations.
- Save the final cleanup for last. Leave the finishing passes for the very end, once the whole piece has its form, and then go over everything again.
Frequently asked questions
Can you use a gouge upside down?
Flipping a gouge over is how I undercut from an edge in workshop 21. A #5 at 1/4 inch (6 mm) went in first, then I turned it upside down and the same tool hooked the waste out. After that I made a small dome there, careful not to leave a weak spot.
What do you do when the wood starts to split under the tool?
Change direction. I saw the grain begin to split in workshop 21 and changed the direction of my cuts, because I did not want to see that split. Switching direction can go wrong as well, and one of my passes did, though the upward movement it left still looked good to me.
Is it okay to watch the workshops at a faster speed?
Feel free to speed them up, and I said so in workshop 21. The one catch is the tool list, which lives in what I say while I carve. Skip a minute or run it fast and you can lose the name of the gouge I just picked up, along with its size.
What to carve next