

Alexander Grabovetskiy, woodcarver, School of Woodcarving · Published 2020
What does "just slightly" mean in wood carving?
Quick answer: Just slightly is how I tell you a cut is small. In workshop 28, part 10, I used it for an extra detail on a leaf. In my other lessons the same words sit beside an undercut or a clean pass, with a roll, a lowered part or a size.
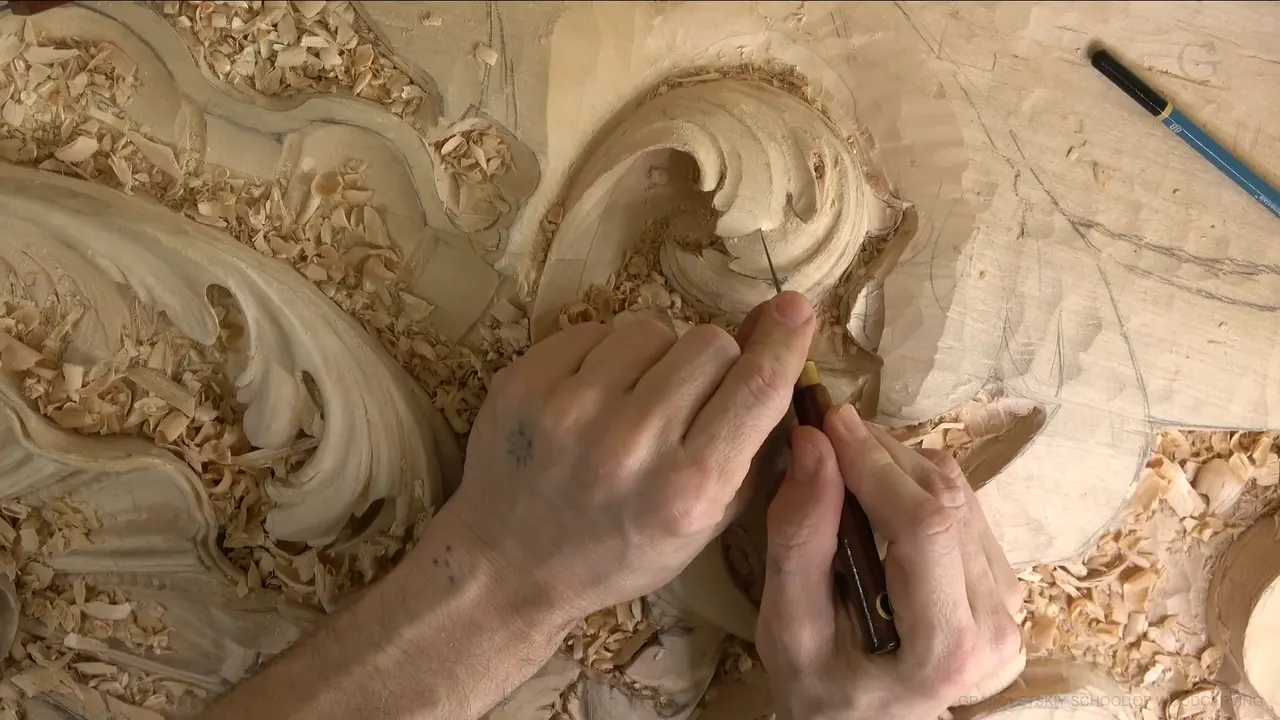
"Just slightly" is how I tell you a cut or a change is small. In part 10 of workshop 28 I gave a leaf an extra detail with those two words, and this page follows them through that video and through other lessons of mine. It says where each line comes from.
Ever looked at a leaf and felt one spot needed a touch, but not a big one? Did you wonder how big a touch is? I used the same words in many lessons, and I give you the lines.

What does "just slightly" mean in wood carving?
On camera it goes with a small move. Right beside the cut sit the two words, and the cut changes with each lesson. Part 10 has a concave. Elsewhere it went with an undercut or a clean pass. Other lessons pair it with a roll or a lowered part. A size in millimeters turns up too. I name the tool or the spot each time, and a number shows up only where I said one.
The acanthus leaf is what I carve in this part, so the first lines come from there. Later the page walks through my other courses, and I link each one.
What did I do just slightly in Venice Room 28.10?
The part starts in the middle of the work. "Okay, I think that's enough," I said, and then "Don't want to risk it." One spot needed to look better: "Get this one a little nicer because it does not look too nice as of now." A really small tool, a tiny one, was my option, I said, and "even with the tiny one, I create too much stress." I "almost lost the end of it."

Next came the extra detail. Giving that spot "what they used to do, like a small concave cut inward like that" was the plan. On it I said "Not much, just slightly." Moments later I was still not satisfied. "I still think this one is not looking too good," I said.
The fix was a tool. I said "Let me use number seven," and maybe it could "create a little nicer movement." The verdict came fast: "Number seven works just perfectly right there."
How slight is a slight concave?
I gave the limit myself, and it came right after the number seven. The hump came up: "I don't like the hump, which you probably don't see, but I can feel it." Maybe I could "just knock that with the concave," I said.
Then the limit. "I don't want to do too deep of a concave because it's going to be too many concaves," I said, twice over, and added "But just slight." The blending was for later. "I'll blend it little later," I said, "but I still can detect like a micro pipe." Overall, I was happy.

Two neighbors of part 10 use the same small steps. Part 9 has "little undercut this way," and then "not much because, see, it's already moving." Part 11 says the side "needs to be also kind of knocked down," and then "Maybe I should use just a skew and kind of refine a little bit."
The rasp came next. One could "fix inside," I said, but this one was "a little too big." I needed "smaller one." After that came a plan: "probably finalize at least this movement with micro cuts, so that it would be my center line."
When is one more slight cut too many?
The same part gives a hint. Of those small line cuts I said "It's not actually on all of the acanthus leaves, by the way." And then a taste of mine: "For some reason, I don't like when some of the wood carvers doing too deep of a cuts."
One small cut was hard to reach. "I need to use a small spoon gouge because, again, I've got the ceiling part in my way." One side first, I said, and another "right on the side of it." One line sounds like a stop. "So that is probably enough. I could do three if I wanted to."

Later: "I'm not going to do any more probably lines on inside." I added that I was not sure. Part 6 of that workshop has a close moment. A pipe, I said, "almost asks me for" a slight concave on its side, and I did not have to. Then the course changed. I would "leave it alone like that for now," I said, and "otherwise, it's going to be too stripy." You can find the whole run of that workshop in the Venice Room lesson 28.
The part ends on a small step. "I need 1 millimeter again, number 11," I said, and "I can excavate even little deeper here, but have to be careful."
How do you take a sharp edge off slightly?
For part 10's ridges, my plan was to "knock them out with some kind of sanding." Perhaps "just a reed brush and knock that down a little bit."

Workshop 12 comes close. From below, a spot looked okay, I said, but "I probably have to break it slightly," because the edge was "just a little too sharp, I'd say." Even with a small number five, "it still gives me just too sharp of a look." After that came "Let me soften them with the sandpaper."
A pipe in Lily Box 4 got a number three. The plan was to fillet both sides "just slightly, not much," and afterward I said "I think it just created a beautiful pipe."

How slight is a slight undercut?
Undercut is where I can show you the most lessons. In Lily Box 3 I said "I really didn't have to do that, and you don't have to do that." I meant undercutting as deep as I do. The point followed. "It's still going to look really nice if you're going to create just a slight angle with your cuts." In another area I planned 1 millimeter (about 1/25 in) for "a deeper exaggeration."
The Corinthian Acanthus course says it for shallow work. "I like undercutting even on the furniture carving, even if it's, how I call it, the really low relief or shallow carving." Even a slight undercut makes a shadow, I said. The carving "appears like it's almost floating," and "it just creates the beautiful shadow."

The careful cut came with "let me little bit undercut under this side just slightly, not much," and then "Again, carefully." "Exactly the same technique," I said, with my finger placed "to prevent slippage," because I did not want "to slip and cut myself."
Next comes a wall undercut, and Venice Room 52 has it. Lots of people, I said, "just do almost a straight cut." We call it a wall undercut: "almost straight down, almost 90 degree, just a slightly angled little bit." It is a lot easier, and "it's still going to look beautiful." Just before, I had said that "they can break it" if it is too fragile.

Two shorter ones. The Dining Table Apron course has "probably just slightly undercut," and that cut, I said, was "going to create my shadow." Workshop 95 adds "a little bit undercut underneath here," with "I cannot do it too deep."
Can you lower or deepen a part just slightly?
I did both on camera. The Lily Box 5 lesson has me wanting to see a piece from the side. It should come "down a little bit," I said, and the next words were "Just slightly." Then: "A little too high for my taste." Earlier came "maybe even a high volute if I need to."
Workshop 100 gives "a little deeper cut in this section," and then "Just slightly deeper." Next, "I'll take again number five," I said, and "blend again."
Workshop 7 shows a leaf going under another one. "I could actually take this leaf little bit underneath of that one, and I think maybe I should," I said. My reason was that I did not want "to create different from what I originally thought."

Deeper has a price. The Floral and Molding course has something I like to use "especially if you're working on a human face or lion head when every slice matters." The line was "just slightly deeper, and you messed up." Then I added "it all depends." A lifelike face needs every slice. A generic one, I said, "that's not as big of a deal."
Can "just slightly" come with a size?
It can, and my own figure comes first. In workshop 49, I would take a number 11 at "seven millimeters," a size I called "a little bigger than a quarter inch." A quarter inch is 6.35 mm. For readers in the United States, I added "a slightly bigger than a quarter inch."
Workshop 22 went the other way. A number seven at "four millimeters" (about 5/32 in) was "little less than 3/16 of an inch" (about 4.8 mm), and my next words were "just slightly less." I also said it "doesn't have to be just that tool." You can use "multiple tools, just small enough to get in and excavate this way."

Another slight concave sits in the plan of Lily Box 7, with "just the number five and quarter inch" (about 6.4 mm). "Not the final movement yet, okay?" came next.

The Flower Rosette course had a warning about hitting hard. The wood was "only three-eighths of an inch thickness, only 10 millimeters thickness," and "you can always overdo it." Three-eighths of an inch is 9.5 mm. Next: "You can see I'm just driving that about maybe a 16th of an inch deep" (about 1.6 mm).
Look at that list again. The tool changes, and the number changes. Only the words stay.

How close to the line is close enough?
I use the words for a miss, too. The first Lily Box lesson has "if you're off just slightly, that is okay." The Furniture Panel course has the same thought about the line.
My finger in Venice Room 36 was too thick to get "really good support on the side," so I said "I have to just eyeball it." My reason to relax followed. "If it is just slightly off, it's not a big deal at all." The slip would show, I said, "that it's a human being did it, not CNC machine." I kept a limit on it, though. "Of course, to a certain degree," I said, and "you don't really want to do too wavy."

When do I stop at just slightly?
A few of my lines sit where a cut ends. Workshop 6 offers a worry about marks in "my background." Then: "This needs to be just slightly touched, and let's move to another one."
A cleaning pass in Venice Room 46 used a number 11 at 3 millimeters (about 1/8 in), and I called it "not much." Workshop 101 adds "There you go. That's what I'm after," and then "So I expose just a slight corner of it." Looks really good, I said, "in my personal opinion, of course," and soon after, "So now it's more looking like architectural carving."
Workshop 118 has a ridge and a tool upside down. The plan was "exactly the same on this ridge," with a slight roll.

Even the color lesson has them. In Lily Box 13 I said "too much is too much." And for one spot: "Not much, just slightly. Just make highlights right here."

All the lines side by side
Here are nine of the lines I quoted, with the place each one comes from, so you can read across.
| Where | Said | About | Next |
|---|---|---|---|
| Venice Room 28.10 | Maybe I can create a little nicer movement | Number seven on leaf | Then a slight concave on hump |
| Corinthian Acanthus 5.2 | I like undercutting even on the furniture carving | Low relief furniture carving | Carving appears almost floating, with shadow |
| Lily Box 11.4 | I don't really want to slip and cut myself | A curl going down | Finger placed to prevent a slip |
| Workshop 95.4 | I cannot do it too deep, just slightly | A little undercut underneath | It casts some of the shadow |
| Furniture Panel 15.9 | close as possible, but if you're just slightly off | Staying near the line | Still okay when a bit off |
| Flower Rosette 1.3 | At this moment, I don't have to go deeper | A sixteenth inch deep | Thin wood, only ten millimeters thick |
| Venice Room 101.11 | So now it's more looking like architectural carving | Cleanup cut, slight corner | Number 11, ten millimeters, cleans up |
| Workshop 118.3 | I can roll it little bit this way | A slight roll planned | The same again on this ridge |
| Lily Box 7.3 | I'll use just the number five and quarter inch | A slight concave planned | Gives a nice movement, not final |
What is slight on your own bench right now?
Look at your own piece. Is there a hump you can feel with a finger, or a ridge that looks too sharp? Then read the lines above for that spot. The twelve parts of workshop 28 sit in the Venice Room course, workshops 26 to 37. Access to the school opens the whole wood carving course.
How it's done
- Pick the small cut. On one spot of the leaf I gave an extra detail, and I said not much.
- Name your limit. I wanted the concave to stay shallow, "just slight," I said.
- Feel the spot. A hump you probably do not see can still be felt, and I said I could feel one.
- Blend it later. A blend was a later job, I said, and I could still detect a micro pipe.
- Take the sharp edge off. For sharp ridges, I named sanding and maybe a reed brush.
Frequently asked questions
How small is a slight concave in wood carving?
The leaf in part 10 of workshop 28 got an extra detail that cuts inward. A deep concave there would mean too many concaves, I said. Lily Box's seventh lesson has me planning "slight concave, not big concave," with a number five at a quarter inch (about 6.4 mm).
Is every slight cut the same cut?
The cut changes from lesson to lesson. The words sit beside an undercut in one lesson and a clean pass in another. Elsewhere they sit by a roll, a lowered part or a size. I name the tool or the spot each time, so the lesson itself tells you what the cut was.
Is it okay to be off the line just slightly?
Two lessons say so. The first Lily Box lesson says a slight miss is okay, and the Furniture Panel course says the same about the line. The lesson in Venice Room 36 agrees and adds a limit, "to a certain degree."
What to carve next