

Alexander Grabovetskiy, woodcarver, School of Woodcarving · Published 2020
What are the most common mistakes in wood carving?
Quick answer: A wood carving mistake I see many carvers repeat is carving on after the tool goes dull, and the fix takes only one minute of stropping. Pushing the gouge instead of slicing it, small tools for every job, rushing, and chopping with no relief cut are others I name on camera.
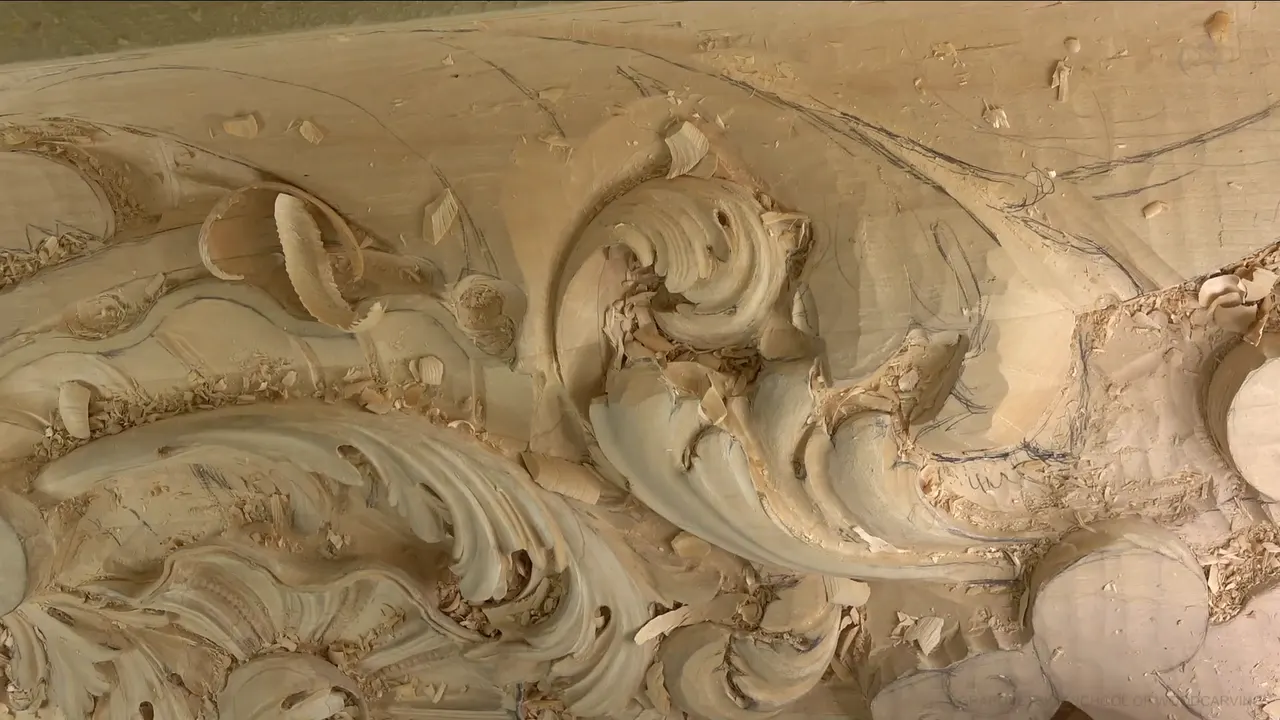
A common wood carving mistake is carving on with a dull tool, and it is a habit I see many carvers repeat. I said it in part 12 of Venice Room workshop 28, the last video of that workshop, while I was excavating around one spot on my ceiling board. The gouge I took to clean up felt too dull. Maybe really dull, I said.
Have you ever kept going with a gouge that seemed a little dull, just to finish one more pass? Would you like that next pass to come off clean? Then start with the dull tool, since fixing it takes one minute.
Part 12 runs under eight minutes. So most of the rest of this page comes from other lessons where I said the word mistake out loud, on this Venice Room ceiling and in my courses on grapes, flowers, a lily box and a dining table apron. Each passage says where it comes from, and each habit comes with the fix I gave for it.

Habits I point out on camera, one line each
- A dull tool kept in use, when a minute of stropping ends the struggle.
- The gouge pushed in flute up, like a wedge, where a slicing pass rotates across the edge.
- Only small gouges, so you spend so much time digging, when a big one takes the mass off in a day.
- A division chopped before any relief cut, so the fibers break.
- Rushing and forcing it. More mistakes come of it, and they take longer to fix.
- Straight lines on a leaf, and a pipe whose two sides run parallel.
What happens when you keep carving with a dull gouge?
You carve with a struggle you don't need. Struggle is the word I used in part 12, and the whole video walks up to it, so here it is in the order I carved it.
It opens with a plan for one spot on the board. I had plenty of material there, I said, and could develop something really interesting, with an extra separation and an eye still to come. Should that part be a little convex, or concave? I didn't know yet. Let me excavate around first, I said, and then I'll decide.

A number 11 went in again. Number nine would work too, I said, it doesn't matter, and I kept the 11 and went on the inside a little more, and around, and around. It was kind of messy right then, but I said we can do something beautiful there.
Then the spot got harder to reach. A long bent or a medium bent number 11 was what I needed, I said, because it was kind of hard to get in, and maybe a little heavier mallet. A 12 ounce one (about 340 g) is not going to fly. It will, I said, but I can get tired a lot quicker. So I need 30 ounces (about 850 g), and let the mallet do the work.

About four minutes in, I said it would probably be better to give a really nice round look and go all the way in, probably with a number three to start. I still didn't want to lose one detail. It feels almost like I'm using a shovel, I said. Huge tools. But at least you can see what I'm doing.

I wanted that separation right away, so I went down around it. Now it had to be cleaned up to the cut, with a number seven or eight, and I said anything will work.

The dull tool turned up right there. The one in my hand felt a little too dull, and then I fixed my own word, because maybe it was really dull. I sharpened it off camera and tried it again. Yep, it's much nicer, I said. Now it just cuts and gives me a really nice and clean result.

And that is one of the mistakes a lot of people make, when the tool is dull and they still continue to carve with it. It takes only one minute to take it on the leather, or a wheel, or even just a strop. Whatever stropper you use, by hand or by machine, it just takes one minute, and you can carve again without the struggle.

See? A really nice and clean excavation, beautiful and deep. It gives me beautiful shadow and nice movement, and that is going to be really visible from the bottom, since this board goes on a ceiling. The video ends on a plan, a number three again, maybe, to start shaping a little better.

Workshop 29 brought it back in its first video. Let me sharpen it, I said, and I can give an even nicer concave. Wikipedia keeps pages on honing and on sharpening, if those words are new to you.
Can the way you swing a mallet be a mistake?
In my April 2020 livestream on mallets I called it a mistake many people are doing. When you hit the tool, you're not supposed to use the whole body, or even the whole hand. You're really just using your palm.
With only the palm working, you don't put stress on your arm, your hand and your shoulder. It gets to you, I said. It can get really painful if you're using that all day long, and you can get really tired really quickly.
Why do I slice instead of pushing the gouge?
Pushing drives the whole wedge of the tool into the fibers, and in lesson 1 of The Tray of Blessing I said I see people doing it a lot of times. They place the tool flute up and start pushing like this. Think about it as a wedge, I said, and that's not good.
The right position is called a slicing cut. The flute goes either to the left or to the right, and you start not in the middle of the tool but closer to the edge, though not all the way to the edge, because that's not workable. By the end you make a rotation motion and escape at the other side of the tool.
Your other hand counts too. I'm right-handed, so my left hand sits solidly on the board, locked in position, and for a left-handed carver it's the opposite. There's no such carving technique as air carving. Treat your tool as your soldier, I said, and you conquer the territory.

My Floral and Molding for the Panel course has me saying it again, in its first lesson. When I'm teaching in person, I see that it would be the biggest mistake lots of people make. They just push, and that's no good, with lots of resistance. With a sharp tool it's possible, but the finish cut is not going to look as nice, and you get tired a lot quicker. Always better to slice it.
It came up in class 1 of my Grinling Gibbons class in Maine with a student who was just pushing. Just pushing is the mistake people make, I said. You use too much force of your body, and you get tired. Start on one side of the tool, end on the other, rotate it while you go, and it takes a lot less force while a lot more material comes off.

Are small gouges a mistake for a new carver?
Working with only small gouges is among the biggest mistakes when people start carving, I said in Big tools vs small, and people who carve for years make it too. They take a small tool and dig, and dig, and dig, and spend so much time, and they get frustrated.
There are pretty much three sizes of tool. Big ones go to about 80 millimeters, like three inches and one-eighth, and medium ones are maybe about 20 millimeters, like three-quarters of an inch. Small is a quarter inch (about 6 mm) and less. A set usually gives you small to medium, and you rarely see the big tool in one. If you watch me on big projects, I take that big gouge and clear the whole thing with it, really quickly, in one day.
The first lesson of Carving Modern Acanthus puts it in one line. If you can get the job done with a bigger tool, just grab the biggest tool. I have some tools of three inches or even bigger, three and one-eighth (about 79 mm) to be exact, and if I can fit that one, I use it.

What makes the fibers break when you jump straight down?
Without relief around the line, you can just break the fibers, and I said so in lesson 3 of my Lily Box course. Please don't make that mistake, I said there, and don't jump. Taking your gouge right away and going straight down with it is the habit. That area sat at about the same level as my leaves, so the relief cuts had to come first.

Many people make big mistakes when they just try to chop the subdivisions without a relief cut, I said in workshop 49 of the Venice Room. For that relief cut I usually take the same number 11, a veiner, 7 millimeters, a little bigger than a quarter inch. A veiner has a letter U shape, and a gouge is always the true radius.

Does rushing a carving really save time?
Rushing costs time. Lesson 11 of Carving Greek Acanthus Leaf has me going little by little, in both directions, without forcing. Forcing it, I said, is probably the biggest mistake some people make. They try to rush it, and they think rushing will be quicker. When you rush something in wood carving, you can make a lot more mistakes, and they take a lot longer to fix. Some can become unfixable, because wood carving is an art of deduction.

On the dining table apron I was cleaning one edge with only the edge of my gouge, not trying to take much material at once. Among the biggest mistakes wood carvers make, I said, is trying to remove as much as they can in one pass. I took that back a little. I shouldn't say it's a mistake. I know some carvers really rely on speed, and I rely on speed too, but quality cannot suffer.
It's up to you, I said, if you want to be Speedy Gonzalez and do choppy work, or really nice, unique pieces that are still fairly quick, because you have to make money.

Grapes bring out the same habit, and the third lesson of my Grape Onlay course says so. It's also a common mistake, I said, when people get too excited and chop too much, too quick. Don't make the grapes too small, and don't go straight down at 90 degrees, because that would be a huge mistake. Keep the angle at the connection points, otherwise you won't be able to clean underneath.

Why does a straight line look wrong on a carved leaf?
Everything on the leaf is supposed to blend in the same motion, and a straight line stops that. Back on The Tray of Blessing, in lesson 3, I asked, please, not to put any straight line on the leaf, not even one on the level. I see that one when people carve leaves. This direction or that direction works, I said, but never a straight line.
A pipe has the same trap. In Venice Room workshop 52 I answered a question about how one looks from above, and a lot of people make mistakes there, I said. First of all, the two sides run parallel, and that's not good. Your pipe is supposed to narrow down, and it shouldn't be a straight line either. It always has to kind of bow.

On a flower in lesson 33 of my Furniture Panel course I wanted to start my concave right below the ridge line, on both sides. And I named a spooning mistake. Some other people start at the ridge, keep that ridge really high everywhere, then spoon in and escape out.

Curls and grapes have their own versions. One mistake I see very often, I said in lesson 14 of that grape course, is excavating only from the inside, which gives a spoon effect that does not look natural, so you have to excavate from the side as well. In its first lesson, before the first bunch, I showed a mistake people fall into when carving grapes. The meeting point between grapes has to be a triangle, so avoid a square, and keep in mind the direction of the whole bunch.

Even the front and the back can get mixed up. My Byzantine acanthus course, on one style of acanthus ornament, has me saying it in lesson 6. I saw people mix them up, so put an F on the front if you wish.
Is skipping detail on a small flower a mistake?
Many carvers skip it, and lesson 12 of the Lily Box has me calling it a common mistake wood carvers make, a lot of wood carvers in the world, I should say. When they come to those tiny, small flowers, they don't really give them a detail. There is a logic to it. If the flower would be really high above, there's no reason.
But think about Grinling Gibbons in England, I said. He really loved to carve flowers, and I love to carve flowers too. A lot of his work is really high above, and he still worked the details, at least at the front. The back he left really rough. Nowadays people take pictures, and even if it's above, they can zoom in and still see it.

Do you have to see the whole form before you carve?
You really don't, and thinking you do is a mistake I named in lesson 4 of the grape onlay. Sometimes you can't visualize it, I said. Just start carving, and that form is going to jump on you, and you'll see much clearer once you start.
A clay model can be a good idea sometimes, and then you follow exactly the form you made. But you really don't have to, especially in cases like that one. Patience is the most important thing in wood carving, I think.
Where I named each mistake
The lesson for each row is linked above, in the section that tells its story.
| The mistake | Where I said it on camera | My fix |
|---|---|---|
| A dull tool kept going | Venice Room 28.12 | Strop it for a minute, then carve on |
| Driving it in, flute up | Tray, lesson 1 | Slice from near one side, and rotate it |
| Small gouges for every job | Techniques Q&A video | Take the biggest tool that does the job |
| Chopping with no relief cut | Lily Box 3.8 | Make the relief cuts before you go down |
| Rushing it and forcing it | Greek acanthus 11 | Both directions, slowly, and without forcing the tool |
| Too much off per pass | Dining apron 8 | The edge of my gouge, little by little |
| Straight lines on a leaf | Tray, lesson 3 | Let everything on it blend in one motion |
| Two parallel sides on pipes | Venice Room 52 | Narrow it down from above, and bow it |
| No detail on small flowers | Lily Box 12 | Detail the front, even when it sits high |
Do I still make these mistakes myself?
I do. In workshop 72 of the Venice Room the camera caught one, and the mistake was all mine. I did not make a good enough relief cut, with almost none below, and when I applied some force, the wood broke with the grain. One of the mistakes I made, I said, and those triangle relief cuts should go much deeper.
During lesson 2 of my Roman acanthus course I said I make that mistake many times when I'm not too careful, when I'm just trying to get my job done quickly, and I break stuff. I prefer not to glue. If I broke something, let it be, and just redesign around that broken part.

At six I took my grandfather's chisel to a brick to carve a face, and I ruined it. The passion was born right there.
Would you like to watch the dull tool, the shovel and that clean, deep hollow in one sitting? Tuition opens every workshop of this ceiling, part 12 included.
How it's done
- Strop the dull tool. A short stop on the leather, and I carve again without the struggle.
- Slice instead of pushing. Flute to the left or right, start closer to the edge than the middle, and rotate until you escape at the other side.
- Lock the other hand down. My left hand stays solid on the board. There is no air carving.
- Take the biggest tool that fits. If a bigger tool can get the job done, I use the biggest one I can fit.
- Relief cuts before you go down. Don't jump straight down with the gouge where the area has no relief, or you break the fibers.
- Work both directions, slowly. Without forcing, because a rushed carving collects more mistakes, and some cannot be fixed.
Frequently asked questions
How long does it take to strop a dull carving tool?
Only a minute, I said on my Venice Room ceiling board, and any stropper works for it, used by hand or run on a machine. Keeping a dull edge in use is the habit I see so many carvers hold on to.
Is it wrong to carve fast?
Speed is fine by me, and I rely on it myself, because you have to make money. On my apron course I first put taking as much as you can in one pass with the biggest mistakes carvers make, then took that back. Quality cannot suffer, I said.
Why does my arm hurt after a day with the mallet?
In my April 2020 livestream I said many people make one mistake there. They swing with the whole body, or the whole hand. I use just my palm, so my arm, hand and shoulder carry no stress. Done the other way all day long, it can get painful.
What to carve next
- Advanced carving venice room 28
- Advanced carving venice room part 3 workshops 26 37
- Advanced carving venice room 29
- Livestream april 2020
- The tray of blessing cabernet sauvignon 1
- Carving floral and molding for the panel 1
- Grinling gibbons maine class 1
- Big tools vs small
- Carving modern acanthus 1
- Wood carving workshop lily box carving first layer 3
- Advanced carving venice room 49
- Carving greek acanthus leaf 11
- Carving dining table apron
- Carving grape onlay 3
- The tray of blessing cabernet sauvignon 3
- Advanced carving venice room 52