

Alexander Grabovetskiy, woodcarver, School of Woodcarving · Published 2020
What does a wood carver mean by "I should tell you"?
Quick answer: In workshop 67, part 6, I said it right after choosing a 12 millimeter tool (0.47 in), and my reason followed: one piece of the carving stood in my way. Pencil marks, mallets, undercuts and a hole filled with putty follow the same kind of opening in my other lessons.
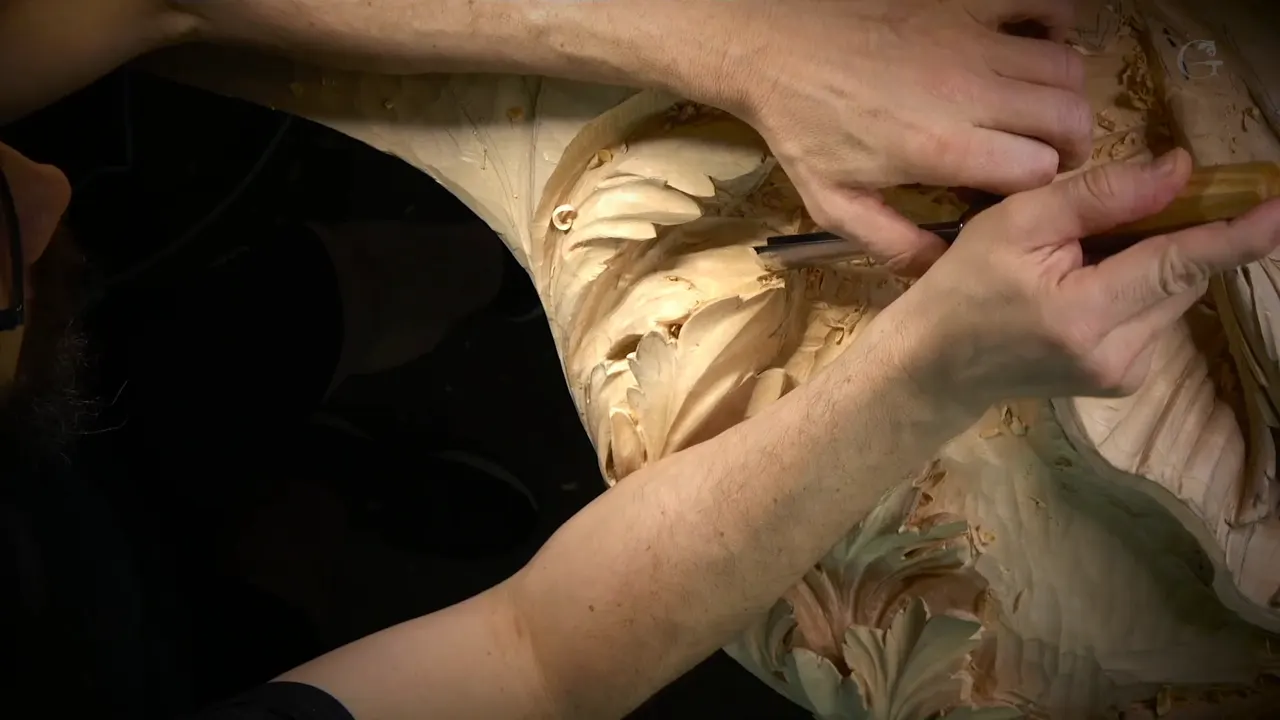

I said "I should tell you" in part 6 of Venice Room 67 right after I picked a 12 millimeter tool (0.47 in). The reason came in the same breath: "everything is in my way." My other lessons have lines that open the same way, with pencil marks, mallets, undercuts and a hole filled with putty coming after them.
Have you ever reached for a tool and found a board with the grain running against you and a leaf beside it, both in your way? Did you go on anyway? That spot is what this page is about. The sixth part comes first, and then the wood carving lessons where I opened a line the same way.
What came right after it in part 6?
Before the words came the tool. "In this case, I'll use a 12 millimeters, a half an inch," I told you, and then I added that it was not that easy. I came back to it: "Like I said, everything. This piece is in my way." The grain came up too: "I can't attack from this side because the grain runs that direction."

Here is what came out of it. "And I was able actually to create that concave, although I need to blend that ridge a little bit." The big tool, by my own account, "gives me a lot nicer, cleaner, wider cut." I could "actually use even bigger than that," so my next line was "Let me try to use 5/8 of an inch, 15 millimeters" (0.59 in) and then "I'm going to just do even wider."
One more description of the wood: "I've got a pronounced pipe." The concave "just rolls to the convex and goes underneath, and that is actually exactly what I'm after."

Which warning came second in part 6?
This one is about my own hands. "I'm carving towards myself, and I would encourage you not to because it's not the safest way." And the risk: "you can slip and cut yourself, and that would be big mistake."
Later in that part a rule came up. "If you do have to cut towards yourself, so you really lock your elbows, your hands right on the piece." That made it "kind of safe, or safer." Still, "if you don't have to cut toward yourself, don't do it, okay?" And then the honest line: "to be honest with you, every carver does it." To that I added "there is just sometimes no way."

I had "just created a really sharp middle line, which I don't need," and I planned to hit it "with the back bend." Size came next. "This tool is little too big now. I need to switch to a smaller one." Then: "I need to go with the number three and six millimeters" (0.24 in) to "blend little nicer."
The facets could wait. "Don't pay attention to those facets," I said. "I have no problem to clean them little later." My last plans in part 6 were to get "final divisions going," to "create another eye" and to "create little bigger opening."

What do parts 5 and 7 add?
Part 5 has an apology near the start: "I apologize if I'm covering with my hands," and "that's the only way I can attack it." Later comes a note about what you are seeing. "You're looking at a slight angle at this moment, so that's why you see that wall." But it is "actually undercut. It's already undercut underneath."
For that wall my plan was "maybe just the number one double bevel," which I thought a "better choice." An edge went wrong on the way, and I said "I just destroyed the edge." Then "Well, actually, no, it's not that bad." The line "I was kind of scared for a moment" came before the next tool. The cleanup tool was still a plan, "two millimeters again, number 11" (0.08 in), and the grain called for care: "I can easily break it if I'm not careful."

The apology comes back in part 7: "My apologies if I'm covering with the hands. But I need to relieve this area." Further on I said "I really don't need actually to excavate this area too much. It's not ever going to be visible. Not at all."
The tools come near the end. Another line: "Let me do a bigger one. There is a big space. I don't have to waste time." So "I'll just take half an inch and see if it's going to fit" (12.7 mm), a number nine. A limit followed: "It actually has a tendency to go deeper, and I don't really need to go deeper."

How did Venice Room 76 and 70 open?
In Venice Room 76, part 7, the line began with the same words and went on: "I like it a lot, actually. The result I am seeing. Okay. I like the result, what I'm seeing." Next came the pencil. "Of course, I just got really dirty. That doesn't look too good." About pencils I said "that's why I hate pencils sometimes," and a plan came right behind it: "Let me clean that little bit."
Then my tools: "I should use now my favorite tools." A line about them followed: "I never resharpened them because they're just that good out of box." A back bent was for later, "for the rest of it little later," once I would create "the final shape."

In Venice Room 70, part 4, a spot was "right on a curve." The same opening came, then "I'm really happy actually." The cut "goes right underneath, and it still blends nicely." Then the plan: "Let me use a back bend, maybe about a number three and 10 millimeters back bend" (0.39 in). The tool gave me "a little resistance," and "I think I need to re-sharpen it."

Which lines come from the Furniture Panel?
Furniture Panel 18, part 3, opens the same way and goes to the edge of a design: "it's always better to work from outside inward because you can always damage the edge. I did not, but it's always better to just work with the tool over the design, okay? And stop before." The job after that was a power plane, "little by little."

A different opening appears in Furniture Panel 19, part 3, in the middle of a way I like to work: "that is not the only way, all right? So there's a lot more ways." Then: "But I have to tell you a little thing about the V tool." I love the V tool, I said, and I joked about saying "Good morning, V tool" when I walk in.
The next line was "I have to tell you the truth. Not in all countries where they made furniture, they had V tools." The old carvers "did not have parting tools until later," and "even nowadays, not all wood carvers in the world even know about the existence of V tool." Back in history there were "lots of veiners and gouges, but not all of them had a V tool."

What did the Lily Box lessons hold?
Lily Box 11, part 5, owns up to a mistake: "I lost some of the parts." The cause was a drill. "I drilled too big of a hole. It was really close to the edges, and I essentially just created a problem for myself. I should think ahead of the time when I drew initially." You are "probably going to have approximately the same problem, but it's okay," I said.
"I really don't need to be too accurate to my drawing," I said in that part, and a job came after it. "I need to chop out whatever the waste." Then "start shaping."

The fourth part of that lesson started with the work I did off camera. The clean side was "pretty much completed," and the hole was gone, and what I used was epoxy. I had "ordered some epoxy," already "pre-colored," an "epoxy putty stick." Mixed "together really well, and it becomes like a solid wood pretty much." Sanding works, and so does carving: "you can carve that."
What came before the band saw?
In the first Floral and Molding lesson, part 1, I had just said "let me hit my band saw." After that came "You always have to start, if you have the shortest distance to the line, to the design. See, I've got only about quarter of an inch" (6 mm).
"You can always start right here," I said. Starting "somewhere else, like right there" would be "a lot of waste," and I said "I want to keep that part." A second good spot was "also really close," and "closer to the edge, you have the design, that's your starting point."
Where do undercuts and shadow come in?
A livestream from April 2020 has a line about this: "There's two types of undercut." One was a "really sharp undercut" for the detail. My aim went further: "I also want to create some kind of dome."

The sharp one, I said, "would not be authentic to the original Italian Venetian style because they did not use V tool." What they used: "they used veiners and they used gouges." The dome effect was for the light from any position, and the shadow was cast from underneath.
Venice Room 15, part 1, opens with "it's really nice," then "That's nice and smooth transition." The edge could wait: "I still have to create a bigger concave. I really want to see that raised more." The tool was a hedge, "maybe number eight." The shadow was the reason for the concave: "I know the position of the room and the light source." Then came a line about my lamp: "exactly like I placed my lamp." The concave would give "extra shadow casting that direction."

Which tools and settings came up?
The mallet livestream of April 2020 has a mallet I do not use. "Look at the finish," I said, and "sometimes it's not a good thing, okay, to have finish on your mallet." A finish is "not the best idea because when you hit the tool, and if it has some kind of slick finish, it's actually tries to jump out." The mallet with "absolutely no finish" got this line: "that's a tiger maple."

Venice Room 1, part 6, opens a line about "the setting of the cut." On a jigsaw "there is three different positions," and I named them "zero, one, two, and three." Then: "As of now, I am on zero, and it gives me a really, really, really nice cut."

Which marks were on the board?
Acanthus over Moldings 1, part 1, starts with marks: "you already saw some marks." They were lines, and "those lines are pretty much the highest spot of my moldings." Then I said "that is going to be all waste."
The marks sat "only on one side," I said, and "I also do have marks on the side right here." A later line went on: "Obviously, you don't see that, but those moldings are right here."

Which lesson said what?
Here are the lessons from this page, each with what I added and what was in my hands.
| Lesson | What I added | What was in my hands |
|---|---|---|
| Venice 67.6 | a tool that is not easy to use, with a piece in my way | A 12 mm (about 1/2 in) tool |
| Workshop 76.7 | I like the result, and I hate pencils sometimes | My favorite tools |
| Room 70.4 | I am really happy, and a ridge does not look too good | Maybe a 10 mm (0.39 in) back bent |
| Panel 18.3 | work from the outside inward, because the edge can be damaged | A power plane |
| Lily 11.5 | I lost some of the parts of my drawing | A hole drilled too big for the edges |
| Box 11.4 | the work I had done off camera, with the hole gone | A stick of epoxy putty |
| Floral 1.1 | start where the design is closest to the edge | About 1/4 in (6 mm) away |
| Livestream | two types of undercut, and the dome I wanted | A sketch on a black screen |
| Panel 19.3 | the old carvers did not all have a V tool | V tools and parting tools |
| Lesson 15.1 | a concave made for the light in the room | Maybe number eight |
| Mallets | what a slick finish does to a mallet | A mallet with no finish |
| Part 1.6 | the setting of the cut on a jigsaw | Setting zero |
| Moldings 1.1 | marks that show the highest spot of the moldings | Lines on the board |
Where can you watch these lessons?
The sixth part sits inside this workshop, and workshops 62 to 73 are in the whole course. The other lessons come from Venice Room Part 7, Part 2 and Part 1, plus Carving Furniture Panel, Lily Box, Floral and Molding for the Panel, Acanthus over Moldings and the livestreams of April 2020. To see the full videos, start here.
How it's done
- Pick a bigger tool. In part 6 I called it "a little bigger tool."
- Say what is in the way. "This piece is in my way," I said, right after the words.
- Mind your hands. Part 6 has the safety rule I gave for carving toward yourself.
- Switch when it is too big. "This tool is little too big now," I said, and my plan was a number three.
- Leave the facets. Part 6 has "Don't pay attention to those facets," and my plan to clean them later.
Frequently asked questions
Which tool did I name before the words?
A tool of 12 millimeters, just under 1/2 in. A bigger one came into my plan next, at 15 millimeters (0.59 in).
What was my reason in part 6?
A piece of the carving sat in my way, and the grain "runs that direction." Both came right after the words.
What did I say about carving toward myself?
That I would encourage you not to, because it is not the safest way. With no choice, lock your elbows, and "don't do it" if you do have one.
Which mallet did I not use?
What to carve next
- Venice Room 67 lesson
- Venice Room Part 6 course
- Venice Room 76
- Venice Room 70
- Furniture Panel 18
- Furniture Panel 19
- Lily Box 11
- Floral and Molding for the Panel 1
- Venice Room 15
- Venice Room 1
- Acanthus over Moldings 1
- Venice Room Part 7 course
- Venice Room Part 2 course
- Venice Room Part 1 course
- Carving Furniture Panel course
- Lily Box course
- Floral and Molding course
- Acanthus over Moldings course